1·1
Chapter 1
Routine maintenance and servicing
1
Contents
Air
cleaner element
renewal . . . . . . . . . . . . . . . . . . . . . . . . . . . . . . .34 Fuel
filter renewal - fuel injection
engines . . . . . . . . . . . . . . . . . . . .36
Alternator drivebelt
check . . . . . . . . . . . . . . . . . . . . . . . . . . . . . . . .20 Hinge and lock check and lubrication . . . . . . . . . . . . . . . . . . . . . . .31
Automatic transmission fluid level check . . . . . . . . . . . . . . . . . . . . .27 Idle
speed and mixture adjustment . . . . . . . . . . . . . . . . . . . . . . . . .10
Automatic transmission
selector mechanism check . . . . . . . . . . . .28
Ignition system
components check . . . . . . . . . . . . . . . . . . . . . . . . .11
Battery check . . . . . . . . . . . . . . . . . . . . . . . . . . . . . . . . . . . . . . . . . . .5 Ignition timing check - models with contact breaker
distributor . . .14
Brake components check . . . . . . . . . . . . . . . . . . . . . . . . . . . . . . . .38
Intensive maintenance . . . . . . . . . . . . . . . . . . . . . . . . . . . . . . . . . . . .2
Brake fluid renewal . . . . . . . . . . . . . . . . . . . . . . . . . . . . . . . . . . . . . .39
Introduction . . . . . . . . . . . . . . . . . . . . . . . . . . . . . . . . . . . . . . . . . . . .1
Contact breaker
points adjustment - models with contact
Manual transmission oil level check . . . . . . . . . . . . . . . . . . . . . . . . .26 breaker distributor . . . . . . . . . . . . . . . . . . . . . . . . . . . . . . . . . . . .13 Oil
filler cap cleaning - OHV and HCS engines . . . . . . . . . . . . . . . . .7
Contact breaker points renewal . . . . . . . . . . . . . . . . . . . . . . . . . . . .25
Rear brake shoe
lining check . . . . . . . . . . . . . . . . . . . . . . . . . . . . . .17
Coolant renewal . . . . . . . . . . . . . . . . . . . . . . . . . . . . . . . . . . . . . . . .33
Road test . . . . . . . . . . . . . . . . . . . . . . . . . . . . . . . . . . . . . . . . . . . . .32
Crankcase
emission control filter renewal . . . . . . . . . . . . . . . . . . . .35 Roadwheel check . . . . . . . . . . . . . . . . . . . . . . . . . . . . . . . . . . . . . . .30
Distributor lubrication - models with contact breaker distributor . .12
Seat belt check . . . . . . . . . . . . . . . . . . . . . . . . . . . . . . . . . . . . . . . . .19
Driveshaft check . . . . . . . . . . . . . . . . . . . . . . . . . . . . . . . . . . . . . . . .29
Spark plug renewal . . . . . . . . . . . . . . . . . . . . . . . . . . . . . . . . . . . . . .24
Engine oil and filter renewal . . . . . . . . . . . . . . . . . . . . . . . . . . . . . . . .6 Spark plug renewal - RS
Turbo models . . . . . . . . . . . . . . . . . . . . . .15
Exhaust manifold nut check - RS Turbo models . . . . . . . . . . . . . . . .9
Suspension and steering check . . . . . . . . . . . . . . . . . . . . . . . . . . . .18
Exhaust system check . . . . . . . . . . . . . . . . . . . . . . . . . . . . . . . . . . .22 Timing belt renewal . . . . . . . . . . . . . . . . . . . . . . . . . . . . . . . . . . . . .37
Fluid
leak check . . . . . . . . . . . . . . . . . . . . . . . . . . . . . . . . . . . . . . . . .8 Turbocharger-to-manifold nut check - RS Turbo models . . . . . . . .23
Fluid level checks . . . . . . . . . . . . . . . . . . . . . . . . . . . . . . . . . . . . . . . .3 Tyre checks . . . . . . . . . . . . . . . . . . . . . . . . . . . . . . . . . . . . . . . . . . . .4
Front brake
disc pad check . . . . . . . . . . . . . . . . . . . . . . . . . . . . . . .16
Valve clearance adjustment - OHV and HCS engines . . . . . . . . . . .21
Degrees of difficulty
Easy ,
suitable for Fairly easy, suitable Fairly difficult, suitable Difficult, suitable for Very difficult, novice with
little for beginner with for competent DIY
experienced DIY suitable for
expert DIY
experience some experience
mechanic mechanic or professional 1·2 Servicing Specifications
Engine
Oil filter type . . . . . . . . . . . . . . . . . . . . . . . . . . . . . . . . . . . . . . . . . . . . . .
Champion C104
Valve clearances (
cold ): OHV engines: Inlet . . . . . . . . . . . . . . . . . . . . . . . . . . . . . . . . . . . . . . . . . . . . . . . . . 0.22 mm (0.008 in) Exhaust . . . . . . . . . . . . . . . . . . . . . . . . . . . . . . . . . . . . . . . . . . . . . . 0.59 mm (0.023 in) HCS engines: Inlet . . . . . . . . . . . . . . . . . . . . . . . . . . . . . . . . . . . . . . . . . . . . . . . . . 0.22 mm (0.008 in) Exhaust . . . . . . . . . . . . . . . . . . . . . . . . . . . . . . . . . . . . . . . . . . . . . . 0.32 mm (0.012 in)
Cooling system
Recommended antifreeze
concentration . . . . . . . . . . . . . . . . . . . . . . . . 45% by
volumeFuel system
Idle speed: Carburettor models: All except
Weber 2V TLDM carburettor . . . . . . . . . . . . . . . . . . . . . 750 to 850 rpm Weber 2V TLDM carburettor . . . . . . . . . . . . . . . . . . . . . . . . . . . . . . 700 to 800 rpm
Bosch K-Jetronic fuel injection models . . . . . . . . . . . . . . . . . . . . . . . 750 to 850 rpm Bosch KE-Jetronic fuel injection models: 1985 models . . . . . . . . . . . . . . . . . . . . . . . . . . . . . . . . . . . . . . . . . . 800 to 900 rpm 1986 models onwards . . . . . . . . . . . . . . . . . . . . . . . . . . . . . . . . . . . 920 to 960 rpm Electronic Fuel Injection (EFI) models . . . . . . . . . . . . . . . . . . . . . . . . . 900 ± 50 rpm
Idle mixture CO content: Bosch K-Jetronic fuel injection models . . . . . . . . . . . . . . . . . . . . . . . 1.0 to 1.5 % Bosch KE-Jetronic fuel injection models: 1985 models . . . . . . . . . . . . . . . . . . . . . . . . . . . . . . . . . . . . . . . . . . 0.25 to 0.75% 1986 models onwards . . . . . . . . . . . . . . . . . . . . . . . . . . . . . . . . . . . 0.5 to 1.1% Electronic Fuel Injection (EFI) models . . . . . . . . . . . . . . . . . . . . . . . . . 0.8 ± 0.25% (cooling fan
running )
Air filter element type: 1.1 litre and 1.3 litre OHV engines . . . . . . . . . . . . . . . . . . . . . . . . . . . Champion W153 1.1 litre and 1.3 litre HCS engines . . . . . . . . . . . . . . . . . . . . . . . . . . . Champion W225 1.1 litre and 1.3 litre CVH engines . . . . . . . . . . . . . . . . . . . . . . . . . . . Champion W127 1.4 litre CVH engine: Carburettor engines . . . . . . . . . . . . . . . . . . . . . . . . . . . . . . . . . . . . Champion W179 Central Fuel Injection (CFI) engines . . . . . . . . . . . . . . . . . . . . . . . . Champion W201 1.6 litre CVH engine (except XR3 models): Up to 1986 . . . . . . . . . . . . . . . . . . . . . . . . . . . . . . . . . . . . . . . . . . . Champion W169 1986 to October 1988 . . . . . . . . . . . . . . . . . . . . . . . . . . . . . . . . . . . Champion W201 October 1988 on . . . . . . . . . . . . . . . . . . . . . . . . . . . . . . . . . . . . . . . Champion W226 1.6 litre CVH engine (XR3 models) . . . . . . . . . . . . . . . . . . . . . . . . . Champion W201
Ignition system
Contact breaker points gap: Bosch distributor . . . . . . . . . . . . . . . . . . . . . . . . . . . . . . . . . . . . . . . . . 0.40 to 0.50 mm (0.016 to 0.02 in)
Lucas distributor . . . . . . . . . . . . . . . . . . . . . . . . . . . . . . . . . . . . . . . . . 0.40 to 0.59 mm (0.016 to 0.023 in)
Dwell angle (contact breaker ignition system) . . . . . . . . . . . . . . . . . . . . 48º to 52º
Ignition timing *:
OHV engines: Up to 1984 (contact breaker) . . . . . . . . . . . . . . . . . . . . . . . . . . . . . . . 12º BTDC at idle speed 1984-on (contact breaker) and all electronic ignition . . . . . . . . . . . . . 6º BTDC at idle speed
CVH engines (all models) . . . . . . . . . . . . . . . . . . . . . . . . . . . . . . . . . . . . 12º BTDC at idle speed
*
Note : Ignition timing on models with either a Distributorless Ignition Sytem (DIS) or a programmed ignition system (ESC)
cannot be adjusted.
Refer to Chapter 5,
Part B for
further information.
Spark plugs:
Type: OHV and HCS engines . . . . . . . . . . . . . . . . . . . . . . . . . . . . . . . . . . . . Champion RS9YCC or RS9YC CVH engines: Carburettor models . . . . . . . . . . . . . . . . . . . . . . . . . . . . . . . . . . . . . Champion RC7YCC or RC7YC Bosch K-Jetronic fuel injection and Electronic Fuel Injection (EFI) models . . . . . . . . . . . . . . . . . . . . . . . Champion C6YCC or RC6YC Bosch KE-Jetronic fuel injection models . . . . . . . . . . . . . . . . . . . . Champion C61YC Central Fuel Injection (CFI) models . . . . . . . . . . . . . . . . . . . . . . . . . Champion RC7YCC or RC7YC4
Electrode gap: All except HCS and CFI models: RS9YCC, RC7YCC, C6YCC spark plugs . . . . . . . . . . . . . . . . . . . . 0.8 mm (0.032 in) RS9YC, RC7YC, RC6YC, . . . . . . . . . . . . . . . . . . . . . . . . . . . . . . . . 0.7 mm (0.028 in) HCS and CFI models . . . . . . . . . . . . . . . . . . . . . . . . . . . . . . . . . . . . . 1.0 mm (0.039 in) Servicing Specifications 1·3
Brakes Minimum front brake disc pad thickness . . . . . . . . . . . . . . . . . . . . . . . . 1.5 mm (0.06 in)
Minimum rear brake shoe lining thickness . . . . . . . . . . . . . . . . . . . . . . . 1.0 mm (0.04 in)
Tyres
Tyre pressures . . . . . . . . . . . . . . . . . . . . . . . . . . . . . . . . . . . . . . . . . . . . See "Weekly checks" on page 0·16
Torque wrench settings Nm lbf ft
Exhaust manifold nuts - RS Turbo models . . . . . . . . . . . . . . . . . . . . . . . 14 to 17 10 to 13
Turbocharger-to-manifold nuts . . . . . . . . . . . . . . . . . . . . . . . . . . . . . . . 21 to 26 15 to 19
Spark plugs: OHV and HCS engines . . . . . . . . . . . . . . . . . . . . . . . . . . . . . . . . . . . . 13 to 20 10 to 15 CVH engines . . . . . . . . . . . . . . . . . . . . . . . . . . . . . . . . . . . . . . . . . . . . 25 to 38 18 to 28
Seat belt
anchor bolts . . . . . . . . . . . . . . . . . . . . . . . . . . . . . . . . . . . . . . . 29 to 41 21 to 30
Roadwheel bolts . . . . . . . . . . . . . . . . . . . . . . . . . . . . . . . . . . . . . . . . . . . 70 to 100 52 to 74
Capacities
Engine oil (drain and refill)
OHV engine: With filter
change . . . . . . . . . . . . . . . . . . . . . . . . . . . . . . . . . . . . . . . . 3.25 litres (5.7
pints )
Without filter change . . . . . . . . . . . . . . . . . . . . . . . . . . . . . . . . . . . . . . 2.75 litres (4.8 pints)
CVH engine: Carburettor engines with filter change: Pre-
July 1982 . . . . . . . . . . . . . . . . . . . . . . . . . . . . . . . . . . . . . . . . . 3.75 litres (6.6 pints) July 1982 onwards . . . . . . . . . . . . . . . . . . . . . . . . . . . . . . . . . . . . . 3.50 litres (6.2 pints) 1 Carburettor engines without filter change: Pre-July 1982 . . . . . . . . . . . . . . . . . . . . . . . . . . . . . . . . . . . . . . . . . 3.50 litres (6.2 pints) July 1982 onwards . . . . . . . . . . . . . . . . . . . . . . . . . . . . . . . . . . . . . 3.25 litres (5.7 pints) Fuel-
injected engines with filter change . . . . . . . . . . . . . . . . . . . . . . . 3.85 litres (6.8 pints) Fuel-injected engines without filter change . . . . . . . . . . . . . . . . . . . . 3.60 litres (6.3 pints)
Fuel
tank All models (except XR3i and Van) pre-May 1983 . . . . . . . . . . . . . . . . . . 40 litres (8.8 gallons)
All
other models (except Van) . . . . . . . . . . . . . . . . . . . . . . . . . . . . . . . . . 48 litres (10.6 gallons)
Van . . . . . . . . . . . . . . . . . . . . . . . . . . . . . . . . . . . . . . . . . . . . . . . . . . . . . 50 litres (11.0 gallons)
Cooling system
1.1 litre OHV engine . . . . . . . . . . . . . . . . . . . . . . . . . . . . . . . . . . . . . . . . 6.7 litres (11.8 pints)
1.1 litre CVH engine: With small
radiator . . . . . . . . . . . . . . . . . . . . . . . . . . . . . . . . . . . . . . . 6.2 litres (11.0 pints) With large radiator . . . . . . . . . . . . . . . . . . . . . . . . . . . . . . . . . . . . . . . . 7.2 litres (12.6 pints)
1.3 litre OHV engine . . . . . . . . . . . . . . . . . . . . . . . . . . . . . . . . . . . . . . . . 7.1 litres (12.5 pints)
1.3 litre CVH engine: Pre-1986 . . . . . . . . . . . . . . . . . . . . . . . . . . . . . . . . . . . . . . . . . . . . . . . 7.1 litres (12.5 pints) 1986 onwards . . . . . . . . . . . . . . . . . . . . . . . . . . . . . . . . . . . . . . . . . . . 7.6 litres (13.3 pints)
1.4 litre CVH engine . . . . . . . . . . . . . . . . . . . . . . . . . . . . . . . . . . . . . . . . 7.6 litres (13.3 pints)
1.6 litre CVH engine: Pre-1986 . . . . . . . . . . . . . . . . . . . . . . . . . . . . . . . . . . . . . . . . . . . . . . . 6.9 litres (12.1 pints) 1986 onwards . . . . . . . . . . . . . . . . . . . . . . . . . . . . . . . . . . . . . . . . . . . 7.8 litres (13.7 pints)
Transmission
4-speed manual . . . . . . . . . . . . . . . . . . . . . . . . . . . . . . . . . . . . . . . . . . . 2.8 litres (4.9 pints)
5-speed manual . . . . . . . . . . . . . . . . . . . . . . . . . . . . . . . . . . . . . . . . . . . 3.1 litres (5.5 pints)
Automatic transmission . . . . . . . . . . . . . . . . . . . . . . . . . . . . . . . . . . . . . 7.9 litres (13.9 pints)
Ford Escort maintenance
schedule The maintenance intervals in this manual are
provided with the If the
vehicle is driven in dusty
areas , used to tow a
trailer , or driven
assumption that you, not the dealer, will be carrying out the
work .
These frequently at slow speeds (
idling in
traffic ) or on short journeys, more
are the minimum maintenance intervals recommended by the
frequent maintenance intervals are recommended.
manufacturer for vehicles driven
daily . If you
wish to
keep your vehicle When the vehicle is new, it should be serviced by a
factory -
in
peak condition at all
times , you may wish to perform some of these authorised dealer
service department , in
order to preserve the factory
procedures more often. We
encourage frequent maintenance, because warranty.
it enhances the efficiency,
performance and resale
value of your vehicle. 1·4 Maintenance schedule
Every 12 000
miles (20 000 km) or 12 months - whichever
comes first Every 250 miles (400 km) or weekly In
addition to all the
items in the 6000 mile (10 000 km) service,
carry out the
following : See "Weekly checks" On OHV and HCS engines check and if
necessary adjust the valve clearances (
Section 21) Check the exhaust system condition and
security (Section 22)
Every 6000 miles (10 000 km) or On RS Turbo models check the tightness of the turbocharger-to-manifold nuts (Section 23)
6 months whichever comes first Renew the spark plugs (Sections 24 and 15)
In addition to all the items in the 250 mile (400 km) service, carry On contact breaker point distributors renew the contact out the following: breaker points (Section 25) Renew the engine oil and filter (Section 6) Check and if necessary top-up the manual transmission On OHV and HCS engines,
remove and
clean the oil oil (Section 26) filler cap (Section 7) Check the automatic transmission fluid level - where Check the hoses,
hose clips and
visible joint gaskets for
applicable (Section 27) leaks and any signs of corrosion or deterioration (Section 8) Check the
operation of the automatic transmission Visually check the fuel pipes and hoses for security, selector mechanism (Section 28) chafing, leaks and corrosion (Section 8) Check the driveshafts for damage or distortion and Check the fuel tank for leaks and any
sign of damage or check the condition of the
constant velocity joint corrosion (Section 8) bellows (Section 29) On RS Turbo models check the tightness of the Inspect the roadwheels for damage (Section 30) exhaust manifold retaining nuts (Section 9) Check the tightness of the roadwheel bolts (Section 30) Check and if necessary adjust the idle speed and Lubricate all
hinges ,
door locks, check straps and the mixture settings (Section 10)
bonnet release mechanism (Section 31) Clean the distributor cap, coil tower and HT leads and Check the operation of all door,
tailgate , bonnet release check for
tracking (Section 11) and
window regulator components (Section 31) On contact breaker point distributors lubricate the Carry out a road test (Section 32) distributor shaft and cam (Section 12) On contact breaker point distributors check and if necessary adjust the points gap (dwell angle), then Every 24 000 miles (40 000 km) or check the ignition timing (Sections 13 and 14) On RS Turbo models renew the spark plugs (Section 15) 2
years - whichever comes first Check the front disc pad thickness (Section 16) In addition to all the items in the 12 000 mile (20 000 km) and Check the rear brake shoe lining thickness (Section 17) 6000 mile (10 000 km)
services , carry out the following: Check the steering and suspension components for Renew the coolant (Section 33) any signs of damage and wear (Section 18) Renew the air cleaner element (Section 34) Check the security of the front suspension
lower arm On CVH engines renew the crankcase emission control balljoint (Section 18) filter (Section 35) Check the seat belt webbing for cuts or damage and On fuel-injected engines renew the fuel filter (Section 36) check the seat belt operation (Section 19) Carefully inspect the paintwork for damage and the bodywork for corrosion (Chapter 11) Every 36 000 miles (60 000 km) or Check the condition and adjustment of the alternator 3 years - whichever comes first drivebelt (Section 20) In addition to all the items listed in the
previous services, carry out the following: On CVH engines renew the timing belt (Section 37) Make a thorough inspection of all brake components and
rubber seals for signs of leaks, general deterioration and wear (Section 38) Renew the brake fluid (Section 39) Maintenance -
Component location 1·5
Engine and under bonnet component location on 1986 1.4 litre models (air cleaner removed for clarity)
1 Fuse and
relay box
2 Windscreen wiper
motor 3 Engine oil dipstick
4 Carburettor
5 Fuel
pump 6 Battery
negative terminal 7 Brake master
cylinder reservoir
8 Distributor
9 Ignition coil
10 Washer reservoir
11 Thermostat
housing 12 Oil filler cap
13 Vehicle identification plate
14 Engine tuning decal
15 Cooling system expansion tank
16 Suspension strut top mounting
1
Engine and under bonnet component locations on 1986 RS Turbo models
1 Fuse and relay box
2 Windscreen wiper motor
3 Crankcase emission control filter
4 Engine oil dipstick
5 Throttle housing
6 Inlet manifold
7 Throttle
position sensor 8
Charge air temperature sensor
9 Distributor
10 Brake master cylinder reservoir
11 Battery negative terminal
12 Ignition coil
13 Fuel filter
14 Washer reservoir
15 Air cleaner
16 Fuel distributor
17 Inlet air hose
18 Turbocharger
19 Vehicle identification plate
20 Engine tuning decal
21 Cooling system expansion tank
22 Suspension strut top mounting 1·6 Maintenance - Component location
Engine and underbonnet components location on 1989 1.3 litre HCS model (air cleaner removed for clarity)
1 Ventilation air inlet duct 2 Battery 3 Bonnet hinge 4 Suspension strut
upper mounting 5 Brake system fluid reservoir 6 Ignition system ESC
module 7 Windscreen washer reservoir filler cap 8 Transmission housing 9
Clutch release
lever 10 Cooling fan motor 11
Starter motor 12 Engine oil filler neck (cap removed) 13 Exhaust manifold
shield 14 Alternator 15 Coolant thermostat and fan thermal
switch 16 Coolant expansion tank 17 Spark plug HT leads 18 Engine oil dipstick 19 Throttle
cable 20 Choke cable 21 Carburettor 22 Fusebox 23 Windscreen wiper motor
Front underbody view of a 1986 1.4 litre Saloon model
1 Anti-roll bar
clamp 2 Anti-roll bar 3 Front suspension lower arm 4 Steering tie-rod 5 Transmission
support crossmember 6 Gearchange rod 7 Gearchange stabiliser 8 Driveshaft 9 Engine oil drain plug 10 Brake caliper 11 Alternator 12 Exhaust front
pipe 13 Starter motor Maintenance procedures 1·7
Rear underbody view of a 1986 1.4 litre Saloon model
1 Fuel filler pipe
2 Suspension lower arm
3 Tie-bar
4 Tie-bar front mounting
5 Fuel tank
6 Handbrake cable adjuster
7 Exhaust mounting
8 Exhaust
intermediate silencer
9 Exhaust rear silencer
10 Rear towing eye
1
another . For example, if the vehicle is raised If engine wear is suspected, a compression for any
reason , the exhaust can be inspected test will
provide valuable information 1 Introduction at the
same time as the suspension and regarding the
overall performance of the main steering components.
internal components.
Such a test can be used The first
step in this maintenance
program as a
basis to decide on the extent of the work
General information is to prepare yourself
before the actual work to be carried out. If for example a This Chapter is
designed to help the home
begins . Read
through all the Sections
relevant compression test indicates
serious internal
mechanic
maintain his/her vehicle for
safety , to the work to be carried out, then make a list engine wear, conventional maintenance as
economy , long life and peak performance. and gather together all the parts and
tools described in this Chapter will not
greatly The Chapter contains a master
required . If a problem is encountered,
seek improve the performance of the engine, and
maintenance schedule, followed by Sections
advice from a parts
specialist , or a dealer may
prove a
waste of time and
money ,
unless dealing specifically with each
task on the service department. extensive overhaul work is carried out first.
schedule.
Visual checks, adjustments, The following series of operations are those
component renewal and other helpful items most often required to improve the
are
included . Refer to the accompanying 2 Intensive maintenance performance of a generally
poor -running
illustrations of the engine compartment and engine.
the underside of the vehicle for the locations If, from the time the vehicle is new, the a) Clean, inspect and test the battery
of the various components. routine maintenance schedule is followed (Section 5). Servicing of your vehicle in
accordance with closely and frequent checks are made of fluid b) Check the levels of all the engine
related the mileage/time maintenance schedule and levels and high wear items, as suggested fluids (Section 3).
the following Sections will provide a planned
maintenance program, which should
result in
throughout this manual, the engine will be c) Check the condition and tension of the
a long and reliable service life. This is a
kept in relatively
good running condition and alternator drivebelt (Section 20).
comprehensive plan, so maintaining some the need for additional work will be minimised. d) Check the condition of the spark plugs
items but not
others at the specified service It is possible that
there will be times when and renew if necessary (Section 15).
intervals will not produce the same
results . the engine is running poorly due to the
lack of e) Check the condition of the air cleaner As you service your vehicle, you will
regular maintenance. This is
even more likely element, and renew if necessary (Sec-
discover that many of the procedures can - if a used vehicle, which has not
received tion 34).
and should - be grouped together because of regular and frequent maintenance checks, is f) Check the condition of all hoses and
the
particular procedure being performed, or
purchased . In such
cases , additional work check for fluid leaks.
because of the
close proximity of two may need to be carried out,
outside of the g) Check and if necessary adjust the idle
otherwise unrelated components to one regular maintenance intervals. speed (where possible) (Section 10). 1·8 Maintenance procedures
Weekly checks
3 Fluid level checks 4 Tyre checks 5 Battery check
See "Weekly checks" starting on Page 0·10. See "Weekly checks" starting on Page 0·10. See "Weekly checks" starting on Page 0·10.
Every 6000 miles or 6 months 3 Remove the oil filler cap from the rocker
cover , 9 Use a clean rag to remove all oil, dirt and then position a container beneath the sump. sludge from the filter sealing area on the 6 Engine oil and filter renewal engine. Check the old filter to make
sure that 4 Clean the drain plug and the area
around it, then slacken it using a suitable
socket or the rubber sealing ring hasn't
stuck to the
1 Frequent oil and filter
changes are the most spanner (see illustration). If possible, try to engine. If it has, carefully remove it.
important preventative maintenance keep the plug pressed into the sump
while 10
Apply a
light coating of clean oil to the
procedures that can be undertaken by the DIY unscrewing it by
hand the last couple of turns. sealing ring on the new filter, then
screw it into
owner . As engine oil
ages , it becomes diluted As the plug releases from the threads,
move it position on the engine. Tighten the filter firmly
and contaminated, which leads to premature
away sharply so the
stream of oil issuing from by hand only - do not use any tools.
Wipe engine wear. the sump runs into the container, not up your clean the exterior of the oil filter.
2 Before starting this procedure, gather sleeve! 11 Remove the old oil and all tools from
together all the necessary tools and materials. 5
Allow some time for the old oil to drain, under the vehicle, then (if applicable) lower the noting that it may be necessary to reposition vehicle to the
ground .
Also make sure that you have plenty of clean 12
Fill the engine with the specified quantity
rags and
newspapers handy to mop up any the container as the oil flow slows to a trickle. and
grade of oil, as described in "Weekly
spills. Ideally, the engine oil should be
warm , 6 After all the oil has drained, wipe off the checks".
Pour the oil in slowly, otherwise it
as it will drain better and more
built -up sludge drain plug with a clean rag and check the may overflow from the top of the rocker cover.
will be removed with it. Take care,
however , condition of the sealing washer. Renew the Check that the oil level is up to the
correct not to
touch the exhaust or any other hot washer if necessary. Clean the area around level on the dipstick, then refit and tighten the
parts of the engine when
working under the the drain plug opening, then refit and tighten oil filler cap.
vehicle. To
avoid any possibility of scalding, the plug to the specified torque
setting . 13 Run the engine for a few minutes, and
and to
protect yourself from possible
skin 7 Move the container into position under the check that there are no leaks around the oil
irritants and other harmful contaminants in oil filter. The oil filter is
located at the rear of filter seal and the sump drain plug.
used engine oils, it is advisable to wear rubber the cylinder block, and is accessible from 14 Switch off the engine and
wait a few
gloves when carrying out this work.
Access to under the vehicle (see illustration) minutes for the oil to settle in the sump
once the underside of the vehicle will be greatly 8 Using an oil filter removal
tool , slacken the more. With the new oil circulated and the filter
improved if it can be raised on a
lift , driven filter initially. Loosely wrap some rags around now
completely full , recheck the level on the
onto
ramps or jacked up and supported on the oil filter, then unscrew it and immediately dipstick and add more oil if necessary.
axle stands (see "Jacking and Vehicle position it with its
open end uppermost to 15 Dispose of the used engine oil safely with
Support"). Whichever
method is chosen,
prevent further spillage of oil. Remove the oil
reference to "General
repair procedures" in
make sure that the vehicle remains as level as filter from the engine compartment and empty the Reference Sections at the end of this
possible, to
enable the oil to drain fully. the oil into the container. manual.
6.4 Engine oil drain plug (arrowed) - 6.7 Oil filter location - CVH engine CVH engine Every 6000 miles or 6 Months 1·9
Follow the lines to the front of the vehicle Models with Ford VV carburettor 7 Oil filler cap cleaning - OHV carefully inspecting
them all the way. Renew and HCS engines damaged sections as necessary. Idle speed 8 From
within the engine compartment, 1 With the engine at normal
operating 1 Simply
pull the oil filler cap from the rocker check the security of all fuel hose attachments temperature, connect a tachometer in
cover and, where applicable, disconnect the and pipe unions, and inspect the fuel hoses accordance with the manufacturer's
hose(s) from the cap. and vacuum hoses for kinks, chafing and instructions.
2 Inspect the filler cap, and if necessary clean deterioration. 2 Disconnect the
wiring multi -plug from the
the cap using clean
petrol to remove any 9 Where applicable, check the condition of radiator cooling fan thermostatic switch in the
deposits. the oil cooler hoses and pipes. thermostat housing and
bridge the two
3 Ensure that the cap is completely dry 10 Check the condition of all exposed wiring contacts in the plug using a suitable
length of
before refitting. harnesses.
wire . This is necessary so that the cooling fan 11 Also check the engine and transmission runs continuously
during adjustment. components for signs of fluid leaks. 3 On automatic transmission models slacken 8 Fluid leak check the adjuster screw on the throttle valve shaft 9 Exhaust manifold nut check - lever to give clearance of 2 to 3 mm (0.079 to RS Turbo models 0.118 in) - see Chapter 7, Part B.
1 Visually inspect the engine joint faces, 4 Ensure that the air cleaner is fitted and that
gaskets and seals for any signs of water or oil Check the tightness of the exhaust its vacuum hoses are not in any way trapped
leaks. Pay particular
attention to the areas manifold securing nuts using a torque wrench. or pinched,
particularly between the air cleaner
around the rocker cover, cylinder head, oil
body and the top
face of the carburettor.
filter and sump joint faces. Bear in mind that 5 Run the engine at 3000 rpm for 30
seconds ,
over a
period of time some very slight 10 Idle speed and mixture then allow it to idle and note the idle speed. If
seepage from these areas is to be
expected adjustment using an exhaust gas analyser it should be
but what you are
really looking for is any noted that initially the CO%
reading will
rise ,
indication of a serious leak. Should a leak be Caution: Certain adjustment but then
fall and stabilise after a period of 5 to 1
found , renew the offending gasket or oil seal 25 seconds. The CO reading should then be
by referring to the appropriate Chapter(s) in points in the fuel system are
protected by "tamperproof" as specified.
this manual.
caps , plugs or seals. In some Idle mixture
2
Similarly , check the transmission for oil EEC countries (though not yet in the UK)
leaks, and investigate and rectify and 6 If necessary, adjust the idle speed it is an
offence to
drive a vehicle with
problems found. adjustment screw to give the specified idle
broken or
missing tamperproof seals.
3 Check the security and condition of all the speed (see illustration). Before disturbing a tamperproof seal,
engine related pipes and hoses. Ensure that 7 Adjustment of the CO content (mixture) is satisfy yourself that you will not be
all cable-ties or securing clips are in
place and not normally required during routine breaking any
local or national
laws by
in good condition. Clips which are broken or maintenance, but if the reading noted in doing so, and fit a new seal after
missing can
lead to chafing of the hoses, paragraph 5 is not as
given in the adjustment is
complete where required by
pipes or wiring which
could cause more Specifications first remove the tamperproof law. Do not break tamperproof seals on a
serious problems in the future. plug, prising it free using a small screwdriver. vehicle which is
still under warranty.
4 Carefully check the condition of all coolant, 8 Run the engine at 3000 rpm for 30 seconds,
fuel and brake hoses. Renew any hose which then allow it to idle. Adjust the mixture screw Note: Before carrying out any carburettor
is cracked, swollen or deteriorated. Cracks (see illustration 10.6) within 30 seconds. If adjustment, ensure that the contact breaker
will show up better if the hose is squeezed. more time is required run the engine at 3000 points, ignition timing and spark plug gaps (as
Pay close attention to the hose clips that rpm
again for 30 seconds. applicable) are set as specified and that the
secure the hoses to the system components. 9 Adjust the idle speed if necessary and distributor is operating correctly (where
Hose clips can pinch and puncture hoses, recheck the CO content. applicable). To carry out the adjustments an
resulting in leaks. If wire type hose clips are 10 Fit a new tamperproof plug to the mixture accurate tachometer will be required and the
used, it may be a good
idea to
replace them adjuster screw on completion. It should be use of an exhaust gas analyser (CO
meter ) is
with screw-type clips. noted that mixture adjustment without a CO also preferable.
5 With the vehicle raised, inspect the fuel analyser is not accurate and
therefore not
tank and filler neck for punctures, cracks and recommended.
other damage. The
connection between the 11 On completion disconnect the
filler neck and tank is especially
critical .
instruments , remove the cooling fan bridging
Sometimes a rubber filler neck or
connecting wire and reconnect the multi-plug.
hose will leak due to loose retaining clamps or 12 On automatic transmission models adjust
deteriorated rubber. the downshift
linkage (Chapter 7, Part B).
6 Similarly, inspect all brake hoses and
metal pipes. If any damage or deterioration is Models with Weber 2V carburettor
discovered , do not drive the vehicle
until the 13 The procedure is the same as for the Ford
necessary repair work has been carried out. VV carburettor as described previously in this
Renew any damaged sections of hose or pipe. Section, but the adjusting screw locations are
7 Carefully check all rubber hoses and metal as shown (see illustrations).
fuel lines
leading away from the petrol tank.
Check for loose connections, deteriorated Models with Bosch K-Jetronic
hoses, crimped lines and other damage. Pay fuel injection system
particular attention to the
vent pipes and 10.6 Idle speed adjustment screw (A) and 14 The idle speed and fuel mixture
hoses which often
loop up around the filler mixture adjustment screw (B) - Ford VV adjustments will normally only be required
neck and can become
blocked or crimped. carburettor after the installation of new components. 1·10 Every 6000 miles or 6 Months
10.13a Weber 2V carburettor idle speed adjustment screw (A) and 10.13b Weber 2V carburettor mixture adjustment screw (A) and mixture screw (B) - XR3 and 1.4 litre models idle speed adjustment screw (B) - 1.6 litre models
Refer to the caution at the
beginning of this
Hook out the plug with a
sharp pointed tool to 24 If the mixture adjustment cannot be
Section before proceeding.
gain access.
finalised within 30 seconds from the moment
15 On
early models the idle speed 17 Before
making any adjustments, warm the of stabilising the exhaust gases,
repeat the
adjustment screw is located on the rear of the engine up to normal operating temperature operations in paragraph 18 before continuing
throttle housing, but access is severely limited and connect a tachometer in accordance with the adjustment procedure.
unless the heater
plenum chamber top cover the manufacturer's instructions. 25 On completion fit a new tamperproof plug
is removed as described in Chapter 4, Part B 18
Increase the engine speed to 3000 rpm and disconnect the tachometer and exhaust
(see illustration). and
hold it at this speed for 30 seconds, then gas analyser.
16 On
later models the idle speed adjustment allow the engine to idle, check the tachometer
screw is located on top of the throttle housing reading and if necessary
turn the idle speed Models with Bosch KE-Jetronic
beneath a tamperproof plug (see illustration). adjustment screw as required until the engine fuel injection system is idling at the specified speed. 26 The idle speed and fuel mixture 19 To check the mixture adjustment an adjustments will normally only be required exhaust gas analyser is needed and should be after the installation of new components. connected in accordance with the 27 The idle speed adjustment screw is manufacturer's instructions. A 3 mm
Allen key located on the side of the throttle housing will also be required to make any adjustments. (see illustration). 20 Before making any adjustments to the 28 Before making any adjustments, warm the mixture, ensure that the idle speed is correct. engine up to normal operating temperature 21 Remove the tamperproof plug from the and connect a tachometer in accordance with top of the mixture adjustment screw
tube on the manufacturer's instructions. top of the fuel distributor (see illustration). 29 Disconnect the wiring multi-plug at the 22 Stabilise the exhaust gases (paragraph 18).
pressure actuator on the side of the fuel 23
Insert the Allen key into the mixture screw distributor (see illustration). tube and
engage the adjusting screw. Turn 30 Increase the engine speed to 3000 rpm 10.13c Idle speed screw (A) and mixture the screw as necessary until the correct CO and hold it at this speed for 30 seconds, then adjustment screw (B) on Weber 2V TLDM reading is obtained, then if required readjust allow the engine to idle. Check the carburettor (1.1 and 1.3 HCS engines) the idling speed. tachometer reading and if necessary turn the
10.15 Idle speed adjustment screw 10.16 K-Jetronic system idle speed 10.21 K-Jetronic system mixture (arrowed) on early K-Jetronic systems adjustment screw (arrowed) on later adjustment screw location (arrowed) models Every 6000 miles or 6 Months 1·11
10.27 Idle speed adjustment screw 10.29 Pressure actuator wiring multi-plug 10.33 KE-Jetronic system mixture (arrowed) on KE-Jetronic system (arrowed) - KE-Jetronic system adjustment tamperproof plug (arrowed)
idle speed adjustment screw as required until Models with Central (
single -point) Make sure that the
carbon brush in the
centre the engine is idling at the specified speed. Fuel Injection (CFI) system of the cap is free to move and that it protrudes
31 To check the mixture adjustment an significantly from its
holder . 39
Both the idle speed and mixture are
exhaust gas analyser is needed and should be 2 Check the distributor cap for signs of controlled by the engine
management system.
connected in accordance with the tracking (indicated by
thin black lines on the Adjustment
requires the use of specialist
manufacturer's instructions. A 3 mm Allen key
equipment . If the idle speed is suspected of surface of the cap). Renew the cap if tracking
will also be required to make any adjustments. being incorrect, the vehicle must be taken to a is evident.
32 Before proceeding ensure that the idle Ford dealer for
diagnostic checks and, if 3 Wipe clean the HT leads and the coil tower.
speed is correct. 4 Check the condition and security of all
33 Unscrew the tamperproof plug from the necessary, adjustment. leads and wiring associated with the ignition 1
mixture adjustment orifice on top of the fuel Models with Electronic Fuel system. Make sure that no chafing is
distributor (see illustration). Injection (EFI) system occurring on any of the
wires and that all
34 Stabilise the exhaust gases (paragraph 30). 40 Idle speed is controlled by the EEC IV connections are secure, clean and free from
35 Insert the Allen key into the mixture module, and cannot be adjusted. corrosion.
adjustment orifice and
push down to engage 41 To adjust the mixture (CO content), first
the adjustment screw. Turn the adjustment run the engine until it reaches normal 12 Distributor lubrication -
screw clockwise to increase the CO reading operating temperature.
and anti-clockwise to
decrease it. Remove the models with contact breaker 42 Connect a CO meter and a tachometer in
Allen key, plug the orifice and check the CO accordance with the manufacturer's distributor
reading. instructions.
36 If the mixture adjustment cannot be 43
Clear any
excess fuel in the inlet manifold 1 Remove the distributor cap and the rotor
finalised within 30 seconds from the moment by running the engine at 3000 rpm for arm.
of stabilising the exhaust gases, repeat the
approximately 15 seconds, then allow the 2 Apply a couple of drops of light oil to the
operations in paragraph 30 before continuing engine to idle.
felt pad in the top of the shaft.
the adjustment procedure. Make sure that the 44 Wait for the test
instrument readings to 3 Wipe clean the distributor cam, then apply
Allen key is removed before increasing the stabilise, then
record the CO content and the a
trace of high melting-point
grease to the
engine speed otherwise the fuel distributor idle speed.
four cam lobes.
will be damaged. 45 If adjustment of the CO content is 4 Refit the rotor arm and the distributor cap.
37
Continue adjustment until the correct CO required, remove the tamperproof cap from
reading is obtained, then if necessary readjust the CO adjustment potentiometer (located on 13 Contact breaker points
the idle speed. the
wing panel
behind the
left -hand adjustment - models with
38 Refit the tamperproof screw and suspension turret) and adjust the screw to contact breaker distributor
reconnect the pressure actuator multi-plug. obtain the correct CO setting at the specified
Disconnect the tachometer and exhaust gas idle speed (see illustration). Note that any 1
Spring back the retaining clips or
undo the
analyser. adjustment must be made within 30 seconds screws as appropriate and lift off the of the instrument readings stabilising, distributor cap. otherwise the procedure described in 2 Withdraw the rotor arm from the distributor paragraph 43 must be repeated. shaft. 46 On completion of adjustment, stop the 3 Using a screwdriver, gently
prise the engine and disconnect all test equipment. Fit contact breaker points open to examine the a new tamperproof cap to the CO adjustment condition of their faces. If they are
rough , potentiometer. pitted or
dirty they should be renewed as described in the next Section. 11 Ignition system component 4 Assuming that the points are in a satisfactory check condition or that they have just been renewed, the gap between the two faces should be 1 Where applicable, remove the distributor checked and if necessary adjusted. This can be cap and thoroughly clean it inside and out
done using feeler blades as described in the with a dry
lint -free cloth. Examine the four HT following paragraphs, or preferably by using 10.45 CO adjustment potentiometer lead segments inside the cap. If the segments the more accurate dwell angle method as location (arrowed) - 1.6 EFI engine appear badly burnt or pitted, renew the cap. described from paragraph 8 onwards. 1·12 Every 6000 miles or 6 Months
13.5a Contact breaker points gap (A) - Bosch distributor 13.5b Contact breaker points gap (A) - Lucas distributor
5 To adjust the points using feeler blades, 7 Refit the rotor arm and the distributor cap. accordance with the manufacturer's
turn the
crankshaft using a spanner on the 8 If a dwell meter is
available adjust the instructions. However, the use of one type of
crankshaft pulley bolt until the
heel of the contact breaker points by measuring and meter is outlined as follows.
contact breaker arm is on the peak of one of setting the dwell angle as follows. 11 Remove the distributor cap and rotor arm
the four cam lobes and the points are fully 9 The dwell angle is the number of degrees of and connect one lead of the dwell meter to
open. A feeler
blade of thickness equal to the distributor cam
rotation during which the the "+" terminal on the coil and the other lead
contact breaker points gap as given in the contact breaker points are closed; ie the to the coil "-" terminal.
Specifications should now just slide between period from when the points close after being 12 Whilst an assistant turns on the ignition
the point faces (see illustrations). opened by one cam
lobe , until they are and cranks the engine on the starter, observe opened again by the next cam lobe. The the reading on the dwell meter
scale . With the
6 If adjustment is required, slacken the advantages of setting the points by this engine cranking the reading should be equal
retaining screw
slightly and move the
fixed method are that any wear of the distributor to the dwell angle given in the Specifications.
point as necessary to achieve the desired gap shaft or cam lobes is taken into
account and 13 If the dwell angle is too small, the contact
(see illustrations). After adjustment tighten the inaccuracies associated with using feeler breaker points gap should be reduced and if
the retaining screw and recheck the gap. blades are eliminated. Also, on 1.1 litre CVH the dwell angle is excessive the gap should be engines the static ignition timing is accurately increased. The points can be easily set in
production and adjustment of the 14 Adjust the points gap while the engine is moved by engaging a screwdriver in the
slot on the ignition timing in service has been deleted cranking using the method described in end of the fixed point and from the maintenance schedule. Therefore paragraph 6. When the dwell angle is levering against the corresponding slot dwell angle adjustment is far more critical on satisfactory, disconnect the meter, then refit or raised pips on the baseplate. these engines. the rotor arm and distributor cap. 10 In general a dwell meter should be used in 15 Check the ignition timing (Section 14).
13.6a Contact breaker point components - Bosch distributor 13.6b Contact breaker point components - Lucas distributor A LT lead
connector B Contact breaker retaining screw A Secondary
movement cam and peg B Contact breaker retaining screw Every 6000 miles or 6 Months 1·13
14.5a Timing mark identification - 14.5b Crankshaft pulley
notch (arrowed) 14.7 Distributor clamp pinch-bolt location OHV engines and timing scale - CVH engine (arrowed) - OHV engines A Notch on crankshaft pulley B Timing scale
cast into timing cover scale is moulded into the timing belt cover 17 A secondary use of the timing light is to 14 Ignition timing check - models and is
situated directly
above the pulley. On check that the centrifugal and vacuum with contact breaker distributor all engines the "O" mark on the scale advance
functions of the distributor are represents Top Dead Centre (TDC) and the working.
Note: With modern ignition systems the only raised projections to the left of TDC are in 18 The
tests are not of
course precise as
suitable way to time the ignition accurately is increments of 4° BTDC (see illustrations). would be the
case if sophisticated equipment 6 Remove the distributor cap and check that
with a stroboscopic timing light. However, for the rotor arm is pointing towards the No 1 were used, but will at
least indicate the 1
initial setting up
purposes (ie after
major serviceability of the
unit .
overhaul, or if the timing has been otherwise spark plug lead
segment in the cap. 19 With the engine idling, timing light
completely
lost ) a
basic initial static setting 7 Slacken the distributor clamp pinch bolt connected and vacuum pipe disconnected
may be used to get the engine
started Once (OHV engines) or the three distributor flange securing bolts (CVH engines) (see and plugged as described in the preceding
the engine is running, the timing should be paragraphs, increase the engine speed to
accurately set using the timing light. Before illustration). 8 Turn the distributor body anti-clockwise 2000 rpm and note the approximate
distance carrying out any of the following, ensure that which the pulley mark moves out of
alignment slightly until the contact breaker points are
the contact breaker points are correctly with the mark on the scale. closed, then slowly turn the distributor body
adjusted as described in Section 13. clockwise until the points just open. Hold the 20 Reconnect the vacuum pipe to the
1 In order that the engine can run
efficiently , it distributor body in this position and tighten distributor and repeat the test when for the
is necessary for a spark to
occur at the spark the clamp pinch bolt or flange securing bolts same increase in engine speed, the alignment
plug and ignite the fuel/air mixture at the as applicable.
differential of the timing
marks should be
instant just before the
piston on the 9 Refit the distributor cap, No 1 spark plug
greater than previously
observed .
compression
stroke reaches the top of its and the plug lead. 21 If the timing marks did not appear to move
travel . The precise instant at which the spark 10 It should now be possible to start and run during the first test, a
fault in the distributor
occurs is
determined by the ignition timing the engine enabling the timing to be centrifugal advance mechanism is indicated.
and this is quoted in degrees before top dead accurately checked with a timing light as No increased movement of the marks during
centre (BTDC). follows. the second test indicates a punctured
2 If the timing is being checked as a
maintenance or service procedure, refer to Stroboscopic setting diaphragm in the vacuum unit, or a leak in the
paragraph 11 onwards. If the distributor has vacuum line. 11 Refer to the Specifications for the timing
been dismantled or renewed, or if its position setting applicable to the engine being worked 22 On completion of the adjustments and
on the engine has been altered, obtain an on and then highlight the appropriate mark on checks, switch off the engine and disconnect
initial static setting as follows. the timing scale and the notch in the pulley the timing light.
Static setting with a dab of white
paint (see paragraph 5). 12 Connect a timing light to the engine in 15 Spark plug renewal -
3 Pull off the plug lead and remove No 1 accordance with the manufacturer's
spark plug (nearest the crankshaft pulley). RS Turbo models instructions (
usually between No 1 spark plug
4 Place a
finger over the plug hole and turn and plug lead).
the crankshaft in the normal direction of 1 The correct functioning of the spark plugs is 13 Disconnect the vacuum hose at the
rotation (clockwise from the crankshaft pulley vital for the correct running and efficiency of distributor vacuum unit and plug the hose.
end) until pressure is felt in No 1 cylinder. This the engine. It is
essential that the plugs fitted 14 Start the engine and allow it to idle.
indicates that the piston is commencing its are appropriate for the engine, and the 15 Point the timing light at the timing marks.
compression stroke. The crankshaft can be They should appear to be stationary with the suitable type is specified at the end of this
turned with a spanner on the pulley bolt. crankshaft pulley notch in alignment with the chapter. If this type is used and the engine is
5 Continue
turning the crankshaft until the appropriate notch on the scale. in good condition, the spark plugs should not
notch on the pulley is
aligned with the 16 If adjustment is necessary (ie the marks are need attention between scheduled
appropriate mark on the timing scale for the not aligned) slacken the distributor clamp pinch replacement intervals. Spark plug cleaning is
engine being worked on (see Specifications). bolt or flange securing bolts as applicable, and rarely necessary and should not be attempted
On OHV engines the timing scale is cast into turn the distributor body as necessary to
align unless specialised equipment is available as
the timing cover and situated just above and the marks. Tighten the pinch bolt or flange damage can easily be caused to the
firing to the right of the pulley. On CVH engines the bolts when the setting is correct. ends. 1·14 Every 6000 miles or 6 Months
2 To remove the plugs, first mark the HT
leads to ensure correct refitment, then pull
them off the plugs. When removing the leads,
pull the terminal insulator at the end of the
lead - not the lead itself.
3 Using a spark plug spanner or
deep socket
and extension bar, unscrew the plugs and
remove them from the engine (see
illustration).
4 The condition of the spark plugs will also
tell much about the condition of the engine.
5 If the insulator
nose of the spark plug is
clean and white, with no deposits, this is
indicative of a
weak mixture, or too hot a plug. 15.3 Tools required for spark plug 15.9 Measuring the spark plug gap with a
(A hot plug transfers
heat away from the removal, gap adjustment and refitting feeler blade
electrode slowly - a cold plug transfers it away
quickly.) 9 To set it,
measure the gap with a feeler 13 Refit the plug leads in the correct order
6 If the tip and insulator nose are covered blade, and then
bend open, or close, the
outer ensuring that they are a secure fit over the
with
hard black-looking deposits, then this is plug electrode until the correct gap is plug ends. Periodically wipe the leads clean to
indicative that the mixture is too
rich . Should achieved (see illustration). The centre
reduce the risk of HT leakage by arcing and
the plug be black and oily, then it is likely that electrode should
never be
bent as this may remove any traces of corrosion that may
the engine is fairly worn, as well as the mixture
crack the
insulation and cause plug
failure , if occur on the end fittings.
being too rich.
nothing worse .
7 If the insulator nose is covered with light tan 10
Special spark plug electrode cap
to greyish
brown deposits, then the mixture is adjusting tools are available from most motor 16 Front brake disc pad check accessory shops (see illustrations).
correct and it is likely that the engine is in 11 Before
fitting the plugs first ensure that the
good condition. 1 Place a
mirror between the roadwheel and plug threads and the seating area in the
8 The spark plug gap is of
considerable the caliper and check the thickness of the cylinder head are clean, dry and free of carbon.
importance , as if it is too large or too small,
friction material of the disc pads (see 12 Screw the plugs in by hand initially and
the
size of the spark and its efficiency will be illustration). If the material has worn down to then fully tighten to the specified torque. If a
seriously
impaired . The spark plug gap should the specified minimum or less, the pads must torque wrench is not available, tighten the
be set to the
figure given in the Specifications be renewed as an axle set (four pads). plugs until initial
resistance is felt, then tighten
at the beginning of this Chapter. 2 For a comprehensive check, the brake by a further 1/16 of a turn for the taper seat plugs pads should be removed and
cleaned . This fitted to OHV engines, or 1/4 of a turn for the will
permit the operation of the caliper to be gasket seat type fitted to CVH engines. Do not checked, and the condition of the brake disc over-tighten the spark plugs, otherwise itself to be examined on both
sides . Refer to damage to the threads may occur and they Chapter 9 for further information. will also be extremely difficult to remove in the future. 17 Rear brake shoe lining check
1 Due to the
fact that the rear brake drums are combined with the hubs, which
makes removal of the drums more complicated than is the case with detachable drums, inspection of the shoe linings can be carried out at the
15.10a Measuring the spark plug gap with a wire gauge . . .
It is very often difficult to insert spark plugs into their
holes without
cross - threading them. To avoid this possibility, fit a short length of 5/16-
inch internal
diameter rubber hose over the end of the spark plug. The flexible hose
acts as a
universal joint to help align the plug with the plug hole. Should the plug
begin to cross-
thread , the hose will
slip on the spark plug, preventing thread damage to the 15.10b . . . and adjusting the gap using a
aluminium cylinder head. 16.1 Checking the front disc pad wear special adjusting tool using a mirror Every 6000 miles or 6 Months 1·15
17.1a Brake shoe viewing hole location (arrowed) in backplate 17.1b Checking rear brake lining wear with a mirror
specified intervals by prising out the small 5 Using a large screwdriver or
flat bar, check Should any fluid be noticed, the suspension
inspection plug from the brake backplate and for wear in the suspension mounting bushes strut/
shock absorber is defective internally,
observing the linings through the hole using a by levering between the relevant suspension and should be renewed. Note: Suspension
mirror (see illustrations). component and its attachment point. Some struts/shock absorbers should always be 1
2 A minimum thickness of friction material movement is to be expected as the mountings renewed in
pairs on the same axle.
must always be observed on the
shoes . If it is are made of rubber, but excessive wear 9 The efficiency of the suspension
worn down to this level, renew the shoes. should be obvious. Also check the condition strut/shock absorber may be checked by
3 Do not attempt to re-line shoes yourself but of any visible rubber bushes, looking for splits, bouncing the vehicle at each
corner .
always obtain factory re-lined shoes. cracks or contamination of the rubber. Generally speaking, the body will
return to its
4 Renew the shoes in an axle set (four shoes), 6 With the car standing on its
wheels , have an normal position and stop after being
even if only one is worn to the minimum. assistant turn the steering
wheel back and depressed. If it
rises and
returns on a
forth about an eighth of a turn each way. rebound, the suspension strut/shock 18 Suspension and steering There should be very little, if any, lost absorber is probably suspect. Examine also movement between the steering wheel and check the suspension strut/shock absorber upper roadwheels. If this is not the case, closely and lower mountings for any signs of wear. observe the
joints and mountings previously
Front suspension and steering described, but in addition, check the steering
check
column universal joints for wear, and the
rack - 19 Seat belt check
1
Raise the front of the vehicle, and securely and-pinion steering
gear itself.
support it on axle stands (see "Jacking and 7 Visually check that each lower arm balljoint is correctly located in the hub
carrier , ensuring 1 Periodically check the
belts for fraying or
Vehicle Support"). that the Torx type pinch-bolt is fully engaged other damage. If evident, renew the belt.
2 Visually inspect the balljoint
dust covers in the
groove in the balljoint
stud . 2 If the belts become dirty, wipe them with a
and the steering rack-and-pinion gaiters for
splits, chafing or deterioration (see
damp cloth using a little
detergent only. Suspension strut/shock absorber 3 Check the tightness of the anchor bolts and
illustration). Any wear of these components check
will cause loss of lubricant, together with dirt if they are ever disconnected, make
quite sure
and water
entry , resulting in
rapid 8 Check for any signs of fluid leakage around that the
original sequence of fitting of
deterioration of the balljoints or steering gear. the suspension strut/shock absorber body, or washers, bushes and anchor
plates is
3
Grasp the roadwheel at the 12 o'
clock and from the rubber gaiter around the piston rod.
retained .
6 o'clock
positions , and try to rock it (see
illustration). Very slight free play may be felt,
but if the movement is appreciable, further
investigation is necessary to determine the
source. Continue rocking the wheel while an
assistant depresses the footbrake. If the
movement is now eliminated or significantly
reduced, it is likely that the hub
bearings are
at fault. If the free play is still evident with the
footbrake depressed, then there is wear in the
suspension joints or mountings.
4 Now grasp the wheel at the 9 o'clock and 3
o'clock positions, and try to rock it as before.
Any movement felt now may again be caused
by wear in the hub bearings or the steering
track -rod balljoints. If the inner or outer balljoint 18.2 Checking a steering gear gaiter 18.3 Rocking the roadwheel to check
is worn, the visual movement will be obvious. steering/suspension components 1·16 Every 6000 miles or 6 Months
20 Alternator drivebelt check
1 A conventional vee drivebelt is used to
drive both the alternators and water pump
pulleys on OHV and HCS engines, and the
alternator pulley only on CVH engines,
power being transmitted via a pulley on the engine
crankshaft.
2 To remove the drivebelt, slacken the
alternator mounting bolts and the bolts on the
adjuster
link and push the alternator in
towards the engine as far as possible (see
illustration).
3 Withdraw the belt from the pulleys. In some
instances it may also be necessary to remove
the adjuster link-to-alternator bolt to avoid
straining the drivebelt.
4 Fit the belt by slipping it over the pulley
rims. If necessary remove the adjuster link-to-
alternator bolt, if not
already done, to avoid
straining the belt. Never be tempted to
remove or refit the drivebelt by prising it over
a pulley rim otherwise the pulley or the
drivebelt internal webbing will be damaged.
5 To tension the belt pull the alternator away 20.2 Alternator mounting and adjuster link bolts
from the engine until the belt is fairly taut, and A Adjuster link-to-alternator bolt C and D Alternator mounting bolts
tighten the adjuster link-to-alternator bolt. B Adjuster link-to-engine bolt
Check that the
total deflection of the belt,
using finger pressure at a point
midway between the alternator and crankshaft or
water pump pulleys, is 10 mm (0.4 in) (see
illustrations). A little
trial and
error may be
switched on. If the belt is too tight the 7 If a new belt has been fitted the tension
necessary to obtain the correct tension. If the should be rechecked and adjusted again if bearings in the water pump and/or alternator
belt is too
slack , it will slip in the pulleys and necessary after the engine has run for will soon be damaged.
soon become glazed or burnt. This is often approximately ten minutes.
indicated by a screeching noise as the engine 6 Once the tension is correct, tighten the
is accelerated, particularly when the remaining adjuster link bolt, front mounting
headlights or other
electrical accessories are bolt and rear mounting bolt in that order.
20.5a Drivebelt tension checking point - CVH engines 20.5b Drivebelt tension checking point - OHV engines Maintenance procedures 1·17
Every 12 000 miles or 12 months 5 The clearances for the inlet and exhaust 21 Valve clearance adjustment - valves are
different (see Specifications). Use a 23 Turbocharger-to-manifold OHV and HCS engines feeler blade of the appropriate thickness to nut check - RS Turbo models check each clearance between the end of the valve stem and the rocker arm. The gauge Check the tightness of the turbocharger-to-
OHV engines should be a
stiff sliding fit. If it is not, turn the exhaust manifold securing nuts using a torque adjuster bolt with a ring spanner. These bolts wrench.
1 This operation should be carried out with are of stiff thread type and
require no
locking the engine cold and the air cleaner and rocker nut. Turn the bolt clockwise to reduce the
cover removed. clearance and anti-clockwise to increase it
2 Using a ring spanner or socket on the 24 Spark plug renewal (see illustration).
crankshaft pulley bolt, turn the crankshaft in a 6 Refit the air cleaner and rocker cover on
clockwise direction until No 1 piston is at TDC completion of adjustment. The procedure is as described for RS Turbo
on its compression stroke. This can be models in Section 15.
verified by checking that the pulley and timing HCS engines
cover marks are in alignment and that the 7 The procedure is as described previously
valves of No 4 cylinder are rocking. When the for OHV engines, but note that the valve 25 Contact breaker points
valves are rocking, this
means that the arrangement has been altered and is now as renewal
slightest rotation of the crankshaft pulley in shown
below . Take care not to overtighten the
either direction will cause one rocker arm to rocker cover bolts on refitting, as this can 1 Spring back the retaining clips or undo the
move up and the other to move down. result in leaks. screws as appropriate and lift off the
3 Numbering from the thermostat housing distributor cap. Valve No Cylinder No
end of the cylinder head, the valves are 2 Withdraw the rotor arm from the distributor
identified as follows. 1 Exhaust 1 shaft. 1 2 Inlet 1 3 On the Bosch distributor disconnect the
Valve No Cylinder No 3 Exhaust 2 contact breaker points LT lead at the spade 1 Exhaust 1 4 Inlet 2 connector. On the Lucas distributor
ease the 2 Inlet 1 5 Inlet 3 contact breaker spring arm out of the
plastic 6 Exhaust 3 3 Exhaust 2 insulator and slide the combined LT and 7 Inlet 4 4 Inlet 2 condenser lead out of the
hooked end of the 8 Exhaust 4 5 Exhaust 3 spring arm. 6 Inlet 3 4 Undo the retaining screw and withdraw the 7 Exhaust 4 contact breaker points from the distributor 22 Exhaust system check 8 Inlet 4 baseplate. Take care not to
drop the screw
4 Adjust the valve clearances by following the and washer inside the distributor during
sequence given in the following table. Turn With the vehicle raised on a
hoist or removal and refitting. If possible use a
the crankshaft pulley 180º (
half a turn) after supported on axle stands (see "Jacking and magnetic screwdriver, or alternatively,
retain adjusting each
pair : Vehicle Support"), check the exhaust system the screw on the end of the screwdriver using for signs of leaks, corrosion or damage and a dab of grease.
Valves rocking Valves to adjust check the rubber mountings for condition and 5 Wipe clean the distributor cam, then apply 7 and 8 1 (Exhaust), 2 (Inlet) security (see illustration). Where damage or a trace of high-melting-point grease to the 5 and 6 3 (Exhaust), 4 (Inlet) corrosion are evident, renew the system four cam lobes. Also, on OHV engines apply 1 and 2 7 (Exhaust), 8 (Inlet) complete or in sections, as applicable, using two drops of light oil to the felt pad at the top 3 and 4 5 (Exhaust), 6 (Inlet) the information given in Chapter 4, Part E. of the distributor shaft.
21.5 Valve clearance adjustment 22.1 Exhaust silencer mounting 1·18 Every 12 000 miles or 12 Months
26.1a Transmission oil filler plug (A) and selector shaft locking 26.1b Allen type transmission filler plug (arrowed) as fitted to mechanism cap (B) later models
6
Locate the new contact breaker points on from August 1985 have an E as the last
letter the baseplate and secure with the retaining of the part number
suffix . 27 Automatic transmission fluid
screw,
lightly tightened only at this stage. On 3 On the early type transmission (suffix letter level check
the Lucas distributor ensure that the D) the oil level must be maintained between 5
secondary movement cam is engaged with and 10 mm (0.2 and 0.4 in) below the lower 1 The automatic transmission fluid level must
the peg, and that both washers are refitted
edge of the filler plug hole. be checked when the engine and
with the retaining screw (see illustration 4 If the transmission is of the later type (suffix transmission are at normal operating
13.6b). letter E) the oil level must be maintained temperature; preferably after a short journey.
7 Reconnect the LT lead, then refer to between 0 and 5 mm (0.2 in) below the lower 2 Park the car on level ground, then fully
Section 13 and adjust the contact breaker edge of the filler plug hole. apply the handbrake.
points gap. 5 To simplify the checking procedure a dipstick can be made from thin rod bent at 3 With the engine running at its normal idle right angles and
having marks on one "leg" speed, apply the footbrake and simultaneously 26 Manual transmission oil level made with a file at 5 mm (0.2 in) intervals.
Rest move the selector lever through the full range check the unmarked leg on the lower edge of the of positions three times then move it back to filler plug hole with the marked leg immersed the P position. Allow the engine to run at idle
1 With the car on level ground wipe the area in the oil. Remove the dipstick, read off the for a further period of one
minute .
around the filler plug, then unscrew the plug level and top-up if necessary using the 4 With the engine still idling, extract the
using a socket spanner, or on later versions a specified grade of oil. Refit the filler plug on transmission fluid level dipstick and wipe it
suitable Torx or Allen key or socket bit, as completion. dry, with a clean non-
fluffy cloth. Fully reinsert
applicable. Access can be gained from above 6 Renewal of the transmission oil is not a the dipstick and then extract it again and
or below the car (see illustrations). service requirement, but if draining is check the fluid level mark, which must be
2 Locate the aluminium
build code tag, which necessary
prior to a repair or overhaul task between the "MAX" and "MIN" markings (see
is secured to one of the transmission housing place a suitable container beneath the illustration)
upper bolts, and note the transmission part selector shaft locking mechanism cap nut 5 If topping-up is necessary, use only the
number stamped on the tag. If the last letter of located just below the filler plug (see specified fluid type and pour it through the
the part number suffix is a D then the illustration). Unscrew the cap nut, remove
transmission was manufactured prior to dipstick tube, but take care not to overfill. The the spring and interlock pin and allow the oil
August 1985. Transmissions manufactured to drain. level must not exceed the "MAX" mark.
Caution: Take care when unscrewing the cap nut as the tension of the spring may cause the pin to fly out as the cap nut is
released . Refit the pin, spring and cap nut when draining is complete, but apply sealer to the cap nut threads (see Specifications). Note that from 1986 onwards the cap nut is shrouded by the transmission support crossmember and cannot be removed in situ. On these models draining can only be carried out after removal of the transmission from 26.6 Selector shaft locking mechanism the car. 27.4 Transmission fluid level dipstick cap nut (arrowed) location and level markings Every 12 000 miles or 12 Months 1·19
6 An improved type of transmission fluid is
used in later models and before topping-up or
refilling it is necessary to identify the
transmission being worked on so that the
correct fluid may be obtained.
7 Locate the transmission identification
number which is stamped on a metal tag
attached to the top of the valve body cover
(see illustration). If, at the end of the second
line on the metal tag, the
prefix E3RP- 27.7 Transmission identification number on valve body tag
appears , then the transmission is of the early
type. If the prefix is E6RP- then the unit is of
the later type. Later transmissions can also be Check for any free play in the joints by first 2 Lightly lubricate the bonnet release
identified by having a black dipstick
stating holding the driveshaft and attempting to mechanism and exposed sections of inner
the fluid specification and type. Having
rotate the wheel. Repeat this check by holding cable with a smear of grease.
determined whether the transmission is of the the inner joint and attempting to rotate the 3 Check the security and operation of all
early or later type, refer to "Lubricants and driveshaft. Any appreciable movement hinges, latches and locks, adjusting them indicates wear in the joints, wear in the where required. Where applicable, check the
fluids" for the fluid requirement. Under no driveshaft splines or loose retaining nut. operation of the central locking system.
circumstances may the later type fluid be used 5 Road test the car and
listen for a metallic 4 Check the condition and operation of the
in the early type transmission, and
vice versa. clicking from the front as the car is driven tailgate struts, renewing them if either is
8 If the fluid level was below the minimum slowly in a
circle with the steering on full lock. leaking or is no longer
able to support the
mark when checked or is in constant need of If a clicking noise is heard this indicates wear tailgate securely when raised.
topping-up, check around the transmission in the outer constant velocity joint caused by
for any signs of excessive fluid leaks, and if excessive clearance between the balls in the
present then they must be rectified without joint and the recesses in which they operate. 32 Road test 1
delay . Remove and inspect the joint (Chapter 8).
9 If the
colour of the fluid is dark brown or 6 If vibration, consistent with road speed, is
black this denotes the sign of a worn brake felt through the car when accelerating, there is
band or transmission clutches in which case Instruments and electrical a possibility of wear in the inner constant equipment
have your Ford dealer check the transmission velocity joint. If so, renewal of the driveshaft
at the earliest
opportunity . inner joint will be necessary. 1 Check the operation of all instruments and electrical equipment. 2 Make sure that all instruments read 28 Automatic transmission 30 Roadwheel check correctly, and switch on all electrical selector mechanism check equipment in turn to check that it functions properly. Carry out a thorough road test, ensuring Check the wheel rims for distortion,
that all gearchanges occur smoothly without damage and excessive run-out. Also make Steering and suspension
snatching, and without an increase in engine sure that the
balance weights are secure with 3 Check for any abnormalities in the steering,
speed between changes. Check that all gear no obvious signs that any are missing. suspension,
handling or road "
feel ".
positions can be engaged with the Check the torque of the wheel bolts. 4 Drive the vehicle, and check that there are
appropriate movement of the selector lever, no
unusual vibrations or noises.
and with the vehicle at rest. Check the
operation of the
parking pawl when "P" is 31 Hinge and lock check and 5 Check that the steering feels
positive , with lubrication no excessive "sloppiness", or roughness, and
selected. check for any suspension noises when 1 Work around the vehicle, and lubricate the cornering, or when
driving over bumps. 29 Driveshaft check bonnet, door and tailgate hinges with a light Drivetrain machine oil such as Duckhams Home Oil. 6 Check the performance of the engine,
1 Carry out a thorough inspection of the clutch, transmission and driveshafts.
driveshafts and joints as follows. 7 Listen for any unusual noises from the
2 Jack up the front of the car and support it engine, clutch and transmission.
securely on axle stands (see "Jacking and 8 Make sure that the engine runs smoothly
Vehicle Support"). when idling, and that there is no hesitation
3 Slowly rotate the roadwheel and inspect the when accelerating.
condition of the outer joint rubber bellows. 9 Where applicable, check that the clutch
Check for signs of cracking, splits or
action is
smooth and progressive, that the
deterioration of the rubber which may allow drive is taken up smoothly, and that the pedal
the grease to
escape and lead to water and travel is not excessive. Also listen for any
grit entry into the joint (see illustration). Also noises when the clutch pedal is depressed.
check the security and condition of the 10 Check that all gears can be engaged
retaining clips. Repeat these checks on the smoothly, without noise, and that the gear
inner constant velocity joints. If any damage lever action is not abnormally vague or
or deterioration is found, the bellows should "notchy".
be renewed as described in Chapter 8. 11 Listen for a metallic clicking
sound from
4 Continue rotating the roadwheel and check 29.3 Checking driveshaft outer joint the front of the vehicle, as the vehicle is driven
for any distortion or damage to the driveshaft. rubber bellows slowly in a circle with the steering on full lock. 1·20 Every 12 000 miles or 12 Months
Carry out this check in both directions. If a 13 Check that there is no vibration through should be a noticeable "give" in the brake
clicking noise is heard, this indicates wear in a the steering when braking. pedal as vacuum builds up. Allow the engine
driveshaft joint, in which case, the complete 14 Check that the handbrake operates to run for at least two minutes, and then
driveshaft must be renewed (see Chapter 8). correctly, without excessive movement of the switch it off. If the brake pedal is depressed lever, and that it holds the vehicle stationary now, it should be possible to detect a hiss
Check the operation and on a
slope . from the
servo as the pedal is depressed.
performance of the braking 15 Test the operation of the brake servo unit After about four or
five applications, no further
system as follows. With the engine off,
depress the hissing should be heard, and the pedal should
12 Make sure that the vehicle does not pull to footbrake four or five times to exhaust the feel considerably firmer.
one side when braking, and that the wheels vacuum. Start the engine, holding the brake
do not lock prematurely when braking hard. pedal depressed. As the engine starts, there
Every 24 000 miles or 2 years Cooling system
flushing Cooling system
filling 33 Coolant renewal 6
Providing that the correct mixture of 11 Using the correct antifreeze mixture (See antifreeze and water has previously been following sub-Section) fill the system through maintained in the system, then no flushing the thermostat housing filler neck slowly until
Cooling system draining should be necessary and the system can be the coolant is
nearly overflowing. Wait a few refilled immediately as described in the
moments for trapped air to escape and add
1 It is preferable to drain the system when the following paragraphs. more coolant. Repeat until the level does not
coolant is cold. If it must be drained when hot, 7 Where the system has been neglected drop and refit the cap. Pour
similar strength release the pressure cap on the thermostat however, and
rust or sludge is evident at coolant into the expansion tank up to the
housing (or expansion tank on later models) draining, then the system should be flushed "MAX" mark and fit the cap.
very slowly, having first covered it with a cloth through using a cold water hose inserted into 12 On later models with a screw type pressure
to avoid any possibility of scalding. Having the thermostat housing (thermostat removed - cap on the expansion tank, fill the system in the
relieved the pressure, remove the cap. see Chapter 3). Continue flushing until the same way, but through the expansion tank
2 Set the heater control to the
maximum heat water flows clean from the disconnected
rather than the thermostat housing.
position.
bottom hose, radiator drain plug and cylinder 13 On all models start the engine and run it to
3 Check to see if a drain plug is fitted to the block drain plug, as applicable. If, after a normal operating temperature then switch off.
lower left-hand side of the radiator. If so,
reasonable period the water still does not run Once it has cooled, check and carry out any
place a suitable container beneath the clear, the radiator can be flushed with a good
final topping-up to the expansion tank only.
radiator, unscrew the plug and allow the proprietary cleaning system. 8 If the radiator is suspected of being Antifreeze mixture
coolant to drain (see illustration). clogged, remove and
reverse flush it as 14 Never operate the vehicle with
plain water
4 If a drain plug is not fitted, place the described in Chapter 3. in the cooling system. Apart from the
danger container beneath the radiator bottom hose. 9 When the coolant is being changed, it is of freezing during winter
conditions , an
Slacken the
clip , release the hose and allow recommended that the overflow pipe is important secondary
purpose of antifreeze is
the coolant to drain. disconnected from the expansion tank and to inhibit the
formation of rust and to reduce
5 A cylinder block drain plug is also fitted to the coolant drained from the tank. If the corrosion.
certain models on the
forward facing side of
interior of the tank is dirty, remove it and 15 The coolant must be renewed at the
the cylinder block, towards the
flywheel end. thoroughly clean it out. intervals specified.
Although the antifreeze
Where this is the case, unscrew the plug and 10 After draining or flushing, reconnect all properties of the coolant will
remain allow the cylinder block to drain into the disconnected hoses and refit the drain plugs
indefinitely , the effectiveness of the rust and
container (see illustrations). where applicable. corrosion inhibitors will gradually weaken.
33.3 Radiator drain plug location 33.5a Cylinder block drain plug location 33.5b Cylinder block drain plug location (arrowed) (arrowed) - OHV engines (arrowed) - CVH engines Every 24 000 miles or 2 Years 1·21
34.1a Removing the air cleaner retaining 34.1b . . . and air cleaner retaining screw 34.2 Release the air cleaner lid retaining screws on a 1.3 litre CVH engine . . . locations on 1.4 litre CVH engine clips, where fitted
16 It is recommended that Ford Super
Plus Bosch K-Jetronic fuel injection
antifreeze is used for filling and topping-up, as models
it has been specially
formulated for use in 34 Air cleaner element renewal
Ford mixed metal engines (see "Lubricants 5 Disconnect the battery earth lead.
and fluids"). 6 Unscrew and loosen off the air ducting-to-
17 A
solution of 45% antifreeze must be Carburettor and Central Fuel sensor plate unit securing band, then
maintained in the system all
year round which Injection (CFI) models separate the two (see illustrations).
will provide adequate
protection against
frost , 1 To remove the air cleaner lid undo and 7 Carefully pull free the
shut -off valve hose
rust and corrosion. remove the retaining screws or bolts on the from the air ducting connector. The hose is a 1
18 After filling with antifreeze, a label should top face of the lid (see illustrations). press fit (see illustration).
be attached to the radiator stating the type of 2 Where applicable release the lid retaining 8 Unscrew and remove the six air sensor
antifreeze and the
date installed. Any clips around the side of the air cleaner body plate-to-cleaner top cover retaining screws,
subsequent topping-up should be made with (see illustration).
the same type and concentration of antifreeze. 3 Lift off the lid, remove and discard the but leave the plate unit in position.
19 Do not use engine antifreeze in the
screen paper element and wipe out the inside of the 9 Prise free and release the air cleaner cover
washer system, as it will cause damage to the air cleaner body and lid (see illustration). retaining clips and detach the hose from the
vehicle paintwork. Screen
wash antifreeze is 4 Place a new element in position and refit cover at the front (see illustration).
available from most motor accessory shops. the lid. 10 Carefully lift the sensor plate clear, together with its gasket, and
pivot it back out of the way. Withdraw the shut-off valve from the rear end of the cleaner case cover, then lift out the cover and remove the element from the casing (see illustrations). 11 If the air cleaner casing is to be removed you will need to detach the fuel filter from the side of the cleaner casing (leave the fuel lines attached to the filter) and the air inlet hose from the front end of the case. Unscrew and remove the casing retaining nuts from the inner wing panel and lift out the casing. 12 Refitting is the
reversal of the removal 34. 3 Removing the air cleaner element 34.6a Slacken the securing band procedure. Wipe the casing clean before screw . . . inserting the new element. When fitting the
34.6b . . . and lift the air duct away from 34.7 Detach the shut-off valve hose - 34.9 Detach the hose from the front of the the sensor plate unit - K-Jetronic system K-Jetronic system air cleaner cover - K-Jetronic system 1·22 Every 24 000 miles or 2 Years
34.10a Lift the sensor plate clear . . . 34.10b . . . withdraw the shut-off valve . . .
34.10c . . . lift out the cover . . . 34.10d . . . and withdraw the element - 34.12 Locating the sensor unit gasket K-Jetronic system
sensor plate unit into position on the top 15 Unclip the retaining clips and lift off the air
cover check that the gasket is in good cleaner top cover. Remove the filter element 35 Crankcase emission control
condition and aligned correctly (see (see illustration). filter renewal - CVH engines
illustration). 16 Clean the inside of the air cleaner body
13 Check that all connections are secure on and fit a new filter element. Place the top
completion. cover in position and secure with the clips. Carburettor and Central Fuel
Bosch KE-Jetronic fuel injection 17 Refit the unit to the air sensor plate and Injection (CFI) engines secure with the two bolts.
models 1 Where fitted, the crankcase ventilation filter
14 Undo the two bolts securing the air Electronic Fuel Injection (EFI) is located in the
base of the air cleaner.
cleaner
assembly to the air sensor plate unit models 2 The filter can be renewed by pulling it out of
and remove the air cleaner assembly (see 18 Proceed as described in paragraphs 15 the air cleaner after disconnecting the hoses
illustration). and 16. (see illustration).
34.14 KE-Jetronic air cleaner retaining 34.15 Lift off the air cleaner and remove 35.2 Crankcase ventilation filter renewal bolts (arrowed) the element - KE-Jetronic system on CVH engines with carburettor Every 24 000 miles or 2 Years 1·23
35.4 Crankcase ventilation filter location on KE-Jetronic fuel 36.3 Fuel filter inlet pipe (A),
outlet pipe (B) and clamp screw (C) injection engines
3 Ensure that the sealing grommet is in Bosch K-Jetronic and KE-Jetronic 9 Refitting is a reversal of the removal
position in the air cleaner before pushing a fuel injection models procedure, but ensure that the flow direction
new filter into place. markings on the filter casing are correctly 1 Disconnect the battery negative lead.
Bosch K-Jetronic and KE-Jetronic 2 Relieve the system pressure (Chapter 4, orientated, and tighten the unions to the 1 Part B). specified torque.
fuel injection engines 10 On completion, switch the ignition on and 3 Place
absorbent rags beneath the filter and
4 The filter is located on the right-hand side disconnect the fuel inlet and outlet off at least five times, and check for fuel
of the engine and can be removed after connections (see illustration). leakage.
disconnecting the hoses (see illustration). On 4 Slacken the clamp
bracket screw and
early versions, detach the filter from its withdraw the filter from the bracket. Electronic Fuel Injection (EFI)
support bracket. 5 Refitting is the reversal of removal, but models
5 Refitting is a reversal of removal, ensuring ensure that the arrows on the filter body point 11 The filter is located in the engine
that the hoses are correctly reconnected. in the direction of fuel flow; ie towards the compartment. outlet pipe union. On completion check for 12 Depressurise the fuel system as
Electronic Fuel Injection (EFI) fuel leaks with the engine running. described in Chapter 4, Part D, then
engines disconnect the inlet and outlet unions from Central Fuel Injection (CFI)
6 The filter is located in the hose run to the air the filter. models
cleaner. Note the locations of the hoses to 13 Note the orientation of the flow direction
ensure correct reconnection. 6 Disconnect the battery negative lead. markings on the filter casing, then remove the 7 Position a suitable container beneath the clamp bolt and withdraw the filter from the fuel filter to
catch any
escaping fuel, then vehicle. Note that the filter will still
contain 36 Fuel filter renewal - fuel slowly slacken the fuel inlet pipe union, fuel, and care should be taken to avoid injection engines allowing the pressure in the fuel line to spillage. dissipate. When fully dissipated, disconnect 14 Refitting is a reversal of the removal Warning: This procedure may the fuel inlet and outlet pipe unions. Take adequate
fire precautions. procedure, but ensure that the flow direction result in some fuel spillage. Before 8 Note the orientation of the flow direction markings on the filter casing are correctly carrying out any operation on the markings on the filter casing, then remove the orientated, and tighten the unions to the fuel system refer to the
precautions given in Safety First! at the clamp bolt and withdraw the filter from the specified torque.
beginning of this manual and follow them vehicle. Note that the filter will still contain 15 On completion, switch the ignition on and
implicitly. Petrol is a
highly dangerous and fuel, and care should be taken to avoid off at least five times, and check for fuel
volatile
liquid and the precautions necessary spillage. leakage.
when handling it cannot be overstressed.
Every 36 000 miles or 3 years 2 The
rigid and flexible
hydraulic pipes and 37 Timing belt renewal - CVH hoses should be inspected for leaks or 38 Brake components check damage regularly. Although the rigid lines are engines plastic-coated in order to preserve them Refer to Chapter 2, Part B. 1 Inspect the thickness of the friction linings against corrosion, check for damage which on the disc pads and brake shoes (as may have occurred through flying
stones , described earlier in this Chapter) at the careless jacking or the traversing of rough intervals specified. ground. 1·24 Every 36 000 miles or 3 Years
3 Bend the hydraulic flexible hoses sharply 1 The procedure is similar to that for the 4 Work through all the remaining bleed
with the fingers and examine the surface of bleeding of the hydraulic system as described screws in the sequence until new fluid can be
the hose for signs of cracking or perishing of in Chapter 9, except that the brake fluid
seen at all of them. Be careful to keep the
the rubber. Renew if evident. reservoir should be emptied by siphoning, master cylinder reservoir topped-up to above
4 Renew the brake fluid at the specified using a clean
poultry baster or similar before the "MIN" level at all times, or air may enter
intervals and examine all rubber components starting, and allowance should be made for the system and greatly increase the length of
(
including master cylinder and piston seals) the old fluid to be expelled when bleeding a the task. section of the
circuit . 5 When the operation is complete, check that
with a critical eye, renewing where necessary. 2 Working as described in Chapter 9, open all bleed screws are securely tightened, and the first bleed screw in the sequence, and that their dust caps are refitted. Wash off all pump the brake pedal gently until nearly all traces of spilt fluid, and recheck the master 39 Brake fluid renewal cylinder reservoir fluid level. the old fluid has been emptied from the master cylinder reservoir. Top-up to the 6 Check the operation of the brakes before Warning: Brake hydraulic fluid "MAX" level with new fluid, and continue
taking the car on the road. can
harm your
eyes and damage pumping until only the new fluid remains in the painted surfaces, so use
extreme reservoir, and new fluid can be seen emerging caution when handling and from the bleed screw. Tighten the screw, and
pouring it. Do not use fluid that has been top the reservoir level up to the "MAX" level
standing open for some time, as it line.
absorbs moisture from the air. Excess 3 Old hydraulic fluid is invariably much darker
moisture can cause a dangerous loss of in colour than the new, making it easy to
braking effectiveness. distinguish the two. 2A·1
Chapter 2 Part A:
OHV and HCS engines
Contents
Crankcase emission control filter renewal . . . . . . . . . .See Chapter 1 Engine/transmission - removal and separation . . . . . . . . . . . . . . . .11
Crankshaft front oil seal - renewal . . . . . . . . . . . . . . . . . . . . . . . . . . .7 Examination and renovation . . . . . . . . . . . . . . . . . . . . . . . . . . . . . . .13
Cylinder head - removal and refitting . . . . . . . . . . . . . . . . . . . . . . . . .4 General information . . . . . . . . . . . . . . . . . . . . . . . . . . . . . . . . . . . . . .1
Cylinder head and pistons - decarbonising . . . . . . . . . . . . . . . . . . .14 Major operations possible with the engine in the car . . . . . . . . . . . . .2
Engine - complete dismantling . . . . . . . . . . . . . . . . . . . . . . . . . . . . .12 Major operations requiring engine removal . . . . . . . . . . . . . . . . . . . .3
Engine - method of removal . . . . . . . . . . . . . . . . . . . . . . . . . . . . . . .11 Oil filler cap cleaning . . . . . . . . . . . . . . . . . . . . . . . . . . .See Chapter 1
Engine - reassembly . . . . . . . . . . . . . . . . . . . . . . . . . . . . . . . . . . . . .15 Oil pump - removal and refitting . . . . . . . . . . . . . . . . . . . . . . . . . . . .10
Engine oil and filter renewal . . . . . . . . . . . . . . . . . . . . .See Chapter 1 Piston/connecting rod assemblies removal and refitting . . . . . . . . . .8
Engine oil level check . . . . . . . . . . . . . . . . . . . . .See "Weekly checks" Rocker gear - dismantling and reassembly . . . . . . . . . . . . . . . . . . . .6
Engine/transmission mountings - removal and refitting . . . . . . . . . . .9 Sump - removal and refitting . . . . . . . . . . . . . . . . . . . . . . . . . . . . . . .5
Engine/transmission - reconnection and installation . . . . . . . . . . . .16 Valve clearance adjustment . . . . . . . . . . . . . . . . . . . . .See Chapter 1
Degrees of difficulty Easy, suitable for Fairly easy, suitable Fairly difficult, Difficult, suitable for Very difficult, novice with little for beginner with suitable for competent experienced DIY suitable for expert DIY 2A experience some experience DIY mechanic mechanic or professional
Specifications
General
Engine type . . . . . . . . . . . . . . . . . . . . . . . . . . . . . . . . . . . . . . . . . . . . . . . Four-cylinder, in-line overhead valve
Capacity : 1.1 litre: OHV engines . . . . . . . . . . . . . . . . . . . . . . . . . . . . . . . . . . . . . . . . . . 1117 cc HCS engines . . . . . . . . . . . . . . . . . . . . . . . . . . . . . . . . . . . . . . . . . . 1118 cc 1.3 litre . . . . . . . . . . . . . . . . . . . . . . . . . . . . . . . . . . . . . . . . . . . . . . . . 1297 cc
Bore : All except 1.1 litre HCS engine . . . . . . . . . . . . . . . . . . . . . . . . . . . . . . 73.96 mm 1.1 litre HCS engine . . . . . . . . . . . . . . . . . . . . . . . . . . . . . . . . . . . . . . 68.68 mm
Stroke: All except 1.1 litre OHV engine . . . . . . . . . . . . . . . . . . . . . . . . . . . . . . 75.48 mm 1.1 litre OHV engine . . . . . . . . . . . . . . . . . . . . . . . . . . . . . . . . . . . . . . 64.98 mm
Compression
ratio : 1.1 litre OHV engines (pre-1986) . . . . . . . . . . . . . . . . . . . . . . . . . . . . . 9.15:1 1.1 litre OHV engines (1986 onwards) . . . . . . . . . . . . . . . . . . . . . . . . . 9.5:1 1.1 litre HCS engines . . . . . . . . . . . . . . . . . . . . . . . . . . . . . . . . . . . . . 9.5:1 1.3 litre OHV engines . . . . . . . . . . . . . . . . . . . . . . . . . . . . . . . . . . . . . 9.3:1 1.3 litre HCS engines . . . . . . . . . . . . . . . . . . . . . . . . . . . . . . . . . . . . . 9.5:1
Firing order . . . . . . . . . . . . . . . . . . . . . . . . . . . . . . . . . . . . . . . . . . . . . . . 1-2-4-3 (No 1 at timing cover end)
Cylinder block
Material . . . . . . . . . . . . . . . . . . . . . . . . . . . . . . . . . . . . . . . . . . . . . . . . . . Cast
iron Number of main bearings: 1.1 litre . . . . . . . . . . . . . . . . . . . . . . . . . . . . . . . . . . . . . . . . . . . . . . . . 3 1.3 litre . . . . . . . . . . . . . . . . . . . . . . . . . . . . . . . . . . . . . . . . . . . . . . . . 5
Cylinder bore diameter: All except 1.1 litre HCS engines: Standard (1) . . . . . . . . . . . . . . . . . . . . . . . . . . . . . . . . . . . . . . . . . . . 73.940 to 73.950 mm Standard (2) . . . . . . . . . . . . . . . . . . . . . . . . . . . . . . . . . . . . . . . . . . . 73.950 to 73.960 mm Standard (3) . . . . . . . . . . . . . . . . . . . . . . . . . . . . . . . . . . . . . . . . . . . 73.960 to 73.970 mm Standard (4) - all except HCS engines . . . . . . . . . . . . . . . . . . . . . . 73.970 to 73.980 mm Oversize 0.5 mm . . . . . . . . . . . . . . . . . . . . . . . . . . . . . . . . . . . . . . . 74.500 to 74.510 mm Oversize 1.0 mm . . . . . . . . . . . . . . . . . . . . . . . . . . . . . . . . . . . . . . . 75.000 to 75.010 mm 2A·2 OHV and HCS engines
Cylinder bore diameter (continued): 1.1 litre HCS engine: Standard (1) . . . . . . . . . . . . . . . . . . . . . . . . . . . . . . . . . . . . . . . . . . . 68.680 to 68.690 mm Standard (2) . . . . . . . . . . . . . . . . . . . . . . . . . . . . . . . . . . . . . . . . . . . 68.690 to 68.700 mm Standard (3) . . . . . . . . . . . . . . . . . . . . . . . . . . . . . . . . . . . . . . . . . . . 68.700 to 68.710 mm Oversize 0.5 mm . . . . . . . . . . . . . . . . . . . . . . . . . . . . . . . . . . . . . . . 69.200 to 69.210 mm Oversize 1.0 mm . . . . . . . . . . . . . . . . . . . . . . . . . . . . . . . . . . . . . . . 69.700 to 69.710 mm
Main bearing
shell inner diameter: Standard . . . . . . . . . . . . . . . . . . . . . . . . . . . . . . . . . . . . . . . . . . . . . . . 57.009 to 57.036 mm 0.254 mm undersize . . . . . . . . . . . . . . . . . . . . . . . . . . . . . . . . . . . . . . 56.755 to 56.782 mm 0.508 mm undersize . . . . . . . . . . . . . . . . . . . . . . . . . . . . . . . . . . . . . . 56.501 to 56.528 mm 0.762 mm undersize . . . . . . . . . . . . . . . . . . . . . . . . . . . . . . . . . . . . . . 56.247 to 56.274 mm
Camshaft bearing inner diameter . . . . . . . . . . . . . . . . . . . . . . . . . . . . . . 39.662 to 39.682 mm
Crankshaft
Main bearing
journal diameter: Standard . . . . . . . . . . . . . . . . . . . . . . . . . . . . . . . . . . . . . . . . . . . . . . . 56.990 to 57.000 mm Standard with
yellow dot (1.1 litre only) . . . . . . . . . . . . . . . . . . . . . . . 56.980 to 56.990 mm 0.254 mm undersize . . . . . . . . . . . . . . . . . . . . . . . . . . . . . . . . . . . . . . 56.726 to 56.746 mm 0.508 mm undersize . . . . . . . . . . . . . . . . . . . . . . . . . . . . . . . . . . . . . . 56.472 to 56.492 mm 0.762 mm undersize . . . . . . . . . . . . . . . . . . . . . . . . . . . . . . . . . . . . . . 56.218 to 56.238 mm
Main bearing running clearance: All except 1.3 litre HCS engine . . . . . . . . . . . . . . . . . . . . . . . . . . . . . . 0.009 to 0.046 mm 1.3 litre HCS engine . . . . . . . . . . . . . . . . . . . . . . . . . . . . . . . . . . . . . . 0.009 to 0.056 mm
Crankpin (big-end) diameter: OHV engines: Standard . . . . . . . . . . . . . . . . . . . . . . . . . . . . . . . . . . . . . . . . . . . . . 42.99 to 43.01 mm 0.254 mm undersize . . . . . . . . . . . . . . . . . . . . . . . . . . . . . . . . . . . . 42.74 to 42.76 mm 0.508 mm undersize . . . . . . . . . . . . . . . . . . . . . . . . . . . . . . . . . . . . 42.49 to 42.51 mm 0.762 mm undersize . . . . . . . . . . . . . . . . . . . . . . . . . . . . . . . . . . . . 42.24 to 42.26 mm HCS engines: Standard . . . . . . . . . . . . . . . . . . . . . . . . . . . . . . . . . . . . . . . . . . . . . 40.99 to 41.01 mm 0.254 mm undersize . . . . . . . . . . . . . . . . . . . . . . . . . . . . . . . . . . . . 40.74 to 40.76 mm 0.508 mm undersize . . . . . . . . . . . . . . . . . . . . . . . . . . . . . . . . . . . . 40.49 to 40.51 mm 0.762 mm undersize . . . . . . . . . . . . . . . . . . . . . . . . . . . . . . . . . . . . 40.24 to 40.26 mm
Thrustwasher thickness: Standard . . . . . . . . . . . . . . . . . . . . . . . . . . . . . . . . . . . . . . . . . . . . . . . 2.80 to 2.85 mm Oversize . . . . . . . . . . . . . . . . . . . . . . . . . . . . . . . . . . . . . . . . . . . . . . . 2.99 to 3.04 mm
Crankshaft endfloat: OHV engines . . . . . . . . . . . . . . . . . . . . . . . . . . . . . . . . . . . . . . . . . . . . 0.079 to 0.279 mm HCS engines . . . . . . . . . . . . . . . . . . . . . . . . . . . . . . . . . . . . . . . . . . . . 0.075 to 0.285 mm
Maximum permissible journal and crankpin ovality and taper . . . . . . . . 0.0254 mm
Camshaft
Number of bearings . . . . . . . . . . . . . . . . . . . . . . . . . . . . . . . . . . . . . . . . 3
Drive . . . . . . . . . . . . . . . . . . . . . . . . . . . . . . . . . . . . . . . . . . . . . . . . . . . . Single
chain Thrust plate thickness . . . . . . . . . . . . . . . . . . . . . . . . . . . . . . . . . . . . . . . 4.457 to 4.508 mm
Camshaft bearing diameter . . . . . . . . . . . . . . . . . . . . . . . . . . . . . . . . . . 39.615 to 39.636 mm
Camshaft bearing
bush internal diameter . . . . . . . . . . . . . . . . . . . . . . . . 39.662 to 39.682 mm
Camshaft endfloat . . . . . . . . . . . . . . . . . . . . . . . . . . . . . . . . . . . . . . . . . 0.02 to 0.19 mm
Number of
links /Length of drive chain . . . . . . . . . . . . . . . . . . . . . . . . . . 46/438.15 mm
Piston and piston
rings Diameter: All except 1.1 litre HCS engines: Standard (1) . . . . . . . . . . . . . . . . . . . . . . . . . . . . . . . . . . . . . . . . . . . 73.910 to 73.920 mm Standard (2) . . . . . . . . . . . . . . . . . . . . . . . . . . . . . . . . . . . . . . . . . . . 73.920 to 73.930 mm Standard (3) . . . . . . . . . . . . . . . . . . . . . . . . . . . . . . . . . . . . . . . . . . . 73.930 to 73.940 mm Standard (4) . . . . . . . . . . . . . . . . . . . . . . . . . . . . . . . . . . . . . . . . . . . 73.940 to 73.950 mm 0.5 mm oversize . . . . . . . . . . . . . . . . . . . . . . . . . . . . . . . . . . . . . . . 74.460 to 74.485 mm 1.0 mm oversize . . . . . . . . . . . . . . . . . . . . . . . . . . . . . . . . . . . . . . . 74.960 to 74.985 mm 1.1 litre HCS engines: Standard (1) . . . . . . . . . . . . . . . . . . . . . . . . . . . . . . . . . . . . . . . . . . . 68.65 to 68.66 mm Standard (2) . . . . . . . . . . . . . . . . . . . . . . . . . . . . . . . . . . . . . . . . . . . 68.66 to 68.67 mm Standard (3) . . . . . . . . . . . . . . . . . . . . . . . . . . . . . . . . . . . . . . . . . . . 68.67 to 68.68 mm 0.5 mm oversize . . . . . . . . . . . . . . . . . . . . . . . . . . . . . . . . . . . . . . . 69.20 to 69.21 mm 1.0 mm oversize . . . . . . . . . . . . . . . . . . . . . . . . . . . . . . . . . . . . . . . 69.70 to 69.71 mm
Piston-to-bore clearance . . . . . . . . . . . . . . . . . . . . . . . . . . . . . . . . . . . . 0.015 to 0.050 mm
Piston ring end gap: Compression . . . . . . . . . . . . . . . . . . . . . . . . . . . . . . . . . . . . . . . . . . . . 0.25 to 0.45 mm Oil control . . . . . . . . . . . . . . . . . . . . . . . . . . . . . . . . . . . . . . . . . . . . . . 0.20 to 0.40 mm OHV and HCS engines 2A·3
Cylinder head
Material . . . . . . . . . . . . . . . . . . . . . . . . . . . . . . . . . . . . . . . . . . . . . . . . . . Cast iron
Maximum permissible cylinder head distortion measured over
entire length . . . . . . . . . . . . . . . . . . . . . . . . . . . . . . . . . . . . . . . . . . . . 0.15 mm
Minimum
combustion chamber depth after
skimming : OHV engines . . . . . . . . . . . . . . . . . . . . . . . . . . . . . . . . . . . . . . . . . . . . 9.07 mm HCS engines . . . . . . . . . . . . . . . . . . . . . . . . . . . . . . . . . . . . . . . . . . . . 14.4 ± 0.15 mm
Valve seat angle . . . . . . . . . . . . . . . . . . . . . . . . . . . . . . . . . . . . . . . . . . . 45°
Valve seat
width : OHV engines: Inlet . . . . . . . . . . . . . . . . . . . . . . . . . . . . . . . . . . . . . . . . . . . . . . . . . 1.20 to 1.75 mm Exhaust . . . . . . . . . . . . . . . . . . . . . . . . . . . . . . . . . . . . . . . . . . . . . . 1.20 to 1.70 mm HCS engines (inlet and exhaust) . . . . . . . . . . . . . . . . . . . . . . . . . . . . . 1.18 to 1.75 mm
Seat cutter
correction angle: Upper . . . . . . . . . . . . . . . . . . . . . . . . . . . . . . . . . . . . . . . . . . . . . . . . . 30° Lower . . . . . . . . . . . . . . . . . . . . . . . . . . . . . . . . . . . . . . . . . . . . . . . . . 75°
Valve
guide bore (standard) . . . . . . . . . . . . . . . . . . . . . . . . . . . . . . . . . . 7.907 to 7.938 mm
Valves - general
Operation . . . . . . . . . . . . . . . . . . . . . . . . . . . . . . . . . . . . . . . . . . . . . . . . Cam followers and pushrods
Valve timing: Pre-1986 OHV engines: Inlet valve opens . . . . . . . . . . . . . . . . . . . . . . . . . . . . . . . . . . . . . . . 21° BTDC Inlet valve closes . . . . . . . . . . . . . . . . . . . . . . . . . . . . . . . . . . . . . . . 55° ABDC Exhaust valve opens . . . . . . . . . . . . . . . . . . . . . . . . . . . . . . . . . . . . 70° BBDC Exhaust valve closes . . . . . . . . . . . . . . . . . . . . . . . . . . . . . . . . . . . . 22° ATDC 1986 onwards OHV engines: Inlet valve opens . . . . . . . . . . . . . . . . . . . . . . . . . . . . . . . . . . . . . . . 14° BTDC Inlet valve closes . . . . . . . . . . . . . . . . . . . . . . . . . . . . . . . . . . . . . . . 46° ABDC 2A Exhaust valve opens . . . . . . . . . . . . . . . . . . . . . . . . . . . . . . . . . . . . 65° BBDC Exhaust valve closes . . . . . . . . . . . . . . . . . . . . . . . . . . . . . . . . . . . . 11° ATDC 1.1 litre HCS engines: Inlet opens . . . . . . . . . . . . . . . . . . . . . . . . . . . . . . . . . . . . . . . . . . . . 14° BTDC Inlet closes . . . . . . . . . . . . . . . . . . . . . . . . . . . . . . . . . . . . . . . . . . . 46° ABDC Exhaust opens . . . . . . . . . . . . . . . . . . . . . . . . . . . . . . . . . . . . . . . . 49° BBDC Exhaust closes . . . . . . . . . . . . . . . . . . . . . . . . . . . . . . . . . . . . . . . . 11° ATDC 1.3 litre HCS engines: Inlet opens . . . . . . . . . . . . . . . . . . . . . . . . . . . . . . . . . . . . . . . . . . . . 16° BTDC Inlet closes . . . . . . . . . . . . . . . . . . . . . . . . . . . . . . . . . . . . . . . . . . . 44° ABDC Exhaust opens . . . . . . . . . . . . . . . . . . . . . . . . . . . . . . . . . . . . . . . . 51° BBDC Exhaust closes . . . . . . . . . . . . . . . . . . . . . . . . . . . . . . . . . . . . . . . . 9° ATDC
Valve clearance (cold): Inlet . . . . . . . . . . . . . . . . . . . . . . . . . . . . . . . . . . . . . . . . . . . . . . . . . . . 0.22 mm Exhaust: OHV engines . . . . . . . . . . . . . . . . . . . . . . . . . . . . . . . . . . . . . . . . . . 0.59 mm HCS engines . . . . . . . . . . . . . . . . . . . . . . . . . . . . . . . . . . . . . . . . . . 0.32 mm
Cam follower diameter . . . . . . . . . . . . . . . . . . . . . . . . . . . . . . . . . . . . . . 13.081 to 13.094 mm
Cam follower clearance in bore . . . . . . . . . . . . . . . . . . . . . . . . . . . . . . . 0.016 to 0.062 mm
Valve spring free length: OHV engines: Pre-1986 . . . . . . . . . . . . . . . . . . . . . . . . . . . . . . . . . . . . . . . . . . . . . 42.0 mm 1986 onwards: 1.1 litre . . . . . . . . . . . . . . . . . . . . . . . . . . . . . . . . . . . . . . . . . . . . . 41.2 mm 1.3 litre . . . . . . . . . . . . . . . . . . . . . . . . . . . . . . . . . . . . . . . . . . . . . 42.4 mm HCS engines . . . . . . . . . . . . . . . . . . . . . . . . . . . . . . . . . . . . . . . . . . . . 41.0 mm
Inlet valve
Length: OHV engines . . . . . . . . . . . . . . . . . . . . . . . . . . . . . . . . . . . . . . . . . . . . 105.45 to 106.45 mm HCS engines . . . . . . . . . . . . . . . . . . . . . . . . . . . . . . . . . . . . . . . . . . . . 103.70 to 104.40 mm
Head diameter: OHV engines: Pre-1986 . . . . . . . . . . . . . . . . . . . . . . . . . . . . . . . . . . . . . . . . . . . . . 38.02 to 38.28 mm 1986 onwards: 1.1 litre . . . . . . . . . . . . . . . . . . . . . . . . . . . . . . . . . . . . . . . . . . . . . 32.89 to 33.15 mm 1.3 litre . . . . . . . . . . . . . . . . . . . . . . . . . . . . . . . . . . . . . . . . . . . . . 38.02 to 38.28 mm HCS engines: 1.1 litre . . . . . . . . . . . . . . . . . . . . . . . . . . . . . . . . . . . . . . . . . . . . . . 32.90 to 33.10 mm 1.3 litre . . . . . . . . . . . . . . . . . . . . . . . . . . . . . . . . . . . . . . . . . . . . . . 34.40 to 34.60 mm 2A·4 OHV and HCS engines
Inlet valve (continued)
Stem diameter: OHV engines: Standard . . . . . . . . . . . . . . . . . . . . . . . . . . . . . . . . . . . . . . . . . . . . . 7.866 to 7.868 mm 0.076 mm oversize . . . . . . . . . . . . . . . . . . . . . . . . . . . . . . . . . . . . . 7.944 to 7.962 mm 0.38 mm oversize . . . . . . . . . . . . . . . . . . . . . . . . . . . . . . . . . . . . . . 8.249 to 8.267 mm HCS engines: Standard . . . . . . . . . . . . . . . . . . . . . . . . . . . . . . . . . . . . . . . . . . . . . 7.025 to 7.043 mm 0.076 mm oversize . . . . . . . . . . . . . . . . . . . . . . . . . . . . . . . . . . . . . 7.225 to 7.243 mm 0.381 mm oversize . . . . . . . . . . . . . . . . . . . . . . . . . . . . . . . . . . . . . 7.425 to 7.443 mm
Valve stem clearance in guide . . . . . . . . . . . . . . . . . . . . . . . . . . . . . . . . 0.021 to 0.070 mm
Exhaust valve
Length: OHV engines: Pre-1986 . . . . . . . . . . . . . . . . . . . . . . . . . . . . . . . . . . . . . . . . . . . . . 105.15 to 106.15 mm 1986 onwards . . . . . . . . . . . . . . . . . . . . . . . . . . . . . . . . . . . . . . . . . 106.04 to 107.04 mm HCS engines . . . . . . . . . . . . . . . . . . . . . . . . . . . . . . . . . . . . . . . . . . . . 104.02 to 104.72 mm
Head diameter: OHV engines . . . . . . . . . . . . . . . . . . . . . . . . . . . . . . . . . . . . . . . . . . . . 29.01 to 29.27 mm HCS engines . . . . . . . . . . . . . . . . . . . . . . . . . . . . . . . . . . . . . . . . . . . . 28.90 to 29.10 mm
Stem diameter: OHV engines: Standard . . . . . . . . . . . . . . . . . . . . . . . . . . . . . . . . . . . . . . . . . . . . . 7.846 to 7.864 mm 0.076 mm oversize . . . . . . . . . . . . . . . . . . . . . . . . . . . . . . . . . . . . . 7.922 to 7.940 mm 0.38 mm oversize . . . . . . . . . . . . . . . . . . . . . . . . . . . . . . . . . . . . . . 8.227 to 8.245 mm HCS engines: Standard . . . . . . . . . . . . . . . . . . . . . . . . . . . . . . . . . . . . . . . . . . . . . 6.999 to 7.017 mm 0.076 mm oversize . . . . . . . . . . . . . . . . . . . . . . . . . . . . . . . . . . . . . 7.199 to 7.217 mm 0.381 mm oversize . . . . . . . . . . . . . . . . . . . . . . . . . . . . . . . . . . . . . 7.399 to 7.417 mm
Valve stem clearance in guide . . . . . . . . . . . . . . . . . . . . . . . . . . . . . . . . 0.043 to 0.092 mm
Lubrication system
Oil pump type . . . . . . . . . . . . . . . . . . . . . . . . . . . . . . . . . . . . . . . . . . . . . Rotor,
external driven by gear on camshaft
Minimum oil pressure at 80° C (175° F): Engine speed 750 rpm . . . . . . . . . . . . . . . . . . . . . . . . . . . . . . . . . . . . 0.6 bar (8.5 lbf/in2) Engine speed 2000 rpm . . . . . . . . . . . . . . . . . . . . . . . . . . . . . . . . . . . 1.5 bar (21.3 lbf/in2)
Oil pressure warning lamp operates . . . . . . . . . . . . . . . . . . . . . . . . . . . . 0.32 to 0.53 bar (4.5 to 7.5 lbf/in2)
Relief valve opens . . . . . . . . . . . . . . . . . . . . . . . . . . . . . . . . . . . . . . . . . . 2.41 to 2.75 bar (34.3 to 39.1 lbf/in2)
Oil pump clearances: Outer rotor-to-body . . . . . . . . . . . . . . . . . . . . . . . . . . . . . . . . . . . . . . 0.14 to 0.26 mm Inner-to-outer rotor . . . . . . . . . . . . . . . . . . . . . . . . . . . . . . . . . . . . . . . 0.051 to 0.127 mm Rotor endfloat . . . . . . . . . . . . . . . . . . . . . . . . . . . . . . . . . . . . . . . . . . . 0.025 to 0.06 mm
Torque wrench settings Nm lbf ft
Main bearing cap bolts . . . . . . . . . . . . . . . . . . . . . . . . . . . . . . . . . . . . . . 88 to 102 65 to 75
Connecting rod (big-end bearing cap) bolts: OHV engines . . . . . . . . . . . . . . . . . . . . . . . . . . . . . . . . . . . . . . . . . . . . 29 to 36 21 to 27 HCS engines: Stage 1 . . . . . . . . . . . . . . . . . . . . . . . . . . . . . . . . . . . . . . . . . . . . . . 4 3 Stage 2 . . . . . . . . . . . . . . . . . . . . . . . . . . . . . . . . . . . . . . . . . . . . . . Tighten by a further 90° Tighten by a further 90°
Rear oil seal retainer bolts . . . . . . . . . . . . . . . . . . . . . . . . . . . . . . . . . . . 16 to 20 12 to 15
Flywheel bolts . . . . . . . . . . . . . . . . . . . . . . . . . . . . . . . . . . . . . . . . . . . . . 64 to 70 47 to 52
Timing chain tensioner . . . . . . . . . . . . . . . . . . . . . . . . . . . . . . . . . . . . . . 7 to 9 5 to 7
Camshaft thrust plate . . . . . . . . . . . . . . . . . . . . . . . . . . . . . . . . . . . . . . . 4 to 5 3 to 4
Camshaft
sprocket bolt . . . . . . . . . . . . . . . . . . . . . . . . . . . . . . . . . . . . . 16 to 20 12 to 15
Timing cover bolts . . . . . . . . . . . . . . . . . . . . . . . . . . . . . . . . . . . . . . . . . 7 to 10 5 to 8
Crankshaft pulley bolt: OHV engines . . . . . . . . . . . . . . . . . . . . . . . . . . . . . . . . . . . . . . . . . . . . 54 to 59 40 to 44 HCS engines . . . . . . . . . . . . . . . . . . . . . . . . . . . . . . . . . . . . . . . . . . . . 100 to 120 74 to 89
Oil pump to crankcase . . . . . . . . . . . . . . . . . . . . . . . . . . . . . . . . . . . . . . 16 to 20 12 to 15
Oil pump cover bolts . . . . . . . . . . . . . . . . . . . . . . . . . . . . . . . . . . . . . . . 8 to 12 6 to 9
Sump bolts: Stage 1 . . . . . . . . . . . . . . . . . . . . . . . . . . . . . . . . . . . . . . . . . . . . . . . . 6 to 8 4 to 6 Stage 2 . . . . . . . . . . . . . . . . . . . . . . . . . . . . . . . . . . . . . . . . . . . . . . . . 8 to 11 6 to 8 Stage 3 . . . . . . . . . . . . . . . . . . . . . . . . . . . . . . . . . . . . . . . . . . . . . . . . 8 to 11 6 to 8
Sump drain plug . . . . . . . . . . . . . . . . . . . . . . . . . . . . . . . . . . . . . . . . . . . 21 to 28 15 to 21
Oil pressure switch . . . . . . . . . . . . . . . . . . . . . . . . . . . . . . . . . . . . . . . . . 13 to 15 10 to 11 OHV and HCS engines 2A·5
Torque wrench settings (continued) Nm lbf ft
Rocker shaft pedestal bolts . . . . . . . . . . . . . . . . . . . . . . . . . . . . . . . . . . 40 to 46 30 to 34
Cylinder head bolts: OHV engines: Stage 1 . . . . . . . . . . . . . . . . . . . . . . . . . . . . . . . . . . . . . . . . . . . . . . 10 to 15 8 to 11 Stage 2 . . . . . . . . . . . . . . . . . . . . . . . . . . . . . . . . . . . . . . . . . . . . . . 40 to 50 30 to 37 Stage 3 . . . . . . . . . . . . . . . . . . . . . . . . . . . . . . . . . . . . . . . . . . . . . . 80 to 90 59 to 66 Stage 4 (after 10 to 20 minutes) . . . . . . . . . . . . . . . . . . . . . . . . . . . 100 to 110 74 to 81 HCS engines: Stage 1 . . . . . . . . . . . . . . . . . . . . . . . . . . . . . . . . . . . . . . . . . . . . . . 30 22 Stage 2 . . . . . . . . . . . . . . . . . . . . . . . . . . . . . . . . . . . . . . . . . . . . . . Tighten by a further 90° Tighten by a further 90° Stage 3 . . . . . . . . . . . . . . . . . . . . . . . . . . . . . . . . . . . . . . . . . . . . . . Tighten by a further 90° Tighten by a further 90°
Rocker cover . . . . . . . . . . . . . . . . . . . . . . . . . . . . . . . . . . . . . . . . . . . . . . 4 to 5 3 to 4
Engine to transmission . . . . . . . . . . . . . . . . . . . . . . . . . . . . . . . . . . . . . . 35 to 45 26 to 33
Right-hand engine mounting to body . . . . . . . . . . . . . . . . . . . . . . . . . . . 41 to 58 30 to 43
Right-hand engine mounting bracket to engine . . . . . . . . . . . . . . . . . . . 54 to 72 40 to 53
Right-hand engine mounting rubber insulator to brackets . . . . . . . . . . . 70 to 95 52 to 70
Front transmission mounting bracket to transmission (pre-1986) . . . . . 41 to 51 30 to 38
Front and rear transmission mounting bolts (pre-1986) . . . . . . . . . . . . . 52 to 64 38 to 47
Transmission mountings to transmission (1986 onwards) . . . . . . . . . . . 80 to 100 59 to 74
Transmission support crossmember to body (1986 onwards) . . . . . . . . 52 38
passages to all bearing surfaces. A drilling in A further
development of the Ford "lean the big-end provides lubrication for the
burn " principle, the HCS engine is basically 1 General information similar to the previous OHV engine, being of gudgeon
pins and cylinder bores. The timing chain and sprockets are lubricated by an oil four cylinder, in-line OHV
construction , but ejection nozzle. nearly every aspect of the engine has been re- 2A
OHV engines designed. The major
differences are in the The 1.1 litre and 1.3 litre OHV engines are HCS engines cylinder head, where the inlet valve
ports and
of four-cylinder, in-line overhead valve type The 1.1 and 1.3 litre High Compression combustion
chambers are designed to impart
(
hence OHV),
mounted transversely together Swirl (HCS) engines were introduced at the a high level of "swirl" to the
incoming fuel/air
with the transmission, at the front of the car. beginning of 1989 and fitted to certain 1.1 mixture. The valve arrangement is also The crankshaft on 1.1 litre engines is Escort models and all 1.3 Escort models, different, being of "mirror" design, where the
supported in three shell type main bearings, inlet valves of the centre cylinders are next to including the Van and Combi, replacing the
whereas the 1.3 litre unit
features a five main each other. Combined with the DIS fully previous OHV engine.
bearing crankshaft. Apart from this
difference and other
minor alterations, the two engines
are virtually the same in design and
construction. The connecting rods are attached to the
crankshaft by horizontally
split shell type big-
end bearings and to the pistons by
interference fit gudgeon pins. The aluminium
alloy pistons are of the slipper type and are
fitted with three piston rings; two
compression and one oil control. The camshaft is chain driven from the
crankshaft and operates the valves via
pushrods and rocker arms. The inlet and
exhaust valves are each closed by a single
valve spring and operate in guides
integral with the cylinder head. The oil pump and
distributor are driven by a skew gear on the
camshaft while an eccentric cam operates the
fuel pump lever. The oil pump is mounted externally on the
cylinder block just below the distributor, and
the full flow type oil filter is screwed directly
into the oil pump. Engine oil contained in the
sump is drawn through a strainer and
pick -up
tube by an externally mounted oil pump of
twin rotor design. The oil is then forced
through the full-flow,
throw -away type oil 1.1 Cutaway view of the 1.1 litre
filter. Oil pressure is regulated by a relief valve OHV engine
integral in the oil pump. The pressurised oil is
directed through the various galleries and 2A·6 OHV and HCS engines
electronic ignition system which has no
moving parts, the result is an economical
engine with cleaner exhaust
emissions which
can run on leaded or
unleaded fuel without
adjustment to the ignition system. Although most components of the HCS
engine have been redesigned, for the most
part the servicing and overhaul procedures
remain unchanged, unless otherwise
stated .
2 Major operations possible with the engine in the car The following work can be carried out 4.6a Heater hose connection on choke 4.6b Heater hose connection at inlet
without having to remove the engine: housing manifold a) Cylinder head - removal and refitting. b) Valve clearances - adjustment (see 8 On manual choke models disconnect the progressively in the reverse order to that given Chapter 1). choke cable from the linkage lever and for tightening (see illustration 4.27). Remove c) Sump - removal and refitting. support bracket. the cylinder head. d) Rocker gear - overhaul. 9 Disconnect the fuel and vacuum pipes from 22 To
dismantle the cylinder head, refer to e) Crankshaft front oil seal - renewal . the carburettor. Section 13. f) Pistons/connecting rods - removal and 10 Disconnect the breather hose from the inlet manifold. Refitting refitting. g) Engine mountings - renewal. 11 On vehicles with servo-
assisted brakes, 23 Before refitting the cylinder head, remove h) Oil filter - removal and refitting. disconnect the vacuum hose from the inlet every
particle of carbon, old gasket and dirt I) Oil pump - removal and refitting. manifold. from the mating surfaces of the cylinder head 12 Disconnect the HT leads from the spark and block. Do not let the removed material plugs. drop into the cylinder bores or waterways, if it 3 Major operations requiring 13 Disconnect the electrical leads from the does, remove it. Normally, when a cylinder engine removal temperature sender unit, the anti-run-on head is removed, the head is decarbonised
solenoid valve at the carburettor, and the and the valves ground in as described in The following work can only be carried out radiator fan thermal switch. Section 14 to remove all trace of carbon.
after removal of the engine from the car: 14 Unbolt and remove the hot air box from Clean the threads of the cylinder head bolts a) Crankshaft main bearings - renewal . the exhaust manifold. and mop out oil from the bolt holes in the b) Crankshaft - removal and refitting. 15 Disconnect the exhaust downpipe from cylinder block. In extreme cases, screwing a c) Flywheel - removal and refitting. the manifold by unbolting the connecting bolt into an oil-
filled hole can cause the block d) Crankshaft rear oil seal - renewal. flanges. Support the exhaust system at the to fracture due to hydraulic pressure. e) Camshaft - removal and refitting. front end. 24 If there is any
doubt about the condition of f) Timing gears and chain - removal and 16 Remove the oil filler cap with breather hose. the inlet or exhaust gaskets, unbolt the refitting. 17 Extract the four screws and remove the manifolds and fit new
ones to perfectly clean rocker cover. mating surfaces. 4 Cylinder head - removal and 18 Unscrew and remove the four fixing bolts 25 Locate a new cylinder head gasket on the and lift away the rocker shaft assembly from cylinder block, making quite sure that the bolt refitting the cylinder head. holes, coolant passages and lubrication holes 19 Withdraw the pushrods,
keeping them in are correctly aligned.
Removal their originally fitted sequence. A
simple way 26 Lower the cylinder head carefully into to do this is to
punch holes in a
piece of card position on the block. Note: On HCS engines, cylinder head bolts and number them 1 to 8 from the thermostat 27 Screw in all the bolts finger tight and then
may be used a total of three times (including housing end of the cylinder head. tighten them in the stages given (see
initial fit) and must be suitably marked to 20 Remove the spark plugs. Specifications), and in the sequence shown to
indicate each removal operation. A new 21 Unscrew the cylinder head bolts the specified torque (see illustration). Note that
cylinder head gasket must be used on refitting.
1 If the engine is in the car carry out the
preliminary operations described in
paragraphs 2 to 16.
2 Disconnect the battery negative terminal.
3 Remove the air cleaner (Chapter 4, Part A).
4 Drain the cooling system (Chapter 1).
5 Disconnect the hoses from the thermostat
housing.
6 Disconnect the heater hose from the upper
connection on the automatic choke housing,
or inlet manifold as applicable (see
illustrations).
7 Release the throttle cable from the
carburettor operating lever by moving the
spring clip and removing the bracket fixing 4.7 Throttle cable disconnection points 4.27 Cylinder head bolt tightening
bolt (see illustration). sequence OHV and HCS engines 2A·7
on all except HCS engines with M11 necked-
shank (a reduced diameter section between the
bolt head and the threaded portion) cylinder
head bolts there are four tightening stages. On
HCS engines with M11 necked-shank cylinder
head bolts there are three tightening stages.
28 Refit the pushrods in their original order.
29 Lower the rocker shaft assembly into
position, making sure that the rocker
adjusting screws engage in the sockets at the
ends of the pushrods.
30 Screw in the rocker pedestal bolts finger
tight. At this stage, some of the rocker arms
will be
applying pressure to the ends of the
valve stems and some of the rocker pedestals 5.6a Sump gasket fitting
details at timing 5.6b Fitting the sump gasket sealing strips
will not be in contact with the cylinder head. cover end (A) and flywheel end (B) to overlap the tabs on the gasket
The pedestals will be pulled down however 2 Refer to Chapter 5, Part A and remove the
when the bolts are tightened to the specified starter motor. 6 Rocker gear - dismantling and
torque, which should now be done. 3 Unbolt and remove the clutch cover plate.
31 Adjust the valve clearances as described reassembly 4 Extract the sump securing bolts and
in Chapter 1. remove the sump. If it is stuck, prise it gently
32 Refit the rocker cover, using a new with a screwdriver but do not use excessive Dismantling
gasket. Do not exceed the specified torque for leverage. If it is very tight, cut round the 1 With the rocker assembly removed as
the securing screws; this may result in oil gasket joint using a sharp
knife . described in Section 4, extract the split pin
leaks at the rocker cover/cylinder head mating Refitting from one end of the rocker shaft (see
face. illustration).
33 Fit the oil filler cap and breather hose and 5 Before refitting the sump, remove the front 2 Take off the spring and plain washers from
the spark plugs. Tighten these to the specified and rear sealing strips and gaskets. Clean the
torque. They are of tapered seat type, no the end of the shaft. 2A mating surfaces of the sump and cylinder 3 Slide off the rocker arms, support pedestals
sealing washers being used. block. and coil
springs , keeping them in their
34 Connect the exhaust downpipe and fit the 6
Stick new gaskets into position on the originally fitted order. Clean out the oil holes in
hot air box. block using thick grease to retain them, then the shaft.
35 Reconnect all electrical leads, vacuum
install new sealing strips into their grooves so
and coolant hoses. that they overlap the gaskets (see Reassembly
36 Reconnect the throttle and choke cables illustrations). 4 Apply engine oil to the rocker shaft before
as described in Chapter 4, Part A. 7 Before offering up the sump, check that the reassembling and make sure that the flat on
37 Refit the air cleaner as described in gap between the sump and the oil baffle is the end of the shaft is to the same side as the
Chapter 4, Part A and fill the cooling system between 2.0 and 3.8 mm (see illustration). rocker arm adjuster screws. This is essential
as described in Chapter 1. 8 Screw in the sump bolts and tighten in for
proper lubrication of the components.
38 Reconnect the battery negative terminal. three stages to the specified torque in the sequence shown (see illustration). a) Stage 1- in alphabetical order 7 Crankshaft front oil seal - 5 Sump - removal and refitting b) Stage 2 - in
numerical order renewal c) Stage 3 - in alphabetical order 9 It is important to follow this procedure in 1 Disconnect the battery negative lead.
Note: New gaskets and sealing strips must be 2 Slacken the alternator mounting and order to provide positive sealing against oil
used on refitting. adjuster bolts and after pushing the alternator leakage.
Removal 10 Refit the clutch cover plate and the starter in towards the engine, slip off the drivebelt. motor and reconnect the battery. 3 Unscrew and remove the crankshaft pulley
1 Disconnect the battery negative lead and bolt. To prevent the crankshaft turning while 11 Refill the engine with the correct grade
drain the engine oil (see Chapter 1). the bolt is being released, jam the teeth of the and quantity of oil.
5.7 Sump and oil baffle clearance details A Sump B Baffle 5.8 Sump bolt tightening sequence 6.1 Rocker shaft assembly components 2A·8 OHV and HCS engines
starter ring gear on the flywheel after
removing the clutch cover plate or starter
motor (Chapter 5, Part A) for access.
4 Remove the crankshaft pulley. This should
come out using the
hands but if it is tight,
prise it carefully with two levers placed at
opposite sides under the pulley flange.
5 Using a suitable
claw tool, prise out the
defective seal and wipe out the seat.
6 Install the new seal using a suitable
distance piece, the pulley and its bolt to
draw it into position. If it is
tapped into position, the
seal may be distorted or the timing cover
fractured.
7 When the seal is fully seated, remove the 8.2 Connecting rod and big-end cap 8.9 Piston ring end gap
positioning pulley and bolt, apply grease to the seal rubbing identification
numbers diagram surface of the pulley, install it and tighten the off before the piston/rod is pushed out of the 15 Wipe the bearing shell seat in the big-end
securing bolt to the specified torque. top of the cylinder block. Take care when cap clean and insert the bearing shell.
8 Refit the clutch cover or starter motor. doing this not to
score the cylinder bore 16 Fit the cap, screw in the bolts and tighten
9 Fit and tension the drivebelt as described in surfaces. to the specified torque.
Chapter 1, and reconnect the battery. 6 Push the piston/connecting rod out of the 17 Repeat the operations on the remaining block, retaining the bearing shell with the rod pistons/connecting rods. 8 Piston/connecting rod if it is to be used again. 18 Refit the sump (Section 5) and the cylinder assemblies - removal and 7 Dismantling the piston/rod is covered in head (Section 4). Refill with oil and coolant. refitting Section 13. 8 Repeat the operations on the remaining 9 Engine/transmission
Note: A piston ring compressor tool will be piston/rod assemblies. mountings - removal and
required for this operation. Refitting refitting
Removal 9 To install a piston/rod assembly, have the
1 Remove the cylinder head and the sump as piston ring gaps staggered as shown, oil the Pre-1986 models
described in Sections 4 and 5 respectively. Do rings and apply a piston ring compressor (see illustration). Compress the piston rings. 1 The engine mountings can be removed if
not remove the oil pick-up filter or pipe, which the
weight of the engine/transmission is first
is an interference fit. 10 Oil the cylinder bores. 11 Wipe out the bearing shell seat in the taken by one of the three following methods.
2 Note the location numbers stamped on the 2 Either support the engine under the sump
connecting rod big-ends and caps, and to connecting rod and insert the shell. using a jack and a block of
wood , or
attach a
which side they face. No 1 assembly is 12 Lower the piston/rod assembly into the hoist to the engine lifting lugs. A third method
nearest the timing cover and the assembly cylinder bore until the base of the piston ring is to make up a bar with end pieces which will
numbers are towards the camshaft side of the compressor stands squarely on the top of the engage in the water
channels at the sides of
engine (see illustration). block (see illustration). the bonnet lid
aperture . Using an adjustable
3 Turn the crankshaft by means of the pulley 13 Check that the directional
arrow on the hook and chain connected to the engine lifting
bolt until the big-end cap bolts for No 1 piston
crown faces towards the timing cover lugs, the weight of the engine can be taken off
connecting rod are in their most accessible end of the engine and then apply the
wooden the mountings.
position. Unscrew and remove the bolts and
handle of a
hammer to the piston crown (see illustrations).
Strike the head of the hammer Rear mountings
the big-end cap complete with bearing shell. If
the cap is difficult to remove, tap it off with a sharply to drive the piston into the cylinder Removal
plastic-faced hammer. bore. 3 Unbolt the mounting, according to type from
4 If the bearing shells are to be used again 14 Oil the crankpin and draw the connecting the body
member or panel, also from the engine
(Section 13), keep the shell taped to its cap. rod down to engage with the crankshaft. or transmission. With the mounting
withdrawn ,
5 Feel the top of the cylinder bore for a wear Check that the bearing shell is still in position the centre bolt can be unscrewed and the
ridge . If one is detected, it should be scraped in the connecting rod. flexible component
detached (see illustrations).
8.13a Relative positions of piston 8.12 Fitting a piston/connecting rod directional arrow and oil
squirt hole in 8.13b Arrow on piston crown must face
assembly with ring compressor in position connecting rod the timing cover when installed OHV and HCS engines 2A·9
9.3a Transmission left-hand rear 9.3b Removing transmission left-hand rear 9.3c Right-hand rear engine mounting mounting-to-bracket attachment - mounting - pre-1986 models attachments - pre-1986 models pre-1986 models A Mounting to side member crossmember at the front and rear and B Mounting to inner wheel
arch Refitting
4 Refitting is a reversal of removal. Make sure remove it from under the car. Remove the 8 Top-up the engine oil to replenish any lost
that the original sequence of assembly of relevant mounting. during the operations.
washers and plates is maintained. Refitting
Front left-hand mounting 11 Refitting is the reversal of removal. Make 11 Engine/transmission -
Removal sure that the original sequence of assembly of removal and separation
5 Removal of the front mounting on the washers and plates is maintained.
transmission requires a different removal Note: Suitable lifting tackle will be required for
procedure. Remove the centre bolt from the 10 Oil pump - removal and this operation.
mounting and then using one of the methods refitting
described, raise the transmission just enough OHV engines 2A
to be able to unbolt and remove the two Note: A new gasket must be used on refitting.
insulator bolts and withdraw the insulator (see Removal
illustration). Removal 1 The engine is removed complete with the
Refitting transmission in a downward direction and then 1 The oil pump is externally mounted on the
6 Refitting is a reversal of removal. Make sure rear facing side of the crankcase. withdrawn from under the front of the car.
that the original sequence of assembly of 2 Using a
strap wrench or similar, unscrew and 2 Disconnect the battery negative lead.
washers and plates is maintained. remove the oil filter cartridge and discard it. 3 Place the transmission in
fourth gear on four-
1986 models onwards 3 Unscrew the three mounting bolts and speed versions, or reverse gear on the five- withdraw the oil pump from the engine (see speed unit to aid adjustment of the gearchange
Removal illustration). linkage when refitting. On models produced from 4 Clean away the old gasket.
February 1987 onwards, place the transmission
7 From 1986 onwards a longitudinal
crossmember is mounted beneath the Refitting in second gear on four-speed versions, or fourth
transmission, and the front and rear left-hand gear on five-speed versions. 5 If a new pump is being fitted. it should be
mountings are attached to it. Removal of the 4 Remove the bonnet (Chapter 11). primed with engine oil before installation. Do
rear right-hand mounting is as previously 5 Remove the air cleaner (Chapter 4, Part A). this by turning its shaft while filling it with
described, but removal of the front and rear clean engine oil. 6 Drain the cooling system (Chapter 1).
left-hand mountings is as follows. 6 Locate a new gasket on the pump 7 Disconnect both the radiator hoses and the
8 Support the engine; see paragraphs 1 and 2. mounting flange, insert the pump shaft and expansion tank hose at the thermostat housing.
9 Undo the nuts securing the mountings to bolt the pump into position. 8 Disconnect the heater hoses from the stub
the transmission support crossmember and to 7 Grease the rubber sealing ring of a new filter on the
lateral coolant pipe, automatic choke
the brackets on the transmission. and screw it into position on the pump, using housing or inlet manifold as applicable (see
10 Unbolt the transmission support hand pressure only, not the removal tool. illustration).
9.5 Transmission left-hand front mounting 10.3 Removing the oil pump 11.8 Heater hose attachments at lateral attachments - pre-1986 models coolant pipe (A) and choke housing (B) 2A·10 OHV and HCS engines
11.22 Gearchange rod and stabiliser 11.24
Typical lifting gear connection to 11.26 Engine right-hand mounting disconnection points - washer fitted engine attachment at side member (A) and inner behind stabiliser arrowed wing panel (B)
9 Disconnect the choke cable (where fitted) 18 The vehicle should now be jacked up and 25 Just take the weight of the
and the throttle cable from the carburettor safety stands fitted to provide sufficient engine/transmission assembly so that the
throttle lever. Unbolt the cable support clearance beneath it to be able to remove the tension is relieved from the mountings.
bracket and tie the cable assembly to one engine/transmission from below. A distance 26 Unbolt the rear right-hand engine
side of the engine compartment. of 686 mm (27.0 in) is recommended between mounting (complete with coolant hose support
10 Disconnect the fuel pipe from the fuel the
floor and the bottom edge of the front on early models) from the side member and
pump and plug the pipe. panel. from the inner wing panel (see illustration).
11 On vehicles equipped with power- 19 Disconnect the exhaust system from its 27 On pre-1986 models unbolt the front and
assisted brakes, disconnect the vacuum pipe flexible mountings and remove the system rear transmission mountings from their
from the inlet manifold. complete. brackets, and remove the front mounting and
12 Disconnect the leads from the following 20 Disconnect the starter motor leads and anti-roll bar support plates from the body on
electrical components: the engine earth strap. both sides (see illustration). a) Alternator and
electric fan temperature 21 Disconnect the gearchange rod from the 28 On 1986 models onwards undo the nuts switch. transmission selector shaft by releasing the and bolts securing the transmission support clamp bolt and withdrawing the rod. Tie the crossmember to the body (see illustrations). b) Oil pressure sender. rod to the stabiliser and then where fitted, The crossmember is removed with the c) Coolant temperature sender. unhook the tension spring. engine/transmission assembly. d) Reversing lamp switch. 22 Unscrew the single bolt and disconnect 29 Carefully lower the engine/transmission e) Anti-run on solenoid valve. the stabiliser from the transmission housing, and withdraw it from under the car.
13 Disconnect the HT and LT (distributor) noting the washer fitted between the stabiliser
wires from the coil
terminals . To ease the withdrawal trunnion and the transmission (see
14 Unscrew the speedometer drive cable operation, lower the engine/ illustration).
from the transmission and release the transmission onto a crawler 23 Remove the driveshafts from the
breather hose. transmission using the procedure described in
board or a sheet of
15 Disconnect the clutch cable from the the manual transmission removal procedure in substantial chipboard placed on rollers
release lever and from its transmission Chapter 7, Part A. Note that on pre-1986 or lengths of pipe.
support. models equipped with an anti-roll bar the
16 Unbolt and remove the hot air box from right-hand mounting clamp should also be
the exhaust manifold. Separation undone and the bar lowered together with the
17 Disconnect the exhaust downpipe from suspension arms. 30 Unscrew and remove the starter motor
the manifold by extracting the two flange 24 Connect a suitable hoist to the engine bolts and remove the starter.
bolts. Support the exhaust pipe to avoid using chains and brackets (see illustration). 31 Unbolt and remove the clutch cover plate
straining it. from the lower part of the clutch bellhousing.
11.28a Transmission support 11.27 Remove the anti-roll bar support crossmember front mounting bolts (A) and 11.28b Transmission support plates on both sides - pre-1986 models anti-roll bar support plate bolts (B) - crossmember rear mounting bolts - 1986 models onwards 1986 models onwards OHV and HCS engines 2A·11
11.35 A locally made-up lifting eye - 11.41a Radiator lower mounting bolt . . . 11.41b . . . and upper locating peg - HCS engine HCS engine
32 Unscrew and remove the bolts from the
mild steel bar, approximately 3" long and 11/2" 46 Disconnect the fuel inlet (
blue clip) and
clutch bellhousing-to-engine mating flange.
wide , with two 1/2" holes drilled in them (see outlet (
green clip) pipes from the fuel pump
33 Withdraw the transmission from the illustration). (see Chapter 4, Part A).
engine. Support its weight so that the clutch 36 Remove the bonnet (Chapter 11). 47 Disconnect the brake servo vacuum hose
assembly is not distorted while the input shaft 37 Disconnect the battery negative lead. from the inlet manifold. On later models
is still in engagement with the splined hub of 38 Remove the air cleaner (Chapter 4, Part A). depress the flanged
collar towards the
the clutch driven plate. 39 Drain the engine oil (Chapter 1). manifold, and pull out the hose (see 40 Drain the coolant (Chapter 1). illustration). Do not pull the hose at an angle,
HCS engines 41 Remove the radiator (Chapter 3) (see or use excessive
force , or the hose may lock illustrations). in position.
Removal 42 Disconnect the heater hoses from the inlet 48 Disconnect the earth lead from the inlet
34 The engine can be lifted from the engine manifold and the water pump. manifold.
bay provided the radiator and certain other 2A 43 Disconnect the lead at the anti-run-on 49 Disconnect the following electrical
ancillary components are removed first to give valve solenoid on the carburettor. connections:
room for manoeuvring. These are detailed in 44 Disconnect the throttle cable (Chapter 4, a) Cooling fan thermal switch on thermostat
the removal procedure. Part A). housing (see illustration).
35 Before commencing work it will be 45 Disconnect the choke cable (Chapter 4, b) Coolant temperature sender (see
necessary to make up two lifting eyes from 1/4" Part A). illustration). c) Alternator. d) Ignition (DIS) coil (Chapter 5, Part B). e) Oil pressure switch. f) Engine coolant temperature sensor (Chapter 5, Part B). g) Engine speed sensor (Chapter 5, Part B). h) Reversing light switch (Chapter 7, Part A). I) Transmission housing earth lead. 50 Disconnect the speedometer cable (see illustration). 51 Disconnect the exhaust downpipe from the exhaust manifold flange. The nuts are
easier to
reach from
underneath the vehicle. Once undone, support the exhaust on wire. 52 Disconnect the starter motor and engine 11.41c Lifting out the radiator - 11.47 Disconnecting the brake vacuum earth lead which is under one of the starter HCS engine servo hose - HCS engine motor bolts (Chapter 5, Part A).
11.49a Disconnecting the cooling fan 11.49b . . . and coolant temperature 11.50 Disconnecting the speedometer thermal switch . . . sender - HCS engine cable - HCS engine 2A·12 OHV and HCS engines
11.57a Right-hand engine mounting 11.57b One bolt (arrowed) is accessible 11.58 Torx headed bolt (arrowed) securing nuts/bolts (arrowed) - HCS engine from within the wheelarch - HCS engine the mounting to the bracket - HCS engine
53 Remove the starter lead support bracket 58 Once removed, undo the Torx headed 64 Remove the nut from the left-hand front
from the transmission housing. bolt securing the mounting to the bracket (see engine mounting.
54 Disconnect the gearchange mechanism illustration). 65 Remove the nut from the left-hand rear
(Chapter 7, Part A). 59 Refit the bracket to the cylinder block and mounting. Remove the nuts securing the
55 Remove the driveshafts (Chapter 8). Note: bolt one of the made-up lifting eyes to the mounting bracket to the transmission housing
On removal of the driveshafts, push a length of bracket using one of the
spare bolts (see and remove the bracket (see illustrations).
wooden dowel into the hole vacated by the illustration). 66 Commence lifting the engine slowly,
driveshaft in the transmission housing to 60 Fit the other lifting eye to the transmission checking all round that everything has been
prevent the sun gears of the differential housing (see illustration). disconnected and that the engine does not
becoming misaligned. A piece of broom 61 Secure suitable lifting gear to the engine foul other components as it is lifted.
Swing the
handle is
ideal , but will have to be turned down and just begin to take the weight. Note: If the engine and
tilt it as necessary to clear
somewhat. carburettor is likely to be damaged because of obstacles (see illustrations).
56 Support the right-hand side of the engine on the angle of the lifting sling/chain, remove the 67 Once out of the engine bay, swing the
a
trolley jack; just take the weight of the engine. carburettor as described in Chapter 4, Part A. engine clear and lower it onto a suitable work
57 Remove the right-hand engine mounting by 62 Remove the alternator (Chapter 5, Part A) surface.
undoing the top nut on the wing panel, removing to give more room for manoeuvring the engine
the bolt accessible from inside the wheelarch, out. Separation
and the three bolts securing the mounting 63 Pull the transmission breather hose from 68 Proceed as described previously in this
bracket to the engine (see illustrations). inside the wing panel. Section for OHV engines
11.65a Mounting nut location (A) and 11.59 Lifting eye (arrowed) bolted to right- 11.60 . . . and on transmission housing - bracket-to-transmission housing nuts (B) -
hand mounting position on cylinder block . . . HCS engine HCS engine
11.65b Removing the mounting bracket - 11.66a Lifting the engine and transmission 11.66b . . . and out of the engine HCS engine upwards . . . compartment OHV and HCS engines 2A·13
12.13 Keep the pushrods in strict order 12.28 Removing the timing chain tensioner 12.31 Camshaft thrust plate removal after removal 10 Unbolt the thermostat housing cover and of the crankshaft sprocket. remove it together with the thermostat (refer 27 Slide the chain tensioner arm from its 12 Engine - complete dismantling to Chapter 3). pivot pin on the front main bearing cap. 11 Remove the rocker cover. 28 Unbolt and remove the chain tensioner 12 Remove the rocker shaft assembly (four (see illustration).
OHV engines bolts). 29 Bend back the lockplate tabs from the
1 The need for dismantling will have been 13 Withdraw the pushrods, keeping them in camshaft sprocket bolts and unscrew and
dictated by wear or noise in most cases. their originally fitted order (see illustration). remove the bolts.
Although there is no reason why only partial 14 Remove the cylinder head complete with 30 Withdraw the sprocket complete with
dismantling cannot be carried out to renew manifolds as described in Section 4. timing chain.
such items as the timing chain or crankshaft 15 Remove the distributor as described in 31 Unbolt and remove the camshaft thrust
rear oil seal, when the main bearings or big- Chapter 5, Part B. plate (see illustration).
end bearings have been knocking and 16 Unbolt and remove the fuel pump. 32 Rotate the camshaft until each cam 2A
especially if the vehicle has covered a high 17 Remove the oil pump (Section 10). follower (tappet) has been pushed fully into its
mileage, then it is recommended that a 18 Pinch the two runs of the water pump hole by its cam lobe.
complete
strip down is carried out and every drivebelt together at the pump pulley to 33 Withdraw the camshaft, taking care not to
engine component examined (Section 13). prevent the pulley rotating and release the damage the camshaft bearings (see illustration).
2 Position the engine so that it is upright on a pulley bolts. 34 Withdraw each of the cam followers,
bench or other
convenient working surface. If
the exterior is very dirty it should be cleaned 19 Release the alternator mounting and keeping them in their originally fitted
before dismantling using paraffin and a stiff adjuster link bolts, push the alternator in sequence by marking them with a piece of
brush or a water-
soluble solvent . towards the engine and remove the drivebelt. numbered tape or using a box with divisions
3 Remove the coolant pipe from the side of 20 Unbolt the alternator bracket and remove (see illustration).
the engine by disconnecting the hose clips the alternator. 35 From the front end of the crankshaft, draw
and the securing bolt. 21 Unbolt and remove the water pump. off the sprocket using a two-legged extractor.
4 If not already done, drain the engine oil. 22 Unscrew the crankshaft pulley bolt. To do 36 Check that the main bearing caps are
5 Remove the dipstick and unscrew and this, the flywheel starter ring gear will have to be marked F (Front), C (Centre) and R (Rear). The
discard the oil filter. jammed to prevent the crankshaft from turning. caps are also marked with an arrow which
6 Disconnect the HT leads from the spark 23 Remove the crankshaft pulley. If this does indicates the timing cover end of the engine, a
plugs, release the distributor cap and lift it not pull off by hand, carefully use two levers point to
remember when refitting the caps.
away complete with leads. behind it placed at opposite points. 37 Check that the big-end caps and
7 Unscrew and remove the spark plugs. 24 Place the engine on its side and remove connecting rods have adjacent matching
8 Disconnect the breather hose from the inlet the sump. Do not invert the engine at this numbers facing towards the camshaft side of
manifold and remove it with the oil filler cap. stage, or sludge and swarf may enter the the engine. Number 1 assembly is nearest the
9 Disconnect the fuel and vacuum pipes from oilways. timing chain end of the engine. If any markings
the carburettor and unbolt and remove the 25 Unbolt and remove the timing chain cover. are missing or indistinct, make some of your
carburettor (refer to Chapter 4, Part A). 26 Take off the oil slinger from the front face own with
quick -drying paint (see illustration).
12.33 Withdrawing the camshaft from the 12.34 Using a valve grinding tool suction 12.37 Connecting rod and big-end cap front of the engine cup to withdraw the cam followers markings 2A·14 OHV and HCS engines
38 Unbolt and remove the big-end bearing
caps. If the bearing shell is to be used again,
tape the shell to the cap.
39 Now check the top of the cylinder bore for
a wear ring. If one can be felt, it should be
removed with a scraper before the piston/rod
is pushed out of the cylinder.
40 Remove the piston/rod by pushing it out
of the top of the block. Tape the bearing shell
to the connecting rod.
41 Remove the remaining three piston/rod
assemblies in a similar way.
42 Unbolt the clutch pressure plate cover
from the flywheel. Unscrew the bolts evenly
and progressively until spring pressure is 13.7a Crankshaft main bearing journal 13.7b Bearing shell colour identification
relieved, before removing the bolts. Be size identification mark on balance web markings (arrowed)
prepared to catch the clutch friction plate as (arrowed)
the cover is withdrawn. timing chain end, the main bearing caps Specifications), then the crankshaft should be
43 Unbolt and remove the flywheel. It is are numbered 1 to 3 or 1 to 5 as reground by your dealer or engine
heavy , do not drop it. If necessary, the starter applicable, and have an arrow on them reconditioning company to
accept the
ring gear can be jammed to prevent the which must point towards the timing undersize main and big-end shell bearings
flywheel rotating. There is no need to mark the chain end of the engine. which are available. Normally, the company
fitted position of the flywheel to its mounting g) The crankshaft thrust bearings are still doing the regrinding will
supply the necessary
flange as it can only be fitted one way. Take fitted either side of the centre main undersize shells.
off the
adapter plate (engine backplate). bearing. 5 If the crankshaft is in good condition, it is
44 Unbolt and remove the crankshaft rear oil h) rear oil seal carrier is secured in place by
wise to renew the bearing shells as it is
almost seal retainer. Torx type bolts. certain that the original ones will have worn.
45 Unbolt the main bearing caps. Remove This is often indicated by scoring of the
the caps, tapping them off if necessary with a bearing surface or by the top
layer of the
plastic-faced hammer. Retain the bearing 13 Examination and renovation bearing metal having worn through to
expose shells with their respective caps if the shells the metal underneath.
are to be used again, although unless the 6 Each shell is marked on its back with the
engine is of low mileage this is not 1 Clean all components using paraffin and a part number. Undersize shells will have the
recommended (see Section 13). To improve stiff brush, except the crankshaft, which undersize stamped additionally on their backs.
access to the No 2 main bearing bolt on 1.3 litre should be wiped clean and the oil passages 7 Standard size crankshafts having main
engines the oil pick-up tube can be removed cleaned out with a length of wire. bearing journal diameters at the lower end of
by drifting it out. A new pick-up tube must be 2 Never assume that a component is unworn the
tolerance range are marked with a yellow
obtained for reassembly together with simply because it
looks all right. After all the
spot on the front balance weight. You will
find suitable adhesive to secure it in position. effort which has
gone into dismantling the that with this type of crankshaft, a standard
46 Lift the crankshaft from the crankcase and engine, refitting worn components will make shell is fitted to the seat in the crankcase but a
lift out the upper bearing shells, noting the the overhaul a waste of time and money. yellow colour-coded shell to the main bearing
thrustwashers either side of the centre Depending on the
degree of wear, the cap (see illustrations).
bearing. Keep these shells with their overhauler's
budget and the anticipated life of 8 If a green spot is seen on the crankshaft
respective caps, identifying them for refitting the vehicle, components which are only then this indicates that 0.25 mm (0.0098 in)
to the crankcase if they are to be used again. slightly worn may be refitted, but if in doubt it undersize big-end bearings are used (see
47 With the engine now completely is always
best to renew. illustration).
dismantled, each component should be Crankshaft, main and big-end Cylinder bores, pistons, rings and
examined as described in Section 13 before bearings connecting rods
reassembling. 3 The need to renew the main bearing shells
HCS engines 9 Cylinder bore wear will usually have been or to have the crankshaft reground will usually evident from the
smoke emitted from the
48 The procedure is as described previously have been determined during the last few
in this Section for OHV engines, noting the miles of operation when
perhaps a heavy
following differences. knocking has
developed from within the a) There is no coolant
transfer pipe
along the crankcase or the oil pressure warning lamp front of the engine. has stayed on denoting a low oil pressure b) Disconnect and remove the HT leads with probably caused by excessive wear in the reference to Chapter 5, Part B. bearings. c) There is no distributor to remove. The 4 Even without these symptoms, the
journals procedure for removal of the DIS coil is and crankpins on a high mileage engine given in Chapter 5, Part B. should be checked for out-of-round (ovality) d) big-end cap bolts are Torx type bolts. and taper. For this a micrometer will be e) Remove the engine speed sensor as needed to check the diameter of the journals described in Chapter 5, Part B before and crankpins at
several different points removing the flywheel to prevent damage around them. A motor
factor or engineer can to the sensor. do this for you. If the
average of the readings f) There are three main bearings on 1.1 shows that either out-of-round or taper is 13.8 Crankshaft big-end journal size engines and five on 1.3 engines. From the outside permitted tolerance (see identification mark on crank throw web OHV and HCS engines 2A·15
13.14 Checking piston ring end gap 13.24a Exploded view of the oil pump 13.24b Lift off the oil pump cover and remove the O-ring A Pump cover F
Blind plug
exhaust during recent operation of the vehicle B O-ring G Oil pressure relief 21 Place the flywheel in the household
on the road, coupled with excessive oil C Pump body valve refrigerator for about an
hour and then heat
consumption and fouling of spark plugs. D Oil filter H Outer rotor the new ring gear to between 260 and 280°C
10 Engine life can be
extended by fitting attachment stud J Inner rotor (500 and 536°F) in a
domestic oven . Do not
special oil control rings to the pistons. These E Filter relief valve K Drive gear heat it above 290°C (554°F) or its hardness
are widely advertised and will give many more will be lost.
thousands of useful mileage without the need not to cut your fingers, piston rings are sharp. 22 Slip the ring onto the flywheel and gently
for a rebore, although this will be inevitable The cylinder bores should be roughened with tap it into position against its
register . Allow it
eventually. If this remedy is decided
upon , fine
glass paper to
assist the bedding-in of the to cool without quenching.
remove the piston/connecting rods (Section 8) new rings. 23 The clutch friction surface on the flywheel
and fit the proprietary rings in accordance should be checked for grooving or tiny
hair Timing sprockets and chain cracks, the
latter being caused by
with the manufacturer's instructions. overheating. If these conditions are evident, it 2A
11 Where a more
permanent solution is 16 The teeth on the timing sprockets rarely wear, but still check for broken or hooked teeth. may be possible to surface
grind the flywheel
decided upon, the cylinder block can be 17 The timing chain should always be provided its balance is not
upset . Otherwise, a
rebored by your dealer or
engineering works , or renewed at time of major engine overhaul. A new flywheel will have to be fitted consult your
by one of the
mobile workshops which now dealer about this.
undertake such work. The cylinder bore will be worn chain is evident if when supported
measured both for out-of-round and for taper horizontally at both ends it
takes on a deeply Oil pump
to decide how much the bores should be bored bowed appearance. 24 The oil pump should be checked for wear
out. A set of matching pistons will be supplied 18
Finally check the rubber
cushion on the by unbolting and removing the cover plate
in a suitable oversize to
suit the new bores. tensioner spring
leaf . If grooved or chewed and O-ring and checking the following
12 Due to the need for special heating and up, renew it. tolerances (see illustrations):
installing equipment for removal and refitting Flywheel a) Outer rotor to pump body gap.
of the interference type gudgeon pin, the b) Inner rotor to outer rotor gap.
removal and refitting of pistons to the 19 Inspect the starter ring gear on the c) Rotor endfloat (use a feeler blade and
connecting rods is definitely a specialist job, flywheel for wear or broken teeth. If evident,
straight -edge
across pump body).
preferably for your Ford dealer. the ring gear should be renewed in the 25 Use feeler blades to check the tolerances
13 The removal and refitting of piston rings is following way.
Drill the ring gear with two and if they are outside the specified
values ,
however well within the
scope of the home holes, approximately 7 or 8 mm (0.3 in) renew the pump (see illustration).
mechanic. Do this by sliding two or three old diameter and offset slightly. Make sure that
feeler blades round behind the top you do not drill too deeply or you will damage Oil seals and gaskets
compression ring so that they are at the flywheel. 26 Renew the oil seals on the timing cover
equidistant points. The ring can now be
slid 20 Tap the ring gear downward off its and the crankshaft rear retainer as a
matter of
up the blades and removed. Repeat the register and remove it. routine at time of major overhaul. Oil seals are
removal operations on the second cheap, oil is not! Use a piece of tubing as a
compression ring and then the oil control ring. removal and installing tool. Apply some
This method will not only prevent the rings grease to the oil seal
lips and check that the
dropping onto empty grooves as they are small tensioner spring in the oil seal has not
withdrawn, but it will also avoid ring breakage. been displaced by the vibration caused during
14 Even when new piston rings have been fitting of the seal.
supplied to
match the pistons, always check 27 Renew all the gaskets by purchasing the
that they are not tight in their grooves and appropriate "de-coke", short or full engine set.
also check their end gaps by pushing them Oil seals may be included in the gasket
sets .
squarely down their particular cylinder bore
and measuring with a feeler blade (see Crankcase
illustration). Adjustment of the end gap can 28 Clean out the oilways with a length of wire
be made by careful grinding to bring it within or by using compressed air. Similarly clean
the specified tolerance. the coolant passages. This is best done by
15 If new rings are being fitted to an old flushing through with a cold water hose.
piston, always remove any carbon from the 13.25 Check the oil pump rotor-to-body Examine the crankcase and block for stripped
grooves beforehand. The best tool for this job clearance (A) and the inner-to-outer rotor threads in bolt holes; if evident, thread inserts
is the end of a broken piston ring. Take care clearance (B) can be fitted. 2A·16 OHV and HCS engines
13.38 Compress the valve spring to 13.39 Remove the valve spring retainer 13.40 . . . followed by the valve remove the collets and spring . . .
29 Renew any
core plugs which appear to be blow with a hammer. Refit the compressor spring with the closer coils to the cylinder
leaking or which are excessively rusty. and compress the spring. head, followed by the spring retainer.
30 Cracks in the
casting may be rectified by 38 Extract the split collets and then gently Compress the spring and engage the split
specialist
welding , or by one of the cold metal release the compressor and remove it (see collets in the cutout in the valve stem. Hold
key interlocking processes available. illustration). them in position while the compressor is 39 Remove the valve spring retainer, the gently released and removed.
Camshaft and bearings spring and the oil seal (see illustration). 48 Repeat the operations on the remaining
31 Examine the camshaft gear and lobes for 40 Withdraw the valve (see illustration). valves, making sure that each valve is returned
damage or wear. If evident a new camshaft 41 Repeat the removal operations on the to its original guide or if new valves have been
must be purchased, or one which has been remaining
seven valves. Keep the valves in fitted, into the seat into which it was ground.
"built-up" such as are advertised by firms their originally fitted sequence by placing 49 On completion, support the ends of the
specialising in
exchange components. them in a piece of card which has holes cylinder head on two wooden
blocks and
32 The bearing internal diameters should be punched in it and numbered 1 to 8 (from the strike the end of the valve stem with a plastic
checked against the specifications if a timing cover end). or
copper -faced hammer, just a light blow to
suitable gauge is available; otherwise, check 42 Place each valve in turn in its guide so that settle the components.
for movement between the camshaft journal approximately one third of its length enters the
and the bearing. Worn bearings should be guide. Rock the valve from side to side. If there 14 Cylinder head and pistons -
renewed by your dealer. is any more than an imperceptible movement,
33 Check the camshaft endfloat by the guides will have to be reamed (working decarbonising
temporarily refitting the camshaft and the from the valve seat end) and oversize
thrust plate. If the endfloat exceeds the stemmed valves fitted. If you do not have the OHV engines
specified tolerance, renew the thrust plate. necessary reamer (tool No 21-242), leave this 1 With the cylinder head removed (Section 4), work to your Ford dealer.
Cam followers the carbon deposits should be removed from 43 Examine the valve
seats . Normally, the the combustion spaces using a scraper and a
34 It is seldom that the cam followers wear in seats do not deteriorate but the valve heads wire brush fitted into an electric drill. Take care
their bores, but it is likely that after a high are more likely to burn away in which case, not to damage the valve heads, otherwise no
mileage, the cam lobe contact surface will new valves can be ground in as described in special precautions need be taken as the
show signs of a
depression or grooving. the next Section. If the seats require re- cylinder head is of cast iron construction.
35 Where this condition is evident, renew the cutting, use a standard cutter available from 2 Where a more thorough job is to be carried
cam followers. Grinding out the wear marks most accessory or tool stores or consult your out, the cylinder head should be dismantled
will only reduce the thickness of the hardened motor engineering works. (Section 13), so that the valves may be ground
metal of the cam follower and accelerate 44 Renewal of any valve seat which is in and the ports and combustion spaces
further wear. cracked or
beyond recutting is definitely a job cleaned, brushed and blown out after the for your dealer or motor engineering works. manifolds have been removed.
Cylinder head and rocker gear 45 If the cylinder head mating surface is 3 Before grinding in a valve, remove the
36 The usual reason for dismantling the suspected of being distorted due to
persistent carbon and deposits completely from its head
cylinder head is to de-carbonise and to grind leakage of coolant at the gasket joint, then it and stem. With an inlet valve, this is usually
in the valves. Reference should therefore be can be checked and surface ground by your quite easy, simply scraping off the
soft carbon
made to Section 14, in addition to the with a blunt knife and
finishing with a wire dealer or motor engineering works. Distortion brush. With an exhaust valve the deposits are
dismantling operations described
here . First is unlikely under normal circumstances with a much harder and those on the head may need
remove the manifolds. cast iron head. a rub on
coarse emery cloth to remove them.
37 Using a standard valve spring 46 Check the rocker shaft and rocker arms
compressor, compress the spring on No 1 pads which bear on the valve stem end faces
valve (valve nearest the timing cover). Do not for wear or scoring, also for any broken coil An old woodworking chisel is
over compress the spring or the valve stem springs. Renew components as necessary a useful tool to remove the
may bend. If it is found that when screwing after dismantling as described in Section 6. If worst of the head deposits.
down the compressor tool, the spring retainer the springs have been in use for 50 000 miles
does not release from the collets, remove the (80 000 km) or more, they should be renewed. 4 Ensure that the valve heads are really clean,
compressor and place a piece of tubing on 47 Reassemble the cylinder head by fitting otherwise the suction cup of the grinding tool
the retainer so that it does not impinge on the new valve stem oil seals. Install No 1 valve will not stick during the grinding-in operations.
collets and strike the end of the tubing a sharp (lubricated) into its guide and fit the valve OHV and HCS engines 2A·17
14.14a View of the swirl chamber in the 14.14b View of the cylinder head with 14.14c Tape the end of the valve stem cylinder head showing the valve seats valves fitted - HCS engine before fitting the valve stem seal - (arrowed) - HCS engine A Inlet side 1 Inlet valves HCS engine
5 Before starting to grind in a valve, support B Exhaust side 2 Exhaust valves
the cylinder head so that there is sufficient
clearance under for the valve stem to
project HCS engines
fully without being obstructed. 14 The procedure is as described previously
6 Take the first valve and apply a little coarse in this Section for OHV engines, noting the
grinding
paste to the bevelled edge of the following.
valve head. Insert the valve into its guide and a) When cleaning out the swirl ports, great
apply the suction grinding tool to its head. care must be exercised not to damage
Rotate the tool between the palms of the the valve seats, especially if using power
hands in a back-and-forth rotary movement tools (see illustration).
until the gritty action of the grinding-in b) The valve arrangement is different, being 2A
process disappears. Repeat the operation of mirror
effect , where the inlet valves for
with fine paste and then wipe away all traces number 2 and 3 cylinders are next to each
of grinding paste and examine the seat and other (see illustration).
bevelled edge of the valve. A matt
silver c) When refitting the valve stem oil seals, tape 14.14d Using a long reach socket to push
mating band should be observed on both the end of the stem to prevent damage to the seal fully home - HCS engine
components, without any sign of black spots. the seal as it is fitted, and use a long reach followers and inserting them fully in their
If some spots do remain, repeat the grinding- socket or length of tube to push the seals original sequence.
in-process until they have disappeared. A fully down (see illustrations). Remove the 2 Lubricate the camshaft bearings and insert
drop or two of paraffin applied to the contact tape on completion. the camshaft from the timing cover end of the
surfaces will increase the speed of grinding- d) The valve seats cannot be re-worked engine.
in, but do not allow any paste to run down into using conventional tools. 3 Fit the thrust plate and tighten the fixing
the valve guide. On completion, wipe away bolts to the specified torque. The endfloat will
every trace of grinding paste using a paraffin- already have been checked as described in
moistened cloth. 15 Engine - reassembly Section 13. Secure the bolts with the locktabs
7 Repeat the operations on the remaining (see illustration).
valves, taking care not to mix up their 4 Wipe clean the main bearing shell seats in
originally fitted sequence. Note: Ensure that all necessary new oil seals the crankcase and fit the shells. Using a little
8 The valves are refitted as described in and gaskets have been obtained before grease, stick the semi-circular thrustwashers
Section 13. starting the reassembly procedure. on either side of the centre bearing so that the
9 An important part of the decarbonising oil grooves are visible when the washers are OHV engines installed (see illustration).
operation is to remove the carbon deposits
from the piston crowns. To do this, turn the 1 With everything clean, commence 5 Check that the Woodruff key is in position
crankshaft so that two pistons are at the top reassembly by oiling the bores for the cam on the front end of the crankshaft and tap the
of their stroke and press some grease
between these pistons and the cylinder walls.
This will prevent carbon
particles falling down
into the piston ring grooves. Stuff rags into the
other two bores.
10 Cover the oilways and coolant passages
with masking tape and then using a blunt
scraper remove all the carbon from the piston
crowns. Take care not to score the soft alloy of
the crown or the surface of the cylinder bore.
11 Rotate the crankshaft to bring the other
two pistons to TDC and repeat the operations.
12 Wipe away the circle of grease and
carbon from the cylinder bores. 15.4 Fit the upper main bearing shell and
13 Clean the top surface of the cylinder block 15.3 Secure the camshaft thrust plate thrustwashers (arrowed) to the centre
by careful scraping. bolts with the locktabs bearing 2A·18 OHV and HCS engines
12 Engage the camshaft sprocket within the timing chain and then engage the chain around the teeth of the crankshaft sprocket. Push the camshaft sprocket onto its mounting flange. The camshaft sprocket bolt holes should now be in alignment with the tapped holes in the camshaft flange and both sprocket timing marks in alignment. Turn the camshaft as necessary to achieve this, also withdraw the camshaft sprocket and reposition it within the loop of the chain. This is a "trial and error" operation which must be continued until exact alignment of bolt holes and timing marks is achieved (see 15.9 Using feeler blades to check 15.10 Oil pick-up tube details - illustrations). crankshaft endfloat 1.3 litre engine 13 Screw in the sprocket bolts to the A Area for
application of adhesive specified torque and bend up the tabs of a
crankshaft sprocket into place using a piece new lockplate (see illustration). B Edge must be
parallel with engine
of tubing. 14 Bolt the timing chain tensioner into longitudinal axis
6 Oil the bearing shells and lower the position, retract the tensioner cam spring and
crankshaft into the crankcase. renewed, the endfloat should be within the then slide the tensioner arm onto its pivot pin.
7 Wipe the seats in the main bearing caps and specified tolerance. If it is not, oversize Release the cam tensioner so that it bears
fit the bearing shells into them. Install the caps thrustwashers are available (see Specifications). upon the arm (see illustration).
so that their markings are correctly positioned 10 If the oil pick-up tube was previously 15 Fit the oil slinger to the front of the
as explained at dismantling in Section 12. removed on 1.3 litre engines a new tube crankshaft sprocket so that its convex side is
8 Screw in the cap bolts and tighten evenly to should now be fitted. Apply a suitable against the sprocket (see illustration).
the specified torque. adhesive (available from Ford dealers) to the 16 Using a new gasket, fit the timing cover,
9 Now check the crankshaft endfloat. Ideally a area shown, and fit the tube with the flat edge which will already have been fitted with a new
dial gauge should be used, but feeler blades are of the mounting flange parallel with the oil seal (see Section 13) (see illustration).
an
alternative if inserted between the face of the longitudinal axis of the engine (see One fixing bolt should be left out at this stage
thrustwasher and the machined surface of the illustration). as it also holds the water pump. Grease the oil
crankshaft balance weight after having prised 11 Rotate the crankshaft so that the timing seal lips and fit the crankshaft pulley. Tighten
the crankshaft first in one direction and then the mark on its sprocket is directly in line with the the pulley bolt to the specified torque.
other (see illustration). Provided the centre of the camshaft sprocket mounting 17 Using a new gasket, bolt the crankshaft
thrustwashers at the centre bearing have been flange. rear oil seal retainer into position. Tighten the
15.12a Crankshaft and camshaft sprocket 15.12b Fit the timing chain and camshaft 15.12c . . . with the sprocket timing marks timing mark locations sprocket . . . aligned with the shaft
centres15.13 Secure the camshaft sprocket bolts 15.14 Refit the timing chain tensioner and 15.15 Fit the oil slinger with its convex with the locktabs arm side against the sprocket OHV and HCS engines 2A·19
15.16 Fitting the timing cover 15.17 Fitting the crankshaft rear oil seal 15.18a Locate the engine adapter plate retainer over the dowels (arrowed) . . .
bolts to the specified torque (see illustration). the oil hole in the connecting rod is on the left
18 Locate the engine adapter (back) plate on (see illustration 8.13a). Oil the cylinder bores.
its dowels and then fit the flywheel (see 22 Install the pistons/connecting rods as
illustrations). described in Section 8.
19 Screw in and tighten the flywheel bolts to 23 Fit the sump as described in Section 5.
the specified torque. To prevent the flywheel 24 Fit the oil pressure sender unit, if removed.
turning, the starter ring gear can be jammed or 25 Turn the crankshaft until No 1 piston is at
a piece of wood placed between a crankshaft TDC (crankshaft pulley 3rd timing cover marks
balance weight and the inside of the crankcase. aligned) and fit the oil pump complete with a
20 Install and centralise the clutch as new gasket and a new oil filter as described in
described in Chapter 6. Section 10.
21 The pistons/connecting rods should now 26 Using a new gasket, fit the fuel pump. If 2A
be installed. Although new pistons may have the insulating block
became detached from
been fitted to the rods by your dealer or the crankcase during removal, make sure that
supplier (see Section 13), it is worth checking a new gasket is fitted to each side of the 15.18b . . . then refit and secure the
to ensure that with the piston crown arrow block. flywheel
pointing to the timing cover end of the engine, 27 Fit the water pump using a new gasket. 28 Fit the cylinder head as described in 35 Fit the pulley to the water pump pulley Section 4. flange. 29 Refit the pushrods in their original 36 Fit the alternator and the drivebelt and sequence and the rocker shaft, also as tension the belt as described in Chapter 1. described in Section 4. 37 Refit the distributor as described in 30 Adjust the valve clearances (Chapter 1) Chapter 5, Part B. and refit the rocker cover using a new gasket. 38 Refit the distributor cap and reconnect the 31 Fit the inlet and exhaust manifolds using spark plug HT leads. new gaskets and tightening the nuts and bolts 39 Bolt on and connect the coolant pipe to to the specified torque (Chapter 4, Part E). the side of the cylinder block. 32 Refit the carburettor using a new flange 40 Fit the breather pipe from the oil filler cap gasket and connect the fuel pipe from the to the inlet manifold and fit the cap. pump (Chapter 4, Part A). 41 Check the sump drain plug for tightness. 33 Screw in the spark plugs and the coolant A new seal should be fitted at regular intervals temperature switch (if removed). to prevent leakage. Refit the dipstick.
15.43a Line up the flange using a spanner 34 Refit the thermostat and the thermostat 42 Refilling with oil should be left until the - HCS engine housing cover. engine is installed in the vehicle.
15.43b Fitting the flywheel to the 15.43c Using the correct tool . . . 15.43d . . . and using a card
template to crankshaft (dowel arrowed) - HCS engine angle-tighten the big-end cap bolts - HCS engine 2A·20 OHV and HCS engines
HCS engines Reconnection linkage using the procedure described in Chapter 7, Part A.
43 The procedure is as described previously 2 Reconnection of the engine and 10 Fit the starter motor leads to their
in this Section for OHV engines, noting the transmission is a reversal of separation, but if terminals.
following points. the clutch has been dismantled, check that 11 Connect the engine earth leads. a) Tighten the main bearing cap bolts to the the friction plate has been centralised as 12 Refit the exhaust system and bolt the specified torque before fitting the oil pick- described in Chapter 6. downpipe to the manifold. Refit the hot air box up tube. Installation which connects with the air cleaner. b) When fitting the oil pick-up tube, use a 13 Reconnect the clutch operating cable. spanner on the flats of the flange to line it OHV engines 14 Reconnect the electrical leads, the fuel up (see illustration). 3 First check that the engine sump drain plug pipe, the brake vacuum hose and the c) The flywheel is dowelled to the crankshaft is tight and then, where applicable refit the speedometer cable. and cannot be fitted off-centre (see selector shaft cap nut (removed to drain the 15 Reconnect the throttle cable and the illustration). transmission oil) together with its spring and choke cable (where applicable) as described d) The big-end bearing cap bolts are angle- interlock pin. Apply sealer to the cap nut in Chapter 4, Part A. tightened after an initial torque
load (see threads when refitting (see Specifications 16 Reconnect the radiator coolant hoses, Specifications). Use the correct tool if it is Chapter 7, Part A). and heater hoses. available or make up a card template with 17 Fill up with engine oil, transmission oil and 4 Manoeuvre the engine/transmission under the specified angle marked on it (see coolant, then reconnect the battery (photo). the vehicle and attach the lifting hoist. Raise illustrations). 18 Refit the bonnet, bolting the hinges to the engine/transmission carefully until the e) Apart from lining up the camshaft and their originally marked positions. Reconnect right-hand rear mounting can be engaged. the screen washer pipe. crankshaft sprocket timing marks (for Refit the mounting nut and bolt loosely only at 19 Fit the air cleaner and reconnect the valve timing), there is no ignition timing this stage. hoses and the air cleaner inlet spout. mark to
worry about. 5 On pre-1986 models refit the front 20 Once the engine is running, check the f) Fit the rocker cover using a new gasket. mounting and anti-roll bar support plates, dwell angle, timing, idle speed and mixture Do not exceed the specified torque for then refit the left-hand front and rear adjustment as applicable (refer to Chapter 1). the securing screws; this may result in oil mountings loosely only. 21 If a number of new internal components leaks at the rocker cover/cylinder head 6 On 1986 models onwards refit the have been installed, run the vehicle at mating face. transmission support crossmember. restricted speed for the first few
hundred miles 7 Lower the hoist and let the power unit rest to allow time for the new components to bed on its mountings. Ensure that none of the 16 Engine/transmission - in. It is also recommended that with a new or mountings are under
strain , then tighten all the reconnection and installation rebuilt engine, the engine oil and filter are mounting nuts and bolts and remove the hoist. changed at the end of the running-in period. 8 The driveshafts and suspension arms
1 This is a
direct reversal of removal and should now be refitted using the procedure HCS engines
separation from the transmission. Take care described in the manual transmission refitting 22 Refitting is a reversal of the removal
not to damage the radiator or front
wings procedure in Chapter 7, Part A. procedure described in Section 11.
during installation. 9 Reconnect and adjust the gearchange 2B·1
Chapter 2 Part B:
CVH engines
Contents
Camshaft - removal and refitting . . . . . . . . . . . . . . . . . . . . . . . . . . . .6 Engine/transmission - removal and separation . . . . . . . . . . . . . . . .11
Crankcase emission control filter renewal . . . . . . . . . .See Chapter 1 Engine/transmission mountings - removal and refitting . . . . . . . . . .10
Cylinder head - removal and refitting . . . . . . . . . . . . . . . . . . . . . . . . .7 Examination and renovation . . . . . . . . . . . . . . . . . . . . . . . . . . . . . . .13
Cylinder head and pistons - decarbonising . . . . . . . . . . . . . . . . . . .14 General information . . . . . . . . . . . . . . . . . . . . . . . . . . . . . . . . . . . . . .1
Engine - complete dismantling . . . . . . . . . . . . . . . . . . . . . . . . . . . . .12 Major operations possible with the engine in the car . . . . . . . . . . . . .2
Engine oil and filter renewal . . . . . . . . . . . . . . . . . . . . .See Chapter 1 Major operations requiring engine removal . . . . . . . . . . . . . . . . . . . .3
Engine oil cooler - removal and refitting . . . . . . . . . . . . . . . . . . . . . .17 Oil seals - renewal . . . . . . . . . . . . . . . . . . . . . . . . . . . . . . . . . . . . . . .5
Engine oil level check . . . . . . . . . . . . . . . . . . . . .See "Weekly checks" Pistons/connecting rods - removal and refitting . . . . . . . . . . . . . . . .9
Engine - reassembly . . . . . . . . . . . . . . . . . . . . . . . . . . . . . . . . . . . . .15 Sump - removal and refitting . . . . . . . . . . . . . . . . . . . . . . . . . . . . . . .8
Engine/transmission - reconnection and installation . . . . . . . . . . . .16 Timing belt - removal, refitting and adjustment . . . . . . . . . . . . . . . . .4
Degrees of difficulty Easy, suitable for Fairly easy, suitable Fairly difficult, Difficult, suitable for Very difficult, 2B novice with little for beginner with suitable for competent experienced DIY suitable for expert DIY experience some experience DIY mechanic mechanic or professional
Specifications
General
Engine type . . . . . . . . . . . . . . . . . . . . . . . . . . . . . . . . . . . . . . . . . . . . . . . Four-cylinder, in-line overhead camshaft
Capacity: 1.1 litre . . . . . . . . . . . . . . . . . . . . . . . . . . . . . . . . . . . . . . . . . . . . . . . . 1117 cc 1.3 litre . . . . . . . . . . . . . . . . . . . . . . . . . . . . . . . . . . . . . . . . . . . . . . . .
1296 cc 1.4 litre . . . . . . . . . . . . . . . . . . . . . . . . . . . . . . . . . . . . . . . . . . . . . . . . 1392 cc 1.6 litre . . . . . . . . . . . . . . . . . . . . . . . . . . . . . . . . . . . . . . . . . . . . . . . . 1597 cc
Bore: 1.1 litre . . . . . . . . . . . . . . . . . . . . . . . . . . . . . . . . . . . . . . . . . . . . . . . . 73.96 mm 1.3 and 1.6 litre . . . . . . . . . . . . . . . . . . . . . . . . . . . . . . . . . . . . . . . . . . 79.96 mm 1.4 litre . . . . . . . . . . . . . . . . . . . . . . . . . . . . . . . . . . . . . . . . . . . . . . . . 77.24 mm
Stroke: 1.1 litre . . . . . . . . . . . . . . . . . . . . . . . . . . . . . . . . . . . . . . . . . . . . . . . . 64.98 mm 1.3 litre . . . . . . . . . . . . . . . . . . . . . . . . . . . . . . . . . . . . . . . . . . . . . . . . 64.52 mm 1.4 litre . . . . . . . . . . . . . . . . . . . . . . . . . . . . . . . . . . . . . . . . . . . . . . . . 74.30 mm 1.6 litre . . . . . . . . . . . . . . . . . . . . . . . . . . . . . . . . . . . . . . . . . . . . . . . . 79.52 mm
Compression ratio: All except 1.6 litre Turbo . . . . . . . . . . . . . . . . . . . . . . . . . . . . . . . . . . . 9.5:1 1.6 litre Turbo . . . . . . . . . . . . . . . . . . . . . . . . . . . . . . . . . . . . . . . . . . . 8.3:1
Firing order . . . . . . . . . . . . . . . . . . . . . . . . . . . . . . . . . . . . . . . . . . . . . . . 1-3-4-2 (No 1 at timing belt end)
Cylinder block
Material . . . . . . . . . . . . . . . . . . . . . . . . . . . . . . . . . . . . . . . . . . . . . . . . . . Cast iron
Number of main bearings . . . . . . . . . . . . . . . . . . . . . . . . . . . . . . . . . . . . 5
Cylinder bore (diameter): 1.1 litre: Standard (1) . . . . . . . . . . . . . . . . . . . . . . . . . . . . . . . . . . . . . . . . . . . 73.94 to 73.95 mm Standard (2) . . . . . . . . . . . . . . . . . . . . . . . . . . . . . . . . . . . . . . . . . . . 73.95 to 73.96 mm Standard (3) . . . . . . . . . . . . . . . . . . . . . . . . . . . . . . . . . . . . . . . . . . . 73.96 to 73.97 mm Standard (4) . . . . . . . . . . . . . . . . . . . . . . . . . . . . . . . . . . . . . . . . . . . 73.97 to 73.98 mm Oversize (A) . . . . . . . . . . . . . . . . . . . . . . . . . . . . . . . . . . . . . . . . . . . 74.23 to 74.24 mm Oversize (B) . . . . . . . . . . . . . . . . . . . . . . . . . . . . . . . . . . . . . . . . . . . 74.24 to 74.25 mm Oversize (C) . . . . . . . . . . . . . . . . . . . . . . . . . . . . . . . . . . . . . . . . . . . 74.25 to 74.26 mm 2B·2 CVH engines
Cylinder bore (diameter) (continued): 1.3 and 1.6 litre: Standard (1) . . . . . . . . . . . . . . . . . . . . . . . . . . . . . . . . . . . . . . . . . . . 79.94 to 79.95 mm Standard (2) . . . . . . . . . . . . . . . . . . . . . . . . . . . . . . . . . . . . . . . . . . . 79.95 to 79.96 mm Standard (3) . . . . . . . . . . . . . . . . . . . . . . . . . . . . . . . . . . . . . . . . . . . 79.96 to 79.97 mm Standard (4) . . . . . . . . . . . . . . . . . . . . . . . . . . . . . . . . . . . . . . . . . . . 79.97 to 79.98 mm Oversize (A) . . . . . . . . . . . . . . . . . . . . . . . . . . . . . . . . . . . . . . . . . . . 80.23 to 80.24 mm Oversize (B) . . . . . . . . . . . . . . . . . . . . . . . . . . . . . . . . . . . . . . . . . . . 80.24 to 80.25 mm Oversize (C) . . . . . . . . . . . . . . . . . . . . . . . . . . . . . . . . . . . . . . . . . . . 80.25 to 80.26 mm 1.4 litre: Standard (1) . . . . . . . . . . . . . . . . . . . . . . . . . . . . . . . . . . . . . . . . . . . 77.22 to 77.23 mm Standard (2) . . . . . . . . . . . . . . . . . . . . . . . . . . . . . . . . . . . . . . . . . . . 77.23 to 77.24 mm Standard (3) . . . . . . . . . . . . . . . . . . . . . . . . . . . . . . . . . . . . . . . . . . . 77.24 to 77.25 mm Standard (4) . . . . . . . . . . . . . . . . . . . . . . . . . . . . . . . . . . . . . . . . . . . 77.25 to 77.26 mm Oversize (A) . . . . . . . . . . . . . . . . . . . . . . . . . . . . . . . . . . . . . . . . . . . 77.51 to 77.52 mm Oversize (B) . . . . . . . . . . . . . . . . . . . . . . . . . . . . . . . . . . . . . . . . . . . 77.52 to 77.53 mm Oversize (C) . . . . . . . . . . . . . . . . . . . . . . . . . . . . . . . . . . . . . . . . . . . 77.53 to 77.54 mm
Main bearing shell inner diameter: Standard . . . . . . . . . . . . . . . . . . . . . . . . . . . . . . . . . . . . . . . . . . . . . . . 58.011 to 58.038 mm Undersize 0.25 mm . . . . . . . . . . . . . . . . . . . . . . . . . . . . . . . . . . . . . . . 57.761 to 57.788 mm Undersize 0.50 mm . . . . . . . . . . . . . . . . . . . . . . . . . . . . . . . . . . . . . . . 57.511 to 57.538 mm Undersize 0.75 mm . . . . . . . . . . . . . . . . . . . . . . . . . . . . . . . . . . . . . . . 57.261 to 57.288 mm
Crankshaft
Main bearing journal diameter: Standard . . . . . . . . . . . . . . . . . . . . . . . . . . . . . . . . . . . . . . . . . . . . . . . 57.98 to 58.00 mm Undersize 0.25 mm . . . . . . . . . . . . . . . . . . . . . . . . . . . . . . . . . . . . . . . 57.73 to 57.75 mm Undersize 0.50 mm . . . . . . . . . . . . . . . . . . . . . . . . . . . . . . . . . . . . . . . 57.48 to 57.50 mm Undersize 0.75 mm . . . . . . . . . . . . . . . . . . . . . . . . . . . . . . . . . . . . . . . 57.23 to 57.25 mm
Main bearing running clearance . . . . . . . . . . . . . . . . . . . . . . . . . . . . . . . 0.011 to 0.058 mm
Thrustwasher thickness: Standard . . . . . . . . . . . . . . . . . . . . . . . . . . . . . . . . . . . . . . . . . . . . . . . 2.301 to 2.351 mm Oversize . . . . . . . . . . . . . . . . . . . . . . . . . . . . . . . . . . . . . . . . . . . . . . . 2.491 to 2.541 mm
Crankshaft endfloat . . . . . . . . . . . . . . . . . . . . . . . . . . . . . . . . . . . . . . . . 0.09 to 0.30 mm
Crankpin (big-end) diameter: 1.1 engines: Standard . . . . . . . . . . . . . . . . . . . . . . . . . . . . . . . . . . . . . . . . . . . . . 42.99 to 43.01 mm Undersize 0.25 mm . . . . . . . . . . . . . . . . . . . . . . . . . . . . . . . . . . . . . 42.74 to 42.76 mm Undersize 0.50 mm . . . . . . . . . . . . . . . . . . . . . . . . . . . . . . . . . . . . . 42.49 to 42.51 mm Undersize 0.75 mm . . . . . . . . . . . . . . . . . . . . . . . . . . . . . . . . . . . . . 42.24 to 42.26 mm Undersize 1.00 mm . . . . . . . . . . . . . . . . . . . . . . . . . . . . . . . . . . . . . 41.99 to 42.01 mm 1.3, 1.4 and 1.6 engines: Standard . . . . . . . . . . . . . . . . . . . . . . . . . . . . . . . . . . . . . . . . . . . . . 47.89 to 47.91 mm Undersize 0.25 mm . . . . . . . . . . . . . . . . . . . . . . . . . . . . . . . . . . . . . 47.64 to 47.66 mm Undersize 0.50 mm . . . . . . . . . . . . . . . . . . . . . . . . . . . . . . . . . . . . . 47.39 to 47.41 mm Undersize 0.75 mm . . . . . . . . . . . . . . . . . . . . . . . . . . . . . . . . . . . . . 47.14 to 47.16 mm Undersize 1.00 mm . . . . . . . . . . . . . . . . . . . . . . . . . . . . . . . . . . . . . 46.89 to 46.91 mm
Big-end bearing running clearance . . . . . . . . . . . . . . . . . . . . . . . . . . . . 0.006 to 0.060 mm
Camshaft
Number of bearings . . . . . . . . . . . . . . . . . . . . . . . . . . . . . . . . . . . . . . . . 5
Drive . . . . . . . . . . . . . . . . . . . . . . . . . . . . . . . . . . . . . . . . . . . . . . . . . . . . Toothed belt
Thrust plate thickness . . . . . . . . . . . . . . . . . . . . . . . . . . . . . . . . . . . . . . . 4.99 to 5.01 mm
Camshaft bearing diameter: 1 .................................................... 44.75 mm 2 .................................................... 45.00 mm 3 .................................................... 45.25 mm 4 .................................................... 45.50 mm 5 .................................................... 45.75 mm
Camshaft endfloat . . . . . . . . . . . . . . . . . . . . . . . . . . . . . . . . . . . . . . . . . 0.05 to 0.15 mm
Pistons and piston rings
Diameter 1.1 litre: Standard 1 . . . . . . . . . . . . . . . . . . . . . . . . . . . . . . . . . . . . . . . . . . . . . 73.910 to 73.920 mm Standard 2 . . . . . . . . . . . . . . . . . . . . . . . . . . . . . . . . . . . . . . . . . . . . . 73.920 to 73.930 mm Standard 3 . . . . . . . . . . . . . . . . . . . . . . . . . . . . . . . . . . . . . . . . . . . . . 73.930 to 73.940 mm Standard 4 . . . . . . . . . . . . . . . . . . . . . . . . . . . . . . . . . . . . . . . . . . . . . 73.940 to 73.950 mm Standard service . . . . . . . . . . . . . . . . . . . . . . . . . . . . . . . . . . . . . . . . . 73.930 to 73.955 mm Oversize 0.29 mm . . . . . . . . . . . . . . . . . . . . . . . . . . . . . . . . . . . . . . . . 74.210 to 74.235 mm Oversize 0.50 mm . . . . . . . . . . . . . . . . . . . . . . . . . . . . . . . . . . . . . . . . 74.460 to 74.485 mm CVH engines 2B·3
Pistons and piston rings (continued)
Diameter - 1.3 and 1.6 litre: Standard 1 . . . . . . . . . . . . . . . . . . . . . . . . . . . . . . . . . . . . . . . . . . . . . 79.910 to 79.920 mm Standard 2 . . . . . . . . . . . . . . . . . . . . . . . . . . . . . . . . . . . . . . . . . . . . . 79.920 to 79.930 mm Standard 3 . . . . . . . . . . . . . . . . . . . . . . . . . . . . . . . . . . . . . . . . . . . . . 79.930 to 79.940 mm Standard 4 . . . . . . . . . . . . . . . . . . . . . . . . . . . . . . . . . . . . . . . . . . . . . 79.940 to 79.950 mm Standard service . . . . . . . . . . . . . . . . . . . . . . . . . . . . . . . . . . . . . . . . . 79.930 to 79.955 mm Oversize 0.29 mm . . . . . . . . . . . . . . . . . . . . . . . . . . . . . . . . . . . . . . . . 80.210 to 80.235 mm Oversize 0.50 mm . . . . . . . . . . . . . . . . . . . . . . . . . . . . . . . . . . . . . . . . 80.430 to 80.455 mm
Diameter - 1.4 litre: Standard 1 . . . . . . . . . . . . . . . . . . . . . . . . . . . . . . . . . . . . . . . . . . . . . 77.190 to 77.200 mm Standard 2 . . . . . . . . . . . . . . . . . . . . . . . . . . . . . . . . . . . . . . . . . . . . . 77.200 to 77.210 mm Standard 3 . . . . . . . . . . . . . . . . . . . . . . . . . . . . . . . . . . . . . . . . . . . . . 77.210 to 77.220 mm Standard 4 . . . . . . . . . . . . . . . . . . . . . . . . . . . . . . . . . . . . . . . . . . . . . 77.220 to 77.230 mm Standard service . . . . . . . . . . . . . . . . . . . . . . . . . . . . . . . . . . . . . . . . . 77.210 to 77.235 mm Oversize 0.29 mm . . . . . . . . . . . . . . . . . . . . . . . . . . . . . . . . . . . . . . . . 77.490 to 77.515 mm Oversize 0.50 mm . . . . . . . . . . . . . . . . . . . . . . . . . . . . . . . . . . . . . . . . 77.710 to 77.735 mm
Piston-to-bore clearance . . . . . . . . . . . . . . . . . . . . . . . . . . . . . . . . . . . . 0.010 to 0.045 mm
Piston ring end gap: 1.1 litre: Compression rings . . . . . . . . . . . . . . . . . . . . . . . . . . . . . . . . . . . . . 0.25 to 0.45 mm Oil control ring . . . . . . . . . . . . . . . . . . . . . . . . . . . . . . . . . . . . . . . . . 0.20 to 0.40 mm 1.3, 1.4 and 1.6 litre: Compression rings . . . . . . . . . . . . . . . . . . . . . . . . . . . . . . . . . . . . . 0.30 to 0.50 mm Oil control ring . . . . . . . . . . . . . . . . . . . . . . . . . . . . . . . . . . . . . . . . . 0.40 to 1.40 mm
Connecting rod
Big-end bore diameter: 1.1 litre . . . . . . . . . . . . . . . . . . . . . . . . . . . . . . . . . . . . . . . . . . . . . . . . 46.685 to 46.705 mm 1.3, 1.4 and 1.6 litre . . . . . . . . . . . . . . . . . . . . . . . . . . . . . . . . . . . . . . 50.890 to 50.910 mm 2B
Small-end bore diameter . . . . . . . . . . . . . . . . . . . . . . . . . . . . . . . . . . . . 20.589 to 20.609 mm
Big-end bearing shell inside diameter: 1.1 litre: Standard . . . . . . . . . . . . . . . . . . . . . . . . . . . . . . . . . . . . . . . . . . . . . 43.016 to 43.050 mm Undersize 0.25 mm . . . . . . . . . . . . . . . . . . . . . . . . . . . . . . . . . . . . . 42.766 to 42.800 mm Undersize 0.50 mm . . . . . . . . . . . . . . . . . . . . . . . . . . . . . . . . . . . . . 42.516 to 42.550 mm Undersize 0.75 mm . . . . . . . . . . . . . . . . . . . . . . . . . . . . . . . . . . . . . 42.266 to 42.300 mm Undersize 1.00 mm . . . . . . . . . . . . . . . . . . . . . . . . . . . . . . . . . . . . . 42.016 to 42.050 mm 1.3, 1.4 and 1.6 litre: Standard . . . . . . . . . . . . . . . . . . . . . . . . . . . . . . . . . . . . . . . . . . . . . 47.916 to 47.950 mm Undersize 0.25 mm . . . . . . . . . . . . . . . . . . . . . . . . . . . . . . . . . . . . . 47.666 to 47.700 mm Undersize 0.50 mm . . . . . . . . . . . . . . . . . . . . . . . . . . . . . . . . . . . . . 47.416 to 47.450 mm Undersize 0.75 mm . . . . . . . . . . . . . . . . . . . . . . . . . . . . . . . . . . . . . 47.166 to 47.200 mm Undersize 1.00 mm . . . . . . . . . . . . . . . . . . . . . . . . . . . . . . . . . . . . . 46.916 to 46.950 mm
Big-end bearing running clearance . . . . . . . . . . . . . . . . . . . . . . . . . . . . 0.006 to 0.060 mm
Cylinder head
Material . . . . . . . . . . . . . . . . . . . . . . . . . . . . . . . . . . . . . . . . . . . . . . . . . . Light alloy
Maximum permissible cylinder head distortion (over entire length) . . . . 0.15 mm
Minimum combustion chamber depth after skimming: 1.1 litre . . . . . . . . . . . . . . . . . . . . . . . . . . . . . . . . . . . . . . . . . . . . . . . . 18.22 mm 1.3 and 1.6 litre . . . . . . . . . . . . . . . . . . . . . . . . . . . . . . . . . . . . . . . . . . 19.60 mm 1.4 litre . . . . . . . . . . . . . . . . . . . . . . . . . . . . . . . . . . . . . . . . . . . . . . . . 17.40 mm
Valve seat angle . . . . . . . . . . . . . . . . . . . . . . . . . . . . . . . . . . . . . . . . . . . 45°
Valve seat width . . . . . . . . . . . . . . . . . . . . . . . . . . . . . . . . . . . . . . . . . . . 1.75 to 2.32 mm
Seat cutter: Upper correction angle . . . . . . . . . . . . . . . . . . . . . . . . . . . . . . . . . . . . 18° Lower correction angle: 1.1 litre . . . . . . . . . . . . . . . . . . . . . . . . . . . . . . . . . . . . . . . . . . . . . . 80° (inlet), 70° (exhaust) 1.3, 1.4 and 1.6 litre . . . . . . . . . . . . . . . . . . . . . . . . . . . . . . . . . . . . 75° (inlet), 70° (exhaust)
Valve guide bore: Standard . . . . . . . . . . . . . . . . . . . . . . . . . . . . . . . . . . . . . . . . . . . . . 8.063 to 8.094 mm Oversize 0.2 mm . . . . . . . . . . . . . . . . . . . . . . . . . . . . . . . . . . . . . . . 8.263 to 8.294 mm Oversize 0.4 mm . . . . . . . . . . . . . . . . . . . . . . . . . . . . . . . . . . . . . . . 8.463 to 8.494 mm
Valves - general
Operation . . . . . . . . . . . . . . . . . . . . . . . . . . . . . . . . . . . . . . . . . . . . . . . . Rocker arms and hydraulic cam followers
Valve timing: 1.1 litre and 1.3 litre: Inlet valve opens . . . . . . . . . . . . . . . . . . . . . . . . . . . . . . . . . . . . . . . 13° ATDC Inlet valve closes . . . . . . . . . . . . . . . . . . . . . . . . . . . . . . . . . . . . . . . 28° ABDC 2B·4 CVH engines
Valve timing (1.1 litre and 1.3 litre) (continued): Exhaust valve opens . . . . . . . . . . . . . . . . . . . . . . . . . . . . . . . . . . . . 30° BBDC Exhaust valve closes . . . . . . . . . . . . . . . . . . . . . . . . . . . . . . . . . . . . 15° BTDC 1.4 litre: Inlet valve opens . . . . . . . . . . . . . . . . . . . . . . . . . . . . . . . . . . . . . . . 15° ATDC Inlet valve closes . . . . . . . . . . . . . . . . . . . . . . . . . . . . . . . . . . . . . . . 30° ABDC Exhaust valve opens . . . . . . . . . . . . . . . . . . . . . . . . . . . . . . . . . . . . 28° BBDC Exhaust valve closes . . . . . . . . . . . . . . . . . . . . . . . . . . . . . . . . . . . . 13° BTDC 1.6 litre (except carburettor versions 1986 onwards): Inlet valve opens . . . . . . . . . . . . . . . . . . . . . . . . . . . . . . . . . . . . . . . 8° ATDC Inlet valve closes . . . . . . . . . . . . . . . . . . . . . . . . . . . . . . . . . . . . . . . 36° ABDC Exhaust valve opens . . . . . . . . . . . . . . . . . . . . . . . . . . . . . . . . . . . . 34° BBDC Exhaust valve closes . . . . . . . . . . . . . . . . . . . . . . . . . . . . . . . . . . . . 6° BTDC 1.6 litre (carburettor versions - 1986 onwards): Inlet valve opens . . . . . . . . . . . . . . . . . . . . . . . . . . . . . . . . . . . . . . . 4° ATDC Inlet valve closes . . . . . . . . . . . . . . . . . . . . . . . . . . . . . . . . . . . . . . . 32° ABDC Exhaust valve opens . . . . . . . . . . . . . . . . . . . . . . . . . . . . . . . . . . . . 38° BBDC Exhaust valve closes . . . . . . . . . . . . . . . . . . . . . . . . . . . . . . . . . . . . 10° BTDC
Valve lift: Inlet: 1.1, 1.3 and 1.4 litre . . . . . . . . . . . . . . . . . . . . . . . . . . . . . . . . . . . . 9.56 mm 1.6 litre . . . . . . . . . . . . . . . . . . . . . . . . . . . . . . . . . . . . . . . . . . . . . . 10.09 mm Exhaust: 1.1, 1.3 and 1.4 litre . . . . . . . . . . . . . . . . . . . . . . . . . . . . . . . . . . . . 9.52 mm 1.6 litre . . . . . . . . . . . . . . . . . . . . . . . . . . . . . . . . . . . . . . . . . . . . . . 10.06 mm
Valve spring free length . . . . . . . . . . . . . . . . . . . . . . . . . . . . . . . . . . . . . 47.2 mm
Inlet valve
Length: 1.1 litre . . . . . . . . . . . . . . . . . . . . . . . . . . . . . . . . . . . . . . . . . . . . . . . . 135.74 to 136.20 mm 1.3 and 1.6 litre . . . . . . . . . . . . . . . . . . . . . . . . . . . . . . . . . . . . . . . . . . 134.54 to 135.0 mm 1.4 litre . . . . . . . . . . . . . . . . . . . . . . . . . . . . . . . . . . . . . . . . . . . . . . . . 136.29 to 136.75 mm
Head diameter: 1.1 litre . . . . . . . . . . . . . . . . . . . . . . . . . . . . . . . . . . . . . . . . . . . . . . . . 37.9 to 38.1 mm 1.3 and 1.6 litre . . . . . . . . . . . . . . . . . . . . . . . . . . . . . . . . . . . . . . . . . . 41.9 to 42.1 mm 1.4 litre . . . . . . . . . . . . . . . . . . . . . . . . . . . . . . . . . . . . . . . . . . . . . . . . 39.9 to 40.1 mm
Stem diameter: Standard . . . . . . . . . . . . . . . . . . . . . . . . . . . . . . . . . . . . . . . . . . . . . . . 8.025 to 8.043 mm 0.20 mm oversize . . . . . . . . . . . . . . . . . . . . . . . . . . . . . . . . . . . . . . . . 8.225 to 8.243 mm 0.40 mm oversize . . . . . . . . . . . . . . . . . . . . . . . . . . . . . . . . . . . . . . . . 8.425 to 8.443 mm
Valve stem clearance in guide . . . . . . . . . . . . . . . . . . . . . . . . . . . . . . . . 0.020 to 0.063 mm
Exhaust valve
Length: 1.1 litre . . . . . . . . . . . . . . . . . . . . . . . . . . . . . . . . . . . . . . . . . . . . . . . . 132.62 to 133.08 mm 1.3 litre . . . . . . . . . . . . . . . . . . . . . . . . . . . . . . . . . . . . . . . . . . . . . . . . 131.17 to 131.63 mm 1.4 litre . . . . . . . . . . . . . . . . . . . . . . . . . . . . . . . . . . . . . . . . . . . . . . . . 132.97 to 133.43 mm 1.6 litre . . . . . . . . . . . . . . . . . . . . . . . . . . . . . . . . . . . . . . . . . . . . . . . . 131.57 to 132.03 mm
Head diameter: 1.1 litre . . . . . . . . . . . . . . . . . . . . . . . . . . . . . . . . . . . . . . . . . . . . . . . . 32.1 to 32.3 mm 1.3 litre . . . . . . . . . . . . . . . . . . . . . . . . . . . . . . . . . . . . . . . . . . . . . . . . 33.9 to 34.1 mm 1.4 litre . . . . . . . . . . . . . . . . . . . . . . . . . . . . . . . . . . . . . . . . . . . . . . . . 33.9 to 34.1 mm 1.6 litre . . . . . . . . . . . . . . . . . . . . . . . . . . . . . . . . . . . . . . . . . . . . . . . . 36.9 to 37.1 mm
Valve stem diameter: Standard . . . . . . . . . . . . . . . . . . . . . . . . . . . . . . . . . . . . . . . . . . . . . . . 7.999 to 8.017 mm 0.20 mm oversize . . . . . . . . . . . . . . . . . . . . . . . . . . . . . . . . . . . . . . . . 8.199 to 8.217 mm 0.40 mm oversize . . . . . . . . . . . . . . . . . . . . . . . . . . . . . . . . . . . . . . . . 8.399 to 8.417 mm
Valve stem clearance in guide . . . . . . . . . . . . . . . . . . . . . . . . . . . . . . . . 0.046 to 0.089 mm
Lubrication
Oil filter . . . . . . . . . . . . . . . . . . . . . . . . . . . . . . . . . . . . . . . . . . . . . . . . . . Champion C104
Oil pump type: Pre-1986 . . . . . . . . . . . . . . . . . . . . . . . . . . . . . . . . . . . . . . . . . . . . . . . Gear type driven by crankshaft 1986 onwards . . . . . . . . . . . . . . . . . . . . . . . . . . . . . . . . . . . . . . . . . . . Rotor type driven by crankshaft
Minimum oil pressure at 80°C (176°F): At 750 rpm . . . . . . . . . . . . . . . . . . . . . . . . . . . . . . . . . . . . . . . . . . . . . 1.0 bar (14.5 lbf/in2) At 2000 rpm . . . . . . . . . . . . . . . . . . . . . . . . . . . . . . . . . . . . . . . . . . . . 2.8 bar (40.6 lbf/in2)
Oil pressure warning lamp operates . . . . . . . . . . . . . . . . . . . . . . . . . . . . 0.3 to 0.5 bar (4.3 to 7.2 lbf/in2) CVH engines 2B·5
Lubrication (continued)
Relief valve opens . . . . . . . . . . . . . . . . . . . . . . . . . . . . . . . . . . . . . . . . . . 4.0 bar (58 lbf/in2)
Oil pump clearances (rotor type pump only): Outer rotor to body . . . . . . . . . . . . . . . . . . . . . . . . . . . . . . . . . . . . . . . 0.060 to 0.190 mm Inner to outer rotor . . . . . . . . . . . . . . . . . . . . . . . . . . . . . . . . . . . . . . . 0.050 to 0.180 mm Rotor endfloat . . . . . . . . . . . . . . . . . . . . . . . . . . . . . . . . . . . . . . . . . . . 0.014 to 0.100 mm
Torque wrench settings Nm lbf ft
Main bearing caps . . . . . . . . . . . . . . . . . . . . . . . . . . . . . . . . . . . . . . . . . 90 to 100 66 to 74
Connecting rod bolts . . . . . . . . . . . . . . . . . . . . . . . . . . . . . . . . . . . . . . . 30 to 36 22 to 26
Oil pump to crankcase . . . . . . . . . . . . . . . . . . . . . . . . . . . . . . . . . . . . . . 8 to 11 6 to 8
Oil pump cover bolts . . . . . . . . . . . . . . . . . . . . . . . . . . . . . . . . . . . . . . . 8 to 11 6 to 8
Oil pump pick-up tube to block . . . . . . . . . . . . . . . . . . . . . . . . . . . . . . . 17 to 23 12 to 17
Oil pump pick-up tube to pump . . . . . . . . . . . . . . . . . . . . . . . . . . . . . . . 8 to 11 6 to 8
Oil cooler threaded sleeve to block . . . . . . . . . . . . . . . . . . . . . . . . . . . . 55 to 60 40 to 44
Rear oil seal carrier bolts . . . . . . . . . . . . . . . . . . . . . . . . . . . . . . . . . . . . 8 to 11 6 to 8
Sump with multi-piece gasket: Stage 1 . . . . . . . . . . . . . . . . . . . . . . . . . . . . . . . . . . . . . . . . . . . . . . . . 8 to 11 6 to 8 Stage 2 . . . . . . . . . . . . . . . . . . . . . . . . . . . . . . . . . . . . . . . . . . . . . . . . 8 to 11 6 to 8
Sump with one-piece gasket: Stage 1 . . . . . . . . . . . . . . . . . . . . . . . . . . . . . . . . . . . . . . . . . . . . . . . . 5 to 8 4 to 6 Stage 2 . . . . . . . . . . . . . . . . . . . . . . . . . . . . . . . . . . . . . . . . . . . . . . . . 5 to 8 4 to 6
Flywheel to crankshaft . . . . . . . . . . . . . . . . . . . . . . . . . . . . . . . . . . . . . . 82 to 92 60 to 68
Torque converter drive plate to crankshaft . . . . . . . . . . . . . . . . . . . . . . . 80 to 88 59 to 65
Crankshaft pulley bolt . . . . . . . . . . . . . . . . . . . . . . . . . . . . . . . . . . . . . . . 100 to 115 74 to 85
Cylinder head bolts: Stage 1 . . . . . . . . . . . . . . . . . . . . . . . . . . . . . . . . . . . . . . . . . . . . . . . . 25 18 Stage 2 . . . . . . . . . . . . . . . . . . . . . . . . . . . . . . . . . . . . . . . . . . . . . . . . 55 40 2B Stage 3 . . . . . . . . . . . . . . . . . . . . . . . . . . . . . . . . . . . . . . . . . . . . . . . . Tighten by a further 90° Tighten by a further 90° Stage 4 . . . . . . . . . . . . . . . . . . . . . . . . . . . . . . . . . . . . . . . . . . . . . . . . Tighten by a further 90° Tighten by a further 90°
Camshaft thrust plate . . . . . . . . . . . . . . . . . . . . . . . . . . . . . . . . . . . . . . . 9 to 13 7 to 10
Camshaft sprocket bolt . . . . . . . . . . . . . . . . . . . . . . . . . . . . . . . . . . . . . 54 to 59 40 to 43
Timing belt tensioner bolts . . . . . . . . . . . . . . . . . . . . . . . . . . . . . . . . . . . 16 to 20 12 to 15
Rocker arm studs in head: Plain stud . . . . . . . . . . . . . . . . . . . . . . . . . . . . . . . . . . . . . . . . . . . . . . 10 to 15 7 to 11 Stud with nylon insert . . . . . . . . . . . . . . . . . . . . . . . . . . . . . . . . . . . . . 18 to 23 13 to 17
Rocker arm nut . . . . . . . . . . . . . . . . . . . . . . . . . . . . . . . . . . . . . . . . . . . . 25 to 29 18 to 21
Rocker cover screws . . . . . . . . . . . . . . . . . . . . . . . . . . . . . . . . . . . . . . . 6 to 8 4 to 6
Timing belt cover bolts . . . . . . . . . . . . . . . . . . . . . . . . . . . . . . . . . . . . . . 9 to 11 7 to 8
Sump drain plug . . . . . . . . . . . . . . . . . . . . . . . . . . . . . . . . . . . . . . . . . . . 21 to 28 15 to 21
Engine to manual transmission . . . . . . . . . . . . . . . . . . . . . . . . . . . . . . . . 35 to 45 26 to 33
Engine to automatic transmission . . . . . . . . . . . . . . . . . . . . . . . . . . . . . 30 to 50 22 to 37
Right-hand engine mounting to body . . . . . . . . . . . . . . . . . . . . . . . . . . . 41 to 58 30 to 43
Right-hand engine mounting bracket to engine . . . . . . . . . . . . . . . . . . . 76 to 104 56 to 77
Right-hand engine mounting rubber insulator to brackets . . . . . . . . . . . 41 to 58 30 to 43
Front transmission mounting bracket to transmission (pre-1986 models) 41 to 51 30 to 38
Front and rear transmission mounting bolts (pre-1986 models) . . . . . . 52 to 64 38 to 47
Transmission mountings to transmission (1986 models onwards) . . . . . 80 to 100 59 to 74
Transmission support crossmember to body (1986 models onwards) . 52 38
Oil pressure switch . . . . . . . . . . . . . . . . . . . . . . . . . . . . . . . . . . . . . . . . . 18 to 22 13 to 16
construction, supporting the overhead of starting up as the cam followers are camshaft in five bearings. Camshaft drive is pressurised with oil. 1 General information by a toothed composite rubber belt, driven The water pump is mounted on the timing from a sprocket on the crankshaft. belt end of the cylinder block and is driven by The 1.1 litre, 1.3 litre, 1.4 litre and 1.6 litre The distributor (where applicable) is driven the toothed belt.
CVH (Compound Valve angle, Hemispherical from the rear (flywheel) end of the camshaft by A gear or rotor type oil pump is mounted on
combustion chambers) engines are of four means of an offset dog. the timing belt end of the cylinder block and is
cylinder in-line overhead camshaft type, The cam followers are of hydraulic type, driven by a gear on the front end of the
mounted transversely, together with the which eliminates the need for valve clearance crankshaft.
transmission, at the front of the car (see adjustment. If the engine has been standing A full-flow oil filter of throw-away type is
illustrations). idle for a period of time, or after overhaul, located on the side of the crankcase. The crankshaft is supported in five main when the engine is started up, valve clatter An engine oil cooler is located under the oil
bearings within a cast iron crankcase. may be heard. This is a normal condition and filter on fuel-injection and automatic The cylinder head is of light alloy will gradually disappear within a few minutes transmission models. 2B·6 CVH engines
2 Major operations possible with 1.1a Cutaway view of the CVH engine the engine in the car
The following work can be carried out
without having to remove the engine: a) Timing belt - renewal. b) Camshaft oil seal - renewal. c) Camshaft - removal and refitting. d) Cylinder head - removal and refitting. e) Crankshaft front oil seal - renewal. f) Sump - removal and refitting. g) Piston/connecting rod - removal and refitting. h) Engine/transmission mountings - removal and refitting.
3 Major operations requiring engine removal
The following work can only be carried out
after removal of the engine from the car: a) Crankshaft main bearings - renewal. b) Crankshaft - removal and refitting. c) Flywheel - removal and refitting. d) Crankshaft rear oil seal - renewal. e) Oil pump - removal and refitting.
1.1b 1.6 litre EFI engine
1 Inlet manifold (upper) 2 Throttle housing 3 Throttle position sensor 4 Fuel
rail 5 Fuel hose 6 Air inlet duct 7 Timing belt cover 8 Exhaust heat shield 9 Exhaust manifold 10 Coolant inlet pipe 11 Crankshaft pulley 12 Flywheel ribs 13 Flywheel 14 Oil cooler 15 Oil filter 16 Inlet manifold (lower) 17 Fuel injection wiring harness CVH engines 2B·7
4.3a Crankshaft pulley notch (arrowed) 4.3b Camshaft sprocket at TDC position 4.4a Where a two-piece timing belt cover aligned with TDC (0) mark on belt cover is fitted, undo the bolts . . . scale that the timing mark on the camshaft sprocket Refitting 4 Timing belt - removal, refitting is opposite the TDC mark on the cylinder head 10 Before refitting the belt, check that the and adjustment (see illustrations). crankshaft is still at TDC (the small projection 4 On early models unscrew the four bolts and on the belt sprocket front flange in line with remove the one-piece timing belt cover. On the TDC mark on the oil pump housing) and
Removal later models fitted with a two-piece cover, that the timing mark on the camshaft sprocket
Note: From April 1988 (build code JG) a unscrew the two upper bolts and remove the is opposite the TDC mark on the cylinder head
modified timing belt tensioner incorporating a top half, then unscrew the two lower bolts. (see illustrations). Adjust the position of the
larger diameter tensioner
roller was The lower half cannot be removed at this sprockets slightly, but avoid any excessive
introduced, and from October 1988 an stage (see illustrations). movement of the sprockets while the belt is
improved timing belt was used. When renewal 5 Undo the bolts and remove the right-hand off, as the piston crowns and valve heads may 2B
of the timing belt becomes necessary, only the engine
splash shield. make contact.
latest, improved timing belt must be used (the 6 Using a ring spanner unscrew the 11 Engage the timing belt with the teeth of
older type will no longer be available). On crankshaft pulley retaining bolt. Remove the the crankshaft sprocket and then pull the belt
models produced before April 1988 this will starter motor as described in Chapter 5, Part vertically upright on its right-hand run. Keep it
also entail renewal of the tensioner roller. taut and engage it with the teeth of the A and lock the flywheel ring gear with a cold
1 Disconnect the battery negative lead. camshaft sprocket. Check that the positions chisel or similar tool to prevent the crankshaft
2 Release the alternator mounting and of the sprockets have not altered (see rotating (see illustration). Remove the pulley,
adjuster link bolts, push the alternator in illustration). followed by the timing belt cover lower half on
towards the engine and slip the drivebelt off 12 Wind the belt round the camshaft later models.
the pulleys. sprocket, around and under the tensioner and
3 Using a spanner on the crankshaft pulley 7 Slacken the two bolts which secure the timing belt tensioner and, using a large over the water pump sprocket.
bolt, turn the crankshaft until the notch on the 13 Refit the crankshaft pulley and tighten the
pulley is aligned with the TDC (0) mark on the screwdriver, prise the tensioner to one side to bolt, using the same procedure as used
timing belt cover scale. On models with a relieve the tautness of the belt (see previously to stop the crankshaft turning. On
distributor, now remove the distributor cap illustration). If the tensioner is spring-loaded, later models make sure that the timing belt
and check that the rotor arm is pointing tighten one of the bolts to retain it in the cover lower half is placed in position before
towards the No 1 cylinder HT lead segment in slackened position. refitting the pulley.
the cap. If the rotor arm is pointing towards 8 If the original belt is to be refitted, mark it
the No 4 cylinder segment, turn the crankshaft for direction of travel and also the exact tooth Adjustment
through another complete turn and realign the positions on all three sprockets. Note: Accurate adjustment of the timing belt
pulley notch with the TDC mark. On EFI 9 Slip the timing belt off the camshaft, water entails the use of Ford special tools. An
engine models (see Chapter 4, Part D), check pump and crankshaft sprockets. approximate setting can be achieved using the
4.4b . . . and remove the upper half 4.6 Using a
stout bar to lock the flywheel 4.7 Timing belt tensioner retaining bolts ring gear (arrowed) 2B·8 CVH engines
4.10a Crankshaft sprocket projection 4.10b . . . and camshaft sprocket timing 4.11 Place the timing belt in position (arrowed) aligned with TDC mark on oil mark aligned with TDC mark on cylinder pump housing head
method described in this Section, but the 14 Slacken the belt tensioner bolts, lever the
tension should be checked by a dealer on tensioner to one side and retighten the bolts.
completion. 5 Oil seals - renewal With the belt slack, it can now be slipped from
14 To adjust the belt tension, slacken the the sprockets. Before removing the belt note
tensioner and move it towards the front of the its original position on the sprockets (mark the
car to apply an initial tension to the belt. Camshaft oil seal teeth with quick-drying paint), also its
Secure the tensioner in this position. direction of travel. Note: Thread locking compound will be
15 Rotate the crankshaft clockwise through 15 Withdraw the crankshaft sprocket. If it is required to
coat the camshaft sprocket bolt on
two complete revolutions, then return to the tight you will need to use a special extractor, refitting.
TDC position. Check that the camshaft but due to the confined
space available you 1 Disconnect the battery negative lead.
sprocket is also at TDC as previously may need to lower the engine from its 2 Release the timing belt from the camshaft
described. mounting on that side. Before resorting to sprocket, as described in Section 4.
16 Grasp the belt between thumb and this, try levering the sprocket free using 3
Pass a bar through one of the holes in the
forefinger at a point midway between the screwdrivers. If the mounting is to be camshaft sprocket to anchor the sprocket disconnected refer to Part A of this Chapter.
crankshaft and camshaft sprocket on the while the retaining bolt is unscrewed. Remove 16 Remove the dished washer from the
straight side of the belt. When the tension is the sprocket. crankshaft, noting that the concave side is
correct it should just be possible to
twist the 4 Using a suitable tool, hooked at its end, against the oil seal.
belt through 90° at this point. Slacken the prise out the oil seal (see illustration). 17 Using a suitably hooked tool, prise out the
tensioner and using a large screwdriver as a 5 Apply a little grease to the lips of the new oil seal from the oil pump housing.
lever, move it as necessary until the tension is seal and draw it into position using the 18 Grease the lips of the new seal and press
correct. Tighten the tensioner bolts, rotate the sprocket bolt and a suitable distance piece. it into position using the pulley bolt and
camshaft to settle the belt, then recheck the 6 Refit the sprocket, tightening the bolt to the suitable distance piece made from a piece of
tension. It will probably take two or three specified torque wrench setting. Thread tubing.
attempts to achieve success. locking compound should be applied to the 19 Fit the thrustwasher (concave side to oil
17 It must be emphasised that this is an threads of the bolt. seal), the belt sprocket and the pulley to the
approximate setting only and should be 7 Refit and tension the timing belt (Section 4). crankshaft. On models with a two-piece
rechecked by a Ford dealer at the earliest 8 Reconnect the battery. timing belt cover, place the lower half in
opportunity. position before refitting the pulley. Crankshaft front oil seal 20 Fit and tension the timing belt by the
18 Refit the starter motor, engine splash
shield, distributor cap and timing belt cover/s. 9 Disconnect the battery negative lead. method described in Section 4. 10 Release the alternator mounting and 21 Fit the timing belt cover.
19 Refit the alternator drivebelt and adjust its adjuster link bolts, push the alternator in 22 Refit and tension the alternator drivebelt
tension as described in Chapter 1. towards the engine and slip the drivebelt from (Chapter 1).
20 Reconnect the battery. the pulleys. 23 Remove the starter ring gear jamming 11 Unbolt and remove the timing belt cover.
device (if fitted), refit the starter motor and On models with a two-piece cover only the reconnect the battery. upper half can be removed at this stage. 12 Locate a spanner onto the crankshaft pulley bolt and turn the crankshaft over in its 6 Camshaft - removal and normal direction of travel until the timing refitting marks of the crankshaft sprocket and cylinder head are in alignment. 13 You will now need to remove the Carburettor engines crankshaft pulley. To prevent the crankshaft Note: Thread locking compound will be turning, place the vehicle in gear and have an required to coat the camshaft sprocket bolt on assistant apply the brakes or unbolt and refitting. remove the starter motor so that the flywheel Removal ring gear can be jammed with a cold chisel or suitable implement. Unbolt the crankshaft 1 Disconnect the battery negative lead. pulley and remove it with its thrustwasher. 2 Refer to the relevant Part of Chapter 4 and 5.4 Removing the camshaft oil seal Where a two-piece timing belt cover is fitted, remove the air cleaner and the fuel pump. remove the lower half. 3 Disconnect the throttle and where fitted the CVH engines 2B·9
6.12 Removing the camshaft sprocket 6.13a Unscrew the camshaft thrust plate 6.13b . . . and withdraw the thrust plate bolts . . .
choke cable ends from the carburettor 13 Extract the two bolts and pull out the When in position tighten the cover retaining
linkage, then undo the bolts and move the camshaft thrustplate (see illustrations). screws to the specified torque setting.
cable support bracket to one side. 14 Carefully withdraw the camshaft from the 22 Refit the remainder of the components
4 Where applicable, refer to Chapter 5, Part B distributor end of the cylinder head (see with reference to their relevant
Chapters . Do
and remove the distributor. illustration). not
forget the timing belt cover bolts.
5 Remove the timing belt cover-to-cylinder
head attachment bolts. Refitting Fuel injection engines
6 Disconnect the crankcase ventilation hoses 15 Refitting the camshaft is a reversal of Note: Thread locking compound will be
at the rocker cover, undo and remove the bolts removal, but observe the following points. required to coat the camshaft sprocket bolt on
and washers and remove the rocker cover. 16 Lubricate the camshaft bearings before refitting.
7 Unscrew the securing nuts and remove the inserting the camshaft into the cylinder head.
rocker arms and guides. Keep the components 17 It is recommended that a new oil seal is Removal
in their originally installed sequence by marking always fitted after the camshaft has been 23 Disconnect the battery negative lead. 2B
them with a piece of numbered tape or by installed (see preceding Section). Apply thread 24 Where necessary, disconnect any hoses
using a suitably sub-
divided box. locking compound to the sprocket bolt threads. and wiring restricting access to the timing belt
8 Withdraw the hydraulic cam followers, Tighten the bolt to the specified torque. cover and/or the rocker cover. If necessary,
again keeping them in their originally fitted 18 Fit and tension the timing belt, as refer to the relevant Part(s) of Chapters 4 and 5
sequence. described in Section 4.
9 Slacken the alternator mounting and for details. 19 Oil the hydraulic cam followers with 25 On XR3i and Cabriolet models with
adjuster link bolts, push the alternator in hypoid type transmission oil before inserting
towards the engine and slip the drivebelt from
mechanical (Bosch K-Jetronic) fuel injection, them into their original bores. disconnect the inlet air hose between the fuel
the pulleys. 20 Refit the rocker arms and guides in their
10 Unbolt and remove the timing belt cover distributor and throttle housing and position it original sequence, use new nuts and tighten to
(top half only on later models with two-piece out of the way. the specified torque. It is essential that before
cover) and turn the crankshaft to align the 26 On RS Turbo models disconnect the inlet each rocker arm is installed and its nut tightened,
timing mark on the camshaft sprocket with air hose and the small connecting hose at the the respective cam follower is positioned at its
the one on the cylinder head. inlet air duct, then undo the two bolts and lowest point (in contact with cam base circle).
11 Slacken the bolts on the timing belt remove the air duct from the rocker cover.
tensioner, lever the tensioner against the Turn the camshaft (by means of the crankshaft 27 Proceed as described in paragraphs 4 to 14
tension of its coil spring (if fitted) and retighten pulley bolt) as necessary to achieve this. inclusive.
the bolts. With the belt now slack, slip it from 21 Use a new rocker cover gasket, and to
the camshaft sprocket. ensure that a good seal is made, check that its Refitting
12 Pass a rod or large screwdriver through location groove is clear of oil, grease and any 28 Proceed as described in paragraphs 15 to
one of the holes in the camshaft sprocket to portions of the old gasket. A length of sealant 22 inclusive.
lock it and unscrew the sprocket bolt. should be applied to the gasket recess where
Remove the sprocket (see illustration). the cover engages under the timing belt cover. 7 Cylinder head - removal and refitting
Carburettor engines Removal Note: The cylinder head must only be removed when the engine is cold. New cylinder head bolts and a new gasket must be used on refitting. 1 Disconnect the battery earth lead. 2 Remove the air cleaner (Chapter 4, Part A). 3 Drain the cooling system (Chapter 1). 4 Disconnect the coolant hoses from the 6.14 Withdrawing the camshaft 7.4 Disconnecting the hose from the thermostat housing, automatic choke and thermostat housing - carburettor engine inlet manifold as applicable (see illustration). 2B·10 CVH engines
7.5 Disconnect the choke cable from the 7.6 Disconnect the fuel
feed pipe at the 7.7 Disconnect the brake servo vacuum linkage clamp (arrowed) - carburettor pump - carburettor engine hose (arrowed) - 1.4 litre carburettor engine engine
5 Disconnect the throttle and where fitted the 11 Unbolt the exhaust downpipe from the progressively and in the sequence shown
choke cable ends from the carburettor linkage, manifold by unscrewing the flange bolts. Support (see illustration). Discard the bolts, as new
then undo the bolts and move the cable the exhaust pipe by tying it up with wire. ones must be used at reassembly.
support bracket to one side (see illustration). 12 Release the alternator mounting and 19 Remove the cylinder head and manifolds.
6 Disconnect the fuel pipe from the fuel pump adjuster link bolts, push the alternator in
(see illustration). towards the engine and slip the drivebelt from Use the manifolds if necessary
7 Disconnect the vacuum servo hose (where the pulleys. as levers to rock the head from
fitted) from the inlet manifold (see illustration). 13 Unbolt and remove the timing belt cover the block. Do not attempt to tap
8 Where fitted, disconnect the fuel return pipe (upper cover only on later models). the head sideways off the block
from the carburettor (see illustration). 14 Slacken the belt tensioner bolts, lever the as it is located on dowels, and do not
9 Disconnect the remaining vacuum hoses at tensioner to one side against the pressure of attempt to lever between the head and
the carburettor and inlet manifold, noting their the coil spring (if fitted) and retighten the bolts. the block or damage will result.
locations (see illustration). 15 With the timing belt now slack, slip it from
10 Disconnect the leads from the the camshaft sprocket. Refitting
temperature sender unit, ignition coil, anti- 16 Disconnect the leads from the spark plugs
run-on valve solenoid and where applicable, and unscrew and remove the spark plugs. 20 Before installing the cylinder head, make
carburettor electric choke and back bleed 17 Remove the rocker cover. sure that the mating surfaces of head and
solenoid (see illustrations). 18 Unscrew the cylinder head bolts, block are perfectly clean with the head locating dowels in position. Clean the bolt holes free from oil. In extreme cases it is possible for oil left in the holes to crack the block due to hydraulic pressure. 21 Turn the crankshaft to position No 1 piston about 20 mm (0.8 in) before it reaches TDC. 22 Place a new gasket on the cylinder block and then locate the cylinder head on its dowels. The upper surface of the gasket is marked
OBEN -TOP (see illustration). 23 Install and tighten the new cylinder head bolts, tightening them in four stages (see Specifications). After the first two stages, the bolt heads should be marked with a spot of quick-drying paint so that the paint spots all 7.8 Fuel return pipe location (arrowed) - 7.9 Vacuum hose attachments at the inlet face the same direction. Now tighten the bolts 1.4 litre carburettor engine manifold - 1.4 litre carburettor engine
7.10a Disconnect the lead at the 7.10b . . . anti-run-on valve and back bleed 7.18 Cylinder head bolt removal sequence temperature sender . . . solenoid (if fitted) - 1.4 litre carburettor engine CVH engines 2B·11
7.22 The upper surface of the cylinder 7.23a Cylinder head bolt tightening 7.23b Tightening the cylinder head bolts head gasket is marked OBEN-TOP sequence (arrowed)
(Stage 3) through 90° (
quarter turn) followed 37 Disconnect the wiring multi plugs at the wiring to facilitate cylinder head removal, with
by a further 90° (Stage 4). Tighten the bolts at cold start valve, warm-up regulator, and reference to the appropriate Sections of
each stage only in the sequence shown auxiliary air device, then disconnect the Chapters 4 and 5.
before
going on to the next stage. If all the throttle valve stop earth cable (see 42 Disconnect the throttle cable as described
bolts have been tightened equally, the paint illustration). in Chapter 4, Part C or Part D, as applicable.
spots should now all be pointing in the same 38 Disconnect the leads from the spark plugs 43 The remainder of the removal and the
direction (see illustrations). and remove the distributor cap. Disconnect refitting sequence is the same as described
24 Fit the timing belt (Section 4). the distributor multi plug. for carburettor engines in paragraphs 11 to 26
25 Refitting and reconnection of all other 39 The remainder of the removal and the inclusive.
components is a reversal of dismantling, with refitting sequence is the same as described RS Turbo models
reference to the relevant Chapter. for carburettor engines in paragraphs 11 to 26
26 Refill the cooling system (Chapter 1). inclusive. 44 Disconnect the battery negative lead. 2B 45 Drain the cooling system as described in
Fuel injection engines 1.4 CFI (Central Fuel Injection) and 1.6 Chapter 1. EFI (Electronic Fuel Injection) engines 46 Disconnect the inlet air hose and the
Note: The cylinder head must only be
removed when the engine is cold. New 40 Disconnect the battery negative lead. connecting hose at the inlet air duct, then
cylinder head bolts and a new gasket must be 41 Disconnect all relevant hoses, pipes and undo the two bolts and remove the air duct
used on refitting.
XR3i and Cabriolet models with
mechanical (Bosch K-Jetronic) fuel
injection
27 Disconnect the battery negative lead.
28 Disconnect the inlet air hose at the throttle
housing.
29 Drain the cooling system (Chapter 1).
30 Disconnect the crankcase ventilation
hoses from the inlet manifold and rocker cover.
31 Disconnect the coolant hoses from the
thermostat housing, inlet manifold and inlet
manifold intermediate flange.
32 Disconnect the throttle cable from the
throttle housing. 7.33 Fuel feed pipe union at the warm-up 7.35 Injector pipe unions at the fuel
33 Relieve the fuel system pressure by slowly regulator - XR3i and Cabriolet distributor - XR3i and Cabriolet
loosening the fuel feed pipe union at the
warm-up regulator (see illustration). Absorb
fuel leakage in a cloth. Reference to the fuel-
injection system
layout in Chapter 4, Part B,
or D, as applicable will assist in identification
of the relevant components where necessary.
34 Disconnect the vacuum servo hose from
the inlet manifold.
35 Disconnect the two fuel pipe unions at the
warm-up regulator, the single pipe to the cold
start valve and the four injector feed pipes at
the fuel distributor (see illustration). Recover
the sealing washers located on each side of
the banjo unions and seal all disconnected 7.37 Wiring connections on the fuel-injection system - XR3i and Cabriolet
pipes and orifices to prevent dirt ingress.
36 Disconnect the vacuum hoses at the A Warm-up regulator C Throttle valve stop earth cable
throttle housing after marking their locations B Cold start valve D Auxiliary air device
to aid refitting. 2B·12 CVH engines
7.49 Wiring connections and hose attachments on the fuel- injection system - RS Turbo A Inlet air duct F Mounting bracket B Vacuum hose G Throttle position sensor multi-
7.46 Air inlet duct connecting hose clip (A) charge air temperature C Crankcase ventilation valve hose plug
sensor multi-plug (B) and throttle position sensor multi-plug (C) on D Auxiliary air device hose H Charge air temperature sensor RS Turbo models E Vacuum servo hose multi-plug
from the rocker cover. Disconnect the sensor 50 Disconnect the throttle cable from the
multi plugs (see illustration). throttle housing.
47 Disconnect the coolant hoses from the 51 Remove the turbocharger (Chapter 4, Part B). 8 Sump - removal and refitting
thermostat housing, inlet manifold and inlet 52 Relieve the fuel system pressure by slowly
manifold intermediate flange. loosening the cold start valve union on the top Note: New gaskets and sealing strips must be
48 Disconnect the crankcase ventilation hose of the fuel distributor (see illustration). used on refitting.
at the rocker cover and the two vacuum hoses Absorb fuel leakage in a cloth. Reference to
from the inlet manifold. Release the hoses the fuel-injection system layout in Chapter 4, Removal
from their clips. Part B will assist in identification of the 1 Disconnect the battery negative lead.
49 Disconnect the brake servo vacuum hose relevant components where necessary. 2 Drain the engine oil.
at the inlet manifold (see illustration). 53 Disconnect the fuel pipes at the fuel 3 Remove the starter motor as described in injectors and at the cold start valve (see Chapter 5, Part A. illustration). Recover the sealing washers 4 Apply the handbrake, jack up the front of located on each side of the banjo unions and the car and support it on stands (see "Jacking seal all disconnected pipes and orifices to and Vehicle Support"). prevent dirt ingress. Move the fuel pipes clear 5 Unbolt and remove the cover plate from the of the cylinder head. clutch housing (see illustration). 54 Disconnect the wiring multi plugs at the 6 Unbolt and remove the engine splash shield temperature gauge sender unit, ignition coil, at the crankshaft pulley end (see illustration). throttle position sensor, solenoid control valve, 7 Unscrew the sump securing bolts coolant temperature sensor,
thermo -time switch, progressively and remove them. cold start valve and auxiliary air device. 8 Remove the sump and peel away the 55 Disconnect the leads from the spark plugs gaskets and sealing strips. and remove the distributor cap. 56 The remainder of the removal and the Refitting refitting sequence is the same as described 9 Make sure that the mating surfaces of the 7.52 Cold start valve union on fuel for carburettor engines in paragraphs 12 to 26 sump and block are clean, then fit new end distributor - RS Turbo inclusive. sealing strips into their grooves and stick new
7.53 Fuel pipe connections at the fuel 8.5 Remove the clutch housing cover plate 8.6 And the right-hand engine splash injectors - RS Turbo shield CVH engines 2B·13
8.9a Fitting the sump sealing strips . . . 8.9b . . . followed by the side gaskets with 8.9c Apply sealer to the areas shown their ends overlapped when fitting a one piece sump gasket A Oil pump housing-to-block joint B Rear oil seal carrier-to-block joint
side gaskets into position using thick grease. 6 Push the piston/rod out of the top of the
The ends of the side gaskets should overlap block, again keeping the bearing shell with the
the seals. On later models a one-piece sump rod if the shell is to be used again. 12 Insert the piston/rod assembly into the
gasket is used. Before fitting, apply sealer to 7 Repeat the removal operations on the cylinder bore until the base of the piston ring
the joints of the cylinder block and rear oil seal remaining piston/rod assemblies. compressor stands squarely on the top of the
carrier, and cylinder block and oil pump 8 Dismantling a piston/connecting rod is covered in Section 13. block.
housing (four locations). Without applying any
further sealer, locate the gasket into the 13 Check that the directional arrow on the
grooves of the oil seal carrier and oil pump Refitting piston crown faces towards the timing cover
housing (see illustrations). To retain the 9 To refit a piston/rod assembly, have the end of the engine, then apply the wooden
gasket insert two or three studs into the piston ring gaps staggered as shown (see handle of a hammer to the piston crown.
cylinder block if necessary and remove them illustrations). Oil the rings and apply a piston Strike the head of the hammer sharply to drive 2B
once the sump is in place. ring compressor. Compress the piston rings. the piston into the cylinder bore and release
10
Offer up the sump, taking care not to 10 Oil the cylinder bores. the ring compressor (see illustrations).
displace the gaskets and insert the securing 11 Wipe clean the bearing shell seat in the 14 Oil the crankpin and draw the connecting
bolts. Tighten the bolts in two stages to the connecting rod and insert the shell (see rod down to engage with the crankshaft.
final torque given in the Specifications. illustration). Make sure the bearing shell is still in position.
11 Refit the cover plate to the clutch housing
and refit the engine splash shield.
12 Refit the starter motor.
13 Fill the engine with oil and reconnect the
battery.
9 Pistons/connecting rods - removal and refitting
Note: A piston ring compressor tool will be
required for this operation.
Removal
1 Remove the sump, as described in Sect-
ion 8, and the cylinder head, as described in 9.2 Connecting rod and main bearing 9.9a Piston ring end gap positioning
Section 7. identification numbers diagram - all except 1.6 EFI engines
2 Check that the connecting rod and cap
have adjacent numbers at their big-end to
indicate their position in the cylinder block
(No 1 nearest timing cover end of engine) (see
illustration).
3 Bring the first piston to the lowest point of
its throw by turning the crankshaft pulley bolt
and then check if there is a wear ring at the
top of the bore. If there is, it should be
removed using a scraper, but do not damage
the cylinder bore.
4 Unscrew the big-end bolts and remove
them.
5 Tap off the big-end cap. If the bearing shell 9.9b Piston ring
profile and orientation - 1.6 EFI engine
is to be used again, make sure that it is 1 Top compression ring 3 Oil control rings 5 Gudgeon pin
retained with the cap. Note the two cap 2 Second compression ring 4 Oil squirt hole 6 Piston ring grooves
positioning roll pins. 2B·14 CVH engines
9.11 Fitting the bearing shell in the 9.13a Arrow (A) or cast nipple (B) faces the 9.13b Installing a piston/connecting rod connecting rod timing belt end of the engine when installed assembly refitting. On models produced from February 1987 onwards, place the transmission in second gear on four-speed versions, or fourth gear on five-speed versions. 4 Refer to Chapter 11 and remove the bonnet. 5 Refer to Chapter 4, Part B and remove the air cleaner. 6 Refer to Chapter 1 and drain the cooling system. 7 Disconnect the radiator top and bottom hoses and the expansion tank hose at the thermostat housing. 8 Disconnect the heater hoses from the automatic choke, thermostat housing and 9.16a Fitting the big-end cap to the 9.16b Tightening the big-end cap bolts to inlet manifold as applicable. connecting rod the specified torque 9 Disconnect the throttle cable and where fitted the choke cable ends from the
15 Wipe the bearing shell seat in the big-end carburettor throttle levers (see illustration).
cap clean and insert the bearing shell . 11 Engine/transmission - Unbolt the cable support bracket and move
16 Lubricate the bearing shell with oil then fit removal and separation the bracket and cable(s) to one side.
the cap, aligning the numbers on the cap and 10 Disconnect the fuel feed pipe from the fuel
the rod, screw in the bolts and tighten them to Note: Suitable lifting tackle will be required for pump and plug the pipe. Where fitted disconnect
the specified torque setting (see illustrations). this operation. the fuel return hose at the carburettor.
17 Repeat the operations on the remaining Carburettor engines 11 Disconnect the brake servo vacuum hose
pistons/connecting rods. from the inlet manifold.
18 Refit the sump (Section 8) and the cylinder Removal 12 Disconnect the leads from the following
head (Section 7). Refill the engine with oil and 1 The engine is removed complete with the electrical components:
coolant. transmission in a downward direction and then a) Alternator (see illustration). withdrawn from under the front of the car. b) Cooling fan temperature switch and 10 Engine/transmission temperature sender (see illustrations). 2 Disconnect the battery negative lead. mountings - removal and 3 Place the transmission in fourth gear on c) Oil pressure switch (see illustration). refitting four-speed manual transmission models or d) Reversing lamp switch (see illustration). reverse gear on the five-speed unit, to aid e) Anti-run-on valve solenoid (see Refer to Part A, Section 11. adjustment of the gearchange linkage when illustration) and back bleed solenoid (where applicable).
11.9 Disconnecting the throttle cable end 11.12a Disconnecting the alternator multi- 11.12b . . . cooling fan switch . . . (1.3 litre carburettor engine) plug . . . CVH engines 2B·15
11.12c . . . temperature sender . . . 11.12d . . . oil pressure switch . . . 11.12e . . . reversing lamp switch . .
f) Electric choke (where applicable). 686 mm (27.0 in) is recommended between the cable and the downshift linkage. g) Ignition coil. floor and the bottom edge of the front panel. 21 Remove the driveshafts from the h) Distributor (see illustration). 18 Disconnect the exhaust system from its transmission using the procedure described in I) Starter motor solenoid (see illustration). flexible mountings and remove the system Chapter 8 for each driveshaft.
13 Unscrew the speedometer drive cable complete. 22 On pre-1986 models equipped with an
from the transmission and release the 19 On manual transmission models anti-roll bar, undo the two bolts each side
breather hose (see illustration). disconnect the gearchange rod from the securing the anti-roll bar mounting clamps
14 Disconnect the transmission earth strap. transmission selector shaft by releasing the and remove the clamps.
15 On manual transmission models clamp bolt and withdrawing the rod (see 23 On 1986 models onwards, undo the three
disconnect the clutch cable from the release illustration). Tie the rod to the stabiliser and bolts each side securing the anti-roll bar
lever and from the transmission support. then where fitted, unhook the tension spring. mounting plates to the body (see illustration).
16 Disconnect the exhaust downpipe from Unscrew the single bolt and disconnect the 24 On automatic transmission models undo 2B
the manifold flange and support the system to stabiliser from the transmission housing, the transmission fluid cooler pipes and
avoid undue strain. noting the washer fitted between the stabiliser withdraw the pipes. Plug the unions to
17 Apply the handbrake, jack up the front of trunnion and the transmission. prevent dirt Ingress.
the car and support it on stands to provide 20 On automatic transmission models refer 25 Unbolt the right-hand and left-hand
sufficient clearance beneath it to remove the to Chapter 7, Part B, and disconnect the engine splash
shields and remove them from
engine/transmission from below. A distance of starter inhibitor switch wiring, the selector under the car (see illustrations).
11.12f . . . anti-run-on valve solenoid . . . 11.12g . . . distributor . . . 11.12h . . . and starter motor connections on the 1.3 litre carburettor engine
11.13 Disconnect the speedometer cable 11.19 Disconnect the gearchange rod at 11.23 Anti-roll bar mounting plate (arrowed) at the transmission the selector shaft clamp attachments - 1986 models onwards 2B·16 CVH engines
11.25a Remove the right-hand splash 11.25b . . . and left-hand splash shield 11.26 Anti-lock Braking System (ABS) pipe shield . . . (arrowed) bracket retaining bolt location (arrowed)
26 On cars equipped with an Anti-lock their brackets and remove the front mounting bolts and remove the starter.
Braking System (ABS) undo the hydraulic pipe and anti-roll bar support plates from the body 34 Unbolt and remove the clutch cover plate
mounting bracket bolt (see illustration). on both sides (see illustrations). from the lower part of the clutch bellhousing.
Remove the
modulator clamp bolt and pivot 31 On 1986 models onwards undo the nuts 35 Unscrew and remove the bolts from the
bolt each side and tie the modulator to the and bolts securing the transmission support clutch bellhousing-to-engine mating flange.
underbody (see Chapter 9). crossmember to the body (see illustration). 36 Withdraw the transmission from the
27 Connect a suitable hoist to the engine The crossmember is removed with the engine. Support its weight so that the clutch
using chains and the lifting brackets on the engine/transmission assembly. assembly is not distorted while the input shaft
cylinder head. 32 Carefully lower the engine/transmission is still in engagement with the splined hub of
28 Just take the weight of the and withdraw it from under the car. To ease the clutch driven plate.
engine/transmission assembly so that the the withdrawal operation, lower the engine/
tension is relieved from the mountings. Separation (automatic transmission transmission onto a crawler board or a sheet
29 Unbolt the rear right-hand engine models) of substantial chipboard placed on rollers or
mounting (complete with coolant hose support lengths of pipe (see illustration). 37 Unscrew and remove the starter motor
on early models) from the side member and bolts and remove the starter motor.
from the inner wing panel (see illustrations). Separation (manual transmission 38 Undo the two bolts and remove the
30 On pre-1986 models unbolt the left-hand models) torque converter cover plate.
front and rear transmission mountings from 33 Unscrew and remove the starter motor 39 Working through the cover plate aperture,
11.29a Rear right-hand engine mounting 11.29b . . . and at the inner wing panel 11.30a Detach the left-hand front attachment (arrowed) at side member . . . (arrowed) . . .
11.30b . . . and left-hand rear transmission 11.31 Transmission support crossmember 11.32 Removing the engine/transmission mountings on pre-1986 models bolt locations - 1986 models onwards assembly from under the car CVH engines 2B·17
11.66 Air cleaner retaining bolts (arrowed) 11.70 Vacuum and breather hose 11.74 Fuel pipe connections - RS Turbo on RS Turbo models connections - RS Turbo A Crankcase ventilation hose at rocker cover A Fuel injectors B Cold start valve
unscrew and remove the four nuts securing B Vacuum hoses at inlet manifold
the driveplate to the torque converter. For this 64 Drain the cooling system (Chapter 1). C Retaining clips 65 Disconnect the air inlet hose and
to be accomplished it will be necessary to
progressively turn the crankshaft for access to D Vacuum servo hose connecting hose at the inlet air duct.
each nut in turn. Unscrew the nuts in a 52 Disconnect the two fuel pipe unions at the Disconnect the charge air temperature sensor
progressive
manner , one turn at a time until warm-up regulator, the single pipe to the cold multi plug, undo the two bolts securing the air
removed. start valve and the four injector feed pipes at duct to the rocker cover and remove the duct.
40 Unscrew and remove the engine-to- 66 Undo the two bolts and remove the air the fuel distributor. Recover the sealing
transmission flange bolts and then separate cleaner assembly from the fuel distributor washers located on each side of the banjo
the two
units , but take care not to catch the (see illustration). unions and seal all disconnected pipes and
torque converter studs on the driveplate. The 67 Disconnect the radiator top and bottom orifices to prevent dirt ingress.
torque converter is only loosely attached, so hoses at the thermostat housing, radiator and 53 Disconnect the leads from the following
keep it in position in the transmission housing electrical components: turbocharger return pipe as applicable. 2B
during and after removal of the transmission. 68 Disconnect the heater hoses from the a) Alternator. thermostat housing, three-way connector
Fuel injection engines b) Cooling fan temperature switch. piece and inlet manifold as applicable. c) Oil pressure sender. 69 Remove the turbocharger (Chapter 4, Part B).
Removal d) Reversing lamp switch. 70 Disconnect the crankcase ventilation hose e) Ignition coil.
XR3i and Cabriolet models with mechanical at the rocker cover and the two vacuum hoses f) Distributor.
(Bosch K-Jetronic) fuel injection from the top of the inlet manifold (see g) Starter motor solenoid. illustration). Release the hoses from their clips.
41 The engine is removed complete with the h) Cold start valve.
transmission in a downward direction and 71 Disconnect the vacuum servo hose from j) Warm-up regulator. the inlet manifold.
then withdrawn from under the front of the k) Auxiliary air device.
car. 72 Disconnect the hose at the solenoid l) Throttle valve stop earth cable. control valve.
42 Disconnect the battery negative lead. 54 Unscrew the speedometer drive cable from
43 Place the transmission in fourth gear on 73 Disconnect the throttle cable at the the transmission and release the breather hose. throttle housing.
four-speed models or reverse gear on the five- 55 Disconnect the transmission earth strap.
speed unit to aid adjustment of the gearchange 74 Relieve the fuel system pressure by slowly 56 Disconnect the clutch cable from the loosening the cold start valve union on the top
linkage when refitting. On models produced release lever and from the transmission
from February 1987 onwards, place the of the fuel distributor. Absorb fuel leakage in a support. cloth (see illustration).
transmission in second gear on four-speed 57 The remainder of the removal procedure
versions, or fourth gear on five-speed versions. 75 Disconnect the fuel pipes at the fuel is the same as described previously for injectors and at the cold start valve. Recover
44 Remove the bonnet (Chapter 11). carburettor engines in paragraphs 16 to 32
45 Drain the cooling system (Chapter 1). the sealing washers located on each side of inclusive. the banjo unions and seal all disconnected
46 Remove the air inlet hose between the
fuel distributor and throttle housing. 1.4 CFI (Central Fuel Injection) and 1.6 EFI pipes and orifices to prevent dirt ingress.
47 Disconnect the radiator top and bottom (Electronic Fuel Injection) engines
hoses and the expansion tank hose at the 58 Proceed as described in paragraphs 41
thermostat housing. to 49 inclusive, ignoring the reference to the
48 Disconnect the heater hoses from the fuel distributor.
thermostat housing, and the three-way 59 Disconnect all relevant hoses, pipes and
connection fitting on the oil cooler. wiring to facilitate engine removal, with
49 Disconnect the throttle cable end from the reference to the relevant Parts of Chapters 4
throttle lever and unbolt the cable bracket and 5.
from the throttle housing. 60 Proceed as described in paragraphs 54
50 Relieve the fuel system pressure by slowly to 57 inclusive.
loosening the fuel feed pipe union at the RS Turbo models
warm-up regulator. Absorb fuel leakage in a 61 Disconnect the battery negative lead.
cloth. Reference to the fuel-injection system 62 Place the transmission in reverse gear to
layout in Chapter 4, Part B will assist in aid adjustment of the gearchange linkage
identification of the relevant components when refitting. On models produced from
where necessary. February 1987 onwards, place the 11.76 Coolant temperature sensor (A)
51 Disconnect the vacuum servo hose from transmission in fourth gear. thermo-time switch (B) and auxiliary air
the inlet manifold. 63 Remove the bonnet (Chapter 11). device (C) multi-plugs on RS Turbo models 2B·18 CVH engines
Move the fuel pipes clear of the engine.
76 Disconnect the wiring multi plugs at the
temperature gauge sender unit, ignition coil, 12 Engine - complete dismantling
throttle position sensor, solenoid control
valve, coolant temperature sensor, thermo- 1 The need for dismantling will have been
time switch, cold start valve, oil pressure dictated by wear or noise in most cases.
switch and auxiliary air device (see Although there is no reason why only partial
illustration). dismantling cannot be carried out to renew
77 Disconnect the speedometer cable from such items as the oil pump or crankshaft rear
the transmission and the fuel computer multi- oil seal, when the main bearings or big-end
plug (where fitted). bearings have been knocking and especially if
78 Disconnect the transmission earth strap. the vehicle has covered a high mileage, then it
79 Disconnect the clutch cable from the is recommended that a complete strip-down
release lever and from the transmission is carried out and every engine component
support. examined as described in Section 13. 12.3 Removing the alternator heat shield
80 The remainder of the removal procedure 2 Position the engine so that it is upright and
is the same as described previously for safely chocked on a bench or other
carburettor engines in paragraphs 17 to 32 convenient working surface. If the exterior of 4 Disconnect the heater hose from the water
inclusive. the engine is very dirty it should be cleaned pump. before dismantling, using paraffin and a stiff 5 Drain the engine oil and remove the filter
Separation (all models) and oil cooler where applicable. brush or a water-soluble solvent.
81 Separation from the manual or automatic 3 Remove the alternator, the mounting 6 Jam the flywheel starter ring gear to prevent
transmission is as described previously for bracket and exhaust heat shield, and the the crankshaft turning and unscrew the
carburettor engines. adjuster link (see illustration). crankshaft pulley bolt. Remove the pulley.
12.7 Exploded view of the engine
1 Thermostat housing 2 Thermostat 3 Distributor 4 Camshaft 5 Fuel pump 6 Inlet manifold 7 Oil pressure switch 8 Oil filter 9 Oil seal retainer 10 Oil pump pick-up tube and strainer 11 Camshaft thrust plate 12 Camshaft belt sprocket 13 Timing belt 14 Timing belt cover (one-piece type) 15 Water pump 16 Crankshaft belt sprocket 17 Timing belt tensioner 18 Oil pump CVH engines 2B·19
top of the cylinder block, again retaining the bearing shell with the rod if the shell is to be used again. 31 Remove the remaining pistons/rods in a similar way. 32 Remove the main bearing caps, keeping the shells with their respective caps if the shells are to be used again. Lift out the crankshaft. 33 Take out the bearing shells from the crankcase, noting the semi-circular thrustwashers on either side of the centre bearing. Keep the shells identified as to position in the crankcase if they are to be used again. 34 Prise down the spring arms of the 12.13 Remove the rocker cover 12.25 Unscrew the oil pressure switch crankcase ventilation baffle and remove it from inside the crankcase just below the
7 Unbolt and remove the timing belt cover (4 19 Remove the engine adapter plate. ventilation hose connection.
bolts) (see illustration). Note that the cover is 20 Unbolt and remove the crankshaft rear oil 35 The engine is now completely dismantled
in two halves on later models. seal retainer. and each component should be examined as
8 Slacken the two bolts on the timing belt 21 Unbolt and remove the timing belt described in Section 13 before reassembling.
tensioner, lever the tensioner against its tensioner and take out the coil spring. (This
spring pressure where applicable and tighten spring is not used on all models).
the bolts to lock it in position. 22 Unbolt and remove the water pump. 13 Examination and renovation
9 With the belt now slack, note its running 23 Remove the belt sprocket from the
direction and mark the mating belt and sprocket crankshaft using the hands or if tight, a two-
teeth with a spot of quick-drying paint. This is legged
puller . Take off the thrustwasher.
not necessary if the belt is being renewed. 24 Unbolt the oil pump and pick-up tube and Crankshaft, bearings, cylinder
10 Disconnect the spark plug leads and, remove them as an assembly. bores and pistons
where applicable, remove the distributor cap 25 Unscrew and remove the oil pressure 1 Refer to Section 13 in Part A of this Chapter.
complete with HT leads (if not already done). switch (see illustration). The information applies equally to the CVH 2B
11 Unscrew and remove the spark plugs. 26 Turn the crankshaft so that all the pistons engine, except that standard sized crankshafts
12 Disconnect the crankcase ventilation hose are half-way down the bores, and feel if a are unmarked and the following differences in
from its connector on the crankcase. wear ridge exists at the top of the bores. If so, the piston rings should be noted.
13 Remove the rocker cover (see illustration). scrape the ridge away, taking care not to 2 The top rings are coated with molybdenum.
14 Unscrew the cylinder head bolts in the damage the bores. Avoid damaging the coating when fitting the
sequence shown in illustration 7.18 and 27 Inspect the big-end and main bearing rings to the pistons.
discard them. New bolts must be used at caps for markings. The main bearings should 3 The lower (oil control) ring must be fitted so
reassembly. be marked 1 to 5 with a directional arrow that the manufacturer's mark is towards the
15 Remove the cylinder head complete with pointing to the timing belt end. The big-end piston crown, or the groove towards the
manifolds. caps and connecting rods should have gudgeon pin. Take care that the rails of the oil
16 Turn the engine on its side. Do not invert it adjacent matching numbers. Number 1 is at control ring abut without overlapping.
as sludge in the sump may enter the oilways. the timing belt end of the engine. Make your
Remove the sump bolts, withdraw the sump own marks if necessary. Timing sprockets and belt
and peel off the gaskets and sealing strips. 28 Unscrew the bolts from the first big-end 4 It is very
rare for the teeth of the sprockets
17 Remove the bolts from the clutch cap and remove the cap. The cap is located to wear, but attention should be given to the
pressure plate in a progressive manner until on two roll pins, so if the cap requires tapping tensioner idler pulley. It must turn freely and
the pressure of the assembly is relieved and off make sure that it is not tapped in a smoothly, be ungrooved and without any
then remove the cover, taking care not to sideways direction. shake in its bearing. Otherwise renew it.
allow the friction plate to fall to the floor. 29 Retain the bearing shell with the cap if the 5 Always renew the coil spring (if fitted) in the
18 Unbolt and remove the flywheel. The bolt shell is to be used again. tensioner. If the engine has covered 36 000 miles
holes are offset so it will only fit one way. 30 Push the piston/connecting rod out of the (60 000 km) then it is essential that a new belt is fitted, even if the original one appears in good condition. Flywheel 6 Refer to Section 13 in Part A of this Chapter. Oil pump 7 The oil pump on pre-1986 models is of gear type incorporating a crescent
shape spacer. From 1986 onwards a low friction rotor type is fitted. Although no wear
limit tolerances are specified for the gear type pump, if on inspection there is obvious wear between the gears, or signs of scoring or wear ridges, the pump should 13.7a Gear type oil pump 13.7b Rotor type oil pump be renewed (see illustrations). Similarly if a high mileage engine is being reconditioned it is
A Pressure relief valve D Oil pump cover A Pressure relief valve C Inner rotor recommended that a new pump is fitted.
B Driven gear E Return pipe B Outer rotor D Oil pump cover Inspection of the rotor type pump is covered in
C Driving gear Section 13, in Part A of this Chapter. 2B·20 CVH engines
Oil seals and gaskets reduce its overall length to a point where the 26 Extract the split collets and then gently self-adjusting capability of the cam follower is release the compressor and remove it.
8 Renew the oil seals in the oil pump and in
exceeded and valve clearances are not taken 27 Remove the valve spring retainer, the
the crankshaft rear oil seal retainer as a matter up, with consequent noisy operation. spring and the valve stem oil seal. Withdraw
of routine at time of major overhaul. It is 18 Cam followers cannot be dismantled so if the valve.
recommended that the new seals are drawn they become worn after high mileage, they 28 Valve removal should commence with
into these components using a nut and bolt must be renewed. On refitting, it is only No 1 valve (nearest timing belt end). Keep the
and distance pieces, rather than tapping them necessary to smear the outside surfaces with valves and their components in their originally
into position, to avoid distortion of the light clean engine oil, as they are self priming and installed order by placing them in a piece of
alloy castings. will fill with engine oil once the engine is card which has holes punched in it and
9 Renew the camshaft oil seal after the running, although initial operation may be numbered 1 to 8.
camshaft has been installed. noisy until primed. 29 To check for wear in the valve guides,
10 Always smear the lips of a new oil seal place each valve in turn in its guide so that
with grease, and check that the small Cylinder head and rocker arms approximately one third of its length enters
tensioner spring in the oil seal has not been 19 The usual reason for dismantling the the guide. Rock the valve from side to side. If
displaced during installation. cylinder head is to decarbonise and to grind in any more than the slightest movement is
11 Renew all gaskets by purchasing the the valves. Reference should therefore be possible, the guides will have to be reamed
appropriate engine set, which usually includes made to Section 14 in addition to the (working from the valve seat end) and oversize
the necessary oil seals. dismantling operations described here. stemmed valves fitted. If you do not have the
Crankcase 20 Remove the inlet and exhaust manifolds necessary reamer (Tool No 21-071 to 21-074), and their gaskets (Chapter 4, Part E) also the leave this work to your Ford dealer.
12 Refer to Section 13 in Part A of this Chapter. thermostat housing (Chapter 3). 30 Examine the valve seats. Normally the
Camshaft and bearings 21 Unscrew the nuts from the rocker arms seats do not deteriorate, but the valve heads and discard the nuts. New ones must be fitted are more likely to burn away, in which case
13 Examine the camshaft gear and lobes for at reassembly. new valves can be ground in as described in
damage or wear. If evident, a new camshaft 22 Remove the rocker arms and the the next Section. If the seats require recutting,
must be purchased, or one which has been hydraulic cam followers, keeping them in their use a standard cutter, available from most
built-up, such as are advertised by firms originally fitted sequence. Keep the rocker accessory or tool stores.
specialising in exchange components. guide and spacer plates in order. 31 Renewal of any valve seat which is
14 The bearing internal diameters in the 23 The camshaft need not be withdrawn but cracked or beyond recutting is definitely a job
cylinder head should be checked against the if it is wished to do so, first remove the thrust for your dealer or motor engineering works.
Specifications if a suitable gauge is available, plate and take the camshaft out from the rear 32 If the rocker arm studs must be removed
otherwise check for movement between the of the cylinder head. for any reason, a special procedure is
camshaft journal and the bearing. If the 24 The valve springs should now be necessary. Warm the upper ends of the studs
bearings are proved to be worn, then a new compressed. A standard type of compressor with a blow-lamp flame (not a welder) before
cylinder head is the only answer as the will normally do the job, but a forked tool (Part unscrewing them. Clean out the cylinder head
bearings are machined directly in the cylinder No 21-097) can be purchased or made up to threads with an M10 tap and clean the
head. engage on the rocker stud using a nut and threads of oil or grease. Discard the old studs
15 Check the camshaft endfloat by distance piece to compress it. and fit new ones, which will be coated with
temporarily refitting the camshaft and thrust 25 Compress the valve spring and extract the adhesive compound on their threaded portion
plate. If the endfloat exceeds the specified split collets. Do not overcompress the spring, or will have a nylon locking insert. Screw in
tolerance, renew the thrust plate. or the valve stem may bend. If it is found the studs without pausing, otherwise the when screwing down the compressor tool adhesive will start to set and prevent the stud
Cam followers that the spring retainer does not release from seating.
16 It is seldom that the hydraulic type cam the collets, remove the compressor and place 33 If the cylinder head mating surface is
followers (tappets) wear in their cylinder head a piece of tubing on the retainer so that it suspected of being distorted, it can be
bores. If the bores are worn then a new does not impinge on the collets and place a checked and surface ground by your dealer or
cylinder head is called for. small block of wood under the head of the motor engineering works. Distortion is
17 If the cam lobe contact surface shows valve. With the cylinder head resting flat down possible with this type of light alloy head if the
signs of a depression or grooving, grinding on the bench, strike the end of the tubing a bolt tightening method is not followed exactly,
out the wear surface will not only remove the sharp blow with a hammer. Refit the or if severe overheating has taken place.
hardened surface of the follower but may also compressor and compress the spring. 34 Check the rocker arm contact surfaces for wear. Renew the valve springs if they have been in service for 50 000 miles (80 000 km) or more. 35 Commence reassembly of the cylinder head by fitting new valve stem oil seals (see illustration). 36 Oil No 1 valve stem and insert the valve into its guide (see illustration). 37 Fit the valve spring (closer coils to cylinder head), then the spring retainer (see illustrations). 38 Compress the spring and engage the split collets in the cut-out in the valve stem. Hold them in position while the compressor is 13.35 Using a socket to install a valve 13.36 Inserting a valve into its guide gently released and removed (see stem oil seal illustration). CVH engines 2B·21
13.37a Fit the valve spring . . . 13.37b . . . and spring retainer 13.38 Compress the spring and fit the collets
39 Repeat the operations on the remaining 2 Where a more thorough job is to be carried paste and examine the seat and bevelled edge
valves, making sure that each valve is returned out, the cylinder head should be dismantled of the valve. A matt silver mating band should
to its original guide or new valves have been as described in Section 13 so that the valves be observed on both components, without any
fitted, into the seat into which it was ground. may be ground in, and the ports and sign of black spots. If some spots do remain,
40 Once all the valves have been fitted, combustion spaces cleaned and blown out repeat the grinding-in process until they have
support the ends of the cylinder head on two after the manifolds have been removed. disappeared. A drop or two of paraffin applied
wooden blocks and strike the end of each 3 Before grinding in a valve, remove the to the contact surfaces will speed the grinding
valve stem with a plastic or copper-faced carbon and deposits completely from its head process, but do not allow any paste to run
hammer, just a light blow to settle the and stem. With an inlet valve this is usually down into the valve guide. On completion,
components. quite easy, simply a case of scraping off the wipe away every trace of grinding paste using
41 Fit the camshaft (if removed) and a new oil soft carbon with a blunt knife and finishing a paraffin-moistened cloth.
seal as described in Section 6. with a wire brush. With an exhaust valve, the 7 Repeat the operations on the remaining 2B
42 Smear the hydraulic cam followers with deposits are very much harder and those on valves, taking care not to mix up their
hypoid type transmission oil and insert them the valve head may need a rub on coarse originally fitted sequence.
into their original bores (see illustration). emery cloth to remove them. An old 8 An important part of the decarbonising
43 Fit the rocker arms with their guides and woodworking chisel is a useful tool to remove operation is to remove the carbon deposits
spacer plates, use new nuts and tighten to the the worst of the valve head deposits. from the piston crowns. To do this (engine in
specified torque. It is important that each 4 Make sure that the valve heads are really vehicle), turn the crankshaft so that two
rocker arm is installed only when its particular clean, otherwise the rubber suction cup pistons are at the top of their stroke and press
cam follower is at its lowest point (in contact grinding tool will not stick during the grinding- some grease between the pistons and the
with the cam base circle) (see illustrations). in operations. cylinder walls. This will prevent carbon
44 Refit the exhaust and inlet manifolds and 5 Before starting to grind in a valve, support particles falling down into the piston ring
the thermostat housing, using all new gaskets. the cylinder head so that there is sufficient grooves. Plug the other two bores with rag. clearance under it for the valve stem to project 9 Cover the oilways and coolant passages fully without being obstructed, otherwise the with masking tape and then using a blunt 14 Cylinder head and pistons - valve will not seat properly during grinding. scraper, remove all the carbon from the piston decarbonising 6 Take the first valve and apply a little coarse crowns. Take great care not to score the soft grinding paste to the bevelled edge of the alloy of the crown or the surface of the
1 With the cylinder head removed as valve head. Insert the valve into its guide and cylinder bore.
described in Section 7, the carbon deposits apply the suction grinding tool to its head. 10 Rotate the crankshaft to bring the other
should be removed from the combustion Rotate the tool between the palms of the two pistons to TDC and repeat the operations.
surfaces using a blunt scraper. Take great hands in a back-and-forth rotary movement 11 Wipe away the circles of grease and
care as the head is of light alloy construction until the gritty action of the grinding-in process carbon from the cylinder bores.
and avoid the use of a rotary (power-driven) disappears. Repeat the operation with fine 12 Clean the top surfaces of the cylinder
wire brush. paste and then wipe away all trace of grinding block by careful scraping.
13.42 Fitting a cam follower to its bore 13.43a Fit the rocker arm spacer plate . . . 13.43b . . . followed by the rocker arm and guide 2B·22 CVH engines
15.1 Crankcase ventilation baffle 15.2 Inserting a main bearing shell into the 15.3 Locating the crankshaft crankcase thrustwashers on the centre main bearing outwards (see illustration). (see illustration). Provided the thrustwashers 4 Oil the bearing shells and carefully lower at the centre bearing have been renewed, the 15 Engine - reassembly the crankshaft into position. endfloat should be within specified tolerance. 5 Insert the bearings shells into the main If it is not, oversize thrustwashers are available
Note: Ensure that all necessary new oil seals bearing caps, making sure that their seats are (see Specifications).
and gaskets have been obtained before perfectly clean. Oil the bearings and install the 8 The pistons/connecting rods should now
starting the reassembly procedure. caps in their correct numbered location and be installed. Although new pistons may have
1 With everything clean and parts renewed with the directional arrow pointing towards been fitted to the rods by your dealer or
where necessary, commence reassembly by the timing belt end of the engine (see supplier due to the special tools needed, it is
inserting the ventilation baffle into the illustrations). worth checking to ensure that with the piston 6 Tighten the main bearing cap bolts to the crown arrow or cast nipple in the piston oil
crankcase. Make sure that the spring arms cut-out pointing towards the timing belt end
engage securely (see illustration). specified torque. of the engine, the F mark on the connecting
2 Insert the bearing half shells into their seats 7 Check the crankshaft endfloat. Ideally a dial rod or the oil ejection hole in the rod big-end
in the crankcase, making sure that the seats gauge should be used, but feeler blades are an is as shown (see illustration).
are perfectly clean (see illustration). alternative if inserted between the face of the 9 Oil the cylinder bores and install the
3 Stick the semi-circular thrustwashers on thrustwasher and the machined surface of the pistons/connecting rods (Section 9).
either side of the centre bearing with thick crankshaft balance web, having first prised the 10 Fit the oil pressure switch.
grease. Make sure that the oil channels face crankshaft in one direction and then the other 11 Before fitting the oil pump, action must be taken to prevent damage to the pump oil seal from the step on the front end of the crankshaft. First remove the Woodruff key and then build up the front end of the crankshaft using adhesive tape to form a smooth inclined surface to permit the pump seal to slide over the step without its lip turning back or the seal spring being displaced during installation (see illustration). 12 If the oil pump is new, pour some oil into it before installation in order to
prime it and rotate its driving gear a few turns (see illustration). 13 Align the pump gear flats with those on the crankshaft and install the oil pump complete 15.5a Fit the caps to their correct 15.5b . . . with the arrows on the caps with new gasket. Tighten the bolts to the numbered locations . . . pointing
toward the timing belt end specified torque.
15.7 Checking crankshaft endfloat with a 15.8 Piston/connecting rod orientation 15.11 Using masking tape to eliminate the feeler blade step on the crankshaft CVH engines 2B·23
15.12 Priming the oil pump prior to fitting 15.15 Fitting the oil pump pick-up tube 15.16 Fit the timing belt guide with its concave side towards the pump
14 Remove the adhesive tape and tap the spring (where fitted). Lever the tensioner fully pistons are not projecting from the block), fit
Woodruff key into its groove. against spring pressure and temporarily the sump, gaskets and sealing strips as
15 Bolt the oil pump pick-up tube into tighten the bolts. described in Section 8.
position (see illustration). 20 Using a new gasket, bolt on the rear oil 24 Fit the cylinder head as described in
16 To the front end of the crankshaft, fit the seal retainer, which will have been fitted with a Section 7, using new bolts. Refit the manifolds
thrustwasher (belt guide) so that its concave new oil seal and the seal lips greased (see (see illustrations).
side is towards the pump (see illustration). illustration). 25 Install and tension the timing belt as
17 Fit the crankshaft belt sprocket. If it is 21 Engage the engine adapter plate on its described in Section 4.
tight, draw it into position using the pulley bolt locating dowels and then offer up the 26 Using a new gasket, fit the rocker cover.
and a distance piece. Make sure that the belt flywheel. It will only go on in one position as it 27 Reconnect the crankcase ventilation
retaining flange on the sprocket is towards the has offset holes. Insert new bolts and tighten hoses between the rocker cover and the
front of the crankshaft and the nose of the to the specified torque (see illustrations). The crankcase (see illustrations). 2B
shaft has been smeared with a little grease bolts should be pre-coated with thread 28 Screw in a new set of spark plugs,
before fitting (see illustration). sealant. correctly gapped, and tighten to the specified
18 Install the water pump using a new gasket 22 Fit the clutch and centralise it (refer to torque - this is important. If the specified
and tightening the bolts to the specified Chapter 6). torque is exceeded, the plugs may be
torque (see illustration). 23 With the engine resting on its side (not impossible to remove (see Chapter 1).
19 Fit the timing belt tensioner and its coil inverted unless you are quite sure that the 29 Fit the timing belt cover.
15.17 Fitting the crankshaft sprocket with 15.18 Fitting the water pump 15.20 Crankshaft rear oil seal retainer with the flange outward new seal prior to fitting
15.21a Locate the adapter plate on the 15.21b . . . fit the flywheel to the 15.24a Fit the inlet manifold gasket . . . dowels . . . crankshaft 2B·24 CVH engines
15.24b . . . and manifold 15.27a Connecting the crankcase rear 15.27b . . . and the front hose ventilation hose . . .
7 On pre-1986 models refit the front mounting and anti-roll bar support plates, then refit the left-hand front and rear mountings loosely only. 8 On 1986 models onwards, refit the transmission support crossmember. 9 Lower the hoist and let the power unit rest on its mountings. Ensure that none of the mountings are under strain, then tighten all the mounting nuts and bolts to the specified torque and remove the hoist. 10 The driveshafts and suspension arms should now be refitted using the procedure described in Chapter 8. 15.32 Fitting the right-hand engine 15.33 Fitting the alternator mounting 11 Refit the anti-roll bar clamps and mounting bracket mounting plates as applicable. 12 On cars equipped with an Anti-lock
30 Fit the crankshaft pulley and tighten the transmission input shaft with molybdenum Braking System (ABS), refit the modulators,
bolt to the specified torque while the flywheel disulphide grease and then, supporting the drivebelts and the pipe mounting bracket,
ring gear is
locked to prevent it turning. weight of the transmission, connect it to the then adjust the modulator drivebelt tension as
31 Smear the sealing ring of a new oil filter engine by
passing the input shaft through the described in Chapter 9.
with a little grease, and screw it into position splined hub of the clutch plate until the 13 Refit the engine splash shields.
using hand pressure only. Where applicable, transmission locates on the dowels. Screw in the 14 On automatic transmission models
refit the oil cooler at the same time. bolts and tighten to the specified torque. Refit the reconnect the fluid cooler pipes, then
32 Install the engine mounting brackets, if clutch cover plate and the starter motor. reconnect and adjust the selector cable and
removed (see illustration). 4 On automatic transmission models ensure downshift linkage as described in Chapter 7,
33 Refit the ancillaries. The alternator bracket that the torque converter is fully seated on the Part B.
and alternator (Chapter 5, Part A), the fuel transmission, then locate the transmission on 15 On manual transmission models
pump, where applicable (Chapter 4, Part A), the engine dowels while at the same time reconnect and adjust the gearchange linkage
the thermostat housing (Chapter 3), and the guiding the torque converter studs through the using the procedure described in Chapter 7,
distributor (Chapter 5, Part B) (see holes in the driveplate. Screw in the engine-to- Part A.
illustration). transmission bolts and tighten to the specified 16 On RS Turbo models refer to Chapter 4,
34 Fit the distributor cap and reconnect the torque. Turn the crankshaft to provide access Part B and refit the turbocharger.
HT leads. to each of the torque converter studs in turn, 17 Refit the exhaust system and bolt the
35 Check the tightness of the oil drain plug then fit and tighten the nuts. Refit the cover downpipe to the manifold.
and insert the dipstick. plate and the starter motor.
16 Engine/transmission - Installation reconnection and installation 5 First check that the engine sump drain plug is tight and then, where applicable refit the
1 This is a direct reversal of removal and selector shaft cap nut (removed to drain the
separation from the transmission. Take care manual transmission oil) together with its
not to damage the radiator or front wings spring and interlock pin (see illustration).
during installation. Apply sealer to the cap nut threads when refitting (see Specifications Chapter 7, Part A).
Reconnection 6 Manoeuvre the engine/transmission under
2 Make sure that the engine adapter plate is the vehicle and attach the lifting hoist. Raise
correctly located on its dowels. the engine/transmission carefully until the
3 On manual transmission models check that right-hand rear mounting can be engaged.
the clutch driven plate has been centralised as Refit the mounting nut and bolt but loosely 16.5 Fitting the selector shaft cap nut,
described in Chapter 6. Smear the splines of the only at this stage. spring and interlock pin CVH engines 2B·25
18 Check that everything has been
reconnected underneath, then lower the car 17.3 Engine oil cooler assembly
to the ground.
19 Where applicable reconnect the clutch A Threaded bush
operating cable. B Gasket
20 Reconnect the transmission earth strap C Oil cooler
and speedometer cable. D Threaded sleeve
21 Reconnect the coolant and heater hoses. E Oil filter
22 Reconnect the accelerator cable and
where fitted the choke cable and adjust as
described in Chapter 4, Part A.
23 Reconnect all fuel and vacuum hoses and
pipes with reference to the relevant Part of
Chapter 4 where necessary. Use screw type
hose clips to secure any hoses originally
retained with crimped clips. On fuel-injection
models use new sealing washers on each side
of the banjo unions.
24 Reconnect all electrical wiring with by screwing a new threaded bush into the
reference to Chapters 3, 4, 5 and 12 and to 17 Engine oil cooler - removal cylinder block.
any
notes made during removal. and refitting 7 Apply Omnifit Activator "Rapid" (to Ford
25 Fill up with engine oil, transmission oil or Specification SSM-998-9000-AA) to the
fluid and coolant, then reconnect the battery. Note: Suitable sealant will be required on exposed threads of the bush and to the
26 Refit the bonnet and the air cleaner or on refitting - see text. internal threads of the threaded sleeve.
RS Turbo models the inlet air duct. 8 Apply one drop of Omnifit Sealant "300
27 Once the engine is running check the Removal Rapid" (to Ford Specification SSM-4G-9003-
dwell angle, timing, idle speed and mixture as 1 Remove the engine oil filter (Chapter 1). AA) to the threads of the bush. Do not use
described in Chapter 1. 2 Note the angle at which the coolant hoses more than one drop, as there is risk of
28 If a number of new internal components are set, then disconnect the hoses and plug contaminating the oil system. 2B
have been installed, run the vehicle at a their ends to minimise coolant loss. If 9 Fit the oil cooler over the threaded bush
restricted speed for the first few hundred necessary, drain the coolant (Chapter 1). using a new gasket, and secure it in position
miles to allow time for the new components to 3 Using a ring spanner or socket, undo and (remember the angle of the coolant pipes)
bed in. It is also recommended that with a remove the threaded sleeve (see illustration). with the threaded sleeve, tightening it to the
new or rebuilt engine, the engine oil and filter 4 Remove the oil cooler and its gasket. specified torque.
are changed at the end of the running-in 5 Should the threaded bush come out with 10 Fit the new oil filter (Chapter 1).
period. the threaded sleeve, or if it is removed for 11 Reconnect the coolant hoses, top-up the other
reasons , it should be renewed. oil and coolant to their correct levels, and then run the engine to normal operating Refitting temperature and check for leaks. On 6 Clean the threads of the
female connection completion, allow the engine to cool and in the cylinder block, then commence refitting recheck oil and coolant levels. 2B·26 Notes 3·1
Chapter 3
Cooling, heating and ventilation systems
Contents
Antifreeze mixture . . . . . . . . . . . . . . . . . . . . . . . . . . . . .See Chapter 1 Heater motor/fan - removal and refitting . . . . . . . . . . . . . . . . . . . . .13
Coolant level check . . . . . . . . . . . . . . . . . . . . . .See "Weekly checks" Heating and ventilation system -
description . . . . . . . . . . . . . . . . . . .8
Cooling system - draining, flushing and refilling . . . . . .See Chapter 1 Radiator - removal, inspection and refitting . . . . . . . . . . . . . . . . . . . .3
General description . . . . . . . . . . . . . . . . . . . . . . . . . . . . . . . . . . . . . .1 Radiator fan - removal and refitting . . . . . . . . . . . . . . . . . . . . . . . . . .2
Heater - removal and refitting . . . . . . . . . . . . . . . . . . . . . . . . . . . . . .11 Radiator fan thermal switch -
testing , removal and refitting . . . . . . .6
Heater controls - adjustment . . . . . . . . . . . . . . . . . . . . . . . . . . . . . . .9 Temperature gauge sender unit - removal and refitting . . . . . . . . . . .7
Heater controls - removal and refitting . . . . . . . . . . . . . . . . . . . . . . .10 Thermostat - removal, testing and refitting . . . . . . . . . . . . . . . . . . . .4
Heater
matrix - removal and refitting . . . . . . . . . . . . . . . . . . . . . . . .12 Water pump - removal and refitting . . . . . . . . . . . . . . . . . . . . . . . . . .5
Degrees of difficulty Easy, suitable for Fairly easy, Fairly difficult, Difficult, suitable Very difficult, novice with little suitable for suitable for for experienced suitable for expert 3 experience beginner with competent DIY DIY mechanic DIY or professional some experience mechanic
Specifications
System type . . . . . . . . . . . . . . . . . . . . . . . . . . . . . . . . . . . . . . . . . . . Pressurised, pump-assisted thermo-syphon with front mounted radiator and electric cooling fan
Pressure cap rating
Up to 1986: 1.1 litre OHV engine . . . . . . . . . . . . . . . . . . . . . . . . . . . . . . . . . . . . . . 0.9 bar (13.0 lbf/in2) 1.3 and 1.6 litre CVH engine . . . . . . . . . . . . . . . . . . . . . . . . . . . . . . . . 0.85 to 1.1 bar (12.0 to 15.7 lbf/in2)
1986 onwards . . . . . . . . . . . . . . . . . . . . . . . . . . . . . . . . . . . . . . . . . . . . . 0.98 to 1.2 bar (14.2 to 17.0 lbf/in2)
Thermostat
Type . . . . . . . . . . . . . . . . . . . . . . . . . . . . . . . . . . . . . . . . . . . . . . . . . . . . Wax
Start to open temperature . . . . . . . . . . . . . . . . . . . . . . . . . . . . . . . . . . . 85° to 89°C (189° to 192°F)
Fully open temperature . . . . . . . . . . . . . . . . . . . . . . . . . . . . . . . . . . . . . . 102°C (223°F) (±3°C/5°F for used thermostats)
Torque wrench settings Nm lbf ft
Radiator mounting bolts: Pre-1986 models . . . . . . . . . . . . . . . . . . . . . . . . . . . . . . . . . . . . . . . . . 7 to 10 5 to 7 1986 models onwards . . . . . . . . . . . . . . . . . . . . . . . . . . . . . . . . . . . . . 20 to 27 15 to 20
Thermostat housing bolts: OHV engines . . . . . . . . . . . . . . . . . . . . . . . . . . . . . . . . . . . . . . . . . . . . 17 to 21 13 to 16 CVH engines . . . . . . . . . . . . . . . . . . . . . . . . . . . . . . . . . . . . . . . . . . . . 9 to 12 7 to 9
Water pump bolts: OHV engines . . . . . . . . . . . . . . . . . . . . . . . . . . . . . . . . . . . . . . . . . . . . 7 to 10 5 to 7 CVH engines . . . . . . . . . . . . . . . . . . . . . . . . . . . . . . . . . . . . . . . . . . . . 7 to 10 5 to 7
Water pump pulley (OHV engines) . . . . . . . . . . . . . . . . . . . . . . . . . . . . . 9 to 11 6 to 8
Fan shroud to radiator: Pre-1986 models . . . . . . . . . . . . . . . . . . . . . . . . . . . . . . . . . . . . . . . . . 7 to 10 5 to 7 1986 models onwards . . . . . . . . . . . . . . . . . . . . . . . . . . . . . . . . . . . . . 3 to 5 2 to 4
Fan motor to shroud . . . . . . . . . . . . . . . . . . . . . . . . . . . . . . . . . . . . . . . . 9 to 12 7 to 9 3·2 Cooling, heating and ventilation systems
1 General description
The cooling system is of the pressurised
pump-assisted thermo-syphon type. The
system
consists of the radiator, water pump,
thermostat, electric cooling fan, expansion
tank and associated hoses. The system functions as follows. When the
coolant is cold the thermostat is shut and
coolant flow is restricted to the cylinder block,
cylinder head, inlet manifold and the vehicle
interior heater matrix. As the temperature of
the coolant rises, the thermostat opens
allowing the coolant to pass into the radiator. 2.4 Radiator fan shroud retaining bolts -
The coolant now circulates through the 2.3 Radiator fan shroud retaining bolts - 1986 models onwards
radiator where it is cooled by the inrush of air pre-1986 models Refitting
when the car is in forward
motion ,
supplemented by the operation of the radiator 8 Reassembly and refitting are reversals of 2 Radiator fan - removal and the removal and dismantling operations.
cooling fan. Coolant is then circulated from refitting
the base of the radiator, up through the water RS Turbo models
pump, and into the cylinder block to complete
the circuit. All models except RS Turbo 1985 models On OHV engines, the water pump is driven Removal
by a vee-belt from the crankshaft pulley. On Removal 9 Disconnect the battery negative terminal.
CVH engines, the water pump is driven by the 1 Disconnect the battery negative terminal. 10 Detach the transverse coolant hose from
timing belt. 2 Disconnect the wiring plug at the fan motor the two clips above the radiator (see When the engine is at normal operating and unclip the wiring from the shroud. illustration).
temperature the coolant expands, and some 3 On pre-1986 models the fan shroud is 11 Unscrew the three fan shroud retaining
of it is displaced into the expansion tank. The secured to the radiator with four bolts. bolts.
coolant collects in the tank and is returned to Unscrew the two upper bolts and slacken the 12 Disconnect the upper and lower air hoses
the radiator when the system cools. On 1.1 two lower bolts (see illustration). at the turbo intercooler mounted alongside
litre engines the system pressure cap is fitted 4 For 1986 models onwards the shroud is the radiator.
to the thermostat housing and the expansion retained by two bolts at the top and two clips 13 Undo the two air cleaner retaining bolts
tank acts as a simple overflow bottle. On all at the bottom. Unscrew the two upper bolts and remove the air cleaner assembly (see
other engines the pressure cap is fitted to the (see illustration). illustration).
expansion tank which is pressurised with the 5 On all models carefully lift the fan and 14 Undo the single upper retaining screw and
rest of the system. shroud assembly upwards and out of the lift the intercooler to disengage the lower On all engines except 1.1 litre CVH versions engine compartment, taking care not to retaining peg (see illustration). Remove the
the radiator cooling fan is controlled by a damage the radiator. intercooler.
thermal switch located in the thermostat 6 Extract the retaining clip and remove the 15 Undo the two upper radiator retaining
housing. When the coolant reaches a fan from the motor shaft. bolts, disengage the lower guides and move
predetermined temperature the switch 7 Unscrew the three nuts and separate the the radiator towards the engine taking care
contacts close thus actuating the fan. On 1.1 motor from the shroud (see illustration). not to stretch the hoses.
litre CVH engines with standard equipment 16 Disconnect the fan wiring multi-plug,
the cooling fan operates continuously release the cable-tie and separate the fan
whenever the ignition is switched on. wiring from the harness.
2.10 Radiator fan removal details - 1985 RS Turbo A Transverse cooling hose 2.7 Fan motor retaining nuts - pre-1986 B Transverse cooling hose clips 2.13 Air cleaner retaining bolts (A) - 1985 models C Fan shroud retaining bolts RS Turbo Cooling, heating and ventilation systems 3·3
2.14 Intercooler retaining bolt (A) and 2.20a Release the wiring harness clips . . . 2.20b . . . to gain access to the fan shroud upper air hose connection (B) - bolts on 1986 RS Turbo models 1985 RS Turbo 21 Unhook the shroud from the top of the that the base of the radiator is
held in place by radiator, disconnect the wiring at the harness two lugs (see illustrations). connector and remove the fan and shroud Inspection assembly from the front of the radiator. 6 If the purpose of removal was to thoroughly 22 Remove the fan guard from the shroud. clean the radiator, first reverse flush it with a 23 Extract the retaining circlip and washer, cold water hose. The normal coolant flow is then withdraw the fan from the motor shaft. from left to right (from the thermostat housing 24 Unscrew the three nuts, unclip the wiring to the radiator) through the matrix and out of and remove the motor from the shroud. the opposite side. Refitting 7 If the radiator
fins are clogged with
flies or 25 Reassembly and refitting are the reversals dirt, remove them with a soft brush or blow of the removal and dismantling operations. compressed air from the rear face of the radiator. It is recommended that the fan 3 Radiator - removal, inspection assembly is first removed as described in the and refitting preceding Section (if not already done). In the 3 absence of a compressed air line, a
strong jet
2.20c Fan shroud bracket retaining bolts - from a water hose may provide an alternative RS Turbo from 1986 onwards All models except RS Turbo method of cleaning. 8 If the radiator is leaking, it is recommended
17 Carefully lift the fan up and out of its Pre-1986 models that a reconditioned or new one is obtained
location. The fan, motor and shroud are Removal from
specialists . In an
emergency , minor leaks
serviced as an assembly on these models and 1 Drain the cooling system as described in can be cured by using a radiator sealant. If the
further dismantling is not recommended. Chapter 1. radiator, due to neglect, requires the
Refitting 2 Disconnect the battery negative terminal. application of chemical cleaners, then these
18 Refitting is the reverse sequence to 3 Release the retaining clips and disconnect are best used when the engine is hot and the
removal. all the hoses from the radiator, and on radiator is in the vehicle. Follow the vehicles with automatic transmission, manufacturer's instructions precisely and
1986 models onwards appreciate that there is an element of risk in disconnect and plug the oil cooler
pipelines .
Removal 4 Disconnect the wiring plug at the fan motor the use of most de-scaling
products ,
19 Disconnect the battery negative terminal. and unclip the wiring from the shroud (see especially in a system which incorporates
20 Working through the aperture below the illustration). alloy and plastic materials.
front bumper, release the wiring harness clips 5 Unscrew the two upper mounting bolts and Refitting
and unscrew the two shroud bracket retaining carefully lift the radiator, complete with fan 9 Refit the radiator by reversing the removal
bolts (see illustrations). and cowl from the engine compartment. Note operations, but ensure that the rubber lug
3.4 Disconnecting radiator fan wiring plug 3.5a Undo the radiator upper bolts . . . 3.5b . . . and lift out the unit complete with fan - pre-1986 models (except RS Turbo) 3·4 Cooling, heating and ventilation systems
3.12 Radiator lower retaining bolts (A) and 3.23 Intercooler upper air hose 3.25 Radiator and intercooler retaining upper lugs (B) - 1986 models onwards attachment - RS Turbo from 1986 onwards bolts - RS Turbo from 1986 onwards (one (except RS Turbo) lower bolt not shown)
insulators are in position. Fill the cooling 18 Refer to Section 2 and remove the
system as described in Chapter 1 and on later radiator fan. 4 Thermostat - removal, testing
models adjust the alternator drivebelt as 19 Lift the radiator up and out of the engine and refitting
described in Chapter 1. compartment.
1986 models onwards OHV engines Inspection and refitting
Removal Note: A new gasket must be used on refitting. 20 Proceed as described previously in this
10 Refer to Section 2 and remove the Section for all models except RS Turbo. Removal
radiator fan.
11 To provide greater clearance for radiator 1986 models onwards 1 Drain the cooling system as described in
removal, slacken the alternator mounting and Chapter 1.
adjustment arm bolts and push the alternator Removal 2 Slacken the clips and disconnect the hoses
in towards the engine as far as it will go. 21 Drain the cooling system as described in at the thermostat housing (see illustration).
12 Unscrew the two radiator lower retaining Chapter 1. Disconnect the radiator fan thermal switch
bolts (see illustration). 22 Disconnect the battery negative terminal. wiring plug.
13 Move the bottom of the radiator in 23 Release the retaining clips and disconnect 3 Unscrew the two bolts and remove the
towards the engine, then lower it to disengage the coolant hoses at the radiator and the air thermostat housing cover. If it is tight carefully
the two upper retaining lugs. Carefully lift the hoses at the turbo intercooler (see tap it with a soft-faced
mallet .
radiator from the engine compartment. illustration). 4 Extract the thermostat (see illustration). If 24 Refer to Section 2 and remove the it is stuck tight in its seat, do not lever it out by
Inspection and refitting radiator fan. its bridge piece, but cut round it with a very
14 Proceed as described previously in this 25 Undo the two radiator and intercooler sharp knife.
Section for pre-1986 models. lower retaining bolts (see illustration). Testing
RS Turbo models 26 Undo the four bolts securing the 5 To test the thermostat, first check that in a intercooler to the radiator and remove the cold condition its valve plate is closed.
1985 models intercooler from the front.
Suspend it on a
string in a pan of cold water
Removal 27 Manipulate the radiator up and out of its together with a thermometer (see illustration).
15 Drain the cooling system as described in location from the front (see illustration). Heat the water and check that the thermostat
Chapter 1. starts to open at the temperature given in the
16 Disconnect the battery negative terminal. Inspection and refitting Specifications. It is difficult to check that the
17 Release the retaining clips and disconnect 28 Proceed as described previously in this thermostat opens fully, as this occurs at a
all the coolant hoses from the radiator. Section for all models except RS Turbo. temperature above the boiling point of water.
4.2 Expansion tank hose (A) and radiator 3.27 Radiator removal - RS Turbo from top hose (B) connections at thermostat 4.4 Thermostat location in cylinder head - 1986 onwards housing - OHV engine OHV engine Cooling, heating and ventilation systems 3·5
4.5 Testing the thermostat 4.10 Disconnect the expansion tank hose 4.13a Extract the retaining spring clip at the thermostat housing - CVH engine (arrowed) . . .
6 Remove the thermostat from the water and Testing and refitting pump and if the unit is leaking, noisy, or in any
check that the valve closes as the unit cools. way unserviceable, renewal will be necessary. 14 Proceed as described previously in this
If the thermostat does not operate as Section for OHV engines. Refitting
described, obtain a new thermostat. 9 Refitting is the reverse sequence to
Refitting 5 Water pump - removal and removal. Use a new gasket lightly smeared
7 Refitting is the reverse sequence to refitting with jointing compound and tighten the
removal, but ensure that all traces of old retaining bolts to the specified torque.
gasket are removed from the housing mating 10 Refill the cooling system, and adjust the
faces and use a new gasket lightly smeared OHV engines drivebelt tension as described in Chapter 1.
with jointing compound. Tighten the retaining Note: A new gasket and suitable jointing
bolts to the specified torque. compound must be used on refitting. CVH engines
8 On completion, refill the cooling system as Note: The following procedure entails the use
described in Chapter 1. Removal of special tools to tension the timing belt after
CVH engines 1 Drain the cooling system as described in refitting the water pump. Read through the 3 Chapter 1. entire Section to familiarise yourself with the
Note: A new gasket must be used on refitting. 2 Slacken the three water pump pulley procedure and refer also to Chapter 2. A new retaining bolts. Any tendency for the pulley to gasket and suitable jointing compound must
Removal turn as the bolts are undone can be restrained be used on refitting.
9 Drain the cooling system as described in by depressing the top run of the drivebelt.
Chapter 1. 3 Release the alternator mounting and Removal
10 Slacken the clips and disconnect the adjustment arm bolts, push the alternator in 11 Drain the cooling system as described in
expansion tank hose, radiator hose and towards the engine and slip the drivebelt off Chapter 1.
heater hose at the thermostat housing (see the pulleys. 12 On carburettor engines refer to Chapter 4
illustration). 4 Unscrew the previously slackened pulley and remove the air cleaner to improve access.
11 Disconnect the radiator fan thermal switch bolts and remove the pulley. 13 Slacken the alternator mounting and
wiring plug. 5 Release the clip and disconnect the hose at adjustment arm bolts, push the alternator in
12 Unscrew the three bolts and remove the the pump outlet. towards the engine and slip the drivebelt off
thermostat housing from the cylinder head. If 6 Unscrew the three retaining bolts and the pulleys.
it is stuck, tap it off carefully with a soft-faced remove the pump from the cylinder block (see 14 Using a spanner on the crankshaft pulley
mallet. illustration). bolt, turn the crankshaft until the notch on the
13 Extract the retaining spring clip and 7 Peel away the old gasket from the cylinder
withdraw the thermostat from the housing block and thoroughly clean the mating face.
followed by the sealing ring (see illustrations). 8 No
provision is made for repair of the water
4.13b . . . withdraw the thermostat . . . 4.13c . . . and remove the sealing ring 5.6 Water pump retaining bolts - OHV engines 3·6 Cooling, heating and ventilation systems
5.14 Crankshaft pulley notch aligned with 5.17 Timing belt tensioner retaining bolts -
TDC (O) mark on timing belt cover scale - CVH engines CVH engines
pulley is aligned with TDC (O) mark on the 5.15 Timing belt cover retaining bolts - Refitting
timing belt cover scale (see illustration). Now early CVH engine models with one-piece 23 Scrape away all traces of old gasket and
remove the distributor cap and check that the cover ensure that the mating faces are clean and
rotor arm is pointing towards the No 1 cylinder on the sprockets so that the belt can be dry.
HT lead segment in the cap. If the rotor arm is engaged in its original position on reassembly. 24 Lightly smear jointing compound on both
pointing towards No 4 cylinder segment, turn 17 Slacken the two timing belt tensioner sides of a new gasket and locate the gasket
the crankshaft through another complete turn retaining bolts and slide the tensioner on the cylinder block face.
and realign the pulley notch with the TDC mark. sideways to relieve the tautness of the belt 25 Place the pump in position, then fit and
15 On early models unscrew the four bolts (see illustration). If the tensioner is spring- tighten the bolts to the specified torque.
and remove the one-piece timing belt cover loaded, tighten one of the bolts to retain it in 26 Fit the timing belt tensioners (and spring
(see illustration). On later models fitted with a the slackened position. where applicable), but only tighten the bolts
two-piece cover, unscrew the two upper bolts 18 Slip the timing belt off the camshaft, finger tight at this stage.
and remove the top half, then unscrew the tensioner and water pump sprockets (see 27 Refer to Chapter 2, and refit and tension
two lower bolts. The lower half cannot be illustration). the timing belt.
removed at this stage. 19 Remove the bolts and lift off the tensioner 28 Refit the hoses to the water pump.
16 Using a dab of quick drying paint, mark and, where fitted, the tensioning spring (see 29 Refit the timing belt cover(s).
the teeth of the timing belt and their notches illustration). 30 Refit the alternator drivebelt and adjust its 20 Slacken the clips and disconnect the tension as described in Chapter 1. hoses at the water pump. 31 On carburettor engines, refit the air 21 Undo the four bolts and remove the pump cleaner. from the cylinder block face (see 32 Refill the cooling system as described in illustrations). Chapter 1. 22 Renewal of the pump will be necessary if there are signs of water leakage, roughness of the bearings, or excessive side play or 6 Radiator fan thermal switch - endfloat at the sprocket. From 1983 onwards testing, removal and refitting a revised water pump was introduced in conjunction with a two-piece timing belt Testing cover. If a water pump is being renewed on an early model with one-piece belt cover, then it 1 The thermal switch is located on the side of will also be necessary to obtain a replacement the thermostat housing on early OHV engine 5.18 Removing the timing belt from the kit. This kit contains a modified belt cover and models and in the thermostat housing cover camshaft sprocket - CVH engine related parts to suit the later type pump which on later OHV versions. On all CVH engines, the is now the only type supplied. switch is located in the thermostat housing. If
5.19 Removing the timing belt tensioner - 5.21a Undo the four bolts . . . 5.21b . . . and remove the water pump - CVH engine CVH engine Cooling, heating and ventilation systems 3·7
the operation of the radiator fan is suspect, the Refitting
thermal switch may be tested as follows. 10 Heater controls - removal and 3 To refit, smear the threads of the sender
2 Disconnect the wiring plug and bridge the unit with jointing compound and screw it into refitting
two plug terminals with a length of wire or the cylinder head securely.
suitable metal
object . The fan should now 4 Reconnect the wiring and top-up the Pre-1986 models
operate with the ignition switched on. If it cooling system as described in Chapter 1.
does, the thermal switch is proved faulty and
must be renewed. If the fan still does not Removal
operate, check the appropriate fuses, wiring 8 Heating and ventilation system - 1 Working inside the vehicle, remove the
and connections. If these are satisfactory it is description
dash lower
trim panel from the right-hand
likely that the fan motor itself is faulty. side. The panel is secured by two metal
tags The heater is of the type which utilises and two clips.
Removal waste heat from the engine coolant. The 2 Detach the air ducts from the right-hand
Note: A new sealing washer will be required coolant is pumped through the matrix in the side of the heater casing and swivel them to
on refitting. heater casing where air, force-fed by a
duplex clear the control cables.
3 To renew the thermal switch wait until the radial fan, disperses the heat into the vehicle 3 Disconnect the control cables from the
engine is cold, then remove the pressure cap interior. heater casing.
on the thermostat housing or expansion tank
Fresh air enters the heater or the ventilator 4
Giving a sharp jerk, pull the knobs from the ducts through the
grille at the rear of the
as applicable. control levers on the facia panel, then press bonnet lid. Air is extracted from the interior of
4 Place a container beneath the thermostat the control
indicator plate downwards and the vehicle through outlets at the rear edges
housing to
collect the small
amount of coolant of the
doors . remove it.
that will be released when the switch is There are differences between the heater 5 Unscrew and remove the two screws which
removed. used on Base models and other versions in are now exposed and which hold the control
5 Disconnect the wiring plug and unscrew the the Escort range. On Base models, a two- lever assembly in position.
switch from its location. speed fan switch is used instead of the three- 6 Carefully withdraw the control unit with the position switch used on other versions. On all cables from the facia and disconnect the wire
Refitting models except the Base
version , central and from the illumination lamp.
6 Using a new sealing washer, refit and side window vents are
incorporated in the
tighten the switch securely. Fit the wiring plug facia panel. 1986 models onwards
and top-up the system as described in The heater/ventilator controls are of lever
Chapter 1. type or rotary type on later models, operating Removal through cables to
flap valves which deflect the 7 Pull the air ducts off the heater on the right- 3 air
flowing through the heater both to
vary the hand side and move them clear. 7 Temperature gauge sender temperature and to distribute the air between 8 Detach the right-hand cable from the heater unit - removal and refitting the footwell and demister outlets. casing and temperature control flap lever. 9 Pull the cover off the left-hand actuating
Note: Suitable jointing compound will be lever and detach the cable from the heater
required on refitting. 9 Heater controls - adjustment casing and air distribution flap lever.
Removal 10 Pull off the heater control knobs and undo 1 On heaters with lever control, set both the two screws, one located under each outer
1 With the engine cold unscrew the pressure control levers approximately 2.0 mm up from control knob, then remove the control panel
cap on the thermostat housing or expansion their lowest setting. On heaters with rotary bezel. Remove the centre vents.
tank as applicable, then refit it. This will controls set the controls just off the COLD 11 Undo the two control panel screws and
release any residual pressure in the system and CLOSED positions. withdraw the panel with cables, through the
and minimise coolant loss when the sender 2 Release the securing bolts on the cable aperture.
unit is removed. clamps and pull the temperature control and
2 Disconnect the wiring and unscrew the air direction flap valve arms to the COLD and Refitting (all models)
sender unit located on the forward facing side CLOSED positions respectively (see 12 Refitting is a reversal of removal. On
of the cylinder head, below the thermostat illustration). Check to see that the setting of completion adjust as described in the
housing on OHV engines, or adjacent to the the levers or rotary knobs on the control panel preceding Section.
thermostat housing on CVH engines (see has not changed and retighten the cable
illustrations). clamps.
7.2a Temperature gauge sender unit 7.2b Temperature gauge sender unit 9.2 Heater control cable connections location in cylinder head - OHV engines location in cylinder head - CVH engines (arrowed) - pre-1986 models 3·8 Cooling, heating and ventilation systems
11 Heater - removal and refitting
Removal
1 Disconnect the battery negative lead.
2 Refer to Chapter 11 and remove the centre
console.
3 Working within the engine compartment,
disconnect the coolant hoses from the heater
pipe stubs at the rear bulkhead (see
illustration). Raise the ends of the hoses to
minimise loss of coolant. 11.3 Coolant hose connections at heater 11.9 Heater mounting nut location - left-
4 The heater matrix will still contain coolant pipe stubs hand side
and should be drained by blowing into the
upper heater pipe stub and catching the 12 Heater matrix - removal and 13 Heater motor/fan - removal
coolant which will be ejected from the lower refitting and refitting
one.
5 Remove the cover plate and gasket from
around the heater pipe stubs. This is held to Removal Removal
the bulkhead by two self-tapping screws. 1 With the heater removed from the vehicle 1 Open the bonnet, disconnect the battery
6 Working inside the vehicle, remove the as previously described, extract the two and pull off the rubber seal which seals the air
dash lower trim panels from both sides. The securing screws and slide the matrix out of inlet duct to the bonnet lid when the lid is the heater casing. closed.
panels are held in position by clips and tags. 2 If further dismantling is necessary, cut the 2 Prise off the five spring clips from the
7 Pull the air distribution ducts from the casing seal at the casing joint, prise off any plenum chamber cover and detach the cover
heater casing and swivel them as necessary securing clips and separate the two halves of at the front.
to clear the control cables. the casing. 3 Disconnect the wiring harness multi-plug,
8 Disconnect the control cables from the 3 Remove the air flap valves. It should be and the earth lead at its body connection
heater casing and the flap arms. noted that the lever for the air distribution adjacent to the heater pipe stub cover plate valve can only be removed when the mark on
9 Remove the two heater mounting nuts and on the engine compartment bulkhead. the lever is in alignment with the one on the
lift the heater assembly out of the vehicle, gearwheel (see illustration). 4 Unscrew and remove the fan housing
taking care not to
spill any remaining coolant 4 If the heater matrix is leaking, it is best to mounting nuts and lift the housing from the
on the
carpet (see illustration). obtain a new or reconditioned unit. Home engine compartment (see illustration). repairs are seldom successful. A blocked 5 Insert the blade of a screwdriver and prise
Refitting matrix can sometimes be cleared using a cold off the securing clips so that the fan covers
10 Refitting is a reversal of removal. Check water hose and reverse flushing, but avoid the can be removed (see illustration). use of searching chemical cleaners. 6 Remove the
resistor and lift out the
that the heater casing seal to the cowl is in motor/fan assembly.
good order, otherwise renew it. Adjust the Refitting
heater controls on completion as described in 5 Reassembly is a reversal of removal. Take Refitting
Section 9. care not to damage the fins or tubes of the 7 Reassembly and refitting are reversals of
11 Top-up the cooling system (see "Weekly matrix when inserting it into the casing. Refit dismantling and removal.
checks") and reconnect the battery. the heater with reference to Section 11.
12.3 Air distribution valve lever and gear 13.4 Heater motor/fan assembly - viewed 13.5 Prising off a heater fan cover clip marks (arrowed) with cover removed 4A·1
Chapter 4 Part A:
Carburettor fuel system
Contents
Accelerator pedal - removal and refitting . . . . . . . . . . . . . . . . . . . . . .8 Fuel pump - cleaning . . . . . . . . . . . . . . . . . . . . . . . . . . . . . . . . . . . . .4
Air cleaner air temperature control - description and testing . . . . . . .3 Fuel pump - testing, removal and refitting . . . . . . . . . . . . . . . . . . . . .5
Air cleaner assembly - removal and refitting . . . . . . . . . . . . . . . . . . .2 Fuel tank - removal and refitting . . . . . . . . . . . . . . . . . . . . . . . . . . . . .6
Air cleaner element renewal . . . . . . . . . . . . . . . . . . . . .See Chapter 1 General information and precautions . . . . . . . . . . . . . . . . . . . . . . . . .1
Carburettor overhaul - general information . . . . . . . . . . . . . . . . . . .17 Idle speed and mixture adjustment . . . . . . . . . . . . . . . .See Chapter 1
Choke control cable - removal, refitting and adjustment . . . . . . . . . .9 Throttle cable - adjustment, removal and refitting . . . . . . . . . . . . . . .7
Ford VV carburettor - adjustment . . . . . . . . . . . . . . . . .See Chapter 1 Weber 2V carburettor - adjustment . . . . . . . . . . . . . . . . . . . . . . . . .13
Ford VV carburettor - removal and refitting . . . . . . . . . . . . . . . . . . .12 Weber 2V carburettor - removal and refitting . . . . . . . . . . . . . . . . . .16
Ford VV carburettor automatic choke components - removal, Weber 2V carburettor automatic choke unit - adjustment . . . . . . . .14 checking and refitting . . . . . . . . . . . . . . . . . . . . . . . . . . . . . . . . . .11 Weber 2V carburettor automatic choke unit - removal, checking
Ford VV carburettor manual choke unit - removal, checking and and refitting . . . . . . . . . . . . . . . . . . . . . . . . . . . . . . . . . . . . . . . . . .15 refitting . . . . . . . . . . . . . . . . . . . . . . . . . . . . . . . . . . . . . . . . . . . . .10
Degrees of difficulty Easy, suitable for Fairly easy, Fairly difficult, Difficult, suitable Very difficult, novice with little suitable for suitable for for experienced suitable for expert experience beginner with competent DIY DIY mechanic DIY or professional some experience mechanic 4A
Specifications
Fuel pump
Type . . . . . . . . . . . . . . . . . . . . . . . . . . . . . . . . . . . . . . . . . . . . . . . . . . . . Mechanically-operated by eccentric on camshaft
Delivery pressure . . . . . . . . . . . . . . . . . . . . . . . . . . . . . . . . . . . . . . . . . . 0.24 to 0.38 bar (3.5 to 5.5 lbf/in2)
Carburettor
Type . . . . . . . . . . . . . . . . . . . . . . . . . . . . . . . . . . . . . . . . . . . . . . . . . . . . Ford variable venturi (VV) or Weber 2V
Application: 1.1 litre OHV engine . . . . . . . . . . . . . . . . . . . . . . . . . . . . . . . . . . . . . . Ford VV 1.1 litre CVH engine . . . . . . . . . . . . . . . . . . . . . . . . . . . . . . . . . . . . . . Ford VV 1.1 litre HCS engine . . . . . . . . . . . . . . . . . . . . . . . . . . . . . . . . . . . . . . Weber 2V TLDM 1.3 litre OHV engine . . . . . . . . . . . . . . . . . . . . . . . . . . . . . . . . . . . . . . Ford VV 1.3 litre HCS engine . . . . . . . . . . . . . . . . . . . . . . . . . . . . . . . . . . . . . . Weber 2V TLDM 1.3 litre CVH engine . . . . . . . . . . . . . . . . . . . . . . . . . . . . . . . . . . . . . . Ford VV 1.4 litre CVH engine . . . . . . . . . . . . . . . . . . . . . . . . . . . . . . . . . . . . . . Weber 2V DFTM 1.6 litre CVH engine (except XR3 models): Up to 1986 . . . . . . . . . . . . . . . . . . . . . . . . . . . . . . . . . . . . . . . . . . . Ford VV 1986 on . . . . . . . . . . . . . . . . . . . . . . . . . . . . . . . . . . . . . . . . . . . . . . Weber VV TLD 1.6 litre CVH engine (XR3 models) . . . . . . . . . . . . . . . . . . . . . . . . . . . Weber 2V DFT
Choke type: All models up to 1984 . . . . . . . . . . . . . . . . . . . . . . . . . . . . . . . . . . . . . Automatic 1.1 and 1.3 litre engines, 1984 on . . . . . . . . . . . . . . . . . . . . . . . . . . . . Manual 1.4 and 1.6 litre engines, 1984 on . . . . . . . . . . . . . . . . . . . . . . . . . . . . Automatic
Ford carburettor specification
Idle speed (Cooling fan on): Manual transmission . . . . . . . . . . . . . . . . . . . . . . . . . . . . . . . . . . . . . . 750 to 850 rpm Automatic transmission . . . . . . . . . . . . . . . . . . . . . . . . . . . . . . . . . . . 850 to 950 rpm
Idle mixture CO content . . . . . . . . . . . . . . . . . . . . . . . . . . . . . . . . . . . . . 1.0 to 2.0% 4A·2 Carburettor fuel system
Weber carburettor specification
Weber 2V DFTM:
Idle speed (cooling fan on) . . . . . . . . . . . . . . . . . . . . . . . . . . . . . . . . . . . 750 to 850 rpm
Idle mixture CO content . . . . . . . . . . . . . . . . . . . . . . . . . . . . . . . . . . . . . 1.25 to 1.75%
Throttle kicker speed . . . . . . . . . . . . . . . . . . . . . . . . . . . . . . . . . . . . . . .
1250 to 1350 rpm
Fast idle speed . . . . . . . . . . . . . . . . . . . . . . . . . . . . . . . . . . . . . . . . . . . . 2600 to 2800 rpm
Choke pull-down . . . . . . . . . . . . . . . . . . . . . . . . . . . . . . . . . . . . . . . . . . 2.7 to 3.2 mm
Float
height . . . . . . . . . . . . . . . . . . . . . . . . . . . . . . . . . . . . . . . . . . . . . . . 7.5 to 8.5 mm
Primary Secondary
Venturi diameter . . . . . . . . . . . . . . . . . . . . . . . . . . . . . . . . . . . . . . . . . . . 21 mm 23 mm
Air correction jet . . . . . . . . . . . . . . . . . . . . . . . . . . . . . . . . . . . . . . . . . . . 200 165
Emulsion tube . . . . . . . . . . . . . . . . . . . . . . . . . . . . . . . . . . . . . . . . . . . . . F22 F60
Idle jet . . . . . . . . . . . . . . . . . . . . . . . . . . . . . . . . . . . . . . . . . . . . . . . . . . . 42 60
Main jet . . . . . . . . . . . . . . . . . . . . . . . . . . . . . . . . . . . . . . . . . . . . . . . . . . 102 125
Weber 2V TLD:
Idle speed (cooling fan on): Manual transmission . . . . . . . . . . . . . . . . . . . . . . . . . . . . . . . . . . . . . . 750 to 850 rpm Automatic transmission . . . . . . . . . . . . . . . . . . . . . . . . . . . . . . . . . . . 850 to 950 rpm
Idle mixture CO content . . . . . . . . . . . . . . . . . . . . . . . . . . . . . . . . . . . . . 1.0 to 2.0%
Throttle kicker speed . . . . . . . . . . . . . . . . . . . . . . . . . . . . . . . . . . . . . . . 1050 to 1150 rpm
Fast idle speed: Manual transmission . . . . . . . . . . . . . . . . . . . . . . . . . . . . . . . . . . . . . . 1850 to 1950 rpm Automatic transmission . . . . . . . . . . . . . . . . . . . . . . . . . . . . . . . . . . . 1950 to 2050 rpm
Choke pull-down: Manual transmission . . . . . . . . . . . . . . . . . . . . . . . . . . . . . . . . . . . . . . 4.0 to 5.0 mm Automatic transmission . . . . . . . . . . . . . . . . . . . . . . . . . . . . . . . . . . . 3.5 to 4.5 mm
Float height . . . . . . . . . . . . . . . . . . . . . . . . . . . . . . . . . . . . . . . . . . . . . . . 28.5 to 29.5 mm Primary Secondary
Venturi diameter . . . . . . . . . . . . . . . . . . . . . . . . . . . . . . . . . . . . . . . . . . . 21 mm 23 mm
Air correction jet . . . . . . . . . . . . . . . . . . . . . . . . . . . . . . . . . . . . . . . . . . . 185 125
Emulsion tube . . . . . . . . . . . . . . . . . . . . . . . . . . . . . . . . . . . . . . . . . . . . . F105 F71
Main jet: Manual transmission . . . . . . . . . . . . . . . . . . . . . . . . . . . . . . . . . . . . . . 117 127 Automatic transmission . . . . . . . . . . . . . . . . . . . . . . . . . . . . . . . . . . . 115 130
Weber 2V DFT:
Idle speed (cooling fan on) . . . . . . . . . . . . . . . . . . . . . . . . . . . . . . . . . . . 750 to 850 rpm
Idle mixture CO content . . . . . . . . . . . . . . . . . . . . . . . . . . . . . . . . . . . . . 1.0 to 1.5%
Fast idle speed . . . . . . . . . . . . . . . . . . . . . . . . . . . . . . . . . . . . . . . . . . . . 2600 to 2800 rpm
Choke pull-down . . . . . . . . . . . . . . . . . . . . . . . . . . . . . . . . . . . . . . . . . . 5.2 to 5.8 mm
Choke phasing . . . . . . . . . . . . . . . . . . . . . . . . . . . . . . . . . . . . . . . . . . . . 1.5 to 2.5 mm
Float height . . . . . . . . . . . . . . . . . . . . . . . . . . . . . . . . . . . . . . . . . . . . . . . 34.5 to 35.5 mm Primary Secondary
Venturi diameter . . . . . . . . . . . . . . . . . . . . . . . . . . . . . . . . . . . . . . . . . . . 24 25
Air correction jet . . . . . . . . . . . . . . . . . . . . . . . . . . . . . . . . . . . . . . . . . . . 160 150
Emulsion tube . . . . . . . . . . . . . . . . . . . . . . . . . . . . . . . . . . . . . . . . . . . . . F30 F30
Idle jet . . . . . . . . . . . . . . . . . . . . . . . . . . . . . . . . . . . . . . . . . . . . . . . . . . . 50 60
Main jet . . . . . . . . . . . . . . . . . . . . . . . . . . . . . . . . . . . . . . . . . . . . . . . . . . 115 125
Weber 2V TLDM:
Idle speed (fan on) . . . . . . . . . . . . . . . . . . . . . . . . . . . . . . . . . . . . . . . . . 700 to 800 rpm
Idle mixture (CO content) . . . . . . . . . . . . . . . . . . . . . . . . . . . . . . . . . . . . 0.5 to 1.5%
Fast idle speed: 1.1 litre . . . . . . . . . . . . . . . . . . . . . . . . . . . . . . . . . . . . . . . . . . . . . . . . 2800 rpm 1.3 litre . . . . . . . . . . . . . . . . . . . . . . . . . . . . . . . . . . . . . . . . . . . . . . . . 2500 rpm
Float height . . . . . . . . . . . . . . . . . . . . . . . . . . . . . . . . . . . . . . . . . . . . . . . 28.0 to 30.0 mm Primary Secondary
Venturi diameter . . . . . . . . . . . . . . . . . . . . . . . . . . . . . . . . . . . . . . . . . . . 26 28
Main jet: 1.1 litre . . . . . . . . . . . . . . . . . . . . . . . . . . . . . . . . . . . . . . . . . . . . . . . . 92 122 1.3 litre . . . . . . . . . . . . . . . . . . . . . . . . . . . . . . . . . . . . . . . . . . . . . . . . 90 122
Emulsion tube . . . . . . . . . . . . . . . . . . . . . . . . . . . . . . . . . . . . . . . . . . . . . F113 F75
Air correction jet: 1.1 litre . . . . . . . . . . . . . . . . . . . . . . . . . . . . . . . . . . . . . . . . . . . . . . . . 195 155 1.3 litre . . . . . . . . . . . . . . . . . . . . . . . . . . . . . . . . . . . . . . . . . . . . . . . . 185 130 Carburettor fuel system 4A·3
Fuel requirement
Fuel octane rating: All except HCS engines . . . . . . . . . . . . . . . . . . . . . . . . . . . . . . . . . . . 97 RON (four-star) HCS engines . . . . . . . . . . . . . . . . . . . . . . . . . . . . . . . . . . . . . . . . . . . . 97 RON (four-star) or 95 RON (unleaded)
Torque wrench settings Nm lbf ft
Carburettor to manifold . . . . . . . . . . . . . . . . . . . . . . . . . . . . . . . . . . . . . 17 to 21 12 to 15
Fuel pump . . . . . . . . . . . . . . . . . . . . . . . . . . . . . . . . . . . . . . . . . . . . . . . 16 to 20 11 to 14
Inlet manifold . . . . . . . . . . . . . . . . . . . . . . . . . . . . . . . . . . . . . . . . . . . . . 16 to 20 11 to 14
Exhaust manifold . . . . . . . . . . . . . . . . . . . . . . . . . . . . . . . . . . . . . . . . . . 14 to 17 10 to 12
Exhaust downpipe to manifold . . . . . . . . . . . . . . . . . . . . . . . . . . . . . . . . 35 to 40 25 to 29
U-bolt clamps . . . . . . . . . . . . . . . . . . . . . . . . . . . . . . . . . . . . . . . . . . . . . 35 to 40 25 to 29
Downpipe to front section connecting flange . . . . . . . . . . . . . . . . . . . . . 35 to 47 25 to 34
Warning: Many of the procedures Refitting 1 General information and in this Chapter entail the removal 8 Refitting is a reversal of removal. precautions of fuel pipes and connections which may result in some fuel The fuel system on all models with spillage. Before carrying out any operation 3 Air cleaner air temperature
carburettor induction is composed of a on the fuel system refer to the precautions control - description and testing
centrally mounted fuel tank, a fuel pump, a given in Safety First! at the beginning of
carburettor and an air cleaner. this manual and follow them implicitly. The fuel tank is mounted under the floor Petrol is a highly dangerous and volatile Thermostatically-controlled air
pan beneath the rear seats. The tank is liquid and the precautions necessary cleaner
ventilated, has a simple filler pipe and a fuel when handling it cannot be overstressed 1 On all pre-1986 models and certain models
gauge sender unit. from 1986 onwards, the air cleaner is The fuel pump is a mechanical diaphragm 2 Air cleaner assembly - removal thermostatically-controlled by a vacuum
type actuated by means of a pushrod bearing and refitting operated system to provide air at the most
on an eccentric cam on the camshaft. The suitable temperature for combustion with
pump is a sealed unit and cannot be minimum emission levels.
dismantled. Removal 2 This is accomplished by
drawing in cold air The carburettor may be either a Ford variable 1 Disconnect the battery negative terminal. from an inlet at the front of the car, and hot air
venturi (VV) type or one of four versions of the 2 Disconnect the crankcase ventilation hoses from a
collector box on the exhaust manifold
Weber 2V type, depending on model. which are accessible from above, from the air The air cleaner has a thermostatically or and blending them. The
proportion of hot and 4A cleaner body (see illustration). cold air is varied by the position of a flap valve
waxstat-controlled air inlet, supplying either 3 Disconnect the cold air inlet hose from the in the inlet spout which itself is controlled by a
hot air from the exhaust manifold heat box or end of the air cleaner spout where applicable vacuum diaphragm. The vacuum pressure is
cold air from the front of the engine (see illustration).
compartment. On the thermostatically- regulated by a heat sensor located within the 4 Where fitted, on CVH engines, pull out the air cleaner body to ensure that the
controlled type, a flap valve within the air crankcase emission valve from the underside appropriate degree of inlet manifold vacuum
cleaner unit regulates the air inlet temperature of the air cleaner body. is applied to the flap valve, thus maintaining
according to operating conditions in 5 Undo the retaining screws or bolts on the the air temperature within the preset
limits .
conjunction with a vacuum diaphragm unit
and a heat sensor unit. On the waxstat air air cleaner lid and lift the unit off the 3 To check the thermostatic control of the air
cleaner, being progressively introduced from carburettor. cleaner the engine must be cold. First observe
1986 onwards the air cleaner operates in the 6 On 1.1 and 1.3 litre HCS engines, unclip the the position of the flap valve which should be
same way as the thermostatically-controlled fuel trap from the side of the air cleaner fully closed prior to starting the engine (see
type, but the flap valve is controlled by a wax casing. illustration). The flap valve can be observed
capsule. The capsule is mounted in the inlet 7 According to model, disconnect the using a mirror after disconnecting the inlet hose.
spout and operates the flap valve by vacuum hose and the remaining crankcase
expansion and contraction of the wax which ventilation hose(s) as applicable, then remove
varies according to temperature. the air cleaner from the engine.
3.3 Thermostatically controlled air cleaner operation under low vacuum conditions A Vacuum hose to heat sensor B Vacuum diaphragm C Diaphragm 2.2 Disconnecting the crankcase 2.3 Cold air inlet hose removal from air D Flap valve closed ventilation hose at the air cleaner body cleaner spout F Cold air inlet 4A·4 Carburettor fuel system
3.4 Thermostatically-controlled air cleaner 3.15 Waxstat type air cleaner components 4.3 CVH engine fuel pump filter operation under high vacuum conditions in air cleaner spout components A Vacuum hose to heat sensor A Wax capsule B Flap valve A Pump cover B Filter B Vacuum diaphragm C Diaphragm 14 To test the unit the engine must initially be D Flap valve open cold. 5 Fuel pump - testing, removal E Hot air inlet 15 Remove the manifold-to-air cleaner hot air and refitting hose and observe the position of the flap
4 Start the engine and check that the flap valve which should be open to allow only hot Note: Refer to the warning at the end of
valve opens fully at idle speed to allow only air to enter (see illustration). Section 1 before proceeding.
hot air from the manifold to enter the air 16 Refit the hose and warm up the engine to
cleaner (see illustration). normal operating temperature. Testing
5 Should the flap valve remain in the closed 17 Remove the hot air hose again and check 1 The fuel pump may be quite simply tested
position once the engine is started, then the the position of the flap valve. With the engine by disconnecting the fuel inlet pipe from the
diaphragm unit or the heat sensor is at fault at normal operating temperature the flap carburettor and placing its open end in a
and should be tested to isolate the defective should be closed to admit only cold air into container.
unit. the air cleaner. 2 Disconnect the LT lead from the negative
6 Make sure that all vacuum lines are secure 18 If this is not the case the waxstat is terminal of the ignition coil to prevent the
and free from leaks as a final check. defective and the air cleaner must be renewed engine firing.
7 To check the operation of these as the waxstat is not available separately. 3 Actuate the starter motor. Regular well-
components a vacuum pump is required. If 19 Refit the hot air hose on completion of the defined spurts of fuel should be seen being
one is available proceed as follows, if not, checks. ejected from the open end of the fuel inlet
have the tests carried out by a dealer. pipe.
8 Detach the diaphragm-to-heat sensor 4 Where this is not evident and yet there is
vacuum line at the sensor end and connect a 4 Fuel pump - cleaning fuel in the tank, the pump is in need of
vacuum pump to the diaphragm unit. Apply a renewal. The pump is a sealed unit and
vacuum up to 100 mm (4.0 in) of
mercury and cannot be dismantled or repaired.
retain this whilst checking the flap valve. Note: Refer to the warning at the end of
9 If the flap valve is now open, then the heat Section 1 before proceeding. Removal
sensor is faulty and must be renewed. If the 1 On certain early models the fuel pump has 5 On OHV and HCS engines, the fuel pump is
valve remains shut, the diaphragm unit is a detachable cover allowing access to the mounted on the cylinder block and is actuated
faulty and a new air cleaner will have to be internal filter for cleaning. If this type of pump by a lever which is in direct contact with an
obtained, as the diaphragm unit is not is fitted (identified by a raised cover secured eccentric cam on the camshaft.
available separately. with a screw) the filter can be cleaned as 6 On CVH engines, the fuel pump is mounted
10 After the checks, disconnect the vacuum follows. on the cylinder head and is actuated by a
pump and reconnect the vacuum line and inlet 2 Place a piece of rag around the pump body pushrod from an eccentric cam on the
hose. to catch the fuel which will drain out when the camshaft. cover is removed.
Waxstat-controlled air cleaner 3 Unscrew and remove the single cover
11 From 1986 onwards the waxstat type air screw and lift off the cover (see illustration).
cleaner is being progressively introduced to 4 Take out the rubber sealing ring and the
replace the thermostatically-controlled type filter screen from inside the cover.
used previously. 5 Clean the screen by brushing it in clean fuel,
12 The waxstat air cleaner performs the then fit it into the cover, noting the projections
same hot and cold air blending operation on some screens which centralise it.
using a flap valve as described previously, but 6 Fit the sealing ring. If it is not in good order,
the flap valve is controlled by a wax capsule renew it.
and is not
dependent on manifold vacuum. 7 Locate the cover on the pump body. On
13 When the engine is cold the wax in the some pumps, the cover is correctly installed
capsule contracts and the flap valve is pulled when the notch in the cover engages in the
back to shut off the cold air inlet. As engine groove in the pump body.
ambient temperature rises the wax expands 8 Screw in the retaining screw, but do not
and the flap is opened to admit only cold air overtighten it provided it is making a good 5.7 CVH engine fuel pump removal
into the air cleaner. seal. Carburettor fuel system 4A·5
5.9 Removing the fuel pump push-rod 5.10 Fuel pump connections on 1.1 and 6.3 Fuel tank flexible hose connections at 1.3 litre HCS engines front of tank A Inlet from tank
7 To remove the pump, disconnect and plug 7 Lower the tank until the fuel hoses can be B Outlet to carburettor
the fuel inlet and outlet hoses (and on HCS detached from the sender unit and from their C Return to tank
engines, the fuel return hose) at the pump and retaining clips. On 1986 models onwards
then unbolt it from the engine (see disconnect the small bore vent pipe located
illustration). Note the fuel hose connections 2 As there is no drain plug incorporated in the on the top face of the tank (see illustration).
to ensure correct reconnection on refitting. tank, the best time to remove it is when it is Lower the tank fully and remove it from under
8 Retain any insulating spacers and remove nearly empty. If this is not possible, syphon as the car.
and discard the flange gaskets. much fuel as possible from the tank into a
9 On CVH engines, withdraw the push-rod container which can be sealed, but before Refitting
(see illustration). doing so, observe the following precautions: 8 If the tank is to be cleaned out, repaired or a) Disconnect the battery, negative lead first. renewed, remove the sender unit. To do this,
Refitting unscrew the unit in an anti-clockwise direction b) Do not smoke or bring
naked lights near .
10 Refitting is a reversal of removal, but use c) Avoid placing the vehicle over an using the special tool (23-014) or a suitable
new flange gaskets. If crimped type hose clips inspection pit as the fuel vapour is heavier lever engaged behind the tabs.
were used originally, these will have been than air. 9 If the tank contains sediment or water,
destroyed when disconnecting the fuel hoses. 3 With the rear of the vehicle raised and clean it out by shaking vigorously using
Renew them with conventional nut and screw supported securely, disconnect the flexible paraffin as a solvent. After several changes,
type clips. Ensure that the fuel hoses are hose connection between the sections of rigid
rinse out finally with petrol. 4A
correctly reconnected as noted before fuel line at the front face of the tank (see 10 If the tank is leaking, leave repair to a
removal (see illustration). illustration). On some models
dual pipelines specialist company. Attempting to weld or are used, the second one being a fuel return solder the tank without it first having been line which returns excess fuel from the steamed out for several
hours is extremely 6 Fuel tank - removal and refitting carburettor. dangerous. 11 Refit the sender unit using a new sealing 4 Disconnect the electrical leads from the ring.
Note: Refer to the warning at the end of tank sender unit. 12 Refit the tank into the vehicle by reversing
Section 1 before proceeding. 5 Brush away all adhering dirt and disconnect the removal operations. Check all connections the tank filler pipe and vent pipes from the
Removal for leaks after the tank has been partly filled tank pipe stubs (see illustration). with fuel.
1 The fuel tank will normally only need to be Additionally, on 1986 models onwards,
removed if it is severely contaminated with disconnect the filler vent pipe.
sediment or other substance, or requires 6 Support the tank and unscrew the bolts
repair. from the support straps (see illustration).
6.7 Fuel tank assembly A Fuel tank B Vent pipe
6.5 Fuel tank filler and vent pipe locations 6.6 Fuel tank support strap bolt (arrowed) C Fuel filler stub (arrowed) D Fuel gauge sender unit 4A·6 Carburettor fuel system
7.11a Prise out the throttle cable retaining 7.11b . . . then release the cable retainer clip . . . (arrowed)
7.8 Throttle cable attachment at pedal end
9 Working under the bonnet, release the 7 Throttle cable - adjustment, cable from the bulkhead. 8 Accelerator pedal - removal removal and refitting and refitting It is easier to release the cable if an assistant can
Adjustment punch the cable grommet out Removal
1 Disconnect the battery earth lead. from inside the vehicle. 1 The pedal can be removed once the throttle
2 On manual transmission models remove cable has been disconnected from it as
the air cleaner unit, as given in Section 2. 10 Remove the air cleaner (manual described in Section 7.
3 Get an assistant to sit in the driving seat transmission models only). 2 Undo the two pedal support bracket
and fully depress the accelerator pedal, then 11 The cable must now be detached from its retaining bolts and remove the pedal.
whilst it is depressed turn the cable adjuster bracket on the carburettor or, on automatic transmission models, from the throttle cable Refitting
at the carburettor or throttle cable mounting
bracket connection to the point at which the mounting bracket on the right-hand side of 3 Refitting is the reversal of removal but on the engine. Prise out the clip then depress the completion check the throttle cable
linkage is just fully open. four lugs on the retainer simultaneously so adjustment as described in Section 7.
4 Release the accelerator pedal then fully that the retainer can be slid out of its bracket.
depress and release it again and check that Take care not to damage the outer cable. On
when depressed the throttle is fully opened. 1.1 and 1.3 litre HCS engine models, pull the 9 Choke control cable - removal,
Readjust if necessary. securing clip from the support assembly, and refitting and adjustment
5 On completion refit the air cleaner and release the cable from the bracket (see
reconnect the battery earth lead. illustrations). Pre-1986 models
Removal 12 Disconnect the end of the cable from the ball-stud by sliding back the spring retaining Removal
6 Disconnect the battery earth lead. clip (see illustration).
7 Working within the vehicle, remove the 1 Disconnect the battery earth lead.
facia lower insulation panel. Refitting 2 For improved access, remove the air
8 Disconnect the cable from the upper end of 13 Fit the new cable by reversing the removal cleaner unit (Section 2).
the accelerator pedal arm. Do this by sliding procedure, then adjust as described
off the spring clip to release the cable end previously in this Section.
from the ball-stud (see illustration).
9.4 Choke cable attachments at facia - pre-1986 models 7.11c Throttle cable support bracket on 7.12 Release the cable end fitting spring A Bezel D Knob 1.3 litre HCS engine retaining clip B Switch lever E
Coin box A Securing bolt B Securing clip C Knob retaining clip Carburettor fuel system 4A·7
9.9 Choke cable adjustment spacer 9.10 Choke knob pulled out for adjustment 9.11 Choke cable adjustment at dimensions - pre-1986 models with spacer (B) in position - pre-1986 carburettor - pre-1986 models X = 37.0 to 37.5 mm models A Cable clamp bolt Y = 12.0 mm minimum B Outer cable retaining clip C Operating lever
3 At the carburettor end of the cable, loosen Refitting D Cable clamp
the cable clamp bolt, detach the outer cable E Point 22 mm from cable end 8 Refitting is the reversal of removal, but in
securing clip at the choke control bracket and F Full choke stop conjunction with the following adjustment
disconnect the cable. procedure.
4 Working inside the car, remove the coin ensure that there is a small clearance between
box from the lower facia panel (beneath the Adjustment the lever and the "off stop" when the choke
choke control knob) (see illustration). knob is pushed in. 9 From either a flat strip of metal or preferably
5 Remove the clip retaining the cable control metal tubing make up a spacer as shown (see 1986 models onwards
knob and withdraw the knob from the switch illustration).
lever. 10 Pull out the choke and locate the spacer Removal
6 Remove the control switch bezel and then, behind the choke knob. Ensure that the
reaching up underneath the facia withdraw 15 Disconnect the battery earth lead. spacer remains in position throughout the
the switch from the underside of the panel 16 Remove the air cleaner as described in procedure (see illustration).
(through the coin box aperture). Section 2. 11 At the carburettor end, mark the inner
7 The choke cable can now be pulled through 17 At the carburettor end of the cable, loosen cable at a point 22 mm (0.86 in) from the end
the engine bulkhead and the switch removed. using pencil or tape (see illustration). On the cable clamp bolt, detach the outer cable 4A some cables the cable may be kinked for securing clip at the choke control bracket and reference at this point or a
ferrule may be disconnect the cable. On 1.1 and 1.3 litre HCS fitted. engine models, release the outer cable 12 Insert the cable in the cable clamp until securing clamp and unhook the cable end the mark or ferrule is against the edge of the fitting from the choke lever (see illustrations). clamp. Tighten the clamp bolt. 18 Working inside the car remove the 13 Pull the outer cable so that the operating steering column shrouds for access to the lever on the choke is against the "full choke" cable. stop on the housing. Secure the outer cable to 19 From behind the facia disconnect the its bracket, in this position, using the retaining warning light wire from the choke control clip. assembly (see illustration). 14 Remove the spacer and check that the 20 Using a small
probe , depress the locking operating lever contacts the "choke off" stop pin on the underside of the choke knob collar and "full choke" stop on the housing when the and remove the knob (see illustration). 9.17a Releasing the choke cable clamp choke knob is pushed in and pulled out 21 Unscrew the choke control retaining collar bolt (arrowed) respectively. On completion of the adjustment and withdraw the cable from under the facia.
9.17b Choke cable outer cable clamp (A) 9.19 Removing choke assembly warning 9.20 Using a small probe to release choke and end fitting (B) on 1.3 litre HCS engine light wire - 1986 models onwards knob locking pin - 1986 models onwards 4A·8 Carburettor fuel system
10.4 Choke cable clamp bolt (A) and lever 10.5 Choke unit retaining screw locations housing retaining screws (B) - Ford VV - Ford VV carburettor 10.7 Manual choke and lever assembly - carburettor Ford VV carburettor
Pull the cable through the bulkhead and A Choke linkage Checking B Tapered
needle (metering rod)
remove it from inside the car. 6 With the choke removed clean the unit C Pull-down piston
Refitting inside by gently blowing out dust and any dirt D Spring-loaded lever with an air line or
foot pump.
22 Refitting is the reversal of removal, but in does not bind in any position throughout its 7 Using a small screwdriver or thin rod, raise
conjunction with the following adjustment total travel. If binding does occur it may be the pull-down piston and allow it to drop under
procedure. lightly lubricated with "Ballistol
Spray " which its own weight, checking that it falls smoothly
Adjustment to the lower limit of its travel (see illustration). should be available from main Ford dealers. 8 Repeat this check but with the choke Do not use any other lubricant otherwise a
23 With the cable in position in the facia and sludge build-up may occur, and do not allow
routed through the bulkhead, push the choke linkage lever held in various positions. If the piston binds in any position throughout its overspray to contact the pull-down piston or
knob fully in and engage the inner cable end total travel, try cleaning the unit once more linkage. If the metering rod is partially or
with the clamp at the carburettor.
24 Pull the cable through the clamp up to the with an air line, nothing
else , then repeat the completely seized, lubrication will not help
cable ferrule, then tighten the clamp bolt. checks. Under no circumstances attempt to and the choke unit and lever housing should
25 Pull out the choke knob to the full choke ease a sticking piston with lubrication of any be renewed as an assembly.
position and also hold the choke lever on the kind otherwise the calibration of the piston will 10 If both the metering rod and the pull-down
carburettor in the full choke position. Secure be
affected and its operating
characteristics piston are satisfactory but binding was
the cable to the bracket with the clip. radically altered. Check also that the choke noticed when moving the linkage lever, then
26 Check that with the knob pulled fully out control spring leg is seated in its slot in the the central shaft should be lightly lubricated
the choke lever contacts the full choke stop on choke lever (see illustration). If not, carefully from the rear of the choke unit using the
the carburettor and returns fully to the choke slip it back into place. Check the operation of "Ballistol Spray".
off position when the knob is pushed in. On the piston once more and if it still sticks,
models fitted with the Ford VV carburettor, renew the choke unit and lever housing as an Refitting
ensure that there is a small clearance between assembly.
the choke lever and the choke off stop when 11 To refit the choke unit first position a new 9 Check the choke metering rod by carefully gasket onto the carburettor mating face,
the choke knob is pushed fully in. moving the needle bracket through its full locate the choke unit and fit the retaining range of travel using a small screwdriver (see screws. 10 Ford VV carburettor manual illustration). As with the pull-down piston, the 12 When refitting the lever housing, align the choke unit - removal, check should be made with the linkage lever new gasket with the screw holes and with the checking and refitting held in various positions. Ensure that the rod tab of the gasket positioned as shown. With
Note: A new gasket will be required on
refitting.
Removal
1 Disconnect the battery negative lead.
2 Remove the air cleaner (Section 2).
3 Slacken the choke cable clamp bolt at the
choke lever, detach the outer cable securing
clip at the bracket and remove the cable from
the carburettor.
4 Using a suitable Torx type key or socket bit,
undo the three lever housing retaining screws
and withdraw the lever housing, together with
the choke cable bracket from the carburettor
(see illustration).
5 Carefully unscrew the three Torx screws
which secure the main choke unit to the 10.8 Correct position of choke control spring leg - Ford VV carburettor
carburettor and withdraw the choke unit
together with the gasket (see illustration). A Correctly located B Incorrectly located Carburettor fuel system 4A·9
10.9 Checking choke operation - Ford VV 10.12a Correct location of choke lever 10.12b Fitting lever housing to choke unit - carburettor housing gasket with tab (A) positioned as Ford VV carburettor A Linkage lever C Needle shown - Ford VV carburettor B Metering rod bracket
the linkage lever at its mid travel position, fit 4 Mark the bi-metal housing-to-choke body Checking
the lever housing ensuring that the linkage joint with quick-drying paint to ensure correct 13 Carry out the checks described for the
lever engages with the springloaded arm in realignment on reassembly. manual choke unit in Section 10.
the lever housing (see illustrations). 5 Unscrew and remove the three bi-metal
13 Secure the lever housing and choke cable housing retaining screws and withdraw the Refitting
bracket with the three retaining screws. housing and gasket (see illustration). 14 If a new choke unit is to be fitted, it will
14 Reconnect the choke cable and adjust it first be necessary to tap out the securing Refitting
as described in Section 9. screw holes for the bi-metal housing. The
15 Refit the air cleaner (Section 2), reconnect 6 Refitting is a reversal of the removal thread can be tapped out using the retaining
the battery, then adjust the idle speed and procedure. screws which are of the thread-cutting type.
mixture settings (Chapter 1). 7 Use a new gasket between the main body Do not cut the threads with a standard tap. and the bi-metal housing. 15 Refit the choke housing body to the 11 Ford VV carburettor 8 When fitting the bi-metal housing, engage carburettor using a new gasket, then refit the automatic choke the bi-metal coil with the linkage lever centre bi-metal housing as described previously in slot, then loosely fit the three retaining screws, components - removal, this Section. checking and refitting starting with the lower one (see illustration). 4A 9 Before tightening the retaining screws, align the paint mark on the bi-metal body with the 12 Ford VV carburettor - removal choke body marking (see illustration). and refitting
Bi-metal housing 10 Refit the air cleaner as described in
Note: A new gasket will be required on Section 2 and top-up the cooling system as Note: Refer to the warning at the end of
refitting. described in Chapter 1. Section 1 before proceeding. A new gasket must be used on refitting.
Removal Automatic choke unit
1 Disconnect the battery negative lead. Note: A new gasket will be required on Removal
2 Remove the air cleaner as described in refitting. 1 Disconnect the battery negative lead.
Section 2. 2 Remove the air cleaner (Section 2).
3 Release any pressure in the cooling system Removal 3 On automatic choke carburettors, if the
by loosening the pressure cap (see Chapter 1), 11 Remove the bi-metal housing as engine is still hot, depressurise the cooling
then detach the inlet and outlet hoses at the described previously in this Section. system by carefully releasing the pressure cap
automatic choke unit. Clamp the hoses or 12 Carefully remove the three screws within (see Chapter 1). Disconnect the coolant hoses
position them with their ends facing upwards the choke housing body and withdraw the unit from the automatic choke housing and clamp
to minimise coolant leakage. from the carburettor together with the gasket. or plug them to prevent coolant loss.
11.5 Removing the automatic choke bi- 11.8 Automatic choke linkage lever centre 11.9 Alignment marks on choke unit and metal housing slot (arrowed) bi-metal housing Ford VV carburettor 4A·10 Carburettor fuel system
12.4 Carburettor disconnection points for removal - Ford VV carburettor
13.4 Weber 2V carburettor choke linkage position for fast idle adjustment - XR3 models A Choke plates held closed B Throttle held partially open
5 Release the choke valve plates and without A Fuel inlet hose touching the accelerator pedal, start the B Choke cable connections (manual choke engine by just turning the key. Record the version) engine speed shown on the tachometer and C Vacuum pipe
compare the figure with that specified. D Throttle cable attachments 6 Where necessary turn the fast idle screw in E Idle speed adjustment screw or out to adjust the fast idle speed (see F Anti-run-on valve lead illustration). 7 Refit the air cleaner. Fast idle speed (1.4 litre models)
4 Detach the anti-run-on valve lead at the of the hose is closer than 11 mm (0.4 in) to the 8 Adjust the engine idle speed and mixture
carburettor end (see illustration). automatic choke coolant hoses. If this is not settings as previously described, then switch
5 On manual choke models disconnect the done fuel vaporisation can occur under off the engine. Leave the tachometer
choke cable from the lever and the outer certain conditions. connected from the previous operation.
cable from its clamp on the support bracket. 14 On automatic choke models recheck the 9 Undo the four bolts securing the air cleaner
6 Disconnect the distributor vacuum pipe. coolant level. to the carburettor, disconnect the hot and cold
7 Disconnect the throttle cable by pulling the 15 On completion restart the engine and air inlet hoses and lift off the air cleaner.
spring clip to release the end fitting from the check the idle speed and mixture Position the air cleaner clear of the carburettor,
ball-stud and then unscrewing the cable adjustments, as given in Chapter 1. but leave the crankcase breather hoses and
bracket fixing bolt. the vacuum supply hose connected.
8 Disconnect and plug the fuel inlet and, 13 Weber 2V carburettor -
where fitted, the return hose from the adjustment
carburettor. If crimped type hose clips are
used, cut them off and fit screw type clips at
reassembly. Idle speed and mixture
9 Unscrew the two carburettor mounting adjustment
flange nuts and lift the carburettor from the 1 Refer to Chapter 1.
inlet manifold. Remove the idle speed screw if
necessary for access to the nuts. Fast idle speed (XR3 models) 2 Remove the air cleaner as described in
Refitting Section 2.
10 Refitting is a reversal of removal, but 3 Have the engine at normal operating
make sure that a new flange gasket is used on temperature, with a tachometer connected in
perfectly clean mating surfaces. accordance with the manufacturer's
11 On manual choke models readjust the instructions.
choke cable on reconnection, as described in 4 With the engine switched off, partially open
Section 9. the throttle by moving the cable at the
12 When reconnecting the vacuum pipe carburettor. Close the choke plates with the
make sure that the fuel trap is correctly 13.6 Weber 2V carburettor fast idle fingers and hold them closed while the throttle
positioned. adjustment - XR3 models is released. This has the effect of setting the A Choke plates in open position
13 When refitting the fuel inlet hose ensure choke mechanism in the high cam/fast idle B Fast idle adjustment screw
that it is positioned in such a way that no part position (see illustration). Carburettor fuel system 4A·11
13.11 Weber 2V carburettor fast idle 13.16 Weber 2V carburettor fast idle 13.23 Weber 2V carburettor fast idle adjustment - 1.4 litre models adjustment - 1.6 litre models adjustment screw (arrowed) - 1.1 and 1.3 A Choke plates held open A Fast idle cam litre HCS engine models B Fast idle adjustment screw B Fast idle adjustment screw positioned on third step of cam
10 Pull the choke knob fully out and start the clockwise decreases the speed. tamperproof plug from the top of the kicker
engine. 25 On completion, stop the engine, remove body and adjust the unit to give the specified
11 Using a finger on the linkage lever as the test equipment and refit the air cleaner. speed.
shown, hold the choke plate open and note 37 On completion refit the vacuum
the fast idle speed (see illustration). Throttle kicker (1.4 litre models) connections in their original positions,
12 If adjustment is necessary turn the fast 26 Remove the air cleaner as described in reconnect the fan motor multi-plug and refit
idle adjusting screw until the specified speed Section 2. Plug the vacuum supply from the the air cleaner.
is obtained. manifold.
13 On completion refit the air cleaner and 27 Have the engine at normal operating 14 Weber 2V carburettor
disconnect the tachometer. temperature with a tachometer connected in automatic choke unit - accordance with the manufacturer's adjustment
Fast idle speed (1.6 litre models - instructions.
1986 onwards) 28 With the engine running and the idle
14 Remove the air cleaner as described in speed and mixture correctly adjusted, XR3 models
Section 2. manually operate the throttle kicker by lifting 1 Remove the air cleaner as described in 4A
15 Have the engine at normal operating the operating lever upwards. Note the Section 2.
temperature with a tachometer connected in increase in engine speed. 2 Disconnect the electrical lead to the
accordance with the manufacturer's 29 If the increased speed is outside the figure automatic choke.
instructions. given in the Specifications, remove the 3 Unscrew and remove the three screws
16 With the engine stopped, open the throttle tamperproof plug from the top of the kicker which hold the automatic choke housing
linkage slightly by hand and close the choke body and adjust the unit to give the specified cover in position (see illustration). Withdraw
plate until the fast idle adjusting screw lines speed. the cover and bi-metal coil, followed by the
up with the third (
middle ) step of the fast idle 30 Remove the tachometer and refit the air internal heat shield.
cam (see illustration). Release the throttle so cleaner on completion. 4 The choke plate vacuum pull-down should
that the fast idle screw rests on the cam. now be adjusted. To do this, fit a rubber band
Release the choke plate. Throttle kicker (1.6 litre models - 1986 onwards) to the choke plate lever, open the throttle to
17 Without touching the accelerator pedal, allow the choke plates to close and then
start the engine by just turning the key. 31 The throttle kicker is only fitted to models secure the band to keep the plates closed
18 Note the fast idle speed and if adjustment with automatic transmission. (see illustration).
is necessary, turn the fast idle adjusting screw 32 Have the engine at normal operating
until the specified speed is obtained. temperature, with the idle speed and mixture
19 On completion refit the air cleaner and correctly adjusted and with a tachometer
disconnect the tachometer. connected. 33 Disconnect the wiring multi-plug from the
Fast idle speed (1.1 and 1.3 litre radiator cooling fan thermostatic switch in the
HCS engine models) thermostat housing, and bridge the two
20 Adjust the engine idle speed and mixture contacts in the plug using a suitable length of
settings as previously described, then switch wire. This is necessary so that the cooling fan
off the engine. Leave the tachometer runs continuously during adjustment.
connected from the previous operation. 34 Disconnect the vacuum supply at the
21 Remove the air cleaner assembly as throttle kicker and also disconnect the
described in Section 2. vacuum supply to the throttle kicker
22 Hold the choke valve fully open, start the electrically-operated vacuum switch, at the
engine and check the engine speed. manifold take-off. Using a new hose connect
23 Adjust as necessary on the fast idle speed the kicker directly to the manifold.
screw (see illustration). 35 Start the engine and record the rpm. 14.3 Weber 2V carburettor automatic
24 Turning the screw anti-clockwise 36 If the engine speed is outside the figure choke housing cover screw locations -
increases the fast idle speed, turning it given in the Specifications, remove the XR3 models 4A·12 Carburettor fuel system
14.4 Weber 2V carburettor vacuum pull- 14.5 Weber 2V carburettor vacuum pull- 14.7 Weber 2V carburettor choke phasing down check - XR3 models down adjustment - XR3 models check - XR3 models
A Diaphragm connecting push-rod A Twist drill A Fast idle cam
B Rubber band holding choke plates closed B Adjusting the pull-down setting B Fast idle adjustment screw positioned on
C Screwdriver centre step of cam
5 Using a screwdriver, push the diaphragm 7 The choke phasing must now be checked 1.6 litre models - 1986 onwards
open to its stop and measure the clearance and adjusted. Hold the throttle partially open 15 Remove the air cleaner (Section 2).
between the lower edge of the primary choke and set the fast idle cam so that the fast idle 16 Release any pressure in the cooling system
plate and the air
horn using a twist drill or screw is located on the centre step of the by loosening the pressure cap (see Chapter 1),
other gauge rod. Where the clearance is cam. Release the throttle so that the cam is then detach the water inlet and outlet hoses at
outside that specified, remove the plug from held in this position (see illustration). the automatic choke unit. Clamp the hoses or
the diaphragm housing and turn the screw, 8 Push the choke plates downward until the position them with their ends facing upwards to
now exposed, in or out as necessary (see step on the cam jams against the fast idle minimise coolant leakage.
illustration). 17 Undo the three screws and detach the screw. Now measure the clearance between
6 Refit the plug and remove the rubber band. choke bi-metal coil housing followed by the the lower edge of the primary choke plate and the air horn using a twist drill or gauge rod of internal heat shield. suitable diameter. 18 Fit a rubber band to the choke plate lever, 9 Where necessary, bend the tag to adjust open the throttle to allow the choke plate to the clearance (see illustration). close, and then secure the band to keep the 10 Refit the heat shield, making sure that the plate closed (see illustration). 19 Using a screwdriver, push the diaphragm locating peg is correctly engaged in the notch open to its stop and measure the clearance in the housing (see illustration). between the lower edge of the choke plate 11 Offer up the cover and engage the bi- and the air horn using a twist drill or other metal coil with the slot in the choke lever gauge rod. Where the clearance is outside which
projects through the cut-out in the heat that specified, remove the plug from the shield. diaphragm housing and turn the screw, now 12 Screw in the retaining screws finger tight exposed, in or out as necessary. and then rotate the cover to set the cover 20 Fit a new diaphragm housing plug and 14.9 Weber 2V carburettor choke phasing mark opposite the centre index line (see remove the rubber band. adjustment - XR3 models illustration). 21 Refit the heat shield, making sure that the
Bend tag (arrowed) to achieve specified 13 Reconnect the lead to the choke. locating peg is correctly engaged in the notch
clearance 14 Refit the air cleaner. in the housing.
14.10 Weber 2V carburettor heat shield 14.12 Weber 2V carburettor choke housing 14.18 Weber 2V carburettor vacuum pull- reassembly - XR3 models alignment marks - XR3 models down adjustment - 1.6 litre models
A Heat shield A Rich position A Twist drill
B Locating peg engaged with housing notch B Index mark B Diaphragm pushed fully open with rubber C Weak position band holding choke plate closed Carburettor fuel system 4A·13
15.5 Weber 2V carburettor choke housing retaining screw locations - XR3 models
22 Place the bi-metal coil housing in position
with the coil engaged with the slot in the
choke lever which projects through the cut-
out in the heat shield.
23 Screw in the retaining screws finger tight
and then rotate the housing to set the mark
opposite the dot punch mark on the choke
body. Secure the housing.
24 Reconnect the hoses and refit the air
cleaner. 15.6 Exploded view of the Weber 2V carburettor automatic choke unit - XR3 models
25 Check and if necessary top-up the
cooling system as described in Chapter 1. A Housing O-ring C Bi-metal coil E Pull-down diaphragm B Heat shield D Fast idle cam 15 Weber 2V carburettor automatic choke unit - attention to the condition of the pull-down automatic choke unit. Clamp the hoses or diaphragm and the choke housing O-ring position them with their ends facing upwards removal, checking and refitting seal. Renew any parts as necessary. to minimise coolant leakage. Refitting 19 Disconnect the lead at the anti-run-on 4A
XR3 models valve solenoid. 10 Reassemble the choke mechanism shaft, 20 Disconnect the fuel supply and return
Removal linkages, cams and tension springs with hoses at the carburettor. If crimped type hose reference to illustration 15.6 and the notes clips are used, cut them off and use screw
1 Remove the air cleaner (Section 2). type clips at reassembly. made during removal. Secure the shaft with
2 Disconnect the electrical lead to the the retaining nut. 21 Undo the six carburettor upper body
automatic choke. 11 Assemble the components to the vacuum retaining screws and remove the upper body.
3 Undo the three choke housing cover pull-down operating rod and secure with the Note that four of the screws are of the Torx
retaining screws, withdraw the cover and bi- circlip. type and a suitable key or socket bit will be
metal coil, followed by the internal heat shield. 12 Locate the vacuum pull-down diaphragm needed for removal.
4 Undo the six carburettor upper body and operating rod to the choke housing and 22 With the upper body removed, undo the
retaining screws, hold the fast idle operating with the diaphragm laying flat on the housing three screws and remove the choke bi-metal
lever clear of the choke housing and lift off the face refit the cover and secure with the three coil housing followed by the internal heat
upper body. screws. shield.
5 Undo the three screws securing the choke
housing to the upper body, disconnect the 13 Place the O-ring seal on the choke
link rod and remove the choke housing (see housing, then connect the housing to the link
illustration). rod.
6 Undo the three screws and remove the 14 Position the housing on the carburettor
vacuum pull-down housing cover, then upper body and secure with the three screws.
withdraw the spring, diaphragm and operating 15 Refit the upper body to the carburettor.
rod assembly (see illustration). 16 Before refitting the housing cover and bi-
7 Extract the circlip on the end of the vacuum metal coil, refer to Section 14 and adjust the
pull-down operating rod and slide off the rod vacuum pull-down and choke phasing, then fit
components. the cover and bi-metal coil as described.
8 Make a note of the exact position of the
choke mechanism return and tension springs 1.6 litre models - 1986 onwards
then undo the shaft nut, withdraw the shaft
from the choke housing and remove the Removal
linkages and cams. 17 Remove the air cleaner as described in Section 2.
Checking 18 Release any pressure in the cooling 15.23 Weber 2V carburettor pull-down
9 Clean and inspect all the parts for wear, system by loosening the filler cap, then housing cover (A) and choke housing
damage, cracking, or distortion. Pay particular detach the water inlet and outlet hoses at the retaining screws (B) - 1.6 litre models 4A·14 Carburettor fuel system
15.25 Exploded view of the Weber 2V carburettor automatic choke unit - 1.6 litre models 16.3 Weber 2V carburettor disconnection points - XR3 models A Upper choke operating link D Connecting rod and lever B Fast idle cam return spring E Pull-down link A Anti-run-on valve lead C Throttle cable C Connecting rod sleeve F Actuating lever B Electric choke lead
23 Undo the three screws securing the choke refit the cover and secure with the three 5 Disconnect the throttle cable by releasing the
housing to the upper body, disconnect the screws. spring clip securing the end fitting to the ball-
link rod and remove the choke housing (see 29 Locate the O-ring seal on the choke stud, and unscrew the cable bracket fixing bolts.
illustration). housing, then connect the housing to the link 6 Disconnect the fuel inlet and return hoses,
24 Undo the three screws and remove the rod. noting their respective positions, and plug
vacuum pull-down housing cover, then 30 Position the housing on the carburettor them after removal. If crimped type clips are
withdraw the spring, diaphragm and operating upper body and secure with the three screws. used, cut them off and use screw type clips
rod assembly. 31 Refit the upper body to the carburettor. when refitting.
25 Make a note of the exact position of the 32 Before refitting the bi-metal coil housing 7 Undo the four mounting flange nuts and refer to Section 14 and adjust the vacuum washers and withdraw the carburettor from
choke mechanism return and tension springs, pull-down, then fit the coil housing as the inlet manifold.
then undo the nut and remove the connecting
rod, levers and link from the choke housing described. Refitting
(see illustration). 8 Refitting is the reverse sequence to
Checking 16 Weber 2V carburettor - removal, but use a new flange gasket and removal and refitting ensure that the mating surfaces are perfectly
26 Clean and inspect all the parts for wear, clean. Make sure that the vacuum pipe fuel
damage, cracking or distortion. Pay particular Note: Refer to the warning at the end of trap is correctly positioned, and on
attention to the condition of the pull-down Section 1 before proceeding. completion check the idle speed and mixture
diaphragm and the choke housing O-ring settings as described in Chapter 1.
seal. Renew any parts as necessary. XR3 models 1.4 litre models
Refitting Removal 9 The procedure is identical to that just
27 Reassemble the choke mechanism 1 Disconnect the battery negative lead. described for XR3 models except that a
connecting rod, levers, link and springs with 2 Remove the air cleaner as described in manual choke is fitted and the choke inner
reference to illustration 15.25 and the notes Section 2. cable must be released by slackening the
made during removal. Secure the assembly 3 Disconnect the electrical leads at the linkage clamp bolt.
with the retaining nut. electric choke and anti-run-on valve (see 10 Additionally when refitting, observe the
28 Locate the vacuum pull-down diaphragm illustration). following points.
and operating rod in the choke housing. With 4 Disconnect the vacuum pipe at the a) Adjust the choke cable as described in
the diaphragm
lying flat on the housing face, carburettor outlet. Section 9. b) Where applicable, the lead for the anti- run-on valve should be removed from the metal clip which secures it to the carburettor body, re-routed as shown, and taped to the vacuum hose (see illustrations). The metal clip should be discarded, and the securing screw refitted to the carburettor body, ensuring it is fully tightened. 1.6 litre models - 1986 onwards Removal 11 Disconnect the battery negative lead. 12 Remove the air cleaner as described in 16.10a Removing the metal clip (A) 16.10b Correct routing of the anti-run-on Section 2. securing the anti-run-on valve lead (B) - valve lead - 1.4 litre models 13 If the engine is still hot, depressurise the 1.4 litre models A Anti-run-on valve C Lead taped to cooling system by carefully releasing the B Lead vacuum hose pressure cap (see Chapter 1). Carburettor fuel system 4A·15
16.25 Anti-run-on valve solenoid (arrowed) 16.26 Removing a Torx through-bolt - - 1.1 and 1.3 litre HCS engines 1.1 and 1.3 litre HCS engines
16.19 Weber 2V carburettor mounting 1.1 and 1.3 litre HCS engine 25 Disconnect the lead at the anti-run-on through-bolt locations - 1.6 litre models models valve solenoid (see illustration). 26 Remove the four Torx type through-bolts Removal securing the carburettor to the inlet manifold
14 Disconnect the coolant inlet and outlet 21 Disconnect the battery negative terminal. (see illustration).
hoses at the automatic choke and clamp or 22 Remove the air cleaner as described 27 Lift off the carburettor (see illustration).
plug their ends to prevent coolant loss.
15 Disconnect the throttle cable by releasing earlier. Refitting
the spring clip securing the end fitting to the 23 Disconnect the throttle and choke cables
ball-stud, then unscrewing the cable bracket as described in the relevant Sections. 28 Refit in reverse order using a new flange
fixing bolts. 24 Disconnect the fuel inlet hose. If crimped gasket.
16 Disconnect the fuel inlet and return hoses, connections are used cut them off and renew 29 On completion check the idle speed and
noting their respective positions, and plug them with screw type clips. mixture settings as described earlier.
them after removal. If crimped type clips are
used, cut them off and use screw type clips
when refitting. 17.7a Exploded view of the Ford VV
17 Disconnect the distributor vacuum pipe carburettor
and the throttle kicker vacuum pipe on
automatic transmission models. 4A
18 Disconnect the electrical lead at the anti-
run-on valve solenoid.
19 Using a suitable Torx type key or socket
bit, unscrew the four mounting through-bolts
from the top of the carburettor and remove
the unit from the manifold (see illustration).
Refitting
20 Refitting is the reverse sequence to
removal, but use a new flange gasket and
ensure that the mating faces are perfectly
clean. On completion top-up the cooling
system as described in "Weekly checks" and
check the idle speed and mixture settings as
described in Chapter 1.
A Top cover G Air control vacuum M Mixture adjustment screw B Manual choke unit diaphragm housing N Anti-run-on valve solenoid C Lever housing H Air control diaphragm P Idle speed adjustment D Choke cable bracket J Accelerator pump screw E Automatic choke unit diaphragm Q Fuel needle valve F Bi-metal housing K Accelerator pump cover R Float bracket 16.27 Lifting off the carburettor - 1.1 and L Throttle linkage 1.3 litre HCS engines 4A·16 Carburettor fuel system
17.7b Exploded view of Weber 2V DFT carburettor - XR3 models
1 Choke housing cover 2 Vacuum pull-down assembly 3 Upper body 4 Fuel filter 5 Accelerator pump discharge tube 6 Anti-run-on valve solenoid 7 Mixture adjustment screw 8 Accelerator pump assembly 9 Power valve assembly 10 Throttle valve plates 11 Secondary throttle spindle 12 Fast idle adjustment screw 13 Fuel return connection 14 Fuel inlet needle valve 15 Needle valve housing 16 O-ring 17 Idle
jets 18 Combined emulsion tube, air correction and main jets 19 Idle speed adjustment screw 20 Float
check that the throttle cable is correctly Blocked jets or internal passages can be 17 Carburettor overhaul - adjusted, and that the air cleaner element is cleaned using an air line. general information clean. If the carburettor is worn or damaged, it If careful checking of all the preceding should either be renewed or overhauled by a Faults with the carburettor are usually points produces no improvement, the specialist, who will be able to
restore the
associated with dirt entering the float carburettor should be removed for cleaning carburettor to its original calibration.
chamber and blocking the jets, causing a and possible overhaul. Carburettor overhaul
kits are available from
weak mixture or power failure within a certain Complete overhaul of a carburettor is seldom a Ford dealer, but it is worth checking on the
engine speed range. If this is the case, then a required. It will usually be found sufficient to use
cost of a reconditioned or new unit before
thorough clean will normally
cure the problem. a suitable carburettor cleaning
agent to remove contemplating overhaul. Exploded views of If a carburettor fault is suspected, always any fuel deposits and/or dirt. Follow the the carburettors are provided as a guide for instructions supplied with the cleaning agent - those wishing to carry out overhaul (see
check first (where possible) that the ignition most products can be used without removing illustrations).
timing is correct, and that the spark plugs are
in good condition and correctly gapped. Also the carburettor from the vehicle. Carburettor fuel system 4A·17
17.7c Exploded view of Weber 2V DFTM carburettor - 1.4 litre models
4A
A Manual choke assembly F Mixture adjustment screw L Primary emulsion tube
B Vacuum pull-down unit G Accelerator pump assembly M Primary idle jet
C Secondary idle jet H Throttle kicker N Needle valve
D Secondary venturi vacuum unit J Power valve diaphragm P Fuel inlet filter
E Idle speed adjustment screw K Float Q Secondary emulsion tube 4A·18
17.7d Exploded view of Weber 2V TLD carburettor - 1.6 litre models
A Emulsion tubes F Secondary venturi vacuum unit K Throttle kicker (automatic transmission B Air correction jets G Power valve diaphragm models) C Automatic choke assembly H Accelerator pump diaphragm L Needle valve D Vacuum pull-down diaphragm J Mixture adjustment screw M Anti-run-on valve solenoid E Main jets N Fuel inlet filter 4B·1
Chapter 4 Part B:
Bosch K-Jetronic and KE-Jetronic
mechanical fuel injection systems
Contents
Accelerator pedal - removal and refitting . . . . . . . . . . . . . . . . . . . . . .5 Fuel pump - removal and refitting . . . . . . . . . . . . . . . . . . . . . . . . . . .6
Air cleaner - removal and refitting . . . . . . . . . . . . . . . . . . . . . . . . . . .2 Fuel tank - removal and refitting . . . . . . . . . . . . . . . . . . . . . . . . . . . . .3
Air cleaner element renewal . . . . . . . . . . . . . . . . . . . . .See Chapter 1 General information and precautions . . . . . . . . . . . . . . . . . . . . . . . . .1
Auxiliary air device - removal and refitting . . . . . . . . . . . . . . . . . . . .10 Idle speed and mixture adjustment . . . . . . . . . . . . . . . .See Chapter 1
Charge air temperature sensor - removal and refitting . . . . . . . . . .17 Idle speed compensator - removal and refitting . . . . . . . . . . . . . . .19
Cold start valve - removal and refitting . . . . . . . . . . . . . . . . . . . . . . .9 Intercooler - removal and refitting . . . . . . . . . . . . . . . . . . . . . . . . . .22
Electro -magnetic pressure actuator - removal and refitting . . . . . .15 Thermo-time switch - removal and refitting . . . . . . . . . . . . . . . . . . .18
Fuel accumulator - removal and refitting . . . . . . . . . . . . . . . . . . . . . .7 Throttle cable - adjustment, removal and refitting . . . . . . . . . . . . . . .4
Fuel distributor - removal and refitting . . . . . . . . . . . . . . . . . . . . . . .11 Throttle housing - removal and refitting . . . . . . . . . . . . . . . . . . . . . .12
Fuel filter renewal . . . . . . . . . . . . . . . . . . . . . . . . . . . . .See Chapter 1 Turbocharger - general description . . . . . . . . . . . . . . . . . . . . . . . . .20
Fuel injection control module - removal and refitting . . . . . . . . . . . .16 Turbocharger - removal and refitting . . . . . . . . . . . . . . . . . . . . . . . .23
Fuel injectors and delivery pipes - removal and refitting . . . . . . . . . .8 Warm-up regulator - removal and refitting . . . . . . . . . . . . . . . . . . . .14
Fuel pressure regulator - removal and refitting . . . . . . . . . . . . . . . .13 Waste
gate solenoid control valve - removal and refitting . . . . . . . .21
Degrees of difficulty Easy, suitable for Fairly easy, Fairly difficult, Difficult, suitable Very difficult, novice with little suitable for suitable for for experienced suitable for expert experience beginner with competent DIY DIY mechanic DIY or professional 4B some experience mechanic
Specifications
General
System type . . . . . . . . . . . . . . . . . . . . . . . . . . . . . . . . . . . . . . . . . . . . . . Bosch mechanical
continuous injection system
Application: XR3i and XR3i Cabriolet models up to 1990 . . . . . . . . . . . . . . . . . . . Bosch K-Jetronic RS Turbo models . . . . . . . . . . . . . . . . . . . . . . . . . . . . . . . . . . . . . . . . Bosch KE-Jetronic
K-Jetronic system specification
Fuel pump type . . . . . . . . . . . . . . . . . . . . . . . . . . . . . . . . . . . . . . . . . . . . 12 volt electric roller cell type
Fuel pump delivery quantity (minimum) . . . . . . . . . . . . . . . . . . . . . . . . . 0.7 litre (1.32 pints) in 30 seconds
Idle speed (cooling fan on) . . . . . . . . . . . . . . . . . . . . . . . . . . . . . . . . . . . 750 to 850 rpm
Idle mixture CO content . . . . . . . . . . . . . . . . . . . . . . . . . . . . . . . . . . . . . 1.0 to 1.5%
Main system pressure . . . . . . . . . . . . . . . . . . . . . . . . . . . . . . . . . . . . . . . 4.7 to 5.5 bar (68 to 80 lbf/in2)
Control pressure (warm engine) . . . . . . . . . . . . . . . . . . . . . . . . . . . . . . . 3.4 to 3.8 bar (39 to 45 lbf/in2)
Injector valve opening pressure . . . . . . . . . . . . . . . . . . . . . . . . . . . . . . . 3.2 to 4.0 bar (46.4 to 51.5 lbf/in2)
KE-Jetronic system specification
Fuel pump type . . . . . . . . . . . . . . . . . . . . . . . . . . . . . . . . . . . . . . . . . . . . 12 volt electric roller cell type
Fuel pump delivery quantity (minimum): 1985 models . . . . . . . . . . . . . . . . . . . . . . . . . . . . . . . . . . . . . . . . . . . . 1.1 litres (1.9 pints) in 60 seconds 1986 models onwards . . . . . . . . . . . . . . . . . . . . . . . . . . . . . . . . . . . . . 2.5 litres (4.4 pints) in 60 seconds
Idle speed (cooling fan on): 1985 models . . . . . . . . . . . . . . . . . . . . . . . . . . . . . . . . . . . . . . . . . . . . 800 to 900 rpm 1986 models onwards . . . . . . . . . . . . . . . . . . . . . . . . . . . . . . . . . . . . . 920 to 960 rpm
Idle mixture CO content: 1985 models . . . . . . . . . . . . . . . . . . . . . . . . . . . . . . . . . . . . . . . . . . . . 0.25 to 0.75% 1986 models onwards . . . . . . . . . . . . . . . . . . . . . . . . . . . . . . . . . . . . . 0.5 to 1.1%
Main system pressure . . . . . . . . . . . . . . . . . . . . . . . . . . . . . . . . . . . . . . . 5.6 to 6.0 bar (82 to 87 lbf/in2)
Injector valve opening pressure . . . . . . . . . . . . . . . . . . . . . . . . . . . . . . . 3.0 to 4.1 bar (43.5 to 59.5 lbf/in2) 4B·2 Bosch K and KE fuel injection systems
Turbocharger
Type . . . . . . . . . . . . . . . . . . . . . . . . . . . . . . . . . . . . . . . . . . . . . . . . . . . . Garrett AiResearch T3
Maximum
boost pressure . . . . . . . . . . . . . . . . . . . . . . . . . . . . . . . . . . . . 0.45 to 0.55 bar (6.5 to 7.9 lbf/in2)
Solenoid control valve operating range . . . . . . . . . . . . . . . . . . . . . . . . . 2500 to 6000 rpm (approximately)
Fuel requirement
Fuel octane rating . . . . . . . . . . . . . . . . . . . . . . . . . . . . . . . . . . . . . . . . . . 97 RON (four-star)
Torque wrench settings Nm lbf ft
K-Jetronic system
Air cleaner retaining bolts . . . . . . . . . . . . . . . . . . . . . . . . . . . . . . . . . . . . 4 to 5 3 to 4
Fuel distributor-to-sensor plate screws . . . . . . . . . . . . . . . . . . . . . . . . . 32 to 38 24 to 28
Sensor plate-to-air cleaner screws . . . . . . . . . . . . . . . . . . . . . . . . . . . . . 8 to 11 6 to 8
Warm-up regulator bolts . . . . . . . . . . . . . . . . . . . . . . . . . . . . . . . . . . . . . 3 to 5 2 to 4
Cold start valve bolts . . . . . . . . . . . . . . . . . . . . . . . . . . . . . . . . . . . . . . . 3 to 5 2 to 4
Auxiliary air device bolts . . . . . . . . . . . . . . . . . . . . . . . . . . . . . . . . . . . . . 3 to 5 2 to 4
Inlet manifold nuts . . . . . . . . . . . . . . . . . . . . . . . . . . . . . . . . . . . . . . . . . 16 to 20 12 to 15
Throttle housing nuts . . . . . . . . . . . . . . . . . . . . . . . . . . . . . . . . . . . . . . . 8 to 11 6 to 8
Exhaust manifold nuts . . . . . . . . . . . . . . . . . . . . . . . . . . . . . . . . . . . . . . 14 to 17 10 to 13
Exhaust downpipe to manifold . . . . . . . . . . . . . . . . . . . . . . . . . . . . . . . . 35 to 40 25 to 29
Banjo union bolts: Fuel distributor inlet and return . . . . . . . . . . . . . . . . . . . . . . . . . . . . . . 16 to 20 11 to 15 Fuel distributor injector pipes . . . . . . . . . . . . . . . . . . . . . . . . . . . . . . . 5 to 8 4 to 6 Fuel distributor cold start valve feed pipe . . . . . . . . . . . . . . . . . . . . . . 5 to 8 4 to 6 Fuel distributor warm-up regulator feed and return pipes . . . . . . . . . 5 to 8 4 to 6 Warm-up regulator inlet (M10) . . . . . . . . . . . . . . . . . . . . . . . . . . . . . . 11 to 15 8 to 11 Warm-up regulator outlet (M8) . . . . . . . . . . . . . . . . . . . . . . . . . . . . . . 5 to 8 4 to 6 Fuel pump, filter and accumulator . . . . . . . . . . . . . . . . . . . . . . . . . . . 16 to 20 11 to 15
KE-Jetronic system
Air cleaner bolts . . . . . . . . . . . . . . . . . . . . . . . . . . . . . . . . . . . . . . . . . . . 8 to 11 6 to 8
Fuel distributor-to-sensor plate screws . . . . . . . . . . . . . . . . . . . . . . . . . 32 to 38 24 to 28
Cold start valve bolts . . . . . . . . . . . . . . . . . . . . . . . . . . . . . . . . . . . . . . . 8 to 11 6 to 8
Auxiliary air device bolts . . . . . . . . . . . . . . . . . . . . . . . . . . . . . . . . . . . . . 8 to 11 6 to 8
Inlet manifold nuts . . . . . . . . . . . . . . . . . . . . . . . . . . . . . . . . . . . . . . . . . 16 to 20 11 to 15
Throttle housing nuts . . . . . . . . . . . . . . . . . . . . . . . . . . . . . . . . . . . . . . . 8 to 11 6 to 8
Thermo-time switch . . . . . . . . . . . . . . . . . . . . . . . . . . . . . . . . . . . . . . . . 20 to 25 15 to 18
Charge air temperature sensor . . . . . . . . . . . . . . . . . . . . . . . . . . . . . . . . 20 to 25 15 to 18
Air inlet duct to rocker cover . . . . . . . . . . . . . . . . . . . . . . . . . . . . . . . . . 14 to 18 10 to 13
Cold start valve fuel supply pipe . . . . . . . . . . . . . . . . . . . . . . . . . . . . . . 5 to 8 4 to 6
Auxiliary air valve vacuum connection . . . . . . . . . . . . . . . . . . . . . . . . . . 4 3
Fuel pressure regulator unions . . . . . . . . . . . . . . . . . . . . . . . . . . . . . . . . 14 to 20 10 to 15
Fuel distributor unions . . . . . . . . . . . . . . . . . . . . . . . . . . . . . . . . . . . . . . 11 to 15 8 to 11
Fuel pump, filter and accumulator unions . . . . . . . . . . . . . . . . . . . . . . . 16 to 20 11 to 15
Fuel injector pipe unions . . . . . . . . . . . . . . . . . . . . . . . . . . . . . . . . . . . . . 10 to 12 7 to 9
Exhaust manifold to cylinder head . . . . . . . . . . . . . . . . . . . . . . . . . . . . . 14 to 17 10 to 13
Turbocharger to exhaust manifold . . . . . . . . . . . . . . . . . . . . . . . . . . . . . 21 to 26 15 to 19
Exhaust downpipe to turbocharger . . . . . . . . . . . . . . . . . . . . . . . . . . . . 35 to 40 25 to 29
Bosch K-Jetronic system c) Fuel accumulator 1 General information and d) Fuel filter The Bosch K-Jetronic fuel-injection system precautions is of the continuous injection type and e) Fuel distributor/mixture control assembly supplies a precisely controlled quantity of f) Throttle valve (plate) atomised fuel to each cylinder under all g) Injector valves
General information operating conditions. h) Air box (plenum chamber) The fuel system comprises a centrally I) Warm-up regulator This system, when compared with
mounted fuel tank, electrically-operated fuel conventional carburettor arrangements, j) Auxiliary air device
pump and Bosch K-Jetronic or KE-Jetronic achieves a more accurate control of the k) Cold start valve
continuous injection system according to air/fuel mixture resulting in reduced emission l) Thermo-time switch
model. The system is used in conjunction with levels and improved performance. m) Safety module
a turbocharger on RS Turbo models. The main components of the fuel injection n) Fuel shut-off valve A more detailed description of the various system are as follows (see illustration). o) Speed sensor module
system components is given in the following a) Fuel tank The fuel pump is of electrically-operated,
paragraphs. b) Fuel pump roller cell type. Bosch K and KE fuel injection systems 4B·3
1.5 K-Jetronic system main component locations A Warm-up regulator B Speed sensing module C Fuel accumulator (early model location) D Fuel pump E Throttle housing F Cold start valve G Fuel distributor H Fuel filter
4B
The fuel accumulator has two functions, (i) the throttle butterfly. During idling, the
airflow pressure valve. The regulator controls the fuel
to dampen the pulsation of the fuel flow,
lifts the sensor plate which in turn raises a supplied to the control circuit which provides
generated by the pump and (ii) to maintain control
plunger which allows fuel to flow past pressure variations to the fuel distributor
fuel pressure after the engine has been the plunger and out of the metering slits to the control plunger. When the coil springs are
switched off. This prevents a vapour lock injector valves. Increases in engine speed pushing against the control pressure valve
developing with consequent hot starting cause increased airflow which raises the there is a high control pressure and this gives
problems. control plunger and so admits more fuel. a weak mixture. The coil spring pressure The fuel filter incorporates two paper filter The throttle valve assembly is mounted in application is controlled by the bi-metal strip which in turn is activated in accordance with
elements to ensure that the fuel reaching the the main air inlet between the mixture control engine temperature and an electrical heat coil.
injection system components is completely assembly and the air box. The auxiliary air device is located on the
free from dirt. The injector valves are located in the inlet inlet manifold. It consists of a pivoted plate, The fuel distributor/mixture control manifold. bi-metal strip and heater coil. The purpose of
assembly. The fuel distributor controls the The air box is mounted on the top of the this device is to supply an increased volume
quantity of fuel being
delivered to the engine, engine and functions as an auxiliary inlet of fuel/air mixture during cold idling.
ensuring that each cylinder receives the same manifold
directing air from the sensor plate to The start valve system consists of an
amount. The mixture control assembly each
individual cylinder. electrical injector and a thermo-time switch.
incorporates an air sensor plate and control The warm-up regulator is located on the Its purpose is to spray fuel into the air box to
plunger. The air sensor plate is located in the inlet manifold and incorporates two coil assist cold starting, the thermo-time switch
main airstream between the air cleaner and springs, a bi-metal strip and a control regulating the amount of fuel injected. 4B·4 Bosch K and KE fuel injection systems
1.16 K-Jetronic system speed sensing module and fuel pump safety module locations
The safety module is located under the 1.19 KE-Jetronic fuel-injection system layout and components
facia panel on the
driver 's side and is
coloured purple (see illustration). Its purpose 1 Injector 9 Throttle position switch
is to shut off the power supply to the fuel 2 Cold start valve 10 Auxiliary air device
pump should the engine stall or the vehicle be 3 Throttle plate 11 Pressure regulator
involved in an
accident . The module senses 4 Sensor plate 12 Control module
ignition pulses, and cuts the fuel supply if the 5 Fuel distributor 13 Fuel filter
ignition pulses stop. 6 Electro-magnetic pressure actuator 14 Fuel accumulator The fuel shut-off valve system is an 7 Thermo-time switch 15 Fuel pump
economy device whereby air is drawn from 8 Temperature sensor 16 Fuel tank
within the air cleaner unit through the shut-off This module receiver inputs from the various pressure. Refer to the warning note at the end
valve and directed into the ducting chamber engine
sensors concerning engine of this Section, and always work with the
above the air sensor plate causing a temperature, engine load, throttle
shift , throttle battery negative lead disconnected and in a
depression. This then
causes the sensor plate position and starter actuation. This information well ventilated area.
to drop which, in turn, shuts off the fuel modifies a program
stored in the module When working on the KE-Jetronic system
supply. The valve is operated by
signals from
memory so that the electromagnetic pressure the following additional precautions must be
a coolant temperature sensor and a throttle actuator, on receiving the
signal from the observed:
position sensor. The shut-off valve will only module, can
alter the mixture to suit all engine a) Never start the engine when the battery is
operate under the following circumstances: operating conditions. This renders the control not firmly connected. a) When the engine coolant temperature is pressure circuit and warm-up regulator of the b) Never disconnect the battery when the at or above 35°C (95°F) K-Jetronic system unnecessary, and also engine is running. b) When the throttle is closed and with the undertakes the functions of the fuel shut-off c) If the battery is to be rapid charged from engine speed decelerating from speeds valve, safety module and speed sensing an external source it should be completely above 1600 rpm module (see illustration). disconnected from the vehicle electrical
The engine speed is sensed by a speed system.
sensing module which is coloured black and Precautions d) The KE-Jetronic control unit must be
located beneath the facia panel on the driver's Due to the
complexity of the fuel-injection removed from the car if
temperatures are
side. system, and the need for special tools and likely to exceed 80°C (176°F) as would be test equipment, any work should be limited to experienced, for example, in a paint spray
Bosch KE-Jetronic system the operations described in this Chapter. oven or if any electric welding is being The Bosch KE-Jetronic fuel-injection Other adjustments and system checks are carried out on the car.
system is fitted to Escort RS Turbo models beyond the scope of most readers and should e) The ignition must be switched off when
and is a further development of the K-Jetronic be left to a Ford dealer. removing the control unit.
system. Before disconnecting any fuel lines, unions Apart from minor alterations the basic Warning: Many of the procedures or components thoroughly clean the
principles of the hydraulics and mechanics component or connection and the adjacent in this Chapter entail the removal
used on the K-Jetronic system are unchanged area. of fuel pipes and connections
on the KE-Jetronic system. The main Place any removed components on a clean which may result in some fuel
difference between the two
types is that on the surface and cover them with plastic sheet or spillage. Before carrying out any operation
KE-Jetronic system all mixture corrections are paper. Do not use fluffy rags for cleaning. on the fuel system refer to the precautions
controlled electronically by an electromagnetic The system operates under pressure at all given in Safety First! at the beginning of
pressure actuator incorporated in the fuel times and care must be taken when this manual and follow them implicitly.
distributor. The pressure actuator is directly disconnecting fuel lines. Relieve the system Petrol is a highly dangerous and volatile
controlled by a variable electric
current pressure as described in the relevant Section liquid and the precautions necessary when
delivered by the fuel-injection control module. before disconnecting any fuel lines under handling it cannot be overstressed Bosch K and KE fuel injection systems 4B·5
2 Air cleaner - removal and refitting
K-Jetronic system
Removal
1 Remove the air cleaner element as
described in Chapter 1.
2 Detach the fuel filter from the side of the
cleaner casing (leave the fuel lines attached to
the filter) and the air inlet hose from the front
end of the case.
3 Unscrew and remove the casing retaining 2.5 KE-Jetronic air cleaner retaining bolts 6.3 Warm-up regulator fuel feed pipe (A),
nuts from the inner wing panel and lift out the (arrowed) outlet pipe (B) and wiring multi-plug (C)
casing. pipes, temporarily plug or seal them if
Refitting 6 Fuel pump - removal and necessary. refitting 7 Note the electrical connections to the pump
4 Refitting is the reversal of the removal and disconnect them.
procedure. Refit the air cleaner element as Note: Refer to the precautions at the end of 8 Loosen the pump bracket retaining bolt and
described in Chapter 1. Section 1 before proceeding. then withdraw the pump unit with rubber protector sleeve.
KE-Jetronic system Removal Refitting
Removal 1 The fuel pump is bolted to the underside of the car just to the rear of the fuel tank. For 9 Refitting of the fuel pump is a reversal of
5 Undo the two bolts securing the air cleaner access raise and support the car securely at the removal procedure. Renew the feed pipe
assembly to the air sensor plate unit and the rear. from the tank if it is damaged or defective.
remove the air cleaner assembly (see 2 Disconnect the battery earth lead. 10 Check that the rubber protector sleeve is
illustration). 3 On the K-Jetronic system relieve the correctly positioned round the pump before system pressure by slowly loosening the fuel tightening the clamp nut.
Refitting 11 On completion, tighten the warm-up feed pipe union at the warm-up regulator (see
6 Refit the unit to the air sensor plate and illustration). Absorb the fuel leakage in a regulator or cold start valve fuel unions,
secure with the two bolts. cloth. reconnect the battery earth lead, start the 4B 4 On the KE-Jetronic system relieve the engine and check for any fuel leaks. system pressure by slowly loosening the cold 3 Fuel tank - removal and refitting start valve union on the top of the fuel 7 Fuel accumulator - removal distributor (see illustration). Absorb fuel and refitting The procedures are the same as described leakage in a cloth.
in Part A of this Chapter for carburettor 5 Clamp the fuel inlet hose midway between Note: Refer to the precautions at the end of
engines, but in addition disconnect the fuel the tank and the pump using a brake hose Section 1 before proceeding.
tank-to-fuel pump hose from the rear face of clamp, self-locking grips or similar. If the fuel
the tank. level in the tank is low you may
prefer to drain Pre-1986 models the fuel from the tank into a suitable container once the inlet hose is disconnected. Removal 4 Throttle cable - adjustment, 6 Disconnect the fuel inlet and outlet pipes 1 The fuel accumulator is mounted adjacent removal and refitting from the pump, catching fuel spillage in a to the fuel pump, above the rear left-hand suitable container (see illustration). Once suspension arm.
Adjustment disconnected do not allow dirt to enter the 2 Disconnect the battery negative lead. The procedure is the same as described in
Part A of this Chapter for carburettor engines,
except that the cable adjuster is situated in a
bracket alongside the throttle housing.
Removal and refitting The procedure is the same as described in
Part A of this Chapter for carburettor engines,
except that it is not necessary to remove the
air cleaner, and the location of the mounting
bracket is alongside the throttle housing.
5 Accelerator pedal - removal and refitting 6.4 KE-Jetronic system cold start valve 6.6 Fuel pump outlet pipe (A), electrical pipe union (arrowed) on fuel distributor connections (B) and pump bracket The procedure is the same as described in retaining bolt (C)
Part A of this Chapter for carburettor models. 4B·6 Bosch K and KE fuel injection systems
4 The injector fuel delivery pipes can be removed by unscrewing and removing the four banjo bolts at the distributor head. Note the respective pipe connections as they are detached and remove the pipes complete with the plastic hoses and the injector harness. Do not separate the pipes or hoses from the injector harness. 5 Before reassembling the fuel delivery pipes, or the injectors, clean all pipe connections thoroughly and use new O-ring seals on the injectors. Use new seal washers on the banjo connections fitting two washers (one each side) per union. Do not overtighten the banjo bolts, or the washers may fracture.
7.5 Fuel pipe connections (arrowed) at the 7.12 Fuel inlet pipe (A) and outlet pipe (B) underbody mounted fuel accumulator at the engine compartment mounted fuel Refitting accumulator 6 Refitting of the injectors and the fuel delivery
3 Raise the rear of the car and support it on accumulator and catch the small quantity of pipes is otherwise a reversal of the removal
axle-stands (see "Jacking and Vehicle fuel which will be released (see illustration). procedure. On completion check that the pipes
Support"). 13 Remove the clamp screw and remove the and hoses are not distorted and when the
4 Relieve the system pressure by slowly accumulator. engine is restarted check for any signs of leaks.
loosening the fuel feed pipe at the warm-up Refitting
regulator. Absorb fuel leakage in a cloth. 9 Cold start valve - removal and
5 Disconnect the fuel pipes from the fuel 14 Refitting is a reversal of removal. Check for leaks on completion (with the engine refitting
accumulator and catch the small quantity of
fuel which will be released (see illustration). restarted). Note: Refer to the precautions at the end of
6 Remove the clamp screw and remove the Section 1 before proceeding.
accumulator. 8 Fuel injectors and injector delivery pipes - removal and K-Jetronic system
Refitting refitting Removal
7 Refitting is a reversal of removal. Check for
leaks on completion (with the engine Note: Refer to the precautions at the end of 1 Disconnect the battery earth lead.
restarted). Section 1 before proceeding. It is important to 2 Detach the electrical wiring multi-plug from note that each injection supply pipe the valve (see illustration).
1986 models onwards 3 Slowly unscrew and remove the fuel supply connection in the distributor head has a screw pipe banjo bolt. Take care on removal, as the
Removal adjacent to it. These four screws are not for system will be under pressure. Soak up fuel adjustment and must not be removed or have
8 On later models with K-Jetronic and KE- spillage with a cloth. their settings altered. New O-ring seals must 4 Unscrew and remove the two socket-head
Jetronic systems the fuel accumulator is be used on refitting.
located in the engine compartment behind the mounting bolts using an Allen key or Torx type Removal key or socket bit on later models, and remove
fuel distributor. the valve.
9 Disconnect the battery negative lead. 1 Disconnect the battery earth lead.
10 For access remove the air cleaner as 2 Detach the four supply pipes from the Refitting
described in Section 2. injectors, and use a rag to collect any spilled 5 Refitting is a reversal of the removal
11 Relieve the system pressure by slowly fuel. procedure. Do not overtighten the banjo bolt
loosening the cold start valve union on the top 3 Unscrew and remove the respective or the washers may fracture (use a new one
of the fuel distributor (see illustration 6.4). injector retaining bracket bolts, then withdraw each side of the union).
Absorb fuel leakage in a cloth. the injectors and their O-ring seals (see 6 On completion restart the engine and check
12 Disconnect the fuel pipes from the illustration). for signs of fuel leakage.
9.8 KE-Jetronic system cold start valve 8.3 Injector fuel pipe union (A) and 9.2 Disconnecting the cold start valve location retaining bracket bolt (B) wiring multi-plug A Fuel pipe union B Retaining bolts Bosch K and KE fuel injection systems 4B·7
10.2 K-Jetronic system auxiliary air device 10.3 K-Jetronic system auxiliary air device 10.8 KE-Jetronic system auxiliary air connections retaining bolt locations device retaining bolts A Throttle housing hose 6 Disconnect the battery negative lead. warm-up regulator (see illustration 6.3). B Cold start valve hose 7 Disconnect the auxiliary air device wiring Absorb the fuel leakage in a cloth. C Wiring multi-plug multi-plug and the two air hoses. 3 Disconnect the four injector feed pipes, the
KE-Jetronic system 8 Undo the two Torx type retaining bolts fuel inlet and return pipes, and the warm-up using a Torx key or socket bit and remove the regulator feed and return pipe banjo unions at
Removal unit from under the inlet manifold (see the fuel distributor (see illustration). Note the illustration). sealing washers on each side of the banjo
7 Disconnect the battery earth lead. unions which must be renewed on reconnection
8 Disconnect the wiring multi-plug from the Refitting
valve which is located underneath the throttle of the pipes. Take care not to allow dirt to enter
housing (see illustration). 9 Refitting is a reversal of removal. the pipes or their connection ports.
9 Slowly unscrew and remove the fuel supply 4 Unscrew the three retaining screws from
pipe banjo union. Take care on removal, as 11 Fuel distributor - removal and the fuel distributor top face and remove the
the system will be under pressure. Soak up unit from the car (see illustration). Recover refitting the sealing O-ring.
fuel spillage with a cloth.
10 Unscrew and remove the two Torx type Note: Refer to the precautions at the end of Refitting
mounting bolts using a Torx key or socket bit. Section 1 before proceeding. It is important to
Remove the valve from under the throttle 5 Refitting is a reversal of removal, but ensure note that each injection supply pipe connection
housing. perfectly clean mating faces and use a new 4B in the distributor head has a screw adjacent to sealing O-ring and new washers for the banjo
Refitting it. These four screws are not for adjustment and unions. Check for any signs of leaks on must not be removed or have their settings
11 Refitting is a reversal of removal. Do not completion and adjust the idle speed and altered. A new O-ring and new banjo union
overtighten the banjo bolt or the washers may mixture settings as described in Chapter 1. sealing washers will be required on refitting.
fracture (use a new one each side of the 6 The main system fuel pressure should be
union). K-Jetronic system checked and if necessary adjusted by a Ford
12 On completion restart the engine and dealer to ensure satisfactory running of the
check for leaks. Removal system. 1 Disconnect the battery negative lead. KE-Jetronic system 10 Auxiliary air device - removal 2 Relieve the system pressure by slowly and refitting loosening the fuel feed pipe union at the Removal 7 Disconnect the battery negative lead.
K-Jetronic system 8 Relieve the system pressure by slowly loosening the cold start valve union on the top
Removal of the fuel distributor (see illustration 6.4). Absorb fuel leakage in a cloth.
1 Disconnect the battery earth lead.
2 Disconnect the wiring multi-plug and the
two air hoses from the device which is located
beneath the cold start valve (see illustration).
3 Undo the two Torx type retaining bolts
using a Torx key or socket bit and lift the unit
away (see illustration).
Refitting
4 Refitting is a reversal of removal. 11.3 K-Jetronic fuel distributor pipe
KE-Jetronic system connections A To injectors E Fuel inlet
Removal B To cold start valve F To warm-up
5 Apply the handbrake, jack up the front of C Fuel return regulator
the car and support it on axle stands (see D From warm-up 11.4 K-Jetronic system fuel distributor
"Jacking and Vehicle Support"). regulator retaining screws (arrowed) 4B·8 Bosch K and KE fuel injection systems
11.11 KE-Jetronic fuel distributor retaining 12.9 Component attachments at the 12.11 Air inlet duct retaining bolts screws (arrowed) KE-Jetronic throttle housing (arrowed) A Charge air temperature sensor multi-plug B Throttle position sensor wiring multi-plug
9 Disconnect the four injector feed pipes, the C Throttle cable bracket 15 Do not remove the throttle position sensor
cold start valve pipe and union adapter, the D Connecting hose retaining clip from the throttle housing unless absolutely
fuel inlet pipe and pressure regulator return necessary. If it must be removed, mark its
pipe from the fuel distributor. Note the sealing Refitting position for refitting and then have it
washers on each side of the banjo unions 6 Refitting is a reversal of removal, but ensure accurately adjusted by a Ford dealer on
which must be renewed on reconnection of that the mating faces are perfectly clean. completion. This will also be necessary if the Renew the gaskets, one on each side of the sensor or throttle housing are renewed.
the pipes. Take care not to allow dirt to enter
the pipes or their connection parts. insulator block, if necessary. Refitting
10 Disconnect the wiring multi-plug from the 7 On completion adjust the idle speed as 16 Refitting is the reversal of removal, but
pressure actuator on the side of the fuel described in Chapter 1. use a new gasket and ensure clean mating
distributor. KE-Jetronic system faces. After refitting adjust the idle speed as
11 Undo the retaining screws and remove described in Chapter 1.
the fuel distributor (see illustration). Recover Removal
the sealing O-ring. 13 Fuel pressure regulator - 8 Disconnect the battery negative terminal.
Refitting 9 Disconnect the charge air temperature removal and refitting sensor and throttle position sensor wiring
12 Refitting is a reversal of removal, but multi-plugs (see illustration). Note: Refer to the precautions at the end of
ensure perfectly clean mating faces and use a 10 Slacken the hose clip and detach the air Section 1 before proceeding.
new sealing O-ring and new washers for the inlet hose from the inlet duct.
banjo unions. Check for any signs of leaks on 11 Undo the two bolts securing the inlet duct Removal
completion and adjust the idle speed and to the rocker cover slacken the throttle 1 The fuel pressure regulator is only used on
mixture settings as described in Chapter 1. housing connecting hose clip and remove the KE-Jetronic systems and is located behind inlet duct (see illustration). the fuel distributor (see illustration). 12 Throttle housing - removal 12 Extract the retaining clip and disconnect 2 Disconnect the battery negative lead. the throttle cable end from the linkage ball- 3 Relieve the system pressure by slowly and refitting stud. loosening the cold start valve union on the top 13 Undo the two bolts and remove the of the fuel distributor (see illustration 6.4).
Note: During
manufacture the throttle plate is throttle cable bracket from the throttle Absorb fuel leakage in a cloth.
adjusted so that it is fractionally open, to avoid housing. 4 Place absorbent cloth beneath the
the possibility of it jamming shut, and it must 14 Disconnect the auxiliary air hose, then regulator and undo the two fuel feed unions
not be repositioned. Idle speed adjustment is undo the four nuts and remove the throttle and the fuel return union. Note the pipe
provided for by means of a screw which, housing. locations to ensure correct refitting.
according to its setting, restricts the airflow
through the air
bypass channel in the throttle
housing.
K-Jetronic system
Removal
1 Disconnect the battery negative lead.
2 Slacken the retaining screw and detach the
inlet air hose from the throttle housing.
3 Disconnect the accelerator cable at the
housing linkage with reference to Section 4.
4 Disconnect the distributor vacuum hose
and auxiliary air hose from the underside of 13.6 KE-Jetronic fuel pressure regulator
the throttle housing. 13.1 KE-Jetronic fuel pressure regulator pipe connections
5 Undo the four nuts and carefully withdraw location (arrowed) behind fuel distributor
the throttle housing from the manifold studs. A Fuel feed B Fuel return Bosch K and KE fuel injection systems 4B·9
5 Remove the securing tie and withdraw the Refitting clean. New O-rings must be used and care
regulator from its bracket. taken not to displace them when fitting. On 7 Refitting is a reversal of removal, but use completion check for fuel leaks with the
Refitting new sealing washers on each side of the banjo engine running.
6 Refitting is a reversal of removal. Ensure unions and apply a thread-locking compound
that all unions are correctly reconnected and to the Torx retaining bolts. On completion check for leaks with the engine running. 16 Fuel-injection control module
secure, and on completion check for fuel leaks - removal and refitting
with the engine running (see illustration). 15 Electro-magnetic pressure 14 Warm-up regulator - removal actuator - removal and refitting Removal and refitting 1 The fuel-injection control module is only Note: Refer to the precautions at the end of used on KE-Jetronic systems and is located in
Note: Refer to the precautions at the end of Section 1 before proceeding. New O-rings the engine compartment behind the heater
Section 1 before proceeding. New banjo must be used on refitting. plenum chamber and fan motor.
union sealing washers must be used on 2 Disconnect the battery negative lead.
refitting. Removal 3 Remove the plenum chamber top cover 1 The electro-magnetic pressure actuator is rubber seal (see illustration).
Removal only used on KE-Jetronic systems and is 4 Release the five retaining clips and lift off
1 The warm-up regulator is only used on K- located on the side of the fuel distributor. the plenum chamber top cover (see
Jetronic systems and is situated on the inlet 2 Disconnect the battery negative lead. illustrations).
manifold just to the rear of the rocker cover. 3 Remove the air cleaner as described in 5 Undo the two nuts securing the heater fan
2 Disconnect the battery negative lead. Section 2. motor assembly to the bulkhead. Lift the unit
3 Relieve the system pressure by slowly 4 Relieve the system pressure by slowly off the studs and place it on the engine, but
loosening the fuel feed pipe union at the loosening the cold start valve union on the top avoid straining the wiring (see illustrations).
warm-up regulator (see illustration 6.3). 6 Disconnect the module wiring multi-plug, of the fuel distributor (see illustration 6.4).
Absorb the fuel leakage in a cloth. then undo the three screws and remove the Absorb fuel leakage in a cloth.
4 After relieving the system pressure 5 Disconnect the wiring multi-plug, then undo unit from its location (see illustration).
disconnect the fuel feed union completely, the two screws securing the actuator to the
followed by the outlet union. Recover the Refitting
sealing washers used on each side of the fuel distributor (see illustration). Remove the
unions. unit and the sealing O-rings. 7 Refitting is the reversal of removal. Take
5 Disconnect the regulator wiring multi-plug. care not to trap the motor wiring when refitting
6 Undo the two Torx type screws using a Refitting the fan motor assembly and ensure that it is
suitable Torx key or socket bit and remove the 6 Refitting is the reverse sequence to engaged in the slot provided in the housing
regulator from its location (see illustration). removal, but ensure both mating faces are (see illustration). 4B
14.6 K-Jetronic system warm-up regulator 15.5 Pressure actuator wiring multi-plug 16.3 Remove the plenum chamber rubber retaining screws (arrowed) seal
16.4a Release the retaining clips . . . 16.4b . . . and lift off the plenum chamber 16.5a Heater fan motor retaining nut top cover 4B·10 Bosch K and KE fuel injection systems
16.5b Removing the heater fan motor 16.6 . . . for access to the fuel-injection 16.7 Fan motor wiring engaged in housing assembly . . . control module slot (arrowed) 2 Disconnect the battery negative lead. 17 Charge air temperature 18 Thermo-time switch - 3 Disconnect the electrical lead, undo the two sensor - removal and refitting removal and refitting screws and withdraw the unit. Detach the air hoses from each end and remove the compensator.
Removal Removal
1 The charge air temperature sensor is only 1 Disconnect the battery negative lead. Refitting
used on KE-Jetronic systems and is located in 2 Drain the cooling system as described in 4 Refitting is a reversal of removal. The air
the air inlet duct (see illustration). Chapter 1. hoses can be connected to either end and the
2 Disconnect the battery negative lead. 3 Raise the front of the car and support it on arrows on the unit can be ignored.
3 Disconnect the wiring multi-plug and axle stands (see "Jacking and Vehicle
unscrew the sensor from its location. Support"). 4 Disconnect the wiring multi-plug from the 20 Turbocharger - general
Refitting thermo-time switch located on the inlet description
4 Refitting is the reversal of removal. manifold intermediate flange and accessible from under the car (see illustration). Escort RS Turbo models are equipped with 5 Unscrew the unit and remove it from its an exhaust driven turbocharger, which is a location. device designed to increase the engine's power output without increasing exhaust Refitting emissions or adversely affecting fuel 6 Refitting is a reversal of removal. Refill the economy. It does so by utilising the heat cooling system as described in Chapter 1. energy present in the exhaust gases as they exit the engine. 19 Idle speed compensator - Basically the turbocharger consists of two removal and refitting fans mounted on a common shaft. One fan is driven by the hot exhaust gases as they rush through the exhaust manifold and expand. Removal The other draws in fresh air and compresses it 1 The idle speed compensator is only fitted to before it enters the inlet manifold. By 17.1 Charge air temperature sensor K-Jetronic systems from 1986 onwards and is compressing the air, a larger charge can be let location (arrowed) located in the centre of the engine into each cylinder and greater power output is compartment bulkhead (see illustration). achieved.
18.4 Thermo-time switch (A) and temperature sensor (B) on the 19.1 K-Jetronic system idle speed compensator location KE-Jetronic system (viewed from under the car) Bosch K and KE fuel injection systems 4B·11
20.4 Turbocharger and waste gate components 1 Turbocharger exhaust manifold and waste gate housing 2 Bypass duct 3 Waste gate 4 Waste gate actuator 5 Actuator rod 6 Waste gate lever
4B
The temperature of the inlet air is reduced, Lubrication oil for the turbocharger is taken
expensive component and servicing or repairs
thus increasing its
density , by passing it from the engine lubricating circuit via a special should be left to a dealer service department
through an intercooler, mounted alongside the
branch line. The turbocharger shaft rotates in or specialist with turbocharger repair
radiator, prior to it entering the manifold. plain bearings through which a relatively large experience. Apart from the information in the The boost pressure generated by the amount of oil is
allowed to pass. Therefore following Sections, any other work on the
turbocharger is controlled by a waste gate when rotating, the shaft floats on a thick
film turbocharger or its related components is
which when open allows a high proportion of of lubricating oil. beyond the scope of the average reader.
the exhaust gases to bypass the turbocharger The turbocharger is a close tolerance,
and directly enter the exhaust system (see
illustration). The turbocharger therefore
loses 21 Waste gate solenoid control
speed and boost pressure is reduced. valve - removal and refitting The waste gate is opened and closed by
the waste gate actuator through an actuator
rod. The waste gate actuator is in turn Removal
controlled by the solenoid control valve which 1 The solenoid control valve is mounted on a
receives signals in the form of a pulsed bracket located underneath the ignition
voltage from the ignition system. Electronic distributor (see illustration).
Spark Control module (see Chapter 5, Part B). 2 Disconnect the battery negative lead.
The Electronic Spark Control module receives 3 Disconnect the solenoid wiring multi-plug.
data from various engine sensors, particularly 4 Identify and mark the hose locations at the
the charge air temperature sensor in the inlet solenoid connections, then remove the hoses.
air duct, which
modify the module program to 5 Undo the retaining screws and remove the
suit all operating conditions. he module then unit from its location.
signals the solenoid control valve to open or
close the waste gate via the waste gate 21.1 Waste gate solenoid control valve Refitting
actuator. location (arrowed) 6 Refitting is a reversal of removal. 4B·12 Bosch K and KE fuel injection systems
22.3 Intercooler upper air hose attachment (arrowed)
22.7 Intercooler mountings and attachments - 1986 models onwards A Retaining bolts B Upper air hose 22 Intercooler - removal and refitting 23 Turbocharger- removal and refitting
1985 models Note: New gaskets and new tabwashers must
Removal be used on refitting.
1 Disconnect the battery negative lead.
2 Remove the air cleaner as described in Removal
Section 2. 1 Disconnect the battery negative lead.
3 Remove the intercooler upper and lower air 2 Disconnect the turbocharger inlet and
hoses (see illustration). outlet air hoses and the hoses from the waste
4 Undo the upper retaining bolt, tilt the gate actuator and solenoid control valve at
intercooler towards the engine at the top and their turbocharger connections. Tape over all
lift up to disengage the lower retaining pins. the disconnected unions and outlets to
Remove the unit from the engine compartment. prevent dirt ingress. 3 Support the exhaust system and 23.4 Turbocharger oil feed union (A),
Refitting turbocharger exhaust manifold (B) and disconnect it from the turbocharger exhaust
5 Refitting is a reversal of removal. manifold . retaining nuts (C) 4 Disconnect the oil feed union on the top of
1986 models onwards the turbocharger and the oil return line from underneath the unit (see illustration). Tape 7 Refitting is a reversal of removal, but
Removal over all disconnected pipes and unions. bearing in mind the following points:
6 Proceed as described in paragraphs 1 to 3. 5 Bend up the tabwashers, then unscrew the a) Tighten all retaining nuts to the specified
7 Undo the two radiator and intercooler lower nuts securing the turbocharger to the exhaust torque and secure with the tabwashers.
retaining bolts (see illustration). manifold. Remove the unit and
store it in a b) Before connecting the oil feed union,
8 Move the radiator and intercooler assembly clean plastic bag while removed from the car. prime the turbocharger bearings by
towards the engine and undo the four bolts injecting clean engine oil into the union
securing the intercooler to the radiator. Refitting orifice.
9 Undo the retaining bolt and move the horn 6 Before refitting the turbocharger ensure c) Crank the engine over on the starter with
nearest to the intercooler to one side. that all mating faces are clean and obtain new the ignition LT lead at the coil
10 Withdraw the intercooler from the engine gaskets and a set of new tabwashers. It is disconnected until the oil pressure
compartment. also advisable to renew the engine oil and warning light
goes out. filter, particularly if a new turbocharger is
Refitting being fitted or if there was any sign of
11 Refitting is a reversal of removal. previous oil contamination. 4C·1
Chapter 4 Part C:
Central (single-point)
Fuel Injection (CFI) system
Contents
Accelerator pedal - removal and refitting . . . . . . . . . . . . . . . . . . . . . .5 Fuel system - depressurising . . . . . . . . . . . . . . . . . . . . . . . . . . . . . . .6
Air charger temperature (ACT) sensor - removal and refitting . . . . .13 Fuel tank - removal and refitting . . . . . . . . . . . . . . . . . . . . . . . . . . . . .3
Air cleaner - removal and refitting . . . . . . . . . . . . . . . . . . . . . . . . . . .2 General information and precautions . . . . . . . . . . . . . . . . . . . . . . . . .1 4C
Air cleaner element renewal . . . . . . . . . . . . . . . . . . . . .See Chapter 1 Heated Exhaust
Oxygen (HEGO) sensor - removal and refitting . . .17
Central Fuel Injection (CFI) unit - removal and refitting . . . . . . . . . . .8 Idle speed and mixture adjustment . . . . . . . . . . . . . . . .See Chapter 1
EEC IV module - removal and refitting . . . . . . . . . . . . . . . . . . . . . . .20 Knock sensor - removal and refitting . . . . . . . . . . . . . . . . . . . . . . . .15
Engine Coolant Temperature (ECT) sensor - removal and Manifold Absolute Pressure (MAP) sensor - removal and refitting . . . . . . . . . . . . . . . . . . . . . . . . . . . . . . . . . . . . . . . . . . . . .14 refitting . . . . . . . . . . . . . . . . . . . . . . . . . . . . . . . . . . . . . . . . . . . . .16
Fuel cut-off (
inertia ) switch - removal and refitting . . . . . . . . . . . . . .18 Speed sender unit - removal and refitting . . . . . . . . . . . . . . . . . . . .19
Fuel filter renewal . . . . . . . . . . . . . . . . . . . . . . . . . . . . .See Chapter 1 Throttle cable - adjustment, removal and refitting . . . . . . . . . . . . . . .4
Fuel injector - removal and refitting . . . . . . . . . . . . . . . . . . . . . . . . .10 Throttle position sensor (TPS) - removal and refitting . . . . . . . . . . .11
Fuel pressure regulator - removal and refitting . . . . . . . . . . . . . . . . .9 Throttle valve control motor - removal and refitting . . . . . . . . . . . . .12
Fuel pump - removal and refitting . . . . . . . . . . . . . . . . . . . . . . . . . . .7
Degrees of difficulty Easy, suitable for Fairly easy, Fairly difficult, Difficult, suitable Very difficult, novice with little suitable for suitable for for experienced suitable for expert experience beginner with competent DIY DIY mechanic DIY or professional some experience mechanic
Specifications
General
System type . . . . . . . . . . . . . . . . . . . . . . . . . . . . . . . . . . . . . . . . . . . . . . Single-point electronic fuel injection
Application . . . . . . . . . . . . . . . . . . . . . . . . . . . . . . . . . . . . . . . . . . . . . . . 1.4 litre engines from 1990
Fuel requirement
Fuel octane rating . . . . . . . . . . . . . . . . . . . . . . . . . . . . . . . . . . . . . . . . . . 95 RON (unleaded)
Torque wrench settings Nm lbf ft
HEGO sensor . . . . . . . . . . . . . . . . . . . . . . . . . . . . . . . . . . . . . . . . . . . . . 50 to 70 37 to 52
Fuel filter unions . . . . . . . . . . . . . . . . . . . . . . . . . . . . . . . . . . . . . . . . . . . 14 to 20 11 to 15 4C·2 Central (single-point) fuel injection system
1.2 Exploded view of the Central Fuel Injection (CFI) unit - 1.4 CFI engine 1 Fuel injector assembly 2 Fuel pressure regulator components 3 Fuel inlet connector 4 Air charge temperature (ACT) sensor 5 Throttle valve control motor 6 Throttle position sensor (TPS) 7 Fuel injector wiring
The CFI unit, resembling a carburettor,
houses the throttle valve, throttle valve control motor, TPS (Throttle Position Sensor), ACT sensor, electronic injector unit, and pressure regulator. Engine management and emission system The EEC IV (Electronic Engine Control IV) module is a microprocessor-
based system containing within its memory the necessary
strategy and calibration data. It provides control signals to the output actuators according to the input signals received from the various engine condition sensors. In addition to the sensors mentioned previously, the module also receives data from an engine coolant temperature sensor (ECT), and a speed sender unit (mounted on the speedometer take-off point on the gearbox). The EEC IV module will calculate the necessary
requirements against data stored or programmed into its memory. Accurate control of the engine is thus maintained. Ignition system The ignition system consists of a another factor in determining fuel distributor, TFI IV module, ignition coil and HT 1 General information and requirements and ignition timing at full throttle wiring. These components are more fully precautions or during ignition key "on" engine "off" described in Chapter 5, Part B. conditions. Using the information from the A knock sensor detects engine detonation, ACT and MAP sensors, the EEC IV module which may occur when using low octane fuel.
General information can calculate the mass of air entering the Screwed into the cylinder block in such a The system is best described by dividing it engine and adjust the fuelling and ignition position as to detect detonation in any of the
into four separate sub-systems: air, fuel, timing accordingly. four cylinders, it passes a signal based on
engine management (EEC IV system), and Fuel system vibration to the EEC IV module. The module
ignition. analyses the signal and adjusts the ignition The fuel system consists of a fuel pump, timing accordingly.
Air system fuel filter, and the CFI unit. Power to the system is supplied by the power relay, which Catalytic converter The air system consists of an air cleaner, has a built-in timer which allows the throttle
connecting air inlet duct, CFI unit, MAP The
function of the catalytic converter is to valve motor to continue to operate after the
(Manifold Absolute Pressure) sensor, and inlet control and reduce exhaust gas emissions, engine is switched off, preventing the engine
manifold. from "running on". keeping oxides of nitrogen (NOx), Air is drawn through the air cleaner and inlet The fuel pump is electric, of roller cell hydrocarbons (HC) and carbon monoxide
duct to the CFI unit. The CFI unit contains an design, and delivers fuel under pressure to the (CO) to an acceptable level.
ACT (Air Charge Temperature) sensor and a engine. Electric power to the pump is supplied The catalyst consists of a
ceramic throttle valve (see illustration). The ACT via a relay which is controlled directly by the honeycomb coated with platinum and
sensor passes information to the EEC IV EEC IV module. The pump contains a non- rhodium, housed in a metal exhaust box. The
module, which uses the information to return valve which maintains pressure in the honeycomb design
presents a large surface
determine the engine's fuel requirement. The system after the ignition is switched off, to area to the exhaust gas promoting maximum
inlet air then passes the throttle valve into the assist starting. conversion. A HEGO (Heated Exhaust Gas
inlet manifold. Below the throttle valve is a From the fuel pump, the fuel passes Oxygen) sensor screwed into the exhaust
take-off point for the MAP sensor which through an in-line filter to the CFI unit. A fuel downpipe allows the engine management
measures pressure in the manifold, passing pressure regulator, mounted on the CFI unit system to control the air/fuel ratio at the ideal
this information to the EEC IV module. The maintains fuel pressure to the injector at 1 bar. ratio of 14.7:1, which is required for the
EEC IV module uses this information as Excess fuel is returned to the fuel tank. catalyst to function most effectively. Central (single-point) fuel injection system 4C·3
Precautions prevent it from turning while the inlet pipe union is loosened. Allow all pressure/fuel
Note: Following disconnection of the battery, seepage to dissipate before fully unscrewing
all Keep
Alive Memory (KAM) values will be the union if it is to be disconnected, or
erased from the EEC IV system module tightened if another part of the system is to be
memory, which may result in erratic idle, worked on.
engine surge, hesitation and a general 5 The system will remain depressurised until
deterioration of driving characteristics. the fuel pump is primed prior to starting the Warning: Many of the procedures engine. Remove the container or cloth, as in this Chapter entail the removal applicable, on completion. of fuel pipes and connections which may result in some fuel
spillage. Before carrying out any operation 7 Fuel pump - removal and
on the fuel system refer to the precautions refitting
given in Safety First! at the beginning of 7.1 Integral fuel level sender unit/fuel
this manual and follow them implicitly. pump - 1.4 CFI engine Removal
Petrol is a highly dangerous and volatile
liquid and the precautions necessary when 1 The fuel pump is integral with the fuel level A Fuel pump B Sender unit
handling it cannot be overstressed sender unit in the fuel tank (see illustration). 6 Either drain the cooling system as 2
Chock the front wheels, then jack up the Refer to the precautions given in Part B of described in Chapter 1, or clamp the coolant rear of the vehicle and support it securely on
this Chapter for models with mechanical fuel hoses as close as possible to the CFI unit to axle stands (see "Jacking and Vehicle minimise coolant loss, then disconnect the
injection. Support"). hoses from the unit. 3 Disconnect the battery negative lead. 7 Disconnect the air charge temperature 2 Air cleaner - removal and 4 Depressurise the fuel system (Section 6). sensor, throttle position sensor, and throttle refitting 5 Remove the fuel tank, then proceed as valve control motor wiring plugs. described for fuel level sender unit removal 8 Disconnect the vacuum pipe from the CFI The procedure is similar to that described in and refitting. This is described as part of the unit.
Part A of this Chapter for carburettor engines. fuel tank removal and refitting procedure in 9 Unscrew the four securing bolts, and lift the Part A of this Chapter. CFI unit from the inlet manifold (see illustration). 3 Fuel tank - removal and refitting Refitting 6 Refitting is a reversal of removal. Refitting 10 Refitting is a reversal of removal, but on The procedure is as described in Part A of 8 Central Fuel Injection (CFI) completion, refill or top-up the cooling system 4C
this Chapter for carburettor engines. unit - removal and refitting (as applicable) as described in Chapter 1, and check for fuel leaks with the engine running. 4 Throttle cable - adjustment, Note: Refer to the precautions at the end of removal and refitting Section 1 before proceeding. 9 Fuel pressure regulator - removal and refitting The procedure is similar to that described in Removal
Part A of this Chapter for carburettor engines. 1 Disconnect the battery negative lead. 2 Remove the air cleaner assembly. Removal 5 Accelerator pedal - removal 3 Depressurise the fuel system as described 1 Remove the CFI unit as described in Section 8. and refitting in Section 6, and disconnect the fuel inlet pipe 2 Remove the four screws securing the from the CFI unit. regulator housing to the CFI unit, then carefully The procedure is the same as described in 4 Disconnect the fuel return pipe from the CFI lift off the housing and recover the ball, cup,
Part A of this Chapter for carburettor models. unit. large spring, diaphragm, valve, and small 5 Disconnect the throttle cable from the spring, noting the position and orientation of linkage on the CFI unit. all components (see illustration). Do not 6 Fuel system - depressurising
Warning: The fuel system will remain pressurised after the engine is switched off. Comply with all relevant safety precautions during
this operation and refer to the "Safety first!"
Section at the beginning of this manual
before proceeding.
1 Disconnect the battery negative lead.
2 Remove the air cleaner assembly.
3 Position a suitable container or a sufficient
quantity of absorbent cloth beneath the fuel
inlet connection on the CFI unit.
4 Use an open-
ended spanner on the flats of 8.9 Unscrewing the CFI unit securing bolts 9.2 Exploded view of fuel pressure
the inlet union screwed into the CFI unit to (arrowed) regulator - 1.4 CFI engine 4C·4 Central (single-point) fuel injection system
10.4 Disconnecting the fuel injector wiring 10.5a Removing an injector retaining collar 10.5b Removing the injector retaining plug - 1.4 CFI engine securing bolt and locktab - 1.4 CFI engine collar - 1.4 CFI engine
attempt to prise the plug from the regulator correctly in position, tighten the screws evenly 9 Use new injector seals, and coat them with
housing, or adjust the Allen screw (if no plug is to avoid distorting the diaphragm. silicon grease (to Ford specification ESEM-
fitted); this will alter the fuel system pressure. 8 Refit the CFI unit as described in Section 8. 1C171A or
equivalent ).
3 Examine all components and renew any 9 On completion, the fuel system pressure 10 Ensure that the locating peg on the
defective items as necessary should be checked by a Ford dealer at the injector is correctly positioned (see earliest opportunity. illustration).
Refitting
4 Commence reassembly by supporting the 10 Fuel injector - removal and
CFI unit on its side so that the regulator 11 Throttle Position Sensor
components can be fitted from above. refitting (TPS) - removal and refitting
5 Fit the small spring, valve, diaphragm Note: Refer to the precautions at the end of
(ensuring that it locates correctly), large Removal Section 1 before proceeding. New injector
spring, and the spring cup. seals will be required on refitting. 1 Disconnect the battery negative lead.
6 Carefully place the ball into position on the
spring cup, and ensure that it locates 2 Unclip and disconnect the sensor wiring Removal
correctly. plug. 1 Disconnect the battery negative lead. 3 Remove the two securing screws, and
7 Refit the regulator housing, taking great 2 Remove the air cleaner assembly. withdraw the sensor from the throttle valve
care to avoid disturbing the ball, and once 3 Depressurise the fuel system as described shaft (see illustration). in Section 6. 4 Disconnect the fuel injector wiring plug (see Refitting illustration). 4 Refitting is a reversal of removal, but ensure 5 Bend back the injector retaining collar that the sensor actuating arm is correctly securing bolt locktabs, then unscrew the located. bolts. Remove the injector retaining collar (see illustrations). 6 Withdraw the injector from the CFI unit, 12 Throttle valve control motor - noting its orientation, then withdraw the removal and refitting injector seals (see illustration). 7 Remove the seal from the injector retaining collar (see illustration). Removal 1 Disconnect the battery negative lead. Refitting 2 Remove the air cleaner assembly.
10.6 Withdrawing the injector from the CFI 8 Refitting is a reversal of removal, bearing in 3 Disconnect the wiring plugs from the motor unit mind the following points. and the throttle position sensor.
10.7 Removing the seal from the injector 10.10 Align locating peg on injector with 11.3 Throttle position sensor (TPS) retaining collar - 1.4 CFI engine slot in CFI unit when refitting location (arrowed) on side of CFI unit Central (single-point) fuel injection system 4C·5
13.4 Disconnecting the ACT sensor wiring 15.1 Knock sensor location - 1.4 CFI engine 16.2 Manifold absolute pressure (MAP) plug - 1.4 CFI engine sensor - 1.4 CFI engine A Knock sensor C Securing bolt B Wiring plug A MAP sensor C Vacuum hose B Wiring plug
4 Remove the screws securing the motor and Refitting
throttle position sensor assembly mounting 17 Heated Exhaust Gas Oxygen
bracket to the CFI unit, and withdraw the 6 Refitting is a reversal of removal, but on
assembly. completion top-up the cooling system as (HEGO) sensor - removal and
5 Remove the motor securing screws and described in "Weekly checks". refitting
withdraw the motor from the bracket. Note: A new sealing ring will be required on
Refitting 15 Knock sensor - removal and refitting.
6 Refitting is a reversal of removal, bearing in refitting Removal
mind the following points.
7 Ensure that the throttle position sensor 1 Apply the handbrake, then jack up the front Removal of the vehicle and support it on axle stands
locates correctly on the throttle valve spindle,
and that the mounting bracket aligns with its 1 The knock sensor is screwed into the (see "Jacking and Vehicle Support").
locating pegs. cylinder block, near the oil filter (see 2 Disconnect the battery negative lead.
8 On completion, the idle speed should be 3 Unclip the wiring and disconnect the sensor illustration). wiring plug (see illustration).
checked by a Ford dealer at the earliest 2 Disconnect the battery negative lead. 4 Remove the sensor heat shield, then 4C
opportunity. 3 Disconnect the sensor wiring plug by unscrew the sensor from the exhaust depressing the plug locking lugs and pulling downpipe, and carefully remove it complete 13 Air Charge Temperature the plug from the sensor. Do not pull on the with sealing ring. (ACT) sensor - removal and wiring. refitting 4 Unscrew the securing bolt and withdraw Warning: Do not touch the tip of the HEGO sensor. the sensor from the cylinder block.
Removal Refitting Refitting
1 The ACT sensor is screwed into the CFI
unit. 5 Refitting is a reversal of removal, but ensure 5 Refitting is a reversal of removal, bearing in
2 Disconnect the battery negative lead. that the mating faces of the sensor and mind the following points.
3 Remove the air cleaner assembly. cylinder block are clean. 6 Clean the sensor threads, and take care not
4 Disconnect the ACT sensor wiring plug (see to touch the tip of the sensor during the
illustration). refitting procedure.
5 Unscrew the sensor from the CFI unit. 16 Manifold Absolute Pressure (MAP) sensor - removal and
Refitting refitting
6 Refitting is a reversal of removal.
Removal 14 Engine Coolant Temperature (ECT) sensor - removal and 1 Disconnect the battery negative lead. refitting 2 Disconnect the sensor wiring plug (see illustration). Do not pull on the wiring. 3 Disconnect the vacuum pipe from the
Removal sensor.
1 The ECT sensor is screwed into the inlet 4 Remove the two securing screws, and
manifold. withdraw the sensor from the engine
2 Disconnect the battery negative lead. compartment bulkhead. 17.3 Heated exhaust gas oxygen (HEGO)
3 Partially drain the cooling system as sensor - 1.4 CFI engine
described in Chapter 1.
4 Disconnect the sensor wiring plug. Refitting A Sealing ring C Sensor shield
5 Unscrew the sensor from the inlet manifold. 5 Refitting is a reversal of removal. B HEGO sensor 4C·6 Central (single-point) fuel injection system
Refitting 6 Refitting is a reversal of removal, but before refitting the spare wheel, ensure that the switch is
reset by pushing down the
button on the top of the switch, and on completion start the engine and check that the switch operates correctly.
19 Speed sender unit - removal and refitting
The speed sender unit is similar to that 18.1 Fuel cut-off (inertia) switch location used with the fuel computer described in 20.1 EEC IV module location (arrowed) - (arrowed) - 1.4 CFI engine Chapter 12. 1.4 CFI engine A Reset button
7 Use a new sensor sealing ring. 20 EEC IV module - removal and
8 Tighten the sensor to the specified torque. refitting
9 On completion, start the engine and check
for leaks between the sensor and the exhaust
downpipe. Removal 1 The EEC IV module is located behind the 18 Fuel cut-off (inertia) switch - centre console, beneath the trim panel (see removal and refitting illustration). 2 Disconnect the battery negative lead. 3 Remove the trim panel to expose the
Removal module, then pull the module from its bracket
1 The fuel cut-off switch is located in the behind the centre console.
luggage compartment, under the spare wheel 4 Loosen the screw securing the wiring plug,
(see illustration).
2 Disconnect the battery negative lead. then disconnect the plug and withdraw the
3 Remove the spare wheel and its cover to module.
gain access to the switch. Refitting
4 Disconnect the switch wiring plug.
5 Remove the two screws securing the switch 5 Refitting is a reversal of removal.
to its bracket, then withdraw the switch. 4D·1
Chapter 4 Part D:
Electronic Fuel Injection (EFI) system
Contents
Accelerator pedal - removal and refitting . . . . . . . . . . . . . . . . . . . . . .5 Fuel system - depressurising . . . . . . . . . . . . . . . . . . . . . . . . . . . . . . .6 4D
Air Charge Temperature (ACT) sensor - removal and refitting . . . . .14 Fuel tank - removal and refitting . . . . . . . . . . . . . . . . . . . . . . . . . . . . .3
Air cleaner - removal and refitting . . . . . . . . . . . . . . . . . . . . . . . . . . .2 General information and precautions . . . . . . . . . . . . . . . . . . . . . . . . .1
Air cleaner element renewal . . . . . . . . . . . . . . . . . . . . .See Chapter 1 Idle speed and mixture adjustment . . . . . . . . . . . . . . . .See Chapter 1
EEC IV module - removal and refitting . . . . . . . . . . . . . . . . . . . . . . .19 Idle Speed Control Valve (
ISCV ) - removal, cleaning and refitting . .12
Engine Coolant Temperature (ECT) sensor - removal and refitting .15 Manifold Absolute Pressure (MAP) sensor - removal and refitting .13
Fuel cut-off (inertia) switch - removal and refitting . . . . . . . . . . . . . .18 Mixture (CO) adjustment potentiometer - removal and refitting . . . .17
Fuel filter renewal . . . . . . . . . . . . . . . . . . . . . . . . . . . . .See Chapter 1 Speed sender unit - removal and refitting . . . . . . . . . . . . . . . . . . . .16
Fuel injectors - removal and refitting . . . . . . . . . . . . . . . . . . . . . . . .10 Throttle cable - adjustment, removal and refitting . . . . . . . . . . . . . . .4
Fuel pressure regulator - removal and refitting . . . . . . . . . . . . . . . . .8 Throttle housing - removal and refitting . . . . . . . . . . . . . . . . . . . . . . .9
Fuel pump - removal and refitting . . . . . . . . . . . . . . . . . . . . . . . . . . .7 Throttle Position Sensor (TPS) - removal and refitting . . . . . . . . . . .11
Degrees of difficulty Easy, suitable for Fairly easy, Fairly difficult, Difficult, suitable Very difficult, novice with little suitable for suitable for for experienced suitable for expert experience beginner with competent DIY DIY mechanic DIY or professional some experience mechanic
Specifications
General
System type . . . . . . . . . . . . . . . . . . . . . . . . . . . . . . . . . . . . . . . . . . . . . . Multi-point electronic fuel injection
Application . . . . . . . . . . . . . . . . . . . . . . . . . . . . . . . . . . . . . . . . . . . . . . . 1.6 litre engines from 1990
Control pressure (engine running) . . . . . . . . . . . . . . . . . . . . . . . . . . . . . 2.3 to 2.5 bar (33 to 36 lbf/in2)
Fuel requirement
Fuel octane rating . . . . . . . . . . . . . . . . . . . . . . . . . . . . . . . . . . . . . . . . . . 95 RON (unleaded) or 97 RON (leaded)
Torque wrench setting Nm lbf ft
Fuel filter unions . . . . . . . . . . . . . . . . . . . . . . . . . . . . . . . . . . . . . . . . . . . 14 to 20 11 to 15 4D·2 Electronic fuel injection system
The fuel pump is electric, and its electrical 1 General information and supply is provided via a relay controlled by the 3 Fuel tank - removal and refitting precautions EEC IV module. When the ignition is switched on, the fuel pump is given a lead-in time of approximately one second in order to build up The procedure is as described in Part A of
General information pressure in the system. The pump also this Chapter for carburettor engines. From the 1990 model year, an Electronic incorporates a non-return valve which
Fuel Injection (EFI) system controlled by the prevents system pressure dropping after the 4 Throttle cable - adjustment,
Electronic Engine Control IV (EEC IV) system, ignition is switched off, to improve the warm start characteristics. removal and refitting
and incorporating an Electronic
Distributorless Ignition system (E-DIS 4) is An inertia switch (located under the spare The procedure is similar to that described in
used on all 1.6 litre fuel injection models. The wheel in the luggage compartment), installed Part A of this Chapter for carburettor engines.
system is designed to meet the requirements between the fuel pump relay and the fuel
of the European 15.04 exhaust emission pump will break the supply to the pump in the
control laws. event of sudden impact, thus switching off the 5 Accelerator pedal - removal Those components more easily related to pump. If the switch has been activated, the and refitting
the ignition system are described in Chapter reset button will be in the raised position.
5, Part B. Those relating to the fuel system are A fuel rail is bolted to the lower section of The procedure is the same as described in
described in this Section. the inlet manifold. The fuel rail acts as a fuel Part A of this Chapter for carburettor models. reservoir for the four fuel injectors, and The engine management and fuel systems locates the injectors in the inlet manifold.
are best described by dividing them into two A fuel filter is installed between the fuel 6 Fuel system - depressurising
separate sub-systems the air inlet system, pump and the fuel rail.
and the fuel system. A fuel pressure regulator, mounted on the
Air inlet system return end of the fuel rail and connected by a Warning: The fuel system will pipe to the inlet manifold to
sense manifold remain pressurised after the The volume of air drawn into the system engine is switched off. Comply pressure, controls fuel pressure in the fuel rail.
depends on air pressure and density, throttle with relevant safety precautions Excess fuel is returned to the fuel tank.
valve position, engine speed and the The fuel injectors are electro-magnetically during this operation and refer to the
cleanliness of the air cleaner element. operated, and the volume of fuel injected is "Safety First" Section at the beginning of The EEC IV module evaluates these factors regulated by varying the electrical pulse this manual before proceeding
through the Air Charge Temperature (ACT) duration which is computed by the EEC IV
sensor, Manifold Absolute Pressure (MAP) 1 Disconnect the battery negative lead. module. 2 Position a suitable container beneath the
sensor and Throttle Position Sensor (TPS), A "limited operation strategy" (LOS) means
and controls the engine idle speed via the Idle fuel filter. that the vehicle is still driveable (albeit at 3 Cover the outlet union on the filter with a
Speed Control Valve (ISCV). reduced power and efficiency) in the event of wad of absorbent cloth to minimise the risk of The air cleaner is similar to that used on a failure in the EEC IV module or its sensors. fuel spray, then slowly loosen the outlet union
earlier fuel injection models. A flexible hose Precautions and allow the pressure to dissipate.
connected to the valve cover acts as a 4 Tighten the union on completion unless the
cylinder head and crankcase breather. A Note: Following disconnection of the battery, filter is to be renewed.
further connection leads to the idle speed all Keep Alive Memory (KAM) values will be 5 The system will remain depressurised until
control valve. The valve is controlled by the erased from the EEC IV system module the fuel pump is primed prior to starting the
EEC IV module, and operates by varying the memory, which may result in erratic idle, engine. Remove the container and cloth on
size and opening duration of an auxiliary air engine surge, hesitation and a general completion.
passage , which by-passes the throttle valve. deterioration of driving characteristics.
A throttle housing bolted to the upper section Warning: Many of the procedures
of the inlet manifold houses the throttle valve 7 Fuel pump - removal and in this Chapter entail the removal refitting
and TPS. The TPS measures throttle opening. of fuel pipes and connections The MAP sensor, mounted on the engine which may result in some fuel
bulkhead and connected to the inlet manifold The fuel pump is integral with the fuel level spillage. Before carrying out any operation sender unit in the fuel tank. Removal and
by a vacuum pipe and electrically to the EEC on the fuel system refer to the precautions refitting are as described in Part C of this
IV module, measures the vacuum in the inlet given in Safety First! at the beginning of Chapter for models with the CFI system.
manifold. If the MAP sensor fails in service, this manual and follow them implicitly.
the EEC IV module uses the TPS to provide Petrol is a highly dangerous and volatile
one of three values: liquid and the precautions necessary when 8 Fuel pressure regulator - a) Idle handling it cannot be overstressed removal and refitting b) Part load Refer to the precautions given in Part B of Note: Refer to the precautions at the end of c) Full load this Chapter for models with mechanical fuel Section 1 before proceeding. A new sealing Inlet air temperature is measured by an injection. ring will be required on refitting.
electrically resistive element in the air charge
temperature sensor (ACT) screwed into the Removal
upper half of the inlet manifold. This supplies 2 Air cleaner - removal and
information to the EEC IV module. refitting 1 Disconnect the battery negative lead. 2 Depressurise the fuel system as described
Fuel system The procedure is similar to that described in in Section 6. The fuel pump and fuel level sender unit are Part B of this Chapter for models with 3 Disconnect the fuel return hose from the
contained in an integral unit in the fuel tank. mechanical fuel injection. regulator. Be prepared for fuel spillage and Electronic fuel injection system 4D·3
6 Disconnect the fuel supply hose from the fuel rail, and disconnect the fuel return hose and the vacuum hose from the pressure regulator. 7 Unscrew the two fuel rail securing bolts, and remove the fuel rail, complete with injectors. 8 To remove the injectors, simply pull them from the fuel rail. Recover the O-ring seals (see illustration). Refitting 9 Refitting is a reversal of removal, but note that new seals must be fitted to all injectors 8.3 Fuel pressure regulator assembly - 9.3 Air inlet pipe securing screws (A) and even if only one injector has been renewed, 1.6 EFI engine hose securing clip (B) - 1.6 EFI engine and all the seals must be lubricated with clean A Regulator C Vacuum hose engine oil before fitting to the injectors. 5 Disconnect the throttle position sensor B Fuel return hose D Securing bolts wiring plug. (to tank) 6 Unscrew the four securing nuts, and 11 Throttle Position Sensor
take adequate fire precautions (see withdraw the throttle housing from the inlet (TPS) - removal and refitting
illustration)). manifold. Recover the gasket.
4 Disconnect the vacuum hose from the Refitting Removal
regulator.
5 Unscrew the two securing bolts and 7 Refitting is a reversal of removal, but use a Note: During this procedure, ensure that the
withdraw the regulator from the fuel rail. new gasket between the throttle housing and sensor wiper is not rotated beyond its normal
6 Recover the sealing ring. the inlet manifold. operating arc 1 Disconnect the battery negative lead.
Refitting 10 Fuel injectors - removal and 2 Disconnect the wiring plug from the sensor
7 Refitting is a reversal of removal, but use a (see illustration). refitting
new sealing ring, and on completion, switch 3 Remove the two securing screws, and
the ignition on and off five times without withdraw the sensor from the throttle valve Note: Refer to the precautions at the end of
cranking the engine and check for fuel leaks. shaft. Section 1 before proceeding. New injector seals will be required on refitting. Refitting 9 Throttle housing - removal and 4D Removal 4 Refitting is a reversal of removal, ensuring refitting that the moulded side of the sensor faces the 1 Disconnect the battery negative lead. throttle housing, and that the flat on the sensor
Note: A new gasket must be used on refitting. 2 Depressurise the fuel system as described wiper engages with the flat on the throttle shaft. in Section 6.
Removal 3 Remove the throttle housing as described
1 Disconnect the battery negative lead. in Section 9. 12 Idle Speed Control Valve
2 Depressurise the fuel system as described 4 Disconnect the wiring plugs from the fuel (ISCV) - removal, cleaning and
in Section 6. injectors, air charge temperature sensor, and refitting
3 Remove the air inlet pipe (see illustration). engine coolant temperature sensor.
4 Disconnect the throttle cable from the 5 Remove the two fuel injection wiring
throttle valve linkage, then unbolt the cable harness securing nuts, and position the wiring Removal
bracket from the housing. harness clear of the fuel rail (see illustration). 1 Disconnect the battery negative lead.
10.8 Fuel rail and injector assembly - 11.2 Throttle position sensor - 1.6 EFI engine 1.6 EFI engine 1 Fuel inlet 4 Seals A Wiring plug B Securing screws
10.5 Fuel injection wiring harness securing 2 Fuel rail 5 Injector nuts (arrowed) - 1.6 EFI engine 3 Pressure regulator 4D·4 Electronic fuel injection system
12.2 Idle speed control valve - 12.7 Using a screwdriver to move the idle 14.1 Air charge temperature sensor - 1.6 EFI engine speed control valve piston - 1.6 EFI engine 1.6 EFI engine A Wiring plug B Securing bolts Refitting A Wiring plug B Sensor
2 Disconnect the valve wiring plug (see 5 Refitting is a reversal of removal, but note that the fuel trap in the vacuum line between
illustration). the inlet manifold and the sensor should be
3 Unscrew the two securing bolts, and fitted with the white end towards the sensor.
withdraw the valve from the air cleaner
housing. 14 Air Charge Temperature
Cleaning (ACT) sensor - removal and
4 Remove the valve as described earlier in refitting
this Section.
5 Immerse the valve in a container of clean Removal
petrol and allow it to soak for approximately
three minutes. 1 The air charge temperature sensor is
6 Use a clean paint brush to clean the bore, screwed into the inlet manifold (see
slots and piston of the valve. illustration). 17.1 Mixture (CO) adjustment
7 Using a small screwdriver, carefully move 2 Disconnect the battery negative lead. potentiometer (arrowed) - 1.6 EFI engine
the piston up and down in the bore (do not 3 Disconnect the sensor wiring plug. Do not
use the slots to do this), then rinse the valve pull on the wiring. 4 Unscrew the sensor from the inlet manifold.
with petrol and dry it, preferably using 17 Mixture (CO) adjustment
compressed air (see illustration). Refitting potentiometer - removal and
8 Refit the valve as described in the following 5 Refitting is a reversal of removal, but apply refitting
paragraphs. suitable sealer to the sensor threads.
Refitting 15 Engine Coolant Temperature Removal
9 Refitting is a reversal of removal, ensuring (ECT) sensor - removal and 1 The potentiometer is located on the side of
that the mating faces of the valve and air the left-hand suspension turret (see
cleaner are clean. refitting illustration).
10 On completion, start the engine and 2 Disconnect the battery negative lead.
check that the idle speed is stable, and that Removal 3 Disconnect the potentiometer wiring plug.
there are no air leaks. Warm the engine up to 4 Remove the securing screw and withdraw
normal operating temperature, then switch on 1 The sensor is screwed into the cylinder the potentiometer.
all available electrical loads and check that block below the inlet manifold.
the idle speed is maintained. 2 Disconnect the battery negative lead. Refitting 3 Drain the cooling system as described in 5 Refitting is a reversal of removal, but on Chapter 1. 13 Manifold Absolute Pressure completion check and if necessary adjust the 4 Disconnect the sensor wiring plug. mixture as described earlier in this Chapter 1. (MAP) sensor - removal and 5 Unscrew the sensor from the cylinder refitting block. 18 Fuel cut-off (inertia) switch - Refitting removal and refitting
Removal 6 Refitting is a reversal of removal, but on
1 Disconnect the battery negative lead. completion refill the cooling system as The procedure is as described in Part C of
2 Disconnect the sensor wiring plug. Do not described in Chapter 1. this Chapter for models with the CFI system.
pull on the wiring.
3 Disconnect the vacuum hose from the 16 Speed sender unit - removal 19 EEC IV module - removal and
sensor. and refitting refitting
4 Remove the two securing screws and
withdraw the sensor from the engine The sender unit is similar to that used with The procedure is as described in Part C of
compartment bulkhead. the fuel computer described in Chapter 12. this Chapter for models with the CFI system. 4E·1
Chapter 4 Part E:
Manifolds, exhaust and 4E
emission control systems
Contents
Crankcase emission control system components - removal and Exhaust system - renewal . . . . . . . . . . . . . . . . . . . . . . . . . . . . . . . . .4 refitting . . . . . . . . . . . . . . . . . . . . . . . . . . . . . . . . . . . . . . . . . . . . . .6 Exhaust system check . . . . . . . . . . . . . . . . . . . . . . . . .See Chapter 1
Crankcase emission control filter renewal . . . . . . . . . .See Chapter 1 Fuel evaporative emission control system components (Central Fuel
Exhaust emission control system components - removal and Injection/CFI engines) - removal and refitting . . . . . . . . . . . . . . . . .5 refitting . . . . . . . . . . . . . . . . . . . . . . . . . . . . . . . . . . . . . . . . . . . . . .7 General information . . . . . . . . . . . . . . . . . . . . . . . . . . . . . . . . . . . . . .1
Exhaust manifold - removal and refitting . . . . . . . . . . . . . . . . . . . . . .3 Inlet manifold - removal and refitting . . . . . . . . . . . . . . . . . . . . . . . . .2
Exhaust manifold nut check - RS Turbo models . . . . .See Chapter 1 Turbocharger-to-manifold nut tightness check . . . . . .See Chapter 1
Degrees of difficulty Easy, suitable for Fairly easy, Fairly difficult, Difficult, suitable Very difficult, novice with little suitable for suitable for for experienced suitable for expert experience beginner with competent DIY DIY mechanic DIY or professional some experience mechanic
Specifications
Fuel evaporative emission control system - carburettor engines
Ported vacuum switch operating temperature: Two-port valve . . . . . . . . . . . . . . . . . . . . . . . . . . . . . . . . . . . . . . . . . . 52 to 55°C (125 to 131°F) Three-port valve . . . . . . . . . . . . . . . . . . . . . . . . . . . . . . . . . . . . . . . . . 52 to 55°C (125 to 131°F) 4E·2 Manifolds, exhaust and emission control systems
1 General information
All models utilise a light alloy inlet manifold
which on carburettor models is coolant
heated to improve the atomisation of the
fuel/air mixture. The exhaust manifold is of cast iron
construction and incorporates a heated air box
as part of the air inlet system on carburettor
models. The exhaust system fitted as original
equipment is of single or two section type
incorporating a silencer and expansion box and
suspended on rubber mountings under the car. Emission control consists of reducing the
emission of noxious gases and vapours, which
are by products of combustion, into the
atmosphere. The system can be divided into 1.9 Typical crankcase ventilation system as used on CVH engines with carburettor
three categories; fuel evaporative emission A Ventilation at idle with part-closed throttle B Ventilation at full throttle position
control, crankcase emission control and
exhaust emission control. The components Crankcase emission control routing is still as just described, but in addition
and system operation for Escort models the gases are drawn through a filter and pass
operating in the United Kingdom are as follows. into the air cleaner. OHV engines
Fuel evaporative emission control This arrangement offsets any tendency for On OHV engines a closed circuit crankcase the fuel/air ratio to be adversely affected at full ventilation system is used ensuring that blow- throttle.
Carburettor engines by gases which pass the piston rings and Fuel evaporative emission control simply collect in the crankcase, as well as oil vapour, Exhaust emission control
consists of internal venting of the carburettor are drawn into the combustion chambers to
float chamber and closed circuit fuel tank be burnt. Carburettor engine models
ventilation. The system consists of a vented engine oil On carburettor engine models an exhaust filler cap connected by one hose to the inlet
Central Fuel Injection (CFI) engine emission control system is used of which the manifold and by another to the air cleaner.
models exact components fitted can vary according The gas flow is controlled by a calibrated port to model. In general the system operates as To minimise the escape of unburned in the oil filler cap and by manifold vacuum follows.
hydrocarbons, the fuel tank filler cap is sealed, according to throttle position. To improve driveability during warm-up
and a
charcoal canister collects the petrol CVH engines conditions and to keep exhaust emission
vapours generated in the fuel tank when the levels to a minimum, a vacuum-operated,
car is parked. The canister stores them until On CVH engines a closed circuit crankcase temperature-
sensitive emission control system
they can be cleared from the canister (under ventilation system is also used (see is fitted to OHV and CVH engines covered by
the control of the fuel injection/ignition system illustration). this manual. The system is designed to ensure
electronic control unit) via the canister purge At light throttle openings, the emissions are that the
rate of distributor vacuum advance is
solenoid valve. When the valve is opened, the drawn out of the rocker cover, through a compatible with the change in fuel/air mixture
fuel vapours pass into the inlet tract, to be control orifice in the crankcase ventilation flow under all throttle conditions, thus resulting
burned by the engine during normal filter (where fitted), and into the inlet manifold. in more complete combustion and reduced
combustion. Under full throttle conditions the gas flow exhaust emissions.
1.15a Emission control system fitted to manual transmission models with Ford VV carburettor A Fuel trap 1.15b Alternative emission control system layout for manual transmission models B Ported vacuum switch adapter with Ford VV carburettor C Ported vacuum switch A Fuel trap D Spark
sustain valve B Ported vacuum switch adapter E Spark delay valve C Ported vacuum switch D Spark sustain valve Manifolds, exhaust and emission control systems 4E·3
1.15d Emission control system layout for automatic transmission models with Ford VV carburettor 1.15c Emission control system layout for manual transmission A Fuel trap F Check valve models with Weber 2V carburettor B Two-way solenoid G Restrictor A Fuel trap C Spark sustain valve C Ported vacuum switch (blue) H Dual diaphragm distributor B Ported vacuum switch D Ported vacuum switch (green) J Inlet manifold connection E T-connectors Under part throttle
cruising conditions, engine warm-up, some models may suffer from
distributor vacuum advance is required to allow a lack of throttle response. To overcome this 2 Inlet manifold - removal and
time for the fuel/air mixture in the cylinders to problem a spark sustain valve may be fitted in refitting
burn. When returning to a part throttle opening the vacuum line either individually or in
after accelerating or decelerating, the conjunction with the spark delay valve. This Note: A new gasket will be required on
distributor vacuum increases before the fuel/air valve is used to maintain distributor vacuum refitting.
mixture has stabilised. On certain engines this under transient throttle conditions, thus
can lead to short periods of incomplete stabilising the combustion process. Carburettor models
combustion and increased exhaust emission. The operation of the valves is controlled by
To reduce this condition a spark delay valve is a ported vacuum switch (PVS) which has the Removal
incorporated in the vacuum line between the vacuum lines connected to it. The PVS is 1 Disconnect the battery negative lead. 4E
carburettor and distributor to reduce the rate at actuated by the engine cooling water and is 2 Remove the air cleaner as described in Part
which the distributor advances. Under certain sensitive to changes in engine operating A of this Chapter.
conditions, particularly during the period of temperature. A fuel trap prevents fuel or fuel 3 Refer to Chapter 1 and drain the cooling vapour from being drawn into the distributor system. vacuum unit (see illustrations). 4 Remove the carburettor as described in The carburettor speed control system is an Part A of this Chapter according to type. integral part of the emission control system on 5 Disconnect the manifold coolant hoses. some UK models as well as for some 6 Make a careful note of all vacuum overseas
market models (see illustration). connections at the vacuum switches and The system's function is to improve the air solenoids and disconnect them. and fuel mixture when the engine is cold in 7 Where applicable disconnect the switch low ambient temperatures. It achieves this by wiring multi-plugs after noting their locations. increasing the air volume to the inlet manifold in order to weaken the mixture ratio which has 8 Undo the manifold retaining nuts and been enriched by choke operation. withdraw the manifold from the cylinder head The carburettor speed control valve is fitted studs. Recover the gasket. to a vacuum hose which is located between Refitting the air cleaner unit and the inlet manifold on UK models. 9 Refitting is the reverse sequence to removal but use a new gasket and ensure that the Central Fuel Injection (CFI) engine mating faces are clean. On completion refill models the cooling system as described in Chapter 1. To minimise the amount of pollutants which XR3i and XR3i Cabriolet models escape into the atmosphere, a catalytic with mechanical (Bosch K- and converter is fitted in the exhaust system of KE-Jetronic) fuel injection CFI engine models. The system is of a closed loop type. A 1.16 Carburettor speed control system Removal Heated Exhaust Gas Oxygen (HEGO) sensor layout located in the exhaust system provides the fuel 10 Disconnect the battery negative lead. A Temperature vacuum switch injection/ignition electronic control unit with 11 Remove the warm-up regulator, throttle B Carburettor speed control valve constant feedback, enabling the control unit to housing, fuel injectors and cold start valve as C Spark delay valve adjust the mixture to provide the best possible described in Part B of this Chapter. D Ported vacuum switch and adapter conditions for the converter to operate. 12 Drain the cooling system (Chapter 1). 4E·4 Manifolds, exhaust and emission control systems
13 Make a note of the vacuum hose, 33 From beneath the manifold disconnect Refitting
crankcase ventilation hose and wiring multi- the thermo-time switch and temperature 46 Commence refitting by cleaning all traces
plug locations as applicable and disconnect sensor wiring multi-plugs after noting their of old gasket from the mating faces of the
them. locations, and the coolant hoses from the manifold and the cylinder head.
14 Disconnect the coolant hoses at the intermediate flange. 47 Refitting is the reversal of removal, using a
manifold intermediate flange. 34 Remove the oil cooler-to-manifold new gasket. Refit the remainder of the
15 Check that all wiring and hoses have been connecting hose. components with reference to the appropriate
disconnected from above and below the 35 Undo the retaining nuts and withdraw the Parts of this Chapter.
manifold, then undo the retaining nuts. manifold and intermediate flange together
16 Withdraw the manifold and intermediate with their gaskets.
flange together with their gaskets. 3 Exhaust manifold - removal Refitting and refitting
Refitting 36 Refitting is the reverse sequence to
17 Refitting is the reverse sequence to Note: A new gasket will be required on removal, but use a new gasket on each side of
removal, but use a new gasket on each side of refitting.
the intermediate flange. Refit the cold start the intermediate flange. Refit the auxiliary air
valve, fuel injectors, throttle housing and device, cold start valve, fuel injectors and Removal
warm-up regulator as described in Part B of throttle housing as described in Part B of this 1 Disconnect the battery negative lead.
this Chapter, and on completion refill the Chapter and on completion refill the cooling 2 On carburettor and CFI engine models
cooling system as described in Chapter 1. system as described in Chapter 1. remove the air cleaner as described in the
RS Turbo models (1985 to May 1986) Central Fuel Injection (CFI) engine appropriate Part of this Chapter. models 3 Remove the turbocharger on RS Turbo
Removal models as described in Part B of this Chapter. 37 Remove the CFI unit as described in Part 4 On EFI engines, unbolt the air inlet pipe and
18 Disconnect the battery negative lead. C of this Chapter. move it to one side.
19 Remove the throttle housing, fuel injectors 38 The remainder of the procedure is similar 5 Where applicable, unbolt the hot air shroud
and cold start valve as described in Part B of to that described previously in this Section for for access to the manifold securing nuts.
this Chapter. carburettor engine models. 6 Support the exhaust system on a jack or
20 Drain the cooling system (Chapter 1). blocks, then disconnect the downpipe at the
21 Disconnect the crankcase ventilation hose Electronic Fuel Injection (EFI) manifold. On models with CFI engines, take
and vacuum hose from the top of the plenum engine models care not to strain the HEGO sensor wiring (see
chamber. Part C of this Chapter).
22 Disconnect the vacuum servo hose from Removal 7 Undo the nuts securing the manifold to the
the side of the plenum chamber. 39 Depressurise the fuel system as cylinder head and remove it from the engine.
23 From below the inlet manifold remove the described in Part D of this Chapter. Recover the manifold gasket.
auxiliary air device as described in Part B of 40 Disconnect the battery negative lead.
this Chapter, then disconnect the thermo-time 41 Remove the air inlet ducting, and Refitting
switch and temperature sensor wiring multi- disconnect the throttle cable from the throttle 8 Refitting is the reverse sequence to removal,
plugs after noting their locations. linkage (see Part A of this Chapter). but refit the turbocharger on RS Turbo models
24 Remove the oil cooler-to-inlet manifold 42 Remove the fuel rail and fuel injectors as as described in Part B of this Chapter.
connecting hose.
25 From above, undo the bolts and remove described in Part D of this Chapter.
the plenum chamber support bracket. 43 Noting their locations, disconnect the coolant, vacuum and breather hoses from the 4 Exhaust system - renewal
26 Undo the nuts and remove the inlet
manifold and plenum chamber from the manifold.
cylinder head. Recover the gasket. 44 Disconnect the wiring multi-plugs from 1 The layout of the exhaust system varies
27 If required undo the nuts and separate the the engine sensors at the inlet manifold. considerably according to model and engine.
plenum chamber from the inlet manifold. 45 Undo the retaining bolts, and withdraw All except the RS Turbo versions can be
Recover the gaskets. the manifold from the cylinder head. Where renewed in sections; coupling sleeves are applicable, note the location of the engine supplied, enabling an old section to be cut out
Refitting lifting bracket and/or earth lead. Remove the and a new one inserted without the need to
28 Refitting is the reverse sequence to gasket. renew the entire system all at once.
removal, but use new gaskets on all flange
joints. Refit the auxiliary air device, cold start
valve, fuel injectors and throttle housing as
described in Part B of this Chapter, and refill
the cooling system as described in Chapter 1.
RS Turbo models (May 1986-on)
Removal
29 Disconnect the battery negative lead.
30 Remove the throttle housing, fuel
injectors, cold start valve and auxiliary air
device as described in Part B of this Chapter.
31 Drain the cooling system (Chapter 1).
32 Disconnect the crankcase ventilation hose
and vacuum hose from the top of the manifold 4.2a Exhaust silencer mounting . . . 4.2b . . . and expansion box mounting
and the vacuum servo hose from the side. Manifolds, exhaust and emission control systems 4E·5
2 It is recommended when working on an
exhaust system that the complete assembly
be removed from under the vehicle by
releasing the downpipe from the manifold and
unhooking the flexible suspension hangers
(see illustrations).
3 Assemble the complete system, but do not
fully tighten the joint clips until the system is
back in the vehicle. Use a new exhaust
manifold/flange gasket and check that the
flexible mountings are in good order, also
check the connecting flange joint.
4 Set the silencer and expansion box in their
correct attitudes in relation to the rest of the
system before finally tightening the joint clips. 5.1 Carbon canister location (wheelarch 5.7 Carbon canister purge solenoid
5 Check that with reasonable deflection in liner removed) - CFI engine location - CFI engine
either direction, the exhaust does not knock 8 Disconnect the battery negative lead. A Canister purge B Wiring plug
against any adjacent components. 9 Disconnect the solenoid wiring plug. solenoid C Hose 10 Disconnect both hoses from the solenoid, side of the engine and can be removed after 5 Fuel evaporative emission noting their locations, then withdraw the disconnecting the hoses (see illustration). On control system components solenoid from the vehicle. early versions detach the filter from its support (Central Fuel Injection/CFI Refitting bracket also. Refitting is a reversal of removal. engines) - removal and refitting 4 During the course of production 11 Refitting is a reversal of removal. modifications have been made to the crankcase ventilation system on K-Jetronic
Carbon canister 6 Crankcase emission control fuel-injected engines to eliminate stalling and system components - removal rough idling caused by oil from the crankcase
Removal and refitting venting system contaminating the throttle
1 The carbon canister is located behind the housing.
bumper, under the front right-hand wheelarch 5 Three versions of the system may be
(see illustration). Carburettor and Central Fuel encountered. If the stalling and rough idling
2 Disconnect the battery negative lead. Injection (CFI) engines problems are encountered on cars equipped
3 Remove the wheelarch liner. 1 On OHV and HCS engines renewal of the with the Mk 1 or Mk 2 system, then they
4 Disconnect the pipe from the carbon vented oil filler cap and crankcase ventilation should be uprated to Mk 3 specification as 4E
canister. hoses is simply a matter of removing them described in the following paragraphs. It
5 Remove the screw securing the canister to from their locations and fitting new parts as should be noted that even the latest (Mk 3)
the mounting bracket, and withdraw the required. level system failed to cure the problem
canister. 2 On CVH engines the crankcase ventilation completely and at the beginning of 1986 a filter (where fitted) can be renewed by pulling revised throttle housing was introduced.
Refitting it out of the air cleaner after disconnecting the These can be identified by having their idle hoses (see illustration). Ensure that the speed adjustment screw located on the top of
6 Refitting is a reversal of removal. sealing grommet is in position in the air the housing under a tamperproof cap, rather
Carbon canister purge solenoid cleaner before pushing a new filter into place. than underneath the housing as on early versions. The latest version of throttle housing
Removal Mechanical (Bosch K- and KE- can be fitted to early cars but the work should Jetronic) fuel injection engines
7 The solenoid is located near the bulkhead
on the right-hand side of the engine 3 On fuel-injection engines the crankcase
compartment (see illustration). ventilation filter is located on the right-hand
6.9 Components of Mk 1 crankcase ventilation system - fuel-injection models
6.2 Crankcase ventilation filter renewal on 6.3 Crankcase ventilation filter location CVH engines with carburettor - pull valve (arrowed) on KE-Jetronic fuel-injected A T-connector C Plenum chamber in direction of arrow engines B Short hose connector 4E·6 Manifolds, exhaust and emission control systems
6.10 Fuel shut-off valve hose (D) and 6.15a Unscrewing the plenum chamber 6.15b Correct setting of plenum chamber plenum chamber connector (C) on Mk 1 plug - fuel-injection models angled connector - fuel-injection models type crankcase ventilation system - fuel-injection models Cars with earliest type (Mk 1) Cars with Mk 2 crankcase ventilation crankcase ventilation system system
be carried out by a dealer, as numerous 8 Remove and discard the crankcase 19 Remove and discard the crankcase
modifications are involved. The latest version ventilation filter vacuum hose. ventilation filter vacuum hose and fit a
of crankcase ventilation system should always 9 Remove and discard the T-connector and blanking cap to the hose connector on the
be fitted first however, as follows. also the short hose (see illustration). throttle housing end of the plenum chamber
6 As a preliminary operation, remove the idle 10 Fit the
overrun fuel shut off valve hose to (see illustration).
speed adjustment screw and blow out the idle the plenum chamber connector (see 20 Remove and discard the plug from the
passage in the throttle housing using air illustration). plenum chamber and substitute the new
pressure. 11 Remove and discard the crankcase angled connector as described in para-
7 Refit the screw. ventilation filter bracket.
graph 15. 12 Remove and discard the hose which runs 21 Fit the new hose between the ventilation between the ventilation filter and the rocker filter and the angled connector. cover. 22 Repeat the operations described in 13 Turn the filter and its hose, which is paragraphs 17 and 18. connected to the air cleaner, so that the small 23 Later model cars have the crankcase spigot on the filter is uppermost. ventilation filter hose connections as shown 14 Fit a new hose between the filter and (see illustration). rocker cover, secure it with the hose clips. 15 Remove and discard the plug from the Electronic Fuel Injection (EFI) plenum chamber and in its place screw in the engines angled connectors. Set the connector as 24 A crankcase ventilation filter is fitted in the shown (see illustrations). hose run to the air cleaner. During the course 16 Connect the ventilation filter to the angled of production, modifications have been made connector using a new hose. to the crankcase ventilation system, and two 17 Seat the idle speed screw gently and then versions of the system may be encountered unscrew it two complete turns. (see illustrations). 18 Bring the engine to normal working 25 Removal and refitting of the filter is simply 6.19 Mk 2 crankcase ventilation system - temperature and adjust the idle speed and a matter of disconnecting the relevant hoses. fuel-injection models mixture as described in Chapter 1.
6.23 Mk 3 crankcase ventilation system - 6.24a Early type crankcase ventilation 6.24b Later type crankcase ventilation fuel-injection models system - 1.6 EFI engine system - 1.6 EFI engine E Hose clip F Cable-ties Manifolds, exhaust and emission control systems 4E·7
6 Reconnect the water hoses and if 7 Exhaust emission control necessary top-up the cooling system. system components - removal Fuel trap and refitting Removal 7 Disconnect the vacuum lines and remove
Carburettor engines the fuel trap from the engine. Refitting
Spark delay/sustain valve 8 When refitting, make sure that the fuel trap
Removal is positioned with the black side (marked
1 Disconnect the vacuum lines at the valve
CARB ) towards the carburettor and the white
and remove the valve from the engine. side (marked DIST) towards the PVS (see
Refitting illustration).
2 When refitting a spark delay valve it must
be positioned with the black side (marked Central Fuel Injection (CFI) 7.8 Fuel trap marked for direction of fitting
CARB) towards the carburettor and the engines
coloured side (marked DIST) towards the Refitting
distributor. When refitting a spark sustain Catalytic converter 14 Commence refitting by ensuring that the
valve the side marked VAC must be towards Removal mating faces of the catalytic converter,
the carburettor and the side marked DIST Note: Handle the catalyst with care. Any downpipe, and exhaust system are clean.
towards the distributor. sudden knocks can cause damage to the 15 Examine the mounting rubbers, and internal substrates renew if necessary, noting that the rubbers
Ported vacuum switch used are of a special high temperature type 9 Disconnect the battery negative lead.
Removal 10 Apply the handbrake, then jack up the due to the high operating temperature of the
3 Remove the filler cap from the expansion front of the vehicle and support it securely on catalyst.
tank to reduce pressure in the cooling system. axle stands (see "Jacking and Vehicle 16 Loosely fit the catalytic converter in
If the engine is hot, remove the cap slowly Support"). position, but do not tighten the fixings yet.
using a rag to prevent scalding. 11 Remove the bolts from the exhaust Use a new gasket at the converter-to-
4 Disconnect the vacuum lines and the water downpipe-to-catalytic converter flanged joint. downpipe flanged joint.
hoses, then unscrew the valve. 12 Unscrew the nuts, and remove the clamp 17 Carefully align the downpipe, converter
Refitting securing the rear of the catalytic converter to and exhaust system, then tighten the fixings.
5 When refitting the valve, note that the 18 Lower the vehicle and reconnect the the exhaust system.
vacuum line from the carburettor is connected battery negative lead, then start the engine
to the middle outlet on the PVS, the vacuum 13 Unhook the catalytic converter from the rubber mountings, and carefully manipulate and check the exhaust system for leaks. 4E
line from the spark delay valve (where fitted) is
connected to the outlet nearest to the threaded the converter from under the vehicle. If Heater Exhaust Gas Oxygen (HEGO)
end of the PVS, and the vacuum line from the necessary, unhook the front end of the sensor
spark sustain valve is connected to the outlet exhaust system from the rubber mountings to 19 Refer to Part C of this Chapter.
furthest from the threaded end of the PVS. ease the procedure. 4E·8 Notes 5A·1
Chapter 5 Part A:
Starting and charging systems
Contents
Alternator - removal and refitting . . . . . . . . . . . . . . . . . . . . . . . . . . . .5 Electrical fault
finding - general information . . . . . . . . . . . . . . . . . . . .2
Alternator brushes and regulator - renewal . . . . . . . . . . . . . . . . . . . .6 General information and precautions . . . . . . . . . . . . . . . . . . . . . . . . .1
Alternator drivebelt check . . . . . . . . . . . . . . . . . . . . . . .See Chapter 1 Ignition switch - removal and refitting . . . . . . . . . . . . . . . . . . . . . . .10
Battery check . . . . . . . . . . . . . . . . . . . . . . . . . . .See "Weekly checks" Starter motor - removal and refitting . . . . . . . . . . . . . . . . . . . . . . . . .8
Battery - removal and refitting . . . . . . . . . . . . . . . . . . . . . . . . . . . . . .4 Starter motor - testing in the car . . . . . . . . . . . . . . . . . . . . . . . . . . . .7
Battery - testing and charging . . . . . . . . . . . . . . . . . . . . . . . . . . . . . .3 Starter motor brushes - renewal . . . . . . . . . . . . . . . . . . . . . . . . . . . .9
Degrees of difficulty Easy, suitable for Fairly easy, Fairly difficult, Difficult, suitable Very difficult, novice with little suitable for suitable for for experienced suitable for expert experience beginner with competent DIY DIY mechanic DIY or professional some experience mechanic 5A
Specifications
Battery
Type . . . . . . . . . . . . . . . . . . . . . . . . . . . . . . . . . . . . . . . . . . . . . . . . . . . . 12 volt lead-acid, 35 to 52 Ah depending on model
Charge condition: Poor . . . . . . . . . . . . . . . . . . . . . . . . . . . . . . . . . . . . . . . . . . . . . . . . . . . 12.4 volts or less Normal . . . . . . . . . . . . . . . . . . . . . . . . . . . . . . . . . . . . . . . . . . . . . . . . . 12.6 volts Good . . . . . . . . . . . . . . . . . . . . . . . . . . . . . . . . . . . . . . . . . . . . . . . . . . 12.7 volts or over
Alternator
Minimum brush length: Bosch, Lucas and
Mitsubishi . . . . . . . . . . . . . . . . . . . . . . . . . . . . . . . 5.0 mm
Motorola . . . . . . . . . . . . . . . . . . . . . . . . . . . . . . . . . . . . . . . . . . . . . . . 4.0 mm
Regulator voltage at 4000 rpm with 3 to 7A load (all models) . . . . . . . . 13.7 to 14.6 volts
Starter motor
Type . . . . . . . . . . . . . . . . . . . . . . . . . . . . . . . . . . . . . . . . . . . . . . . . . . . . Pre-engaged
Make: Bosch . . . . . . . . . . . . . . . . . . . . . . . . . . . . . . . . . . . . . . . . . . . . . . . . . 0.8 kW, 0.85 kW, 0.9 kW, 0.95 kW Lucas . . . . . . . . . . . . . . . . . . . . . . . . . . . . . . . . . . . . . . . . . . . . . . . . . . 8M 90, 9M 90, M 79 Nippondenso . . . . . . . . . . . . . . . . . . . . . . . . . . . . . . . . . . . . . . . . . . . . 0.6 kW, 0.9 kW
Minimum brush length: Bosch . . . . . . . . . . . . . . . . . . . . . . . . . . . . . . . . . . . . . . . . . . . . . . . . . 10.0 mm Lucas . . . . . . . . . . . . . . . . . . . . . . . . . . . . . . . . . . . . . . . . . . . . . . . . . . 8.0 mm Nippondenso 0.6 kW . . . . . . . . . . . . . . . . . . . . . . . . . . . . . . . . . . . . . 10.0 mm Nippondenso 0.9 kW . . . . . . . . . . . . . . . . . . . . . . . . . . . . . . . . . . . . . 9.0 mm 5A·2 Starting and charging systems
Always remove rings watches, etc before Maintenance-free battery - testing working on the electrical system. Even with 4 In cases where a "sealed for life" the battery disconnected, capacitive maintenance-free battery is fitted, topping-up discharge could occur if a component
live and testing of the electrolyte in each cell is not terminal is earthed through a metal object. possible. The condition of the battery type This could cause a shock or
nasty burn. can therefore only be tested using a battery Do not reverse the battery connections. condition indicator or a voltmeter. Components such as the alternator, or any 5 If testing the battery using a voltmeter, other having semi-conductor, could be connect it across the battery and compare the irreparably damaged. result with those given in the Specifications If the engine is being started using
jump under "charge condition". The test is only leads and a
slave battery, connect the accurate if the battery has not been
subject to batteries positive to positive and negative to any kind of charge for the previous six hours. negative. This also applies when connecting a If this is not the case switch on the headlights 1.3 Battery types battery charger.
A Maintenance-free sealed cell type for 30 seconds then wait four to five minutes Never disconnect the battery terminals, or before testing the battery after switching off
B Maintenance-free removable cell top type alternator multi-plug connector, when the
C Low maintenance type the headlights. All other electrical components engine is running. must be switched off, so check that the doors The battery leads and alternator multi-plug and tailgate are fully shut when making the must be disconnected before carrying out any test. 1 General information and electric welding on the car. 6 If the voltage reading is less than the 12.2 precautions Never use an ohmmeter of the type volts then the battery is discharged, whilst a incorporating a hand cranked
generator for reading of 12.2 to 12.4 volts indicates a
General information circuit or continuity testing. partially discharged condition. 7 If the battery is to be charged, remove it The engine electrical system includes all from the vehicle (Section 4) and charge it as
charging, starting and ignition system 2 Electrical fault finding - general information described later in this Section.
components and the engine oil pressure
sensor. Because of their engine-related Standard and low maintenance
functions, these components are covered Refer to Chapter 12. battery - charging
separately from the body electrical
devices 8 Charge the battery at a rate of 3.5 to 4
such as the lights, instruments, etc (which are 3 Battery - testing and charging amps and continue to charge the battery at
covered in Chapter 12). Refer to Part B of this this rate until no further rise in
specific gravity
Chapter for information on the ignition system. is noted over a four hour period. The electrical system is of the 12-volt Note: Refer to the precautions at the end of 9 Alternatively, a trickle charger charging at
negative earth type. Section 1 before proceeding. the rate of 1.5 amps can be safely used The battery is of the low maintenance or overnight.
maintenance-free type and is charged by the Standard and low maintenance 10 Specially rapid "boost" charges which are
alternator, which is belt-driven from a battery - testing claimed to restore the power of the battery in
crankshaft-mounted pulley (see illustration). 1 If the car covers a small annual mileage it is 1 to 2 hours are not recommended as they The starter motor is of the pre-engaged worthwhile checking the specific gravity of the can cause serious damage to the battery
type, incorporating an integral solenoid. On electrolyte every three months to determine plates through overheating.
starting, the solenoid moves the drive pinion the state of charge of the battery. Use a 11 While charging the battery note that the
into engagement with the flywheel ring gear
before the starter motor is energised. Once the hydrometer to make the check and compare temperature of the electrolyte should never
engine has started, a one-way clutch prevents the results with the following table. exceed 37.8°C (100°F).
the motor armature being driven by the engine Ambient temperature: Maintenance-free battery -
until the pinion disengages from the flywheel. charging Further details of the various systems are Above 25ºC Below 25ºC
given in the relevant Sections of this Chapter. Fully charged 1.210 to 1.230 1.270 to 1.290 12 This battery type takes considerably
While some repair procedures are given, the 70% charged 1.170 to 1.190 1.230 to 1.250 longer to fully recharge than the standard
usual course of action is to renew the discharged 1.050 to 1.070 1.110 to 1.130 type, the time taken being dependent on the
component concerned. The owner whose extent of discharge, but it can take
anything interest extends beyond mere component Note that the specific gravity readings assume up to three
days .
renewal should obtain a copy of the an electrolyte temperature of 15°C (60°F); for 13 A constant voltage type charger is
"
Automobile Electrical & Electronic Systems every 10°C (50°F) below 15°C (60°F) subtract required, set to 13.9 to 14.9 volts with a
Manual", available from the publishers of this 0.007. For every 10°C (50°F) above 15°C charger current below 25 amps. Using this
manual. (60°F) add 0.007. method the battery should be usable within 2 If the battery condition is suspect first three hours, giving a voltage reading of 12.5
Precautions check the specific gravity of electrolyte in volts, but this is for a partially discharged It is necessary to take
extra care when each cell. A
variation of 0.040 or more battery and, as mentioned, full charging can
working on the electrical system to avoid between any cells indicates loss of electrolyte take considerably longer.
damage to semi-conductor devices (diodes or deterioration of the internal plates. 14 If the battery is to be charged from a fully
and transistors), and to avoid the risk of 3 If the specific gravity variation is 0.040 or discharged state (condition reading less than
personal injury. In addition to the precautions more, the battery should be renewed. If the 12.2 volts) have it recharged by your Ford
given in "Safety First!" at the beginning of this cell variation is satisfactory but the battery is dealer or local
automotive electrician as the
manual, observe the following items when discharged, it should be charged as charge rate is
higher and constant supervision
working on the system. described later in this Section. during charging is necessary. Starting and charging systems 5A·3
5.4 Alternator mounting and adjuster link 5.6a Correct fitting of alternator mounting 5.6b Alternator mounting bolt bolts components - early models arrangement - later models A Adjuster link-to-alternator bolt A Large washer B Adjuster link-to-engine bolt B Small washer (pre-1985 CVH engines only) C and D Alternator mounting bolts C Mounting bracket D Alternator illustration). It may be necessary to remove the adjuster link-to-alternator bolt to facilitate 6 Alternator brushes and 4 Battery - removal and refitting removal of the drivebelt. regulator - renewal 5 Undo and remove the mounting nuts and
Note: Refer to the precautions at the end of bolts and adjuster link bolt, if not already
Section 1 before proceeding. removed, and withdraw the alternator from Bosch alternator the engine. 1 With the alternator removed from the
Removal engine, clean the external surfaces free from Refitting
1 The battery is located on the left-hand side dirt.
of the engine compartment on a bulkhead 6 Refitting is the reverse sequence to 2 Extract the brush box/regulator screws
platform . removal, bearing in mind the following points. from the rear cover and withdraw the brush
2 Disconnect the leads at the negative (earth) a) Ensure that the mounting bolts and box/regulator (see illustration). Check the
terminal by undoing the retaining nut and washers are
assembled as shown (see brush length and, if less than the specified
removing the bolt. Disconnect the positive illustrations). minimum, renew them.
terminal leads in the same way. b) Adjust the drivebelt tension as described 3 Unsolder the brush wiring connectors and
3 Undo the bolts securing the two battery in Chapter 1. remove the brushes and the springs.
clamps and remove the clamps. c) On completion, where applicable, refill the
4 Lift the battery from its location, keeping it cooling system as described in Chapter 1. 4 Refit by reversing the removal operations. 5A
in an upright position to avoid spilling
electrolyte on the paintwork.
Refitting
5 Refitting is the reverse sequence to removal.
Smear
petroleum jelly on the terminals when
refitting and always connect the positive lead
first and the negative lead last.
5 Alternator - removal and refitting
Note: Refer to the precautions at the end of
Section 1 before proceeding.
Removal
1 The operations are similar for all makes of
alternator.
2 Disconnect the battery negative terminal,
then disconnect the multiplug or leads from
the rear of the alternator.
3 On certain CVH engine models it may be 6.2 Exploded view of the Bosch G1 and K1 series alternators
necessary to remove the air cleaner hose, and A Fan H
Rectifier diode pack disconnect the radiator bottom hose to give B Spacer J
Stator sufficient clearance to enable removal of the C Drive end housing K Slip rings
alternator, in which case the cooling system D Drive end bearing retaining plate L Rotor
must be drained with reference to Chapter 1. E Slip ring end bearing M Drive end bearing
4 Release the mounting and adjuster link F Slip ring end housing N Spacer
bolts, push the alternator in towards the G Brush box/regulator O Pulley
engine and remove the drivebelt (see 5A·4 Starting and charging systems
6.6a Exploded view of the Lucas A115 and A133 alternator
A Pulley B Fan C Drive end housing D Drive end bearing E Rotor F Slip ring G Slip ring end bearing H Rear cover J Anti-surge diode K Diode plate L Voltage regulator M Slip ring end housing N Stator
Lucas alternator 5 Proceed as described in paragraph 1. 6 Remove the alternator rear cover (see illustrations). 7 Extract the brush box retaining screws and withdraw the brush assemblies from the brush box. 8 If the length of the brushes is less than the specified minimum, renew them. Refit by reversing the removal operations. 9 To remove the regulator, disconnect the wires from the unit and unscrew the retaining screw (A115 and A133 units only - three screws on A127 type). 10 Refit by reversing the removal operations, but check that the small plastic spacer and the connecting link are correctly located. Motorola alternator 11 Proceed as described in paragraph 1. 12 Extract the two regulator securing screws, disconnect the two regulator leads and withdraw the unit (see illustration). 13 Extract the brush box retaining screw and pull and tilt the brush box from its location, taking care not to damage the brushes during the process. 14 If necessary, unsolder the brush connections. 15 Fit the new brushes by reversing the removal operations. Mitsubishi alternator 16 Proceed as described in paragraph 1. 6.6b Exploded view of the Lucas A127 alternator 17 Undo the three housing through-bolts and remove the slip ring end housing. It may be A Pulley F Through-bolt K Slip ring end housing B Fan G Rear cover L Rectifier pack necessary to apply heat from a high-power C Drive end housing H Brush box and regulator M Stator (200
watt ) soldering iron to the centre of the D Drive end bearing J Slip ring end bearing N Suppressor end housing for a few minutes if the housing E Rotor refuses to free from the rotor (see illustrations). Starting and charging systems 5A·5
6.12 Exploded view of the Motorola alternator
A Pulley B Fan C Drive end bearing D Drive end bearing retaining plate E Slip ring F Slip ring end bearing G Stator H Slip ring end housing J Rectifier assembly K End cover L Regulator M Brush box N Rotor P Spacer
6.17a Exploded view of the Mitsubishi alternator
A Pulley B Fan C Large spacer D Through-bolt E Dust cap F Drive end housing G Drive end bearing H Bearing retainer J Dust seal K Small spacer 5A L Rotor M Seal N Bearing O Slip ring end housing P Rectifier assembly R Brush box S Stator
18 Undo the four bolts and remove the stator and rectifier assembly from the slip ring end housing. 19 Unsolder the brush box-to-rectifier assembly terminal and remove the brush box. 20 Renew the brush box and brushes if they are worn below the specified minimum. 21 Fit the new brushes by reversing the removal operations.
Insert a suitable piece of wire through the access hole in the housing to keep the brushes retracted as the housing is fitted (see illustration). After
6.17b Using a soldering iron to heat the 6.21 Using a length of wire (A) to hold fitting the housing release the brushes slip ring end housing - Mitsubishi brushes in the retracted position - by removing the wire. alternator Mitsubishi alternator 5A·6 Starting and charging systems
6 If the circuit and solenoid are proved 7 Starter motor - testing in the sound, the fault must lie in the starter motor. car The starter motor can be checked by a Ford dealer or an automotive electrical specialist. A
Note: Refer to the precautions given in specialist may be able to overhaul the unit at a
"Safety first!" and in Section 1 of this Chapter cost significantly less than that of a new or
before proceeding. exchange starter motor.
1 If the starter motor fails to operate when the
ignition key is turned to the appropriate 8 Starter motor - removal and
position, the possible causes are as follows. refitting a) The battery is faulty. b) The electrical connections between the switch, solenoid, battery and starter Removal motor are somewhere failing to pass the 1 Disconnect the battery. 8.2 Disconnecting the wiring from the necessary current from the battery 2 Working from under the vehicle, disconnect starter motor solenoid through the starter to earth. the main starter motor cable and the two c) The solenoid is faulty. 6 Insert the ignition key into the switch and wires from the starter solenoid (see d) The starter motor is mechanically or turn it to position I. illustration). electrically defective. 7 Using a thin pointed tool, depress the lock 3 Unbolt the starter motor and withdraw it
2 To check the battery, switch on the spring through the access hole in the lock from its location.
headlamps. If they dim after a few seconds, this housing (see illustration). Pull on the key
indicates that the battery is discharged - Refitting while holding the lock spring depressed, and
recharge (see Section 3) or renew the battery. If remove the switch. It may be necessary to 4 Refit by reversing the removal operations.
the headlamps
glow brightly, operate the starter move the key slightly to the left and right to
switch and observe the lamps. If they dim, then align the key
barrel and lock housing cam, so
this indicates that current is reaching the starter 9 Starter motor brushes - permitting removal.
motor, therefore the fault must lie in the starter renewal
motor. If the lamps continue to glow brightly Refitting
(and no clicking sound can be heard from the 1 Starter motor brush renewal is a relatively 8 Refitting is a reversal of removal, ensuring
starter motor solenoid), this indicates that there difficult procedure, requiring skill in the use of that the ignition key is in position I.
is a fault in the circuit or solenoid - see the a soldering iron. It should also be borne in
following paragraphs. If the starter motor turns mind that if the starter motor has been in
slowly when operated, but the battery is in good service long enough to wear the brushes out,
condition, then this indicates either that the the rest of the unit is likely to be well worn
starter motor is faulty, or there is considerable also. In such a case the best course is to
resistance somewhere in the circuit. obtain a new or reconditioned starter motor.
3 If a fault in the circuit is suspected, 2 For further advice on brush renewal and on
disconnect the battery leads, the starter motor overhaul in general, consult an
starter/solenoid wiring and the auto electrical specialist.
engine/transmission earth strap(s).
Thoroughly clean the connections, and
reconnect the leads and wiring. Use a 10 Ignition switch - removal and
voltmeter or test lamp to check that full refitting
battery voltage is available at the battery
positive lead connection to the solenoid. Pre-1986 models
Smear petroleum jelly around the battery
terminals to prevent corrosion - corroded 10.3 Ignition switch removal using a Removal
connections are
among the most frequent screwdriver to depress the switch
causes of electrical system faults. 1 Disconnect the battery, undo the screws retaining clip - pre-1986 models
4 If the battery and all connections are in and remove the steering column lower
good condition, check the circuit by shroud.
disconnecting the wire from the solenoid 2 Insert the ignition key into the lock and turn
blade terminal. Connect a voltmeter or test it to position I.
lamp between the wire end and a good earth 3 Using a flat-bladed screwdriver, depress
(such as the battery negative terminal), and the switch retaining clip, at the same time
check that the wire is live when the ignition pulling out the switch using the ignition key
switch is turned to the "start" position. If it is, (see illustration).
then the circuit is sound - if not, there is a fault
in the ignition/starter switch or wiring. Refitting
5 The solenoid contacts can be checked by 4 Refitting is a reversal of removal, ensuring
connecting a voltmeter or test lamp between that the ignition key is in position I.
the battery positive feed connection on the
starter side of the solenoid, and earth. When 1986 models onwards
the ignition switch is turned to the "start"
position, there should be a reading or lighted Removal
bulb , as applicable. If there is no reading or 5 Disconnect the battery, undo the screws 10.7 Ignition switch removal using a
lighted bulb, the solenoid is faulty and should and remove the steering column lower pointed tool to depress the lock spring -
be renewed. shroud. 1986 models onwards 5B·1
Chapter 5 Part B:
Ignition systems
Contents
Condenser (contact breaker ignition system) - testing, removal General description and precautions . . . . . . . . . . . . . . . . . . . . . . . . .1 and refitting . . . . . . . . . . . . . . . . . . . . . . . . . . . . . . . . . . . . . . . . . . .3 Ignition HT coil - testing, removal and refitting . . . . . . . . . . . . . . . . .4
Contact breaker points adjustment . . . . . . . . . . . . . . . .See Chapter 1 Ignition system - testing . . . . . . . . . . . . . . . . . . . . . . . . . . . . . . . . . . .2
Contact breaker points renewal . . . . . . . . . . . . . . . . . .See Chapter 1 Ignition system component check . . . . . . . . . . . . . . . .See Chapter 1
Distributor - removal and refitting . . . . . . . . . . . . . . . . . . . . . . . . . . .5 Ignition system electronic modules - removal and refitting . . . . . . . .6
Distributor lubrication - models with contact breaker Ignition timing check - models with contact breaker distributor . . . . . . . . . . . . . . . . . . . . . . . . . . . . . . . . .See Chapter 1 distributor . . . . . . . . . . . . . . . . . . . . . . . . . . . . . . . . .See Chapter 1
Distributorless Ignition System (DIS) components - removal and Spark plug renewal . . . . . . . . . . . . . . . . . . . . . . . . . . . .See Chapter 1 refitting . . . . . . . . . . . . . . . . . . . . . . . . . . . . . . . . . . . . . . . . . . . . . .7
Degrees of difficulty Easy, suitable for Fairly easy, Fairly difficult, Difficult, suitable Very difficult, novice with little suitable for suitable for for experienced suitable for expert experience beginner with competent DIY DIY mechanic DIY or professional some experience mechanic
Specifications 5B
General
System type: 1.1 litre OHV engines . . . . . . . . . . . . . . . . . . . . . . . . . . . . . . . . . . . . . Mechanical contact breaker and coil 1.1 litre CVH engines up to 1986 . . . . . . . . . . . . . . . . . . . . . . . . . . . . Mechanical contact breaker and coil 1.1 litre CVH engines from 1986 . . . . . . . . . . . . . . . . . . . . . . . . . . . . . Electronic breakerless ignition 1.1 litre HCS engines . . . . . . . . . . . . . . . . . . . . . . . . . . . . . . . . . . . . . Distributorless ignition system (DIS/ESC) 1.3 litre OHV engines . . . . . . . . . . . . . . . . . . . . . . . . . . . . . . . . . . . . . Electronic breakerless ignition 1.3 litre CVH engines . . . . . . . . . . . . . . . . . . . . . . . . . . . . . . . . . . . . . Electronic breakerless ignition 1.3 litre HCS engines . . . . . . . . . . . . . . . . . . . . . . . . . . . . . . . . . . . . . Distributorless ignition system (DIS/ESC) 1.4 litre carburettor engines . . . . . . . . . . . . . . . . . . . . . . . . . . . . . . . . Electronic breakerless ignition 1.4 litre fuel injection engines . . . . . . . . . . . . . . . . . . . . . . . . . . . . . . . Programmed electronic ignition (EEC IV) 1.6 litre carburettor engines . . . . . . . . . . . . . . . . . . . . . . . . . . . . . . . . Electronic breakerless ignition 1.6 litre K-Jetronic fuel injection engines . . . . . . . . . . . . . . . . . . . . . . Electronic breakerless ignition 1.6 litre Electronic Fuel Injection (EFI) engines . . . . . . . . . . . . . . . . . . Distributorless ignition system (DIS/EEC IV) 1.6 litre RS Turbo engines . . . . . . . . . . . . . . . . . . . . . . . . . . . . . . . . . . Programmed electronic ignition (ESC II)
Location of number No 1 cylinder . . . . . . . . . . . . . . . . . . . . . . . . . . . . . Crankshaft pulley end
Firing order: OHV and HCS engines . . . . . . . . . . . . . . . . . . . . . . . . . . . . . . . . . . . . 1-2-4-3 CVH engines . . . . . . . . . . . . . . . . . . . . . . . . . . . . . . . . . . . . . . . . . . . . 1-3-4-2
Spark plugs
Type . . . . . . . . . . . . . . . . . . . . . . . . . . . . . . . . . . . . . . . . . . . . . . . . . . . . See Chapter 1 Specifications
Distributor
Direction of rotor arm rotation (all engines) . . . . . . . . . . . . . . . . . . . . . . Anti-clockwise viewed from cap
Contact breaker points gap: Bosch distributor . . . . . . . . . . . . . . . . . . . . . . . . . . . . . . . . . . . . . . . . . 0.40 to 0.50 mm (0.016 to 0.020 in) Lucas distributor . . . . . . . . . . . . . . . . . . . . . . . . . . . . . . . . . . . . . . . . . 0.40 to 0.59 mm (0.016 to 0.023 in)
Dwell angle (contact breaker system) . . . . . . . . . . . . . . . . . . . . . . . . . . . 48° to 52° 5B·2 Ignition systems
Ignition coil - contact breaker ignition system
Type . . . . . . . . . . . . . . . . . . . . . . . . . . . . . . . . . . . . . . . . . . . . . . . . . . . . Low voltage for use with 1.5 ohm ballast resistance
Output: OHV engines . . . . . . . . . . . . . . . . . . . . . . . . . . . . . . . . . . . . . . . . . . . . 23.0 k volt (minimum) CVH engines . . . . . . . . . . . . . . . . . . . . . . . . . . . . . . . . . . . . . . . . . . . . 25.0 k volt (minimum)
Primary resistance . . . . . . . . . . . . . . . . . . . . . . . . . . . . . . . . . . . . . . . . . 1.2 to 1.4 ohms
Secondary resistance . . . . . . . . . . . . . . . . . . . . . . . . . . . . . . . . . . . . . . . 5000 to 9000 ohms
Ignition coil - electronic ignition systems (except DIS)
Type . . . . . . . . . . . . . . . . . . . . . . . . . . . . . . . . . . . . . . . . . . . . . . . . . . . . Oil filled high output
Output . . . . . . . . . . . . . . . . . . . . . . . . . . . . . . . . . . . . . . . . . . . . . . . . . . . 25.0 to 30.0 k volt according to application
Primary resistance: All models except RS Turbo 1986 onwards . . . . . . . . . . . . . . . . . . . . 0.72 to 0.88 ohms RS Turbo from 1986 onwards . . . . . . . . . . . . . . . . . . . . . . . . . . . . . . . 1.0 to 1.2 ohms
Secondary resistance . . . . . . . . . . . . . . . . . . . . . . . . . . . . . . . . . . . . . . .
4500 to 7000 ohms
Ignition coil - DIS
Output . . . . . . . . . . . . . . . . . . . . . . . . . . . . . . . . . . . . . . . . . . . . . . . . . . . 37 k volt (minimum) open circuit
Primary resistance (measured at coil): 1.1 and 1.3 litre HCS engines . . . . . . . . . . . . . . . . . . . . . . . . . . . . . . . 0.50 to 1.00 ohm 1.6 litre Electronic Fuel Injection engines . . . . . . . . . . . . . . . . . . . . . . 4.5 to 5.0 ohms
HT leads
Resistance . . . . . . . . . . . . . . . . . . . . . . . . . . . . . . . . . . . . . . . . . . . . . . . 30 000 ohms maximum per lead (typical value)
Type: OHV engines . . . . . . . . . . . . . . . . . . . . . . . . . . . . . . . . . . . . . . . . . . . . Champion CLS 8 CVH engines . . . . . . . . . . . . . . . . . . . . . . . . . . . . . . . . . . . . . . . . . . . . Champion CLS 9
Torque wrench settings Nm lbf ft
Spark plugs: OHV and HCS engines . . . . . . . . . . . . . . . . . . . . . . . . . . . . . . . . . . . . 13 to 20 10 to 15 CVH engines . . . . . . . . . . . . . . . . . . . . . . . . . . . . . . . . . . . . . . . . . . . . 25 to 38 18 to 28
Distributor clamp pinch bolt (OHV engines) . . . . . . . . . . . . . . . . . . . . . . 4 3
Distributor clamp plate bolt (OHV engines) . . . . . . . . . . . . . . . . . . . . . . 10 7
Distributor mounting bolts (CVH engines) . . . . . . . . . . . . . . . . . . . . . . . 7 5
appropriate metal segment. The voltage then similar to those described previously for the 1 General information and passes via the spark plug lead to the spark contact breaker system, however in the precautions plug, where it finally
jumps the spark plug gap breakerless electronic ignition system, the before going to earth. action of the contact breaker points is The distributor is driven by a skew gear simulated electronically within the distributor.
Contact breaker ignition system from the camshaft on the OHV engine and by Control of ignition advance characteristics is The ignition system is divided into two an offset dog on the end of the camshaft on still carried out in the conventional way using
circuits, low tension (primary) and high tension CVH engines. mechanical and vacuum systems.
(secondary). The low tension circuit consists of The ignition advance is a function of the
the battery, ignition switch, primary coil distributor and is controlled both mechanically Programmed electronic ignition
windings and the contact breaker points and and by a vacuum-operated system. (RS Turbo models)
condenser. The high tension circuit consists of A ballast resistor is incorporated in the low The two main components of the system
the secondary coil windings, the heavy ignition tension circuit between the ignition switch are the electronic control module designated
lead from the centre of the distributor cap to and the coil primary windings. The ballast Electronic Spark Control II (ESC II), and a Hall
the coil, the rotor arm and the spark plug leads resistor consists of a grey coloured resistive effect electronic ignition distributor.
and spark plugs. wire running externally to the main loom The distributor is mounted on the flywheel When the system is in operation, low between the ignition switch and coil. During end of the cylinder head, and is driven directly
tension voltage is changed in the coil into high starting this resistor is bypassed allowing full off the camshaft by an offset dog coupling.
tension voltage by the opening and
closing of available battery voltage to be fed to the coil Contained within the distributor is a
trigger the contact breaker points in the low tension which is of a low voltage type. This ensures
vane , permanent magnet and position sensor.
circuit. High tension voltage is then fed, via the that during starting when there is a heavy The trigger vane is a cylindrical disc attached
carbon brush in the centre of the distributor drain on the battery, sufficient voltage is still to the distributor shaft and having four slots on
cap, to the rotor arm of the distributor. The available at the coil to produce a
powerful its
vertical surface, one for each cylinder. The
rotor arm revolves inside the distributor and spark. During normal running, battery voltage permanent magnet and position sensor are
each time it comes in line with one of the four is directed through the ballast resistor to limit secured to the distributor baseplate in such a
metal segments in the distributor cap, which the voltage supplied to the coil to seven volts. way that the vertical surface of the trigger vane
are connected to the spark plug leads, the passes between them. As the trigger vane
opening and closing of the contact breaker Electronic breakerless ignition rotates, the magnetic
field between the
points causes the high tension voltage to build The fundamentals of operation of the magnet and position sensor is interrupted and
up and jump the gap from the rotor arm to the electronic breakerless ignition system are a series of
square wave electronic pulses are Ignition systems 5B·3
produced. This output wave form is sent to the d) Idle speed. 1.6 litre Electronic Fuel Injection
ESC II module and from this, engine speed, e) Engine overspeed protection. engines
ignition advance and idle speed are If the module should fail, the ignition timing The ignition system is under the overall
calculated. will be switched by the TFI IV module (there control of the EEC IV engine management A small bore hose connecting the inlet will be no ignition advance) and fuel will be module. The module compares the signals
manifold to a vacuum transducer within the delivered at a constant rate. This state is provided by the various sensors with engine
module supplies the unit with information on
known as the Limited Operation Strategy operating parameters stored in its memory,
engine load, and a charge air temperature (LOS) and allows the vehicle to be driven, and varies the engine operating settings
sensor, which is a temperature sensitive albeit with greatly reduced engine directly according to engine load and the
resistor located in the air intake duct, provides performance and fuel economy. prevailing operating conditions.
information on engine intake air temperature. Ignition is via a Distributorless Ignition Should any of the system sensors fail, the
From this constantly
changing data the ESC II System (DIS), similar to that described EEC IV module will sense this and substitute a
module selects a particular advance setting previously for 1.4 litre fuel injection engines. single predetermined value for the failed input.
from a range of ignition characteristics stored The DIS is controlled by the E-DIS 4 module.
in its memory. Again, this will allow continued engine With the firing point
established , the operation, with reduced performance and Precautions
module switches off the ignition coil primary driveability. Under these conditions a self-test code will be stored in the module memory to Warning: The DIS system carries
circuit, the magnetic field in the coil collapses aid subsequent fault diagnosis by a Ford much higher voltages than
and the high tension voltage is created. At dealer. conventional systems, and
precisely the right instant the ESC II module adequate precautions must be
switches the coil primary circuit back on and
the
cycle is repeated for each cylinder in turn. Distributorless ignition system taken to avoid personal injury. Refer to the Additionally the ESC II module operates in (DIS) "Safety first!" Section at the beginning of this manual before proceeding, and
conjunction with the fuel-injection and turbo 1.4 litre fuel injection engines always disconnect the battery negative
systems to provide data on engine rpm to the lead before working on the system
fuel-injection control module, and to provide The mechanical distribution of high tension
an overriding control of turbo boost pressure. voltage (by a rotating distributor) is replaced It is necessary to take extra care when by "static"
solid -state electronic components. working on the ignition system, both to avoid
Programmed electronic ignition The system selects the most appropriate damage to semi-conductor devices and to
(1.4 litre fuel injection engines) ignition advance setting for the prevailing avoid personal injury. Refer to the precautions The ignition system consists of a Hall effect engine operating conditions from a three- given in "Safety First!" at the beginning of this
distributor (as described previously for RS dimensional map of values stored in the manual, with particular reference to the
Turbo models), TFI IV ignition module, coil Electronic Spark Control (ESC) module warning concerning ignition HT voltage. Also
and EEC IV module. refer to the precautions at the beginning of memory. The module selects the appropriate The distributor is similar to that used on Chapter 5A. advance value according to information
earlier CVH engine models, but has no supplied on engine load, speed, and
centrifugal or vacuum advance mechanisms,
the advance functions being carried out by operating temperature by various sensors. 2 Ignition system - testing 5B
the EEC IV module. The distributor acts as a Engine speed is monitored by a sensor
trigger and provides a pulse signal to the EEC mounted in the cylinder block, which is
IV module. activated by 35 equally-spaced teeth on the Note: Refer to the precautions given in The distributor performs the following flywheel. A gap occupies the position of the Section 1 before proceeding.
functions: 36th tooth, which denotes 90° BTDC for No 1 a)
Sends signals to the EEC IV module to cylinder. As the engine speed increases, so Contact breaker ignition system trigger the ignition firing process. does the
frequency and amplitude of the 1 By far the
majority of breakdown and b) Enables the EEC IV module to calculate signal sent to the ESC module (photos). running troubles are caused by faults in the engine speed from the pulse signals. Engine load information is provided by a ignition system either in the low tension or c) Distributes HT voltage to the spark plugs. pressure sensor which is integral with the ESC high tension circuits. The TFI (Thick Film Integration) IV module module. The sensor monitors vacuum in the 2 There are two main symptoms indicating
functions as a high current switch by inlet manifold via a hose. faults. Either the engine will not start or fire, or
controlling the ignition coil primary LT circuit. Engine temperature is monitored by an the engine is difficult to start and misfires. If it
The module is controlled by one of two input Engine Coolant Temperature (ECT) sensor is a regular misfire (ie the engine is running on
signals, either from the Hall effect sensor in only two or three cylinders), the fault is almost screwed into the bottom of the inlet manifold.
the distributor, or from the EEC IV module. sure to be in the secondary or high tension A DIS coil assembly is mounted on the The signal from the distributor passes via circuit. If the misfiring is intermittent the fault cylinder block next to No 1 cylinder. The coil
the TFI IV module to the EEC IV module. The could be in either the high or low tension has two primary and two secondary windings. circuits. If the car stops suddenly, or will not
EEC IV module modifies the signal to provide One secondary winding supplies current to start at all, it is likely that the fault is in the low
ignition timing advance relative to engine numbers 1 and 4 cylinders simultaneously, tension circuit. Loss of power and
speed, load and temperature, before returning
it to the TFI IV module. while the other supplies current to numbers 2 overheating, apart from faulty carburation The EEC IV module provides total engine and 3 cylinders. Whenever either of the coils settings, are normally due to faults in the
management via the ignition and fuel systems. is energised, two
sparks are generated. For distributor or to incorrect ignition timing.
From signals received from the various example, one spark is produced in No 1 cylinder on its compression stroke, while the Engine fails to start
sensors, the module controls the following
functions: other spark is produced in No 4 cylinder on its 3 If the engine fails to start and the car was a) Ignition timing. exhaust stroke. The spark in No 4 cylinder is running normally when it was last used, first b) Fuel delivery. "redundant" and has no detrimental effect on check there is fuel in the petrol tank. If the c) Deceleration fuelling. engine performance. engine turns over normally on the starter 5B·4 Ignition systems
motor and the battery is evidently well 13 Hold the lead about 3/16 inch (5 mm) carried out to establish continuity or
charged, then the fault may be in either the away from the block. Re-start the engine. If resistance, this is not recommended as the
high or low tension circuits. First check the HT the sparking is fairly strong and regular, the incorrect use of test probes between
circuit. fault must lie in the spark plug. component connector pins can cause damage
4 One of the commonest reasons for bad 14 The plug may be loose, the insulation may to the internal circuitry of some components.
starting is wet or damp spark plug leads and be cracked, or the points may have burnt 24 Following the disconnection of the
distributor. Remove the distributor cap. If away giving too wide a gap for the spark to battery, all of the system Keep Alive Memory
condensation is visible internally dry the cap jump. Worse still, one of the points may have (KAM) values will be erased from the EEC IV
with a rag and also wipe over the leads. Refit broken off. Either renew the plug, or clean it, module memory, which may result in erratic
the cap. A moisture dispersant can be very reset the gap and then test it. idle, engine surge, hesitation and a general
effective in these situations. 15 If there is no spark at the end of the plug deterioration of driving characteristics.
5 If the engine still fails to start, check the lead, or if it is weak and intermittent, check 25 After reconnecting the battery, start the
voltage is reaching the plugs by disconnecting the ignition lead from the distributor to the engine and allow it to idle for at least three
each plug lead in turn at the spark plug end, plug. If the insulation is cracked or perished, minutes. After normal operating temperature
and holding the end of the cable about 3/16 inch renew the lead. Check the connections at the is reached, increase the engine speed to 1200
(5 mm) away from the cylinder block. Spin the distributor cap. rpm and maintain this speed for at least two
engine on the starter motor. 16 If there is still no spark, examine the minutes.
6 Sparking between the end of the cable and distributor cap carefully for tracking. This can 26 This procedure will allow the module to
the block should be fairly strong with a strong be recognised by a very thin black line running "re-learn" its reference values. It may be
regular blue spark. (Hold the lead with rubber between two or more electrodes, or between necessary to drive the vehicle for
to avoid electric shocks). If voltage is reaching an electrode and some other part of the approximately five miles of varied driving to
the plugs, then remove them and clean and distributor. These lines are paths which now complete the
learning process.
regap them. The engine should now start. conduct electricity across the cap thus letting
7 If there is no spark at the plug leads, take off it run to earth. The only answer is a new Distributorless ignition system
the HT lead from the centre of the distributor distributor cap. (DIS)
cap and hold it to the block as before. Spin the 17 Apart from the ignition timing being
engine on the starter once more. A rapid incorrect, other causes of misfiring have All engines
succession of blue sparks between the end of already been dealt with under the Section 27 Refer to paragraphs 21 to 23.
the lead and the block indicate that the coil is dealing with the failure of the engine to start.
in order and that the distributor cap is cracked, To recap, these are that 1.6 litre Electronic Fuel Injection
the rotor arm is faulty, or the carbon brush in a) The coil may be faulty giving an engines
the top of the distributor cap is not making intermittent misfire; 28 Refer to paragraphs 24 to 26.
good contact with the rotor arm. b) There may be a damaged wire or loose
8 If there are no sparks from the end of the connection in the low tension circuit; 3 Condenser (contact breaker
lead from the coil, check the connections at c) The condenser may be faulty; or
the coil end of the lead. If it is in order start d) There may be a mechanical fault in the system) - testing, removal and
checking the low tension circuit. distributor (broken driving spindle or refitting
9 Use a 12v voltmeter or a 12v bulb and two contact breaker spring).
lengths of wire. With the ignition switched on 18 If the ignition timing is too far retarded, it Note: Refer to the precautions given in
and the points open, test between the low should be noted that the engine will
tend to Section 1 before proceeding.
tension wire to the coil and earth. No reading overheat, and there will a quite noticeable
indicates a break in the supply from the drop in power. If the engine is overheating and Testing
ignition switch. Check the connections at the the power is down, and the ignition timing is 1 The purpose of the condenser is to prevent
switch to see if any are loose. Refit them and correct, then the carburettor should be excessive arcing of the contact breaker
the engine should run. checked, as it is likely that this is where the points, and to ensure that a rapid collapse of
10 With the points still open take a reading fault
lies . the magnetic field, created in the coil, and
between the moving point and earth. No necessary if a healthy spark is to be produced
reading here indicates a break in the wire or Electronic breakerless ignition at the plugs, is allowed to occur.
poor connections between the coil "-" 19 Testing of the electronic ignition system 2 The condenser is fitted in parallel with the
terminal and distributor, or a faulty coil. Take a can only be accurately carried out using Ford contact breaker points. If it becomes faulty it
further reading between the coil "- " terminal
dedicated test equipment and a systematic will lead to ignition failure, as the points will be
and earth. No reading confirms a faulty coil. test procedure. For this reason any suspected prevented from cleanly interrupting the low
For these tests it is sufficient to separate the faults in the system must be
referred to a Ford tension circuit.
points with a piece of dry paper while testing dealer. 3 If the engine becomes very difficult to start,
with the points open. or begins to miss after several miles of Programmed electronic ignition running, and the contact breaker points show
Engine misfires (RS Turbo models) signs of excessive
burning , then the condition
11 If the engine misfires regularly, run it at a 20 Refer to paragraph 19. of the condenser must be suspect. A further
fast idling speed. Pull off each of the plug test can be made by separating the contact
caps in turn and listen to the note of the Programmed electronic ignition breaker points by hand, with the ignition
engine. Hold the plug cap in a dry cloth or (1.4 litre fuel injection models) switched on. If this is accompanied by an
with a rubber glove as additional protection 21 Complete and accurate fault diagnosis is excessively strong flash, it indicates that the
against a shock from HT supply. only possible using special test equipment condenser has failed.
12 No difference in engine running will be available to a Ford dealer. 4 Without special test equipment, the only
noticed when the lead from the defective 22 Where a component is obviously reliable way to diagnose condenser trouble is
circuit is removed. Removing the lead from defective, it can be removed and a new to renew the suspect unit and note if there is
one of the good cylinders will accentuate the component fitted in its place. any improvement in performance. To do this
misfire. 23 Although certain electrical checks can be proceed as follows according to engine type. Ignition systems 5B·5
3.7 Distributor turned through 120° for 3.13 Bosch distributor condenser renewal 3.14 Lucas distributor condenser renewal condenser renewal - Bosch distributor, - CVH engines - CVH engines OHV engines A Condenser retaining screw A Condenser retaining screw A LT lead connector B LT lead connector B Contact breaker spring arm B Condenser retaining screw C Hooked end of spring arm
Removal the screws as appropriate and lift off the distributor cap. 4 Ignition HT coil - testing,
OHV engines 13 On the Bosch distributor disconnect the removal and refitting contact breaker points LT lead from the spade
5 Spring back the retaining clips and lift off terminal, undo the retaining screw and
the distributor cap. Withdraw the rotor arm Note: Refer to the precautions given in withdraw the condenser from the side of the
from the distributor shaft. Section 1 before proceeding. distributor body. Disconnect the ignition LT
6 Accurately mark the position of the lead at the coil and remove the condenser All except models with DIS
distributor body in relation to the clamp plate, (see illustration). ignition system
then slacken the clamp plate pinch bolt. 14 On the Lucas distributor ease the contact
7 Turn the distributor body approximately breaker spring arm out of the plastic insulator Testing
120° in a clockwise direction to expose the and slide the combined LT and condenser
externally mounted condenser (see lead out of the hooked end of the spring arm. 1 Accurate checking of the coil output
illustration). Undo the condenser retaining screw and requires the use of special test equipment and
8 Disconnect the contact breaker points LT earth lead, disconnect the ignition LT lead at should be left to a dealer or suitably equipped
lead from the spade terminal, and the ignition the coil, and withdraw the condenser and automotive electrician. It is however possible
LT lead at the coil. wiring from the distributor (see illustration). to check the primary and secondary winding
9 Undo the retaining screw and withdraw the Refitting resistance using an ohmmeter as follows.
condenser from the side of the distributor 2 To check the primary resistance disconnect 5B
body. OHV engines the LT and HT wiring at the coil and connect
10 Place the new condenser in position and the ohmmeter across the coil positive and
secure with the retaining screw. 15 Refit the rotor arm and distributor cap. If negative terminals (see illustrations). The
11 Reconnect the LT leads, then turn the in any doubt about the distributor position, resistance should be as given in the
distributor back to its original position and check the ignition timing as described in Chapter 1. Specifications at the beginning of this
align the marks made during removal. Tighten Chapter.
the clamp plate pinch bolt. CVH engines 3 To check the secondary resistance,
CVH engines 16 On all distributors refitting is the reverse connect one lead from the ohmmeter to the sequence to removal. coil negative terminal, and the other lead to
12 Spring back the retaining clips or undo the centre HT terminal. Again the resistance should be as given in the Specifications. 4 If any of the measured valves vary significantly from the
figures given in the Specifications, the coil should be renewed. 5 If a new coil is to be fitted, ensure that it is of the correct low voltage type suitable for use in conventional ignition systems equipped with ballast resistance. Removal 6 The ignition coil is mounted on the engine compartment right-hand inner valance on OHV engine models, and on the left-hand inner valance on CVH engine versions.
4.2a Ignition coil location (arrowed) - CVH 4.2b Ignition coil terminal identification - 7 To remove the coil, disconnect the LT leads engines with contact breaker ignition contact breaker ignition system at the coil positive and negative terminals and system A Negative LT terminal to distributor the HT lead at the centre terminal. B HT terminal to distributor cap 8 Undo the mounting bracket retaining bolts C Positive LT feed terminal and remove the coil. 5B·6 Ignition systems
4.12 DIS coil location (plastic cover 4.17 Removing a DIS coil securing screw - 5.5 Distributor removal - OHV engines removed) - 1.6 litre Electronic Fuel 1.3 litre HCS engine (contact breaker system) Injection engine A Rotor arm facing distributor cap No 1 spark plug lead segment
Refitting 5 Distributor - removal and B Pulley notch aligned with TDC mark on
9 Refitting is the reverse sequence to removal. timing scale refitting
DIS ignition system distributor body and a corresponding mark on the cylinder block.
Testing Contact breaker ignition system 7 Undo the bolt securing the distributor clamp plate to the cylinder block. Do not
10 Testing of the DIS type ignition coil OHV engines remove the distributor by releasing the clamp
requires the use of specialist equipment, and Removal plate pinch bolt.
should be entrusted to a Ford dealer. 8 Withdraw the distributor from the cylinder 1 Disconnect the leads from the spark plugs,
Removal spring back the retaining clips and lift off the block. As the distributor is removed, the rotor distributor cap. arm will move a few degrees clockwise. Note
11 On 1.1 and 1.3 litre HCS engines, the coil the new position of the rotor arm and make a 2 Disconnect the LT lead at the coil negative
is mounted on the cylinder block, above the second mark on the distributor body rim (see terminal and the vacuum hose at the
oil filter. distributor vacuum unit. illustration).
12 On 1.6 litre Electronic Fuel Injection (EFI) 3 Remove No 1 spark plug (nearest the Refitting
engines, the coil is mounted on the left-hand crankshaft pulley). 9 Before installing the distributor make sure
side of the cylinder head (see illustration). 4 Place a finger over the plug hole and turn that the crankshaft is still positioned at TDC
13 Disconnect the battery negative lead. the crankshaft in the normal direction of as previously described. If a new distributor is
14 If applicable, remove the securing screw(s) rotation (clockwise viewed from the being fitted, transfer the markings made
and withdraw the plastic cover from the coil. crankshaft pulley end) until pressure is felt in during removal to the new unit.
15 Release the retaining clip, and disconnect No 1 cylinder. This indicates that the piston is 10 Hold the distributor over its hole in the
the coil wiring plug. commencing its compression stroke. The cylinder block with the mark made on the
16 Compress the retaining clips on each side crankshaft can be turned with a spanner on distributor body aligned with the mark on the
of the HT lead connectors, and disconnect the the pulley bolt. cylinder block.
HT leads from the coil. Note the location of 5 Continue turning the crankshaft until the 11 Position the rotor arm so that it points
each lead to ensure correct refitting. notch in the pulley is aligned with the "O" mark toward the mark made on the distributor rim
17 Remove the securing screws, and on the timing scale just above the pulley. In after removal and push the distributor fully
withdraw the coil (see illustration). this position No 1 piston is at Top Dead Centre home. As the skew gears mesh the rotor arm (TDC) on compression (see illustration). will move anti-clockwise and should align with
Refitting 6 Using a dab of quick drying paint, mark the the first mark made on the distributor rim.
18 Refitting is a reversal of removal, ensuring position of the rotor arm on the rim of the 12 With all the marks aligned, refit and tighten
that the HT leads are correctly reconnected. distributor body. Make a further mark on the the distributor clamp plate retaining bolt. 13 Reconnect the LT lead and vacuum hose, then refit the distributor cap, spark plug and plug leads. 14 Refer to Chapter 1 and adjust the ignition timing. CVH engines Removal 15 Spring back the retaining clips, or undo the retaining screws and lift off the distributor cap. 16 Disconnect the LT lead at the coil negative terminal and the vacuum hose at the distributor vacuum unit. 5.8 Rotor arm position marked on 17 Undo the three distributor flange retaining distributor body after removal - OHV bolts and withdraw the distributor from the 5.17 Distributor flange retaining bolt cylinder head (see illustration). engines (contact breaker system) locations - CVH engines (contact breaker Refitting A Rotor arm system) 18 Before refitting, check the condition of the B Mark made on distributor body rim Ignition systems 5B·7
5.19 Align distributor shaft drive dog with 5.21 Distributor mounting flange and 5.25 Disconnecting the distributor LT
slots in camshaft - CVH engines (contact cylinder head punch mark locations - CVH wiring multi-plug - CVH engines (electronic breaker system) engines (contact breaker system) breakerless system)
O-ring oil seal at the base of the distributor plugs, spring back the retaining clips and lift being fitted, transfer the markings made
and renew it if necessary. off the distributor cap. during removal to the new unit.
19 Hold the distributor with the vacuum unit 25 Disconnect the distributor LT wiring multi- 33 Hold the distributor over its hole in the
towards the inlet manifold side of the engine. plug and the vacuum hose at the distributor cylinder block with the mark made on the
Align the distributor shaft drive dog with slots vacuum unit (see illustration). distributor body aligned with the mark made
in the end of the camshaft (see illustration). 26 Proceed as described in paragraphs 3 on the cylinder block.
20 Insert the distributor and turn the rotor and 4. 34 Position the rotor arm so that it points to
arm slightly so that the drive dogs engage and 27 Refer to Chapter 1 and
look up the ignition the mark made on the distributor rim after
the distributor moves fully home. Refit but do timing setting for the engine being worked on. removal, and push the distributor fully home
not tighten the three retaining bolts. 28 Continue turning the crankshaft until the (see illustration). As the skew gears mesh,
21 During production the distributor is notch in the pulley is aligned with the correct the rotor arm will move anti-clockwise and
precisely positioned for
optimum ignition setting on the scale located just above and to should align with the manufacturer's mark on
timing and marked accordingly with a punch the right of the pulley. The "O" mark on the the distributor rim.
mark on the distributor mounting flange and scale represents Top Dead Centre (TDC) and 35 With the distributor in place, turn the body
the cylinder head (see illustration). the raised projections to the left of TDC are in slightly, if necessary so that the arms of the
22 If the original distributor is being refitted, increments of 4° BTDC (see illustration 5.5). trigger wheel and stator are aligned, then refit
align the punch marks, tighten the distributor 29 Check that the rotor arm is pointing to the and tighten the clamp plate bolt.
flange mounting bolts and refit the distributor notch on the rim of the distributor body (see 36 Reconnect the LT wiring multi-plug and
cap, LT lead and vacuum hose. illustration). vacuum hose, then refit the distributor cap,
23 If a new distributor is being fitted, turn the 30 Make a mark on the distributor body and spark plug and plug leads. 5B
distributor body so that the mounting bolts a corresponding mark on the cylinder block to 37 Refer to Chapter 1 and adjust the ignition
are positioned centrally in their elongated aid refitting. timing.
slots, then tighten the bolts just over finger 31 Undo the bolt securing the distributor
tight. Refit the distributor cap, LT lead and clamp plate to the cylinder block, then CVH engines
vacuum hose, then adjust the ignition timing withdraw the distributor from its location. As Removal
as described in Chapter 1. the distributor is removed, the rotor arm will 38 Spring back the retaining clips or undo the move a few degrees clockwise. Note the new retaining screws and lift off the distributor cap.
Electronic breakerless ignition position of the rotor arm and make an 39 Disconnect the LT wiring multi-plug and alignment mark on the distributor body rim. the vacuum hose(s) at the distributor vacuum
OHV engines Refitting unit (where applicable).
Removal 32 Before installing the distributor, make sure 40 Undo the distributor flange retaining bolts
24 Disconnect the leads from the spark that the crankshaft is still positioned at TDC and withdraw the distributor from the cylinder as previously described. If a new distributor is head (see illustration).
5.29 Rotor arm aligned with manufacturer's mark on distributor body 5.34 Rotor arm position prior to refitting - 5.40 Distributor flange upper retaining
rim - OHV engines (electronic breakerless OHV engines (electronic breakerless bolts (arrowed) - CVH engines (electronic system) system) breakerless system) 5B·8 Ignition systems
5.42 Checking the distributor O-ring seal 5.45a Distributor mounting flange and 5.45b Distributor mounting flange and condition - CVH engines (electronic cylinder head punch marks (arrowed) - cylinder head punch marks (arrowed) - breakerless system) CVH engines (electronic breakerless CVH engines (electronic breakerless system - early type distributor shown) system - later type distributor shown)
Refitting 45 During production the distributor is an accuracy of half a degree using a
41 At the beginning of 1985 a modified precisely positioned for optimum ignition microwave timing system. Subsequent timing
distributor of either Bosch or Lucas timing and marked accordingly with punch requires the use of special test equipment.
manufacture was introduced for all CVH marks on the distributor mounting flange and Unless absolutely necessary do not remove
engines equipped with electronic ignition. The the cylinder head (see illustrations). the distributor
modified unit is identifiable from the earlier 46 If the original distributor is being refitted, 50 Disconnect the battery negative lead.
type by only having no retaining bolt flanges align the punch marks, tighten the distributor 51 Disconnect the HT lead from the coil, then
instead of the three used previously. If an flange retaining bolts and refit the distributor remove the distributor cap and position it to
early type distributor is being renewed, only cap, wiring multi-plug and vacuum hose(s) as one side.
the modified type will be supplied by Ford applicable. 52 Disconnect the distributor wiring plug.
parts dealers and it will therefore also be 47 If a new distributor is being fitted, turn the 53 Ensure that there are suitable alignment
necessary to obtain an LT wire assembly (part distributor body so that the retaining bolts are marks between the base of the distributor and
No. 84AG-12045-BA) to adapt the existing positioned centrally in their elongated slots, the cylinder head. If necessary, make suitable
wiring on the car to suit the modified then tighten the bolts just over finger tight. marks using a scribe or a centre punch (see
distributor. It is also recommended by the 48 Refit the distributor cap, wiring multi-plug illustration).
manufacturers that a complete new set of HT and vacuum hose(s) (as applicable). If an early 54 Remove the distributor retaining bolts and
leads to the latest Ford specification is type distributor is being replaced with the withdraw the distributor from the cylinder
obtained at the same time. Apart from modified type, connect the green wire of the head.
connecting the new LT wire assembly which is new LT wire assembly to the coil negative
described later in this Section, fitting the new terminal, the black wire to the positive Refitting
distributor is the same as for earlier units, as terminal and the brown wire to a suitable
follows. 55 Commence refitting by checking the earth. Join the existing coil wires to the stud condition of the distributor oil seal, renewing it
42 Before refitting check the condition of the terminals of the new wiring assembly, green if necessary. Lubricate the seal with clean
O-ring seal at the base of the distributor and to green and black to black (see illustration). engine oil.
renew it if necessary (see illustration). 49 Adjust the ignition timing (Chapter 1). 56 Align the distributor drive dog with the slot
43 Hold the distributor with the vacuum unit
(where fitted) towards the inlet manifold side of in the camshaft. The dog will only fit one way, Programmed electronic ignition
the engine and align the distributor shaft drive as the slot is offset. (EEC IV) - 1.4 litre fuel injection 57 Loosely secure the distributor to the
dog with the slot in the end of the camshaft. engines
44 Insert the distributor and turn the rotor cylinder head with the retaining bolts, then
arm slightly so that the drive dogs engage and turn the distributor body until the marks on the
the distributor moves fully home. Refit but do Removal base of the distributor and the cylinder head
not tighten the retaining bolts. Note: During production, engines are
timed to are aligned. If a new distributor or cylinder
5.48 LT wire assembly to suit modified 5.53 Make alignment marks (arrowed) 5.57 Correct alignment of distributor distributor - CVH engines (electronic between the distributor and cylinder head wiring plug - 1.4 litre fuel injection engine breakerless system) to assist alignment on refitting - 1.4 litre A Direction of rotation
A Wiring multi-plug B Green wire fuel injection engine B Centreline through distributor wiring to
amplifier module C Black wire plug (40° to the vertical) Ignition systems 5B·9
6.1 Electronic amplifier module locations 6.3a Electronic amplifier securing screw 6.3b Removing the electronic amplifier A Early type Bosch distributor (arrowed) - later type Bosch distributor module - later type Lucas distributor B Early type Lucas distributor motor assembly to the bulkhead. Lift the unit off the studs and place it on the engine. Avoid straining the wiring (see illustration). 12 Unclip and detach the wiring multi-plug from the spark control module (see illustration). 13 Undo the retaining screws and remove the module from the bulkhead. Detach the module vacuum hose. Refitting 14 Refitting is the reverse sequence to removal. Take care not to trap the motor wiring when refitting the fan motor assembly, and ensure that it is engaged in the slot 6.10a Release the retaining clips . . . 6.10b . . . and remove the plenum chamber provided in the housing. top cover
head has been fitted, position the wiring plug 6 Refit the module and tighten the securing 1.1 and 1.3 litre HCS engines
as shown (see illustration). Tighten the screws. (DIS/ESC)
retaining bolts. 7 Where applicable, refit the distributor as
58 Reconnect the distributor wiring plug, described in Section 5. Warning: The DIS system carries 5B
then fit the distributor cap and reconnect the much higher voltages than
coil HT lead. RS Turbo engines (ESC II) conventional systems, and
59 Reconnect the battery negative lead. adequate precautions must be
60 Take the vehicle to a Ford dealer at the Electronic Spark Control (ESC II) taken to avoid personal injury. Refer to the
earliest opportunity to have the ignition timing module "Safety first!" Section at the beginning of
accurately adjusted. Removal this manual before proceeding, and 8 Disconnect the battery negative terminal. always disconnect the battery negative 9 Remove the heater plenum chamber top lead before working on the system 6 Ignition system electronic cover rubber seal, modules - removal and refitting 10 Release the five retaining clips and lift off ESC module the plenum chamber top cover (see Removal
Amplifier module - electronic illustrations). 15 The module is located on the front left-
breakerless system 11 Undo the two nuts securing the heater fan hand inner wing panel.
Removal
1 The amplifier module is located on the side
of the distributor (see illustration).
2 If necessary, to improve access remove the
distributor as described in Section 5.
3 Remove the two securing screws, and
withdraw the module from the side of the
distributor (see illustrations).
Refitting
4 Start refitting by cleaning all traces of old
heat sink compound from the distributor body.
5 Apply fresh heat sink compound (supplied
with new amplifier modules) to the back of the 6.11 Undo the fan motor retaining nuts 6.12 Spark control module wiring multi-
amplifier before fitting. (arrowed) plug (A) and vacuum hose (B) 5B·10 Ignition systems
6.17 Disconnecting the vacuum hose from 6.18 Unscrewing the ESC module wiring 6.19 ESC module securing screws the ESC module plug securing screw (arrowed)
22 When refitting the fuel trap, the side 32 Remove the two securing screws and marked "DIST" must face the ESC module, withdraw the module. and the side marked "CARB" must face the Refitting inlet manifold. 33 Refitting is a reversal of removal. 1.4 litre fuel injection engines EEC IV module (EEC IV) 34 Refer to Chapter 4, Part D. TFI IV module Removal 7 Distributorless Ignition System 23 The TFI IV module is located on the front (DIS) components - removal left-hand inner wing panel. and refitting 24 Disconnect the battery negative lead. 25 Depress the locking tabs and disconnect the module wiring plug. Electronic modules 6.29 E-DIS-4 module location 26 Remove the retaining screws, and withdraw the module. 1 Refer to Section 6. A Module C Securing Refitting DIS coil B Wiring plug screws 27 Refitting is a reversal of removal.
16 Disconnect the battery negative lead. 2 Refer to Section 4.
17 Disconnect the vacuum hose from the EEC IV module Engine speed sensor
module (see illustration). 28 Refer to Chapter 4, Part C.
18 Unscrew the central securing screw, and 1.6 litre Electronic Fuel Injection Removal
disconnect the wiring plug (see illustration).
19 Remove the two screws securing the engines (EEC IV) 3 Disconnect the battery negative lead.
module to the wing panel, and withdraw the 4 Disconnect the sensor wiring plug (see
module (see illustration). E-DIS 4 module illustration).
Refitting Refitting 5 Remove the securing screw and withdraw
20 Refitting is a reversal of removal. 29 The module is located on the front left- the sensor. hand inner wing panel in the engine
Fuel trap compartment (see illustration). Refitting
21 A fuel trap is fitted in the vacuum line 30 Disconnect the battery negative lead. 6 Refitting is a reversal of removal.
between the inlet manifold and the ESC 31 Disconnect the module wiring plug. Do
module. not pull on the wiring. Engine Coolant Temperature (ECT) sensor Removal 7 The ECT sensor is screwed into the inlet manifold (see illustration). 8 Disconnect the battery negative lead. 9 Partially drain the cooling system as described in Chapter 1. 10 Disconnect the sensor wiring plug. 11 Unscrew the sensor from the inlet manifold.
Refitting 12 Refitting is a reversal of removal, but on 7.4 Disconnecting the engine speed 7.7 Engine coolant temperature sensor completion top up the cooling system as sensor wiring plug - DIS location (arrowed) - DIS described in "Weekly checks". 9·1
Chapter 9
Braking system
Contents
Anti-lock Braking System - description . . . . . . . . . . . . . . . . . . . . . .19 Hydraulic system - bleeding (anti-lock braking system) . . . . . . . . .23
Brake components check . . . . . . . . . . . . . . . . . . . . . . .See Chapter 1 Hydraulic system - bleeding (conventional braking system) . . . . . .11
Brake
drum - inspection and renewal . . . . . . . . . . . . . . . . . . . . . . . .7 Light
laden valve (Van models) - adjustment, removal and
Brake fluid level check . . . . . . . . . . . . . . . . . . . . . . . . .See Chapter 1 refitting . . . . . . . . . . . . . . . . . . . . . . . . . . . . . . . . . . . . . . . . . . . . .14
Brake fluid renewal . . . . . . . . . . . . . . . . . . . . . . . . . . . .See Chapter 1 Load apportioning valve (anti-lock braking system) - removal
Brake pedal - removal, refitting and adjustment . . . . . . . . . . . . . . .17 and refitting . . . . . . . . . . . . . . . . . . . . . . . . . . . . . . . . . . . . . . . . . .22
Braking system warning lamps and electrical switches - removal Master cylinder - removal, overhaul and refitting . . . . . . . . . . . . . . .12 and refitting . . . . . . . . . . . . . . . . . . . . . . . . . . . . . . . . . . . . . . . . . .18 Modulator (anti-lock braking system) - removal and refitting . . . . .21
Front brake caliper - removal, overhaul and refitting . . . . . . . . . . . . .3 Modulator drivebelt (anti-lock braking system) - removal and
Front brake disc - inspection, removal and refitting . . . . . . . . . . . . .4 refitting . . . . . . . . . . . . . . . . . . . . . . . . . . . . . . . . . . . . . . . . . . . . .20
Front brake disc pad check . . . . . . . . . . . . . . . . . . . . .See Chapter 1 Pressure regulating valve (Saloon and
Estate models) - removal
Front disc pads - renewal . . . . . . . . . . . . . . . . . . . . . . . . . . . . . . . . . .2 and refitting . . . . . . . . . . . . . . . . . . . . . . . . . . . . . . . . . . . . . . . . . .13
General description . . . . . . . . . . . . . . . . . . . . . . . . . . . . . . . . . . . . . .1 Rear brake shoes - renewal . . . . . . . . . . . . . . . . . . . . . . . . . . . . . . . .5
Handbrake - adjustment . . . . . . . . . . . . . . . . . . . . . . . . . . . . . . . . . . .8 Rear brake shoe lining check . . . . . . . . . . . . . . . . . . . .See Chapter 1
Handbrake cables - renewal . . . . . . . . . . . . . . . . . . . . . . . . . . . . . . .9 Rear wheel cylinder - removal, overhaul and refitting . . . . . . . . . . . .6
Handbrake lever - removal and refitting . . . . . . . . . . . . . . . . . . . . . .10 Vacuum servo unit and linkage - removal and refitting . . . . . . . . . .16
Hydraulic pipes and hoses - renewal . . . . . . . . . . . . . . . . . . . . . . . .15
Degrees of difficulty Easy, suitable for Fairly easy, Fairly difficult, Difficult, suitable Very difficult, novice with little suitable for suitable for for experienced suitable for expert experience beginner with competent DIY DIY mechanic DIY or professional some experience mechanic
Specifications
System type ........................................... Diagonally split dual circuit, hydraulic with pressure regulating valve to rear brakes. Servo assistance and Anti-lock Braking System (ABS) as standard or
optional equipment according to model. Cable-operated handbrake on rear brakes
Front brakes
Type . . . . . . . . . . . . . . . . . . . . . . . . . . . . . . . . . . . . . . . . . . . . . . . . . . . . Solid or ventilated disc with single piston sliding calipers 9
Disc diameter . . . . . . . . . . . . . . . . . . . . . . . . . . . . . . . . . . . . . . . . . . . . . 239.45 mm
Disc thickness: Solid disc . . . . . . . . . . . . . . . . . . . . . . . . . . . . . . . . . . . . . . . . . . . . . . 10.0 mm Ventilated disc . . . . . . . . . . . . . . . . . . . . . . . . . . . . . . . . . . . . . . . . . . . 24.0 mm
Minimum disc thickness: Solid disc . . . . . . . . . . . . . . . . . . . . . . . . . . . . . . . . . . . . . . . . . . . . . . 8.7 mm Ventilated disc . . . . . . . . . . . . . . . . . . . . . . . . . . . . . . . . . . . . . . . . . . . 22.7 mm
Maximum disc run-out . . . . . . . . . . . . . . . . . . . . . . . . . . . . . . . . . . . . . . 0.15 mm
Minimum disc pad thickness . . . . . . . . . . . . . . . . . . . . . . . . . . . . . . . . . 1.5 mm
Rear brakes
Type . . . . . . . . . . . . . . . . . . . . . . . . . . . . . . . . . . . . . . . . . . . . . . . . . . . . Self-adjusting single leading shoe drum
Drum diameter: Standard hub/drum . . . . . . . . . . . . . . . . . . . . . . . . . . . . . . . . . . . . . . . 180.0 mm Van, XR3i, RS Turbo and certain 1.6 litre models . . . . . . . . . . . . . . . . 203.2 mm
Wheel cylinder diameter . . . . . . . . . . . . . . . . . . . . . . . . . . . . . . . . . . . . . 17.78 mm, 19.05 mm or 22.2 mm according to model - see text
Minimum brake shoe lining thickness . . . . . . . . . . . . . . . . . . . . . . . . . . . 1.0 mm 9·2 Braking system
Torque wrench settings Nm lbf ft
Caliper piston housing to anchor bracket . . . . . . . . . . . . . . . . . . . . . . . 20 to 25 15 to 18
Caliper anchor bracket to hub carrier . . . . . . . . . . . . . . . . . . . . . . . . . . . 50 to 66 37 to 49
Rear brake backplate bolts . . . . . . . . . . . . . . . . . . . . . . . . . . . . . . . . . . . 45 to 55 33 to 40
Brake pressure regulating valve mounting bolts . . . . . . . . . . . . . . . . . . 20 to 25 15 to 18
Light laden valve to mounting bracket . . . . . . . . . . . . . . . . . . . . . . . . . . 20 to 25 15 to 18
Hydraulic unions . . . . . . . . . . . . . . . . . . . . . . . . . . . . . . . . . . . . . . . . . . . 12 to 15 9 to 11
Master cylinder to servo . . . . . . . . . . . . . . . . . . . . . . . . . . . . . . . . . . . . . 21 to 26 15 to 19
Modulator pivot bolt (ABS) . . . . . . . . . . . . . . . . . . . . . . . . . . . . . . . . . . . 22 to 28 16 to 21
Modulator adjuster bolt (ABS) . . . . . . . . . . . . . . . . . . . . . . . . . . . . . . . . 22 to 28 16 to 21
Modulator drivebelt cover (ABS) . . . . . . . . . . . . . . . . . . . . . . . . . . . . . . . 8 to 11 6 to 8
Load apportioning valve adjusting bracket nuts (ABS) . . . . . . . . . . . . . . 21 to 29 15 to 21
Load apportioning valve to mounting bracket (ABS) . . . . . . . . . . . . . . . 21 to 29 15 to 21
Rear suspension arm inner mounting nuts . . . . . . . . . . . . . . . . . . . . . . . 70 to 90 52 to 66
Front suspension lower arm balljoint pinch-bolt . . . . . . . . . . . . . . . . . . 48 to 60 35 to 44
Tie-rod balljoint nut . . . . . . . . . . . . . . . . . . . . . . . . . . . . . . . . . . . . . . . . . 57 to 68 42 to 50
and Estate models, and a light laden valve on Van models is incorporated in the rear brake 1 General description 2 Front disc pads - renewal hydraulic circuit. The valve regulates the pressure applied to each rear brake and The braking system is of the dual circuit reduces the possibility of the rear wheels Warning: Renew both sets of
hydraulic type with disc brakes at the front locking under heavy braking. front brake pads at the same time
and drum brakes at the rear. A diagonally split The front brakes utilise solid or ventilated - never renew the pads on only
dual circuit hydraulic system is
employed in discs according to model and are operated by one wheel, as uneven braking
which each circuit operates one front and one single piston sliding type calipers. At the rear, may result. Note that the dust created by
diagonally opposite rear brake from a tandem leading and trailing shoes are operated by wear of the pads may contain asbestos,
master cylinder. Under normal conditions twin piston wheel cylinders and are self- which is a health
hazard . Never blow it out
both circuits operate in unison; however, in adjusting by footbrake application. A cable- with compressed air, and don't inhale any
the event of hydraulic failure in one circuit, full operated handbrake provides an independent of it. An approved filtering
mask should be
braking force will still be available at two worn when working on the brakes. DO
wheels. A pressure regulating valve on Saloon mechanical means of rear brake operation. NOT use petrol or petroleum-based From 1986 onwards an anti-lock braking solvents to clean brake parts; use brake system is available as standard or optional cleaner or methylated
spirit only. equipment according to model. Further information on this system will be found in 1 Slacken the roadwheel bolts, raise the front later Sections of this Chapter. of the vehicle, support it with safety stands Note: When servicing any part of the system, (see "Jacking and Vehicle Support") and remove the roadwheel(s). work carefully and methodically; also observe 2 Where fitted, disengage the brake pad wear scrupulous cleanliness when overhauling any sensor from its retaining clip (beneath the part of the hydraulic system. Always renew bleed screw) and disconnect the lead components (in axle sets, where applicable) if connector (see illustration). in doubt about their condition, and use only 3 Using a screwdriver, prise free the retaining genuine Ford replacement parts, or at least clip from the caliper (see illustration). those of known good
quality . Note the 4 Using a 7 mm Allen key, unscrew the bolts warnings given in "Safety first" and at the until they can be withdrawn from the caliper 2.2 Disconnect the disc pad wear sensor relevant points in this Chapter concerning the anchor brackets (see illustrations). lead at the connector dangers of asbestos dust and hydraulic fluid. 5 Withdraw the piston housing and tie it up
2.3 Disc pad retaining clip 2.4a Unscrew the caliper bolt using an 2.4b . . . and withdraw the bolt from the Allen key . . . anchor bracket Braking system 9·3
2.5 Withdraw the caliper piston housing 2.6 Removing the inboard pad from the 2.7 . . . and the outboard pad from the piston housing . . . anchor bracket
with a length of wire to prevent strain on the Take care not to
drip hydraulic fluid onto the from the surface of the new outboard pad and
flexible hose (see illustration). paintwork; it acts as an effective paint stripper. locate it in the jaws of the caliper anchor
6 Withdraw the inboard pad from the piston 11 Commence reassembly by fitting the bracket.
housing (see illustration). inboard pad into the piston housing. Make 15 Locate the caliper piston housing and
7 Withdraw the outboard pad from the sure that the spring on the back of the pad fits screw in the Allen bolts to the specified torque.
anchor bracket (see illustration). into the piston. 16 Fit the retaining clip.
8 Clean away all residual dust or dirt, taking 12 The wear sensor wire should be routed to 17 Repeat the operations on the opposite
care not to inhale the dust as, being ensure that it cannot chafe against any brake.
asbestos based, it is injurious to health. moving parts. Attach the wear sensor 18 Apply the footbrake hard several times to
9 Using a piece of flat wood, a tyre lever or connector to the bleed screw clip (where position the pads against the disc and then
similar, push the piston squarely into its bore. applicable), and reconnect it. check and top-up the fluid in the master
This is necessary in order to accommodate 13 Where the cable has become unwound, cylinder reservoir.
the new thicker pads when they are fitted. loosely coil the
surplus wire so that slack is 19 Fit the roadwheel(s) and lower the vehicle.
10 Depressing the piston will cause the fluid taken out, yet enough flexibility (25 mm) is still 20 Avoid heavy braking (if possible) for the
level in the master cylinder reservoir to rise, so allowed for pad wear. The coiled wire must on first hundred miles or so when new pads have
anticipate this by siphoning out some fluid no account be stretched. been fitted. This is to allow them to bed in and
using an old hydrometer or poultry baster. 14 Peel back the protective paper covering reach full efficiency.
9 3.4 Exploded view of the front brake caliper A Piston housing-to- E Dust excluder anchor bracket bolts F Piston seal B Anchor brackets G Piston C Retaining clip H Piston housing D Disc pad J Disc pad 9·4 Braking system
4 Apply air pressure to the fluid inlet hole and cracks are evident, it must either be refinished 3 Front brake caliper - removal, eject the piston (see illustration). Only low air or renewed. Any refinishing must not reduce overhaul and refitting pressure is needed for this, such as is the thickness of the disc to below a certain produced by a foot-operated tyre pump. minimum (see "Specifications"). Light scoring 5 Using a sharp pointed instrument, pick out on a brake disc is normal and should be Warning: Hydraulic fluid is poisonous; wash off immediately the piston seal from the groove in the cylinder ignored. and thoroughly in the case of skin bore. Do not
scratch the surface of the bore. 3 If disc distortion is suspected, the disc can contact, and seek immediate 6 Examine the surfaces of the piston and the be checked for run-out using a dial gauge or
medical advice if any fluid is swallowed or cylinder bore. If they are scored or show feeler blades located between its face and a
gets into the eyes. Certain types of
evidence of metal-to-metal rubbing, then a fixed point as the disc is rotated (see
hydraulic fluid are inflammable, and may new piston housing will be required. Where illustration).
ignite when allowed into contact with hot the components are in good condition, 4 Where the run-out exceeds the specified
components; when servicing any hydraulic discard the seal and obtain a repair kit. figure, renew the disc.
system, it is safest to assume that the fluid 7 Wash the internal components in clean
is inflammable, and to take precautions brake hydraulic fluid or methylated spirit only, Removal
against the risk of fire as though it is petrol nothing else. 5 With the roadwheel removed (see para-
that is being handled. Hydraulic fluid is 8 Using the fingers, manipulate the new seal graph 1), proceed as follows.
also an effective paint stripper, and will into its groove in the cylinder bore. 6 To remove a disc, unbolt the caliper anchor
attack
plastics ; if any is spilt, it should be 9 Dip the piston in clean hydraulic fluid and bracket, withdraw it and tie it up to the
washed off immediately, using copious insert it squarely into its bore. suspension strut to avoid strain on the flexible
quantities of fresh water. Finally, it is 10 Connect the rubber dust excluder hose (if necessary, remove the brake pads as
hygroscopic (it absorbs moisture from the between the piston and the piston housing, described in Section 2) (see illustration).
air) - old fluid may be contaminated and and then depress the piston fully.
unfit for further use. When topping-up or 7 Extract the small disc retaining screw and pull the disc from the hub (see illustration).
renewing the fluid, use the recommended Refitting
type, and ensure that it comes from a Refitting 11 Refit the caliper by reversing the removal
freshly-opened sealed container. operations, referring to paragraphs 11 to 16 in 8 If a new disc is being installed, clean its
Note: Before starting work, refer to the the previous Section. surface free from preservative.
warning at the beginning of Section 2 12 Reconnect the brake hose to the caliper, 9 Fit the disc and tighten the retaining screw.
concerning the dangers of asbestos dust. taking care not to distort it. When secured it 10 Refit the caliper anchor bracket (and where must not interfere with any of the adjacent applicable the brake pads - see Section 2), and
Removal steering or suspension components. the roadwheel and lower the vehicle to the
1 Proceed as described in paragraphs 1 to 8 13 Bleed the brake hydraulic circuit as given floor.
in the previous Section. in Section 11 or 23, as applicable, then refit
2 Disconnect the brake flexible hose from the the roadwheel(s) and lower the vehicle.
caliper. This can be carried out in one of two 5 Rear brake shoes - renewal
ways . Either disconnect the flexible hose from 4 Front brake disc - inspection,
the rigid hydraulic
pipeline at the support removal and refitting Warning: Brake shoes must be
bracket by unscrewing the union, or, once the renewed on both rear wheels at
caliper is detached, hold the end fitting of the Note: Before starting work, refer to the the same time - never renew the
hose in an open-ended spanner and unscrew warning at the beginning of Section 2 shoes on only one wheel, as
the caliper from the hose. Do not allow the concerning the dangers of asbestos dust. uneven braking may result. Also, the dust
hose to twist, and plug its end after caliper created by wear of the shoes may contain
removal. Inspection asbestos, which is a health hazard. Never
Overhaul 1 Fully apply the handbrake then loosen the blow it out with compressed air, and don't front roadwheel bolts. Raise and support the inhale any of it. An approved filtering
3 Brush away all external dirt and pull off the front of the vehicle on safety stands (see mask should be worn when working on
piston dust-excluding cover. "Jacking and Vehicle Support") and remove the brakes. DO NOT use petrol or the roadwheel(s). petroleum-based solvents to clean brake 2 Examine the surface of the disc. If it is parts; use brake cleaner or methylated deeply grooved or scored or if any small spirit only.
4.3 Checking brake disc run-out
A Steering tie-rod C Brake disc B Dial gauge D Dial gauge 4.6 Caliper anchor bracket-to-hub carrier 4.7 Brake disc retaining screw location support fixture retaining bolts (arrowed) (arrowed) Braking system 9·5
5.3a Remove the rear hub dust cap . . . 5.3b . . . extract the split pin and nut 5.3c . . . then unscrew the hub nut . . . retainer . . .
5.3d . . . and remove the thrustwasher 5.4 Remove the hub outer bearing . . . 5.5 . . . followed by the hub/drum assembly
Carburettor engine models except 9 Remove the trailing shoe in a similar way, at mechanism to its contracted position (early
Van variants the same time withdrawing the adjuster strut. type) or maximum position (later type). 10 Release the end of the handbrake cable 14 Locate the
webs of the trailing shoe on the
1 Slacken the roadwheel bolts, raise the rear from the lever on the shoe (see illustration). wheel cylinder and the fixed
abutment , making
of the vehicle and support it securely (see 11 Disconnect the trailing shoe from the sure that the lower end of the handbrake lever
"Jacking and Vehicle Support"). Remove the adjuster strut by pulling the shoe outwards is correctly located on the face of the plastic
roadwheels.
2 Release the handbrake fully. and twisting the shoe spring (see plunger and not trapped behind it.
3 Tap off the hub dust cap, remove the split illustration). 15 Fit the trailing shoe hold-down post and
pin, nut retainer, nut and thrustwasher (see 12 Before reassembly, sparingly lubricate the spring. Hold the leading shoe in position.
illustrations). brake shoe contact areas on the backplate, 16 Connect the larger shoe return spring at
4 Pull the hub/drum towards you and then fixed abutment and wheel cylinder pistons the lower (abutment) position between both
push it back enough to be able to take the outer with a high melting-point brake grease. shoes.
bearing from the spindle (see illustration). 13 Commence reassembly by installing the 17 Holding the leading shoe almost at right-
5 Remove the hub/drum and brush out any trailing shoe. Do this by engaging the angles to the backplate, connect the spring
dust taking care not to inhale it (see handbrake lever return spring to the shoe. between it and the strut and then engage the
illustration). Hook the strut onto the spring and lever it into bottom end of the shoe behind the abutment 9
6 Remove the shoe hold-down spring from position. Set the strut self-adjusting retainer plate.
the leading shoe (see illustration). Do this by
gripping the dished washer with a pair of
pliers , depressing it and turning it through 90°.
Remove the washer, spring and the hold-
down post. Note the locations of the leading
and trailing shoes and the cut-back of the
linings at the leading ends.
7 Pull the leading shoe outwards and upwards
away from the backplate (see illustration).
8 Twist the shoe to disengage it from the
return springs and adjuster strut. On models
with the later type rear brake assembly it will
be necessary to move the auto adjuster to
maximum adjustment to disengage the shoe
from the strut. Make a note of the return spring
arrangement and hole locations if in any doubt 5.6 Removing the brake shoe hold-down 5.7 Removing the leading brake shoe
(see illustrations). washer and spring A Leading shoe B Lower spring 9·6 Braking system
5.8a Exploded view of the rear brake assembly as fitted to early models
A Dust excluder B Piston C Seal D Spring E Cylinder body F Seal G Piston H Dust excluder I Gasket J Spring washer K Mounting bolt L Adjuster strut M Return spring N Hold-down spring O Return spring P Inspection hole plug Q Leading shoe R Backplate S Handbrake lever plunger T Trailing shoe U Hold-down post V Spring W Dished washer X Return spring Y Dust cover Z Bleed screw
5.8b Exploded view of the rear brake assembly as fitted to fuel-injected models, Van variants and later Saloon and Estate models
A Trailing shoe B Adjuster strut C Spring D Wheel cylinder E Backplate F Hold-down post G Leading shoe H Spring J Dished washer K Ratchet pawl spring L Return spring M Return spring Braking system 9·7
5.10 Removing the handbrake cable from 5.11 Separating the trailing brake shoe 5.30 Removing the drum retaining screw the trailing brake shoe from the adjuster strut on models with a separate brake drum A Handbrake cable C Trailing shoe Fuel-injection engine models and to the warning at the beginning of Section 3 B Lever Van variants concerning the dangers of hydraulic fluid.
18 Swivel the shoe towards the backplate so 28 On these vehicles the brake drum is Removal
that the cut-out in its web passes over the separate from the hub and can be removed 1 Remove the rear brake shoes, as described
quadrant lever. Fit the shoe hold-down post, without the need to remove the hub as well. in the preceding Section.
spring and washer. The bearings will therefore not need to be 2 Disconnect the fluid pipeline from the wheel
19 Centralise the shoes within the backplate readjusted during reassembly. cylinder and cap the end of the pipe to
by tapping them if necessary with the hand, 29 The brake shoe inspection and removal prevent loss of fluid.
then fit the hub/drum and slide the outer procedure is very similar to that described
bearing onto the spindle. previously but note the following differences. A bleed screw rubber dust
20 Fit the thrustwasher and hub nut finger 30 Before removing the drum unscrew the cap is useful to prevent fluid
tight only. drum retaining screw (see illustration). loss.
21 Tighten the hub nut to a torque of 31 Disconnect the lower shoe return spring
between 20 and 25 Nm (15 and 18 lbf ft), at which bridges the shoes and then disconnect
the same time rotating the roadwheel in an the handbrake cable from the lever. 3 Unscrew the two bolts which hold the
anti-clockwise direction. 32 Prise the shoes away from the lower pivot, wheel cylinder to the brake backplate and
22 Unscrew the nut one half a turn and then twist them from the wheel cylinder and remove the cylinder with sealing gasket (see
tighten it only finger tight. remove as an assembly. illustration).
23 Fit the nut retainer so that two of its slots 33 With the shoes removed they can be Overhaul
line up with the split pin hole. Insert a new separated from the strut. Note how the components are positioned before 4 Clean away external dirt and then pull off
split pin, bending the end around the nut, not dismantling (see illustrations). the dust-excluding covers.
over the end of the stub axle. 5 The pistons and seals will probably shake
24 Tap the dust cap into position. 34 Refitting is a reversal of the removal procedure. out. If they do not, apply air pressure (from a
25 Refit the roadwheel and check that a tyre pump) at the inlet hole to eject them (see
small amount of hub bearing free play can be illustration).
felt when the wheel is rocked at the top and 6 Rear wheel cylinder - removal, 6 Examine the surfaces of the pistons and the
bottom. overhaul and refitting cylinder bores for scoring or metal-to-metal
26 Depress the brake pedal fully several rubbing areas. If evident, renew the complete
times to operate the self-adjusting Note: Before starting work, refer to the cylinder assembly.
mechanism then lower the car to the ground. warning at the beginning of Section 2 7 If the cylinder is to be renewed note that
27 Recheck the tightness of the wheel bolts. concerning the dangers of asbestos dust, and any one of three different sizes may be fitted 9
5.33a Brake shoe return spring and 5.33b Automatic adjuster assembly on 6.3 Rear wheel cylinder retaining bolts adjuster strut arrangement on Van, fuel- Van, fuel-injected models and later Saloon (arrowed) injected models and later Saloon and and Estate models Estate models 9·8 Braking system
recommended. Adjustment must be carried out if the movement of the control lever becomes excessive. 3 Chock the front wheels. Release the handbrake. 4 Raise and support the vehicle at the rear with safety stands (see "Jacking and Vehicle Support"). 5
Grip each adjustment plunger, one located on each rear brake backplate, and move it in and out (see illustration). 6 If the total movement of both plungers added together is between 0.5 and 2.0 mm (0.02 and 0.08 in) then adjustment of the 6.5 Exploded view of the rear wheel 6.7 Wheel cylinder identification letter handbrake is satisfactory. If the plunger cylinder location (arrowed) movement is not as specified proceed as follows. A Dust cap E Piston reconnect the fluid line and refit the shoes 7 Two cable types are used on Escort models B Bleed screw F Piston seal (Section 5). according to year of manufacture and it is C Wheel cylinder G Spring 13 Refit the brake drum and roadwheel and necessary to identify the type being worked D Dust excluder lower the vehicle to the floor. on before proceeding. 14 Bleed the brake hydraulic system as 8 Locate the cable adjuster which is located
according to model and year. The wheel described in Section 11 or 23 as applicable. just forward of the fuel tank. If the cable
cylinders are identified by a letter stamped on adjuster nut has finger grips but the abutment
the rear face which corresponds to the sleeve is smooth, proceed as follows. If both
following (see illustration): 7 Brake drum - inspection and the cable adjuster and abutment sleeve have Letter "T" = 22.2 mm diameter cylinder renewal finger grips, proceed to paragraph 14 (see Letter "L" = 19.05 mm diameter cylinder illustration). Letter "H" = 17.78 mm diameter cylinder Note: Before starting work, refer to the note at
Ensure that the new cylinder obtained is the the beginning of Section 2 concerning the Early type cable with smooth
same as the one removed and more dangers of asbestos dust. abutment sleeve
importantly, is the same as the cylinder on the 1 Whenever a brake drum is removed, brush 9 Make sure that the abutment sleeve on the
other rear brake. out dust from it, taking care not to inhale it cable is fully engaged in its bracket slot.
8 Where the components are in good as it contains asbestos and is injurious to Unlock the adjusting nut by levering between
condition, discard the rubber seals and dust health. the shoulders of the nut and the sleeve.
excluders and obtain a repair kit. 2 Examine the internal friction surface of the 10 Now turn the adjuster nut to eliminate
9 Any cleaning should be done using drum. If deeply scored, or so worn that the slackness from the cable so that it is just
hydraulic fluid or methylated spirit-nothing drum has become pocketed to the width of possible to rotate the adjustment plungers on
else. the shoes, then the drums must be renewed. the brake backplates.
10 Reassemble by dipping the first piston in 3 Regrinding is not recommended as the 11 Apply the handbrake fully to seat the
clean hydraulic fluid and inserting it into the internal diameter will no longer be compatible adjusting nut against its sleeve.
cylinder. Fit a dust excluder to it. with the shoe lining contact diameter. 12 If adjustment of the cable does not alter
11 From the opposite end of the cylinder the plunger movement then the handbrake
body, insert a new seal, spring, a second new cable is likely to be binding or seized or the
seal, the second piston and the remaining 8 Handbrake - adjustment brake mechanism is at fault.
dust excluder. Use only the fingers to 13 On completion lower the car to the
manipulate the seals into position and make ground.
quite sure that the lips of the seals are the 1 Adjustment of the handbrake is normally
correct way round. automatic by means of the self-adjusting Later type cable with finger grip mechanism working on the rear brake shoes. abutment sleeve
Refitting 2 However, due to cable stretch, occasional 14 If the cable adjuster and abutment sleeve
12 Bolt the wheel cylinder to the backplate, inspection of the handbrake adjusters is both have finger grips check to see if a nylon
8.8 Handbrake cable identification 8.5 Handbrake adjustment plunger A Early cable with smooth abutment sleeve 8.14 Handbrake cable adjuster nylon location (arrowed) on backplate B Later cable with finger grip abutment sleeve locking pin (arrowed) Braking system 9·9
locking pin is used to lock the adjusting nut in
position (see illustration). If so remove the 9.3a Handbrake cable layout
locking pin using pliers. Note that a new pin
will be needed after adjustment.
15 Slacken the adjusting nut then apply the
footbrake hard several times to ensure full
self-adjustment of the brake shoes.
16 Turn the abutment sleeve as necessary
until the total movement of both adjustment
plungers added together is between 0.5
and 2.0 mm (0.02 and 0.08 in).
17 Tighten the adjusting nut against the
abutment sleeve as tight as possible by hand
(2 clicks) then tighten it by a further 2 clicks
(maximum) using a suitable wrench.
18 Where applicable fit a new locking pin and
tap it into place.
19 On completion lower the car to the ground.
9 Handbrake cables - renewal
1 Chock the front wheels, then fully release
the handbrake.
2 Raise and support the vehicle at the rear
with axle stands (see "Jacking and Vehicle
Support").
Primary cable
3 Extract the spring clip and clevis pin and
disconnect the primary cable from the
equaliser (see illustrations).
4 Working inside the vehicle, disconnect the 8 Now disconnect the cable from its body
cable from the hand-brake control lever, again guide on the right-hand side of the vehicle. 10 Handbrake lever - removal
by removal of clip and pin.
Drift out the cable 9 Separate the cable assembly/equaliser and refitting
guide to the rear and withdraw the cable from the primary cable by extracting the
through the floorpan. spring clip and clevis pin.
5 Refitting is a reversal of removal. Adjust the 10 Release the cable from the body guides. Removal
handbrake, if necessary, as described in 11 Remove the rear roadwheels and the 1 Chock the front wheels, raise and support
Section 8. brake drums. 12 Release the shoe hold-down spring so the vehicle at the rear using stands (see
Secondary cable that the shoe can be swivelled and the "Jacking and Vehicle Support") then release
6 Using the procedure described in Section handbrake lever unclipped from the relay lever. the handbrake.
8, slacken the cable adjusting nut so that the 13 Remove the cable ends through the brake 2 Working underneath, extract the spring clip
abutment sleeve can be disengaged from its backplate and withdraw the complete cable and clevis pin and disconnect the primary
body guide (see illustration). assembly from the vehicle. cable from the equaliser.
7 Release the cable connector from its body 14 Refitting is a reversal of removal. Grease 3 From inside the car detach the handbrake
guide by extracting the spring clip and the cable groove in the equaliser and adjust warning switch. 9
passing the inner cable through the slit in the the handbrake, as described in Section 8.
guide (see illustration).
9.6 Removing handbrake cable abutment 9.7 Handbrake cable connector spring clip sleeve from the body guide removal
9.3b Primary cable-to-equaliser clevis pin A Body guide B Secondary cable and spring clip (arrowed) 9·10 Braking system
and rear diagonally opposite). If the master cylinder or the pressure regulating valve have been disconnected and reconnected, then the complete system must be bled. 2 When bleeding the brake hydraulic system on a Van, tie the light laden valve actuating lever to the right-hand rear roadspring so that it is in the fully open position (see illustration). This will ensure full fluid flow during the bleeding operations. 3 One of three methods can be used to bleed the system. Bleeding - two-man method 4 Gather together a clean jar and a length of rubber or plastic bleed tubing which will fit the
10.4 Removing handbrake lever clevis pin bleed screw tightly. The help of an assistant 11.2 Light laden valve retained in open and clip will be required. position - Van models
4 Disconnect the cable from the handbrake 5 Take care not to spill fluid onto the A Wire C Actuating
lever by extracting the clip and clevis pin (see paintwork as it will act as a paint stripper. If B Roadspring lever
illustration). any is spilled, wash if off at once with cold possible as they greatly simplify the bleeding
5 Unscrew the lever securing bolts and water. operation and also reduce the risk of expelled
remove the lever. 6 Clean around the bleed screw on the front air or fluid being drawn back into the system. right-hand caliper and attach the bleed tube
Refitting 15 Connect the outlet tube of the bleeder to the screw. device to the bleed screw and then open the
6 Refitting is the reverse sequence to 7 Check that the master cylinder reservoir is screw half a turn. Depress the brake pedal to
removal. On completion adjust the handbrake topped up and then destroy the vacuum in the the floor and slowly release it. The one-way
cable, if necessary, as described in Section 8. brake servo (where fitted) by giving several valve in the device will prevent expelled air applications of the brake foot pedal. from returning to the system at the completion 11 Hydraulic system - bleeding 8 Immerse the open end of the bleed tube in of each stroke. Repeat this operation until (conventional braking system) the jar, which should contain two or three clean hydraulic fluid, free from air
bubbles , inches of hydraulic fluid. The jar should be can be seen coming through the tube. Tighten
Note: On cars equipped with the Anti-lock positioned about 300 mm above the bleed the bleed screw and remove the tube.
Braking System, refer to Section 23. nipple to prevent any possibility of air entering the system down the threads of the bleed 16 Repeat the procedure on the remaining screw when it is slackened. bleed nipples in the order described in Warning: Hydraulic fluid is paragraph 12. Remember to keep the master poisonous; wash off immediately 9 Open the bleed screw half a turn and have your assistant depress the brake pedal slowly cylinder reservoir full. and thoroughly in the case of skin contact, and seek immediate to the floor and then, after the bleed screw is Bleeding - with pressure bleeding
medical advice if any fluid is swallowed or retightened, quickly remove his foot to allow kit
gets into the eyes. Certain types of the pedal to return unimpeded. Repeat the procedure. 17 These too are available from motor
hydraulic fluid are inflammable, and may 10 Observe the submerged end of the tube in accessory shops and are usually operated by
ignite when allowed into contact with hot
components; when servicing any the jar. When air bubbles cease to appear, air pressure from the spare tyre.
hydraulic system, it is safest to assume tighten the bleed screw when the pedal is 18 By connecting a pressurised container to
that the fluid is inflammable, and to take being held fully down by your assistant. the master cylinder fluid reservoir, bleeding is
precautions against the risk of fire as 11 Top-up the fluid reservoir. It must be kept then carried out by simply opening each bleed
though it is petrol that is being handled. topped up throughout the bleeding screw in turn and allowing the fluid to run out,
Hydraulic fluid is also an effective paint operations. If the connecting holes to the rather like turning on a tap, until no air bubbles
stripper, and will attack plastics; if any is master cylinder are exposed at any time due are visible in the fluid being expelled.
spilt, it should be washed off immediately, to low fluid level, then air will be drawn into 19 Using this system, the large reserve of
using copious quantities of fresh water. the system and work will have to start all over fluid provides a safeguard against air being
Finally, it is hygroscopic (it absorbs again. drawn into the master cylinder during the
moisture from the air) - old fluid may be 12 Repeat the operations on the left-hand bleeding operations.
contaminated and unfit for further use. rear brake, the left-hand front and the right- 20 This method is particularly effective when
When topping-up or renewing the fluid, hand rear brake in that order (assuming that bleeding "difficult" systems or when bleeding
always use the recommended type, and the
whole system is being bled). the entire system at time of routine fluid
ensure that it comes from a freshly- 13 On completion, remove the bleed tube. renewal.
opened sealed container. Discard the fluid which has been bled from the system unless it is required for bleed jar All systems
1 This is not a routine operation but will be purposes, never use it for filling the system. 21 On completion of bleeding, top-up the
required after any component in the system fluid level to the mark. Check the feel of the
has been removed and refitted or any part of Bleeding - with one-way valve brake pedal, which should be
firm and free
the hydraulic system has been opened. Where 14 There are a number of one-man brake from any "sponginess" which would indicate
an operation has only affected one circuit of bleeding kits currently available from motor air still being present in the system.
the hydraulic system, then bleeding will accessory shops. It is recommended that one 22 On Van models release the light laden
normally only be required to that circuit (front of these kits should be used whenever valve actuating lever. Braking system 9·11
12 Master cylinder - removal, overhaul and refitting
Note: Before starting work, refer to the
warning at the beginning of Section 3
concerning the dangers of hydraulic fluid.
Removal
1 Disconnect the leads from the level warning
switch in the reservoir cap. Remove the cap.
2 Syphon out as much fluid as possible from
the master cylinder reservoir using an old
battery hydrometer or a poultry baster. Do not 12.4 Master cylinder push rod-to-pedal 12.6 Master cylinder reservoir rubber seals
drip the fluid onto the paintwork as it will act retaining clip (A) - non-servo models (arrowed)
as an effective paint stripper.
3 Disconnect the pipelines from the master
cylinder by unscrewing the unions. Overhaul 10 Remove the pushrod, dust excluder and
Additionally on models equipped with the 6 Clean away external dirt and then detach washer.
anti-lock braking system, release the clips the fluid reservoir by tilting it sideways and 11 Withdraw the primary piston assembly,
and disconnect the two modulator fluid return gently pulling. Remove the two rubber seals which will already have been partially ejected.
pipes. (see illustration). 12 Tap the end of the master cylinder on a
4 On non-servo models release the retaining 7 Secure the master cylinder carefully in a block of wood and eject the secondary piston
clip securing the master cylinder pushrod to vice fitted with jaw protectors. assembly. 8 Unscrew and remove the piston stop bolt. 13 Examine the piston and cylinder bore
the brake pedal (see illustration). 9 Pull the dust excluder back and, using surface for scoring or signs of metal-to-metal
5 Unbolt the master cylinder unit from the circlip pliers, extract the circlip which is now rubbing. If evident, renew the cylinder
servo unit or bulkhead, as applicable, and exposed (see illustration). complete.
withdraw it.
9
12.9 Exploded view of the master cylinder
A Seal G Seal N Reservoir seals B Primary piston H Secondary piston P Piston stop bolt C Shim J Shim R
Boot D Seal K Seal S Pushrod E Spring L Spring T Washer F Retainer M Cylinder body U Circlip 9·12 Braking system
23 Locate the two rubber seals and push the 12.14 Master cylinder primary piston components fluid reservoir into position. 24 It is recommended that a small quantity of fluid is now poured into the reservoir and the pushrod operated several times to prime the A Seal unit. B Piston Refitting C Shim D Seal 25 Refit the master cylinder by reversing the E Retainer removal operations. F Spring 26 Bleed the complete hydraulic system on G Sleeve completion of work (see Section 11 or 23 as H Screw applicable).
13 Pressure regulating valve (Saloon and Estate models) - removal and refitting 1 The brake pressure regulating valve is located within the engine compartment, just 12.15 Master cylinder secondary piston components above the aperture in the wing inner panel through which the steering tie-rod passes. On pre-1986 models the valves comprise a metal A Seal housing bolted to the inner panel. On later B Piston models the valves, one for each brake circuit, C Shim are individually located in a bracket attached D Seal to the inner panel (see illustrations). E Retainer F Spring Removal Note: Before starting work, refer to the warning at the beginning of Section 3 concerning the dangers of hydraulic fluid. 2 Unscrew the unions, noting their locations and disconnect the hydraulic pipes from the valve(s). Cap the ends of the pipes with bleed nipple dust caps to prevent fluid loss. 3 Unscrew the mounting bolts and remove the valve or mounting bracket as applicable.
14 Where the components are in good 18 Using the new seals from the repair kit, On later models extract the retaining clips and
condition, dismantle the primary piston by assemble the pistons, making sure that the remove the valves from the bracket (see
unscrewing the screw and removing the seal lips are the correct way round. illustration).
sleeve. Remove the spring, retainer, seal and 19 Dip the piston assemblies in clean 4 On both versions the valves are sealed
shim. Prise the second seal from the piston hydraulic fluid and enter them into the cylinder units and only serviced as complete
(see illustration). bore. assemblies.
15 Dismantle the secondary piston in a 20 Fit the pushrod complete with new dust
similar way (see illustration). excluder and secure with a new circlip. Refitting
16 Discard all seals and obtain a repair kit. 21 Engage the dust excluder with the master 5 Refitting is the reverse sequence to removal
17 Cleaning of components should be done cylinder. but bleed the hydraulic system as described
in brake hydraulic fluid or methylated spirit - 22 Depress the pushrod and screw in the in Section 11 on completion.
nothing else. stop bolt.
13.1a Pressure regulating valve mounting 13.1b Pressure regulating valves and 13.3 Pressure regulating valve-to-bracket bolts (A) - pre-1986 models mounting bracket - 1986 models onward retaining clip - 1986 models onward Braking system 9·13
14 Light laden valve (Van 14.1 Light laden valve components - Van models models) - adjustment, removal A Valve body G Control spring and refitting B Fluid outlet H Adjuster rod C Fluid inlet I Spacer tube
1 The light laden valve used on Van models is D Actuating lever J Link rod
a pressure regulating valve which reacts to E Adjuster nut K Rear axle tube
suspension height according to vehicle load. F Linkage retaining clip
The valve is mounted on the underside of the
vehicle above the rear axle tube and is
connected to the axle by a rod (see
illustration).
2 The valve should never be dismantled but it
must be adjusted whenever the valve itself,
the axle tube, spring or shock absorber have
been removed, refitted or renewed.
Adjustment
3 Follow this adjustment procedure provided
the original roadsprings have been refitted,
but when new valve linkage has been
installed. Measure the dimension "X" and if 5 If the original roadsprings have been
necessary adjust the position of the nut to
make the dimension between 10 and 12 mm refitted and also the original valve linkage, 15 Hydraulic pipes and hoses -
(see illustration). hold the threaded adjustment rod by means of renewal
4 Rotate the spacer tube so that the its flats and turn the adjusting nut in either
dimension "C" is between 18.5 and 20.5 mm direction until the correct dimensions are Note: Before starting work, refer to the
(see illustration). Crimp the end of the spacer obtained. warning at the beginning of Section 3
tube adjacent to the knurled section of the 6 If one or both rear roadsprings have been concerning the dangers of hydraulic fluid.
tube to prevent the tube from rotating. 1 Always disconnect a flexible hose by renewed, carry out the adjustment procedure prising out the spring anchor clip from the described in paragraph 3, except that the end support bracket and then, using two close- of the spacer tube should be aligned with the fitting spanners, disconnect the rigid line from groove in the link rod (see illustration). the flexible hose (see illustration). 2 Once disconnected from the rigid pipe, the Removal flexible hose may be unscrewed from the Note: Before starting work, refer to the caliper or wheel cylinder. warning at the beginning of Section 3 3 When reconnecting pipelines, or hose concerning the dangers of hydraulic fluid. fittings, remember that all union threads are to 7 If the pressure regulating valve must be metric sizes. No copper washers are used at removed, first disconnect the hydraulic unions and the seal is made at the swaged end of the pipe, so do not try to wind a union pipelines from the valve and cap the pipes. in if it is tight yet still stands proud of the 8 Unbolt the valve from its mounting bracket, surface into which it is screwed. lower the valve and slide the spacer tube 4 A flexible hose must never be installed
14.3 Light laden valve adjustment diagram assembly off the link rod. Remove the link rod. twisted, but a slight "set" is permissible to give - Van models it clearance from an adjacent component. Do Refitting this by turning the hose slightly before A Control spring D Threaded rod B Linkage retaining E Flats 9 Refitting is a reversal of removal, but bleed inserting the bracket spring clip. clip X = 10 to 12 mm the brakes (Section 11) and adjust the valve 5 Rigid pipelines can be made to pattern by 9 C Adjuster nut as described previously in this Section. factors supplying brake components.
14.4 Light laden valve linkage adjustment 14.6 Light laden valve linkage adjustment diagram with original roadsprings - Van diagram with new roadsprings - Van models models A Link rod C = 18.5 to 20.5 mm A Link rod C Spacer tube 15.1 Removing a flexible hose spring B Spacer tube B Groove anchor clip 9·14 Braking system
15.8 Brake pipe flare 16.2 Heater plenum chamber removal 16.8a Vacuum servo unit connecting A Protective coating removed before flaring linkage
6 If you are making up a brake pipe yourself, 7 Remove the servo from the vehicle. It must A Grommet C Bush
observe the following essential requirements. be renewed if defective, no repair is possible. B Connecting link
7 Before flaring the ends of the pipe, trim 8 If necessary, the rest of the servo operating 3 Extract the circlip from the end of the pedal
back the protective plastic coating by a linkage can be removed from under the pivot shaft and withdraw the shaft with clutch
distance of 5.0 mm. instrument panel once the covering and cowl pedal and the flat and wave washers (see
8 Flare the end of the pipe as shown (see side trim have been removed from above the
illustration). illustration). brake pedal inside the vehicle. Unbolt the
9 The minimum pipe bend radius is 12.0 mm, 4 Renew the bushes as necessary. connecting link bracket from the driver's side
but bends of less than 20.0 mm should be (see illustrations). Refitting
avoided if possible. Refitting 5 Reassembly and refitting are reversals of 9 Refitting is the reverse sequence to removal and dismantling. Apply a little grease 16 Vacuum servo unit and removal. Refit the master cylinder as to the bushes when installing. linkage - removal and refitting described in Section 12 and bleed the Adjustment hydraulic system as described in Sections 11
Removal or 23 as applicable. 6 Although the braking system may be in satisfactory condition generally, it is possible
1 Refer to Section 12 and remove the master
cylinder. 17 Brake pedal - removal, that some drivers may feel that the brake
2 On fuel-injection models unclip and lift out refitting and adjustment pedal travel is excessive. The travel can be
the front section of the heater plenum reduced in the following way if the upper
chamber to provide access to the connecting surface of the pedal pad is less than 200.0
linkage across the lower bulkhead (see Removal mm above the metal surface of the floor.
illustration). 1 Working within the vehicle, remove the 7 Remove the brake pedal as described
3 Working inside the vehicle, remove the under-dash cover panel. above.
spring clip which attaches the pushrod to the 2 Extract the spring clip which connects the 8 Remove the white plastic bush (see
arm of the brake pedal. pushrod to the arm of the brake pedal. illustration).
4 Unscrew the nuts which hold the servo to
its mounting bracket, also the servo support
brace to the body.
5 Disconnect the valve hose from the servo.
6 Detach the linkage arm spring at the rear of
the servo and then pull the servo forward until 17.3 Brake pedal components
the servo operating rod can be unclipped
from the linkage. A Washer B Bush C Bush D Washer E Washer F Spring clip G Pushrod clip H Pedal I Pedal pivot shaft
16.8b Vacuum servo unit connecting link bracket on driver's side Braking system 9·15
17.8 Sectional view of brake pedal and 18.4 Removing handbrake warning switch 18.5 Brake stop-lamp switch locknut pushrod location (arrowed) A White plastic B Pushrod clip removed after disconnecting the wiring and 3 The modulators are located in the engine bush C Pedal arm undoing the retaining screw (see illustration). compartment with one mounted on each side of the transmission, directly above the driveshaft
9 Fit a new bush which is red in colour and will Stop-lamp switch inner constant velocity joints. Each modulator
increase the pedal height. Once this type of 5 The stop-lamp switch can be removed by contains a shaft which actuates a flywheel by
bush has been fitted it will not be possible to refit disconnecting the leads and unscrewing the means of a ball and
ramp clutch. A rubber
the anti-rattle retainer. This does not matter. toothed belt is used to drive the modulator shaft
10 Adjust the stop-lamp switch (Section 18). locknut which holds the switch to its bracket from the driveshaft inner constant velocity joint. under the facia (see illustration). 4 During driving and under normal braking, 18 Braking system warning 6 When fitting the switch, adjust its position the modulator shaft and the flywheel rotate lamps and electrical switches by screwing it in or out so that it does not together and at the same speed through the actuate during the first 5.0 mm of pedal travel. engagement of a ball and ramp clutch. In this - removal and refitting condition, hydraulic pressure from the master 19 Anti-lock Braking System - cylinder passes to the modulators and then to
General description each brake in the conventional way. In the event of a front wheel locking the modulator
1 All models are fitted with a low fluid level shaft rotation will be less than that of the
warning switch in the master cylinder reservoir 1 From 1986 onward an anti-lock braking flywheel and the flywheel will overrun the ball
cap and a brake pedal stop-lamp switch. system is available as standard or optional and ramp clutch. This causes the flywheel to
2 Some versions have front disc pad wear equipment on certain Escort models. slide on the modulator shaft, move inward and
sensors and a handbrake "ON" warning switch. operate a lever which in turn opens a dump 2 The system comprises four main
3 Warning indicator lamps are mounted on valve. Hydraulic pressure to the locked brake components: two modulators, one for each
the instrument panel. Their renewal is covered is released via a de-boost piston allowing the
in Chapter 12. brake circuit, and two rear axle load apportioning valves, again, one for each brake wheel to once again revolve. Fluid passed
Handbrake "ON" warning lamp through the dump valve is returned to the circuit. Apart from the additional hydraulic
switch master cylinder reservoir via the modulator piping the remainder of the braking system is return pipes. At the same time hydraulic
4 The handbrake "ON" warning switch is the same as for conventional models (see pressure from the master cylinder causes a
attached to the handbrake lever and can be illustration). pump piston to contact an eccentric cam on the modulator shaft. The flywheel is then decelerated at a controlled rate by the 19.2 Anti-lock braking system flywheel friction clutch. When the speed of the hydraulic pipe arrangement and modulator shaft and flywheel are once again component layout equal the dump valve closes and the cycle 9 repeats. This complete operation takes place many times a second until the vehicle stops or the brakes are released. 5 The load apportioning valves are mounted on the rear crossmember and connected to each rear suspension arm via a linkage. The valves regulate hydraulic pressure to the rear brakes in accordance with vehicle load and
attitude in such a way that braking force at the front brakes will always be greater than that at the rear. 6 A belt break warning switch is fitted to the cover which surrounds each modulator drivebelt. The switch contains an arm which is in contact with the drivebelt at all times. If the belt should break, or if the adjustment of the belt is too slack, the arm will move out closing the switch contacts and informing the driver via an instrument panel warning light. 9·16 Braking system
20.2 Removing the belt break switch from 20.3a Modulator and drivebelt details 20.3b Drivebelt cover retaining nuts the modulator drivebelt cover (arrowed) - models up to 1987 A Modulator E Driveshaft B Sprocket F Drivebelt cover angle of more than 45° from the outer C Drivebelt 20 Modulator drivebelt (anti- D Constant constant velocity joint. lock braking system) - velocity joint Refitting removal and refitting 4 Withdraw the cover from the studs and 12 Before refitting the drivebelt, renew the
Note: Whenever an ABS modulator adjuster remove it by moving it upwards to clear the oil snap-ring fitted to the splines of the inner
bolt is slackened or removed, the bolt threads filter. constant velocity joint.
should be lightly coated with grease to 5 Slacken the modulator adjuster bolt, move 13 Ensure that the modulator sprocket and
prevent the possibility of bolt seizure. Take the modulator to relieve the tension on the constant velocity joint splines are clean and drivebelt then slip the belt off the modulator dry then slip the drivebelt over the joint.
care not to contaminate surrounding sprocket (see illustration). 14 Engage the joint splines with the
components when applying the grease. 6 Extract the split pin, undo the retaining nut differential and firmly push the hub carrier
Right-hand side and separate the tie-rod balljoint from the inwards to force the joint home. steering arm using a suitable balljoint 15 Reconnect the lower arm balljoint to the
Removal separator tool. hub carrier and insert the Torx bolt with its 7 Disconnect the front suspension lower arm head to the rear. Refit the nut and tighten to
Note: A new driveshaft snap-ring and a new balljoint from the hub carrier by removing the the specified torque.
tie-rod balljoint split-pin will be required on nut and pinch-bolt (see illustration). Note 16 Reconnect the tie-rod balljoint to the
refitting. that the pinch-bolt is of the socket-headed steering arm, fit and tighten the nut to the
1 Jack up the front of the car, support it on (Torx) type and a special key or socket bit will specified torque and secure with a new split
stands (see "Jacking and Vehicle Support") be required for this purpose. These are readily pin.
and remove the roadwheel. available from most accessory shops. 17 Slip the drivebelt over the modulator
2 Remove the belt break switch from the 8 Place a suitable container beneath the sprocket ensuring that it
sits squarely in the
drivebelt cover by pushing it upward and driveshaft inner constant velocity joint. sprocket teeth.
carefully levering out the bottom edge. Pull 9 Insert a lever between the inner constant 18 Move the modulator as necessary to
the switch down, withdraw the switch arm velocity joint and the transmission housing. tension the belt so that the belt deflection,
from the opening in the cover and place the Firmly strike the lever to release the constant under light finger pressure, is 5.0 mm. Check
switch to one side (see illustration). velocity joint from the differential. this using a ruler at a point midway between
3 Undo the two drivebelt cover retaining nuts 10 Pull the driveshaft out of the transmission the two sprockets (see illustration).
and washers, and on later models (1987-on), and slip the modulator drivebelt off the joint. 19 With the belt tensioned correctly, tighten
the retaining bolt (see illustrations). Allow the transmission oil to drain into the the modulator adjuster bolt. Before tightening, container. the adjuster bolt threads should be coated 11 With the driveshaft disconnected, with grease - refer to the note at the beginning suspend it in such a way so as not to adopt an of this Section.
20.3c Right-hand side ABS modulator drivebelt cover - 1987-on models A Guard C Bolt 20.5 Modulator adjuster bolt (arrowed) 20.7 Removing suspension lower arm B Support bracket D Washer balljoint pinch-bolt Braking system 9·17
20.18 Using a ruler to check right-hand 20.26 Left-hand drivebelt cover retaining 21.3 Modulator fluid return pipes at master drivebelt adjustment bolt locations (arrowed) cylinder reservoir A To right-hand modulator
20 Refit the drivebelt cover and secure with right-hand modulator fluid return pipe at the B To left-hand modulator
the two nuts and washers, and the bolt (where master cylinder reservoir (nearest to the
applicable). vacuum servo unit) (see illustration). Refitting
21 Engage the belt break switch arm 4 Jack up the front of the car and support it
upwards through the opening in the drivebelt on stands (see "Jacking and Vehicle Support"). 12 If a new unit is being fitted check that it
cover then locate the switch in position. Pull 5 Remove the belt break switch from the has a yellow arrow marked on its cover and a
the switch downward to secure. drivebelt cover by pushing it upward and part number suffix "A" indicating a right-hand
22 Refit the roadwheel and lower the car to carefully levering out the bottom edge. Pull side modulator. Note that the units are not
the ground. the switch down, withdraw the switch arm interchangeable from side to side.
23 Top-up the transmission oil as described from the opening in the cover and place the 13 Reconnect the modulator hydraulic hoses
in Chapter 1. switch to one side. if applicable. 6 Undo the two drivebelt cover retaining nuts 14 Locate the modulator on its mounting
Left-hand side and washers, and on later models (1987-on), bracket, fit the pivot bolt and tighten it to the
24 The procedure is the same as for the the retaining bolt. specified torque.
right-hand side but note the following 7 Withdraw the cover from the studs and 15 Slip the drivebelt over the modulator
differences. remove it by moving it upwards to clear the oil sprocket ensuring that it sits squarely in the
25 Remove the engine splash shield from the filter. sprocket teeth.
inner wheel arch. 8 Disconnect the two hydraulic pipes and 16 Move the modulator as necessary to
26 When removing the drivebelt cover note hoses with the yellow bands at the pipe tension the belt so that the belt deflection,
that it is secured by three bolts, two at the top bracket on the transmission support under light finger pressure is 5.0 mm. Check
and one at the bottom (see illustration). crossmember (see illustration). Allow the this using a ruler at a point midway between
27 To move the modulator for adjustment of remaining hydraulic fluid to drain into a the two sprockets.
the belt tension, use a suitable length of wood suitable container. 17 With the belt tensioned correctly, tighten
inserted through the steering tie-rod aperture 9 Slacken the modulator adjuster bolt, move the modulator adjuster bolt. Before tightening,
in the inner wheel arch, to push on the the modulator to relieve the tension on the the adjuster bolt threads should be coated
modulator as necessary. drivebelt then slip the belt off the modulator with grease - refer to the note at the beginning sprocket (see illustration). of this Section. 10 Undo and remove the adjuster bolt and 18 Reconnect the two modulator hydraulic 21 Modulator (anti-lock braking pipes and hoses. the modulator pivot bolt and withdraw the system) - removal and refitting modulator from the engine compartment. 19 Refit the drivebelt cover and secure with 11 If required, disconnect the hydraulic the two nuts and washers, and the bolt (where
Note: Whenever an ABS modulator adjuster hoses at the modulator after removal. Plug or applicable).
bolt is slackened or removed, the bolt threads 20 Engage the belt break switch arm
should be lightly coated with grease to tape over all pipe ends and orifices to prevent upwards through the opening in the drivebelt 9 dirt ingress.
prevent the possibility of bolt seizure. Take
care not to contaminate surrounding
components when applying the grease.
Note: Before starting work, refer to the
warning at the beginning of Section 3
concerning the dangers of hydraulic fluid.
Right-hand side
Removal
1 Disconnect the wiring plug from the level
warning switch in the master cylinder reservoir
filler cap. Remove the cap.
2 Syphon out as much fluid as possible from
the reservoir using an old battery hydrometer.
Do not drip the fluid onto the paintwork as it 21.8 Hydraulic pipe and hose unions 21.9 Right-hand modulator adjuster and
will act as an effective paint stripper. (arrowed) at the pipe bracket on the pivot bolts (arrowed)
3 Release the hose clip and disconnect the transmission support crossmember 9·18 Braking system
30 Undo the three bolts, two at the top and 43 Refit the belt break switch as described in one at the bottom securing the drivebelt cover paragraph 20. to the modulator bracket. Remove the cover. 44 Refit the engine splash shield. 31 Disconnect the two hydraulic pipes and 45 Refit the roadwheel and lower the car to hoses with the white bands at the pipe the ground. bracket on the transmission support 46 Reconnect the belt break switch wiring crossmember. Allow the remaining hydraulic multi-plug then refit the shield, rotor arm and fluid to drain into a suitable container. distributor cap. 32 Slacken the modulator adjuster bolt, 47 Reconnect the modulator fluid return pipe move the modulator to relieve the tension on to the master cylinder reservoir then fill the the drivebelt then slip the belt off the reservoir with fresh fluid of the specified type. modulator sprocket (see illustration). 48 Bleed the hydraulic system as described in Section 23. 33 Remove the distributor cap, rotor arm and shield. Disconnect the left-hand belt break 21.32 Left-hand modulator adjuster and switch wiring at the multi-plug. 22 Load apportioning valve pivot bolts (arrowed) 34 Undo and remove the adjuster bolt and (anti-lock braking system) -
cover then locate the switch in position. Pull the modulator pivot bolt and withdraw the removal and refitting
the switch downwards to secure. modulator upwards out of the engine
21 Lower the car to the ground. compartment. Note: Before starting work, refer to the
22 Reconnect the modulator fluid return pipe 35 If required, disconnect the hydraulic warning at the beginning of Section 3
to the master cylinder reservoir then fill the hoses at the modulator after removal. Plug or concerning the dangers of hydraulic fluid.
reservoir with fresh fluid of the specified type. tape over all pipe ends and orifices to prevent
23 Bleed the hydraulic system (Section 23). dirt ingress. Removal
Left-hand side 1 Raise the car on a hoist or drive the rear of Refitting the car up on ramps. The rear wheels must
Removal 36 If a new unit is being fitted check that it not
hang free. has a white arrow marked on its cover and a 2 If removing the right-hand side load
24 Disconnect the wiring plug from the level apportioning valve on fuel-injected models, part number suffix "C" indicating a left-hand
warning switch in the master cylinder reservoir undo the nut and bolt securing the fuel pump side modulator. Note that the units are not
filler cap. Remove the cap. mounting bracket to the underbody. Move the
25 Syphon out as much fluid as possible interchangeable from side to side. 37 Reconnect the modulator hydraulic pipes fuel pump aside to gain access to the valve.
from the reservoir using an old battery 3 Disconnect the hydraulic pipes at the valve
hydrometer or a poultry baster. Do not drip if applicable. then plug the pipes and orifices to prevent
the fluid onto the paintwork as it will act as an 38 Locate the modulator on its mounting loss of fluid and dirt ingress.
effective paint stripper. bracket, fit the pivot bolt and tighten it to the 4 As an aid to reassembly, accurately mark
26 Release the hose clip and disconnect the specified torque. the position of the valve adjusting bracket on
left-hand modulator fluid return pipe at the 39 Slip the drivebelt over the modulator the rear suspension arm. This will ensure that
master cylinder reservoir (the one furthest sprocket ensuring that it sits squarely in the the valve adjustment is not lost when refitting.
away from the vacuum servo unit). sprocket teeth. 5 Undo the nuts and remove the stud plate
27 Jack up the front of the car and support it 40 Adjust the drivebelt tension as described securing the adjusting bracket to the
on stands (see "Jacking and Vehicle in paragraphs 16 and 17, but use a suitable suspension arm (see illustration).
Support"). Remove the left-hand roadwheel. length of wood inserted through the steering 6 Undo both rear suspension arm inner
28 Remove the engine splash shield from the tie-rod aperture in the inner wheel arch, to mounting nuts and remove the load
inner wheel arch. push on the modulator as necessary. apportioning valve mounting plate.
29 Remove the belt break switch from the 41 Reconnect the two modulator hydraulic 7 Undo the bolts securing the valve to the
drivebelt cover by pushing it upwards and pipes and hoses. mounting plate and remove the valve and
carefully levering out the bottom edge. Pull 42 Refit the drivebelt cover and secure with adjusting bracket from under the car (see
the switch down, withdraw the switch arm the three bolts. illustration).
from the opening in the cover and place the
switch to one side. 22.7 Load apportioning valve assembly
A Adjusting bracket B Valve pushrod C Apportioning valve
22.5 Load apportioning valve adjusting bracket retaining nut locations (arrowed) Braking system 9·19
22.8 Separating apportioning valve 23.5 Modulator bypass valve (A) location 23.6 Modulator auto bleed plunger pushrod from adjusting bracket location (arrowed)
8 If required separate the valve pushrod from 19 It is recommended that the load Bleed procedure A
the adjusting bracket by levering off the apportioning valve adjustment be checked by 4 Top-up the master cylinder reservoir to the
pushrod trunnion with a screwdriver (see a dealer if the original unit has been refitted. "MAX" mark using the specified type of fluid
illustration). Lubricate the trunnion rubber Special gauges are needed for this operation and keep it topped up throughout the bleed
bush to aid removal. and it is not a DIY
proposition . procedure.
Refitting 5 Using a Torx type key or socket bit slacken 23 Hydraulic system - bleeding the bypass valve on the relevant modulator by
9 If a new valve is being fitted it will be (anti-lock braking system) one to one and a half turns. The bypass valve
supplied with nylon setting spacers and ties is located between the two flexible hoses on
attached, to ensure correct adjustment of the Note: Before starting work, refer to the the side of the modulator (see illustration).
valve. Leave these in position until the valve is warning at the beginning of Section 11 6 Fully depress and hold depressed the auto
installed. concerning the dangers of hydraulic fluid. bleed plunger on the modulator so that the
10 Refit the pushrod trunnion to the adjusting 1 On cars equipped with the anti-lock braking plunger circlip contacts the modulator body
bracket using a suitable socket and a vice. system there are two bleed procedures (see illustration).
11 Locate the valve on its mounting plate and possible according to which part of the 7 Have an assistant steadily pump the brake
secure with the retaining bolts. hydraulic system has been disconnected. pedal at least
twenty times while you observe
12 Position the mounting plate over the 2 If any one of the following conditions are the fluid returning to the master cylinder
suspension arm mounting bolts and secure present, bleed procedure A should be reservoir. Continue this operation until the
with the nuts tightened to the specified adopted: returning fluid is free from air bubbles.
torque. a) A modulator has been removed. 8 Release the auto bleed plunger ensuring
13 Reconnect the hydraulic pipes to the b A modulator-to-master cylinder return that it has fully returned. Pull it out by hand if
valve. hose has been drained. necessary.
14 Refit the stud plate and adjusting bracket c) The two modulator hydraulic hoses have 9 Tighten the bypass valve on the modulator.
to the suspension arm ensuring that the been removed. 10 Now carry out bleed procedure B.
previously made marks are aligned if the 3 If any one of the following conditions are
original components are being refitted. Secure present, bleed procedure B should be Bleed procedure B
the adjusting bracket with the retaining nuts adopted: 11 This procedure is the same as for
tightened to the specified torque. a) Any condition where the master cylinder conventional braking systems and reference
15 If a new valve assembly is being fitted, has been drained providing that the should be made to Section 11. Note,
remove the nylon setting spacers and ties. modulator fluid return pipe has not lost its however, that all the weight of the car must be
16 Where applicable refit the fuel pump head of fluid. on the roadwheels, not suspended wheel free,
mounting bracket. b) Removal of any of the basic braking otherwise the load apportioning valves will not
17 Lower the car to the ground. system components ie brake caliper, bleed. 9
18 Bleed the hydraulic system as described flexible hose or pipe, wheel cylinder, load
in Section 23. apportioning valve. 9·20 Notes 10·1
Chapter 10
Suspension and steering
Contents
Front anti-roll bar - removal and refitting . . . . . . . . . . . . . . . . . . . . . .5 Rear shock absorber (Van models) - removal, testing and refitting .11
Front hub bearings - renewal . . . . . . . . . . . . . . . . . . . . . . . . . . . . . . .2 Rear stub axle carrier (Saloon and Estate models) - removal and
Front suspension lower arm (forged type) - removal, overhaul refitting . . . . . . . . . . . . . . . . . . . . . . . . . . . . . . . . . . . . . . . . . . . . .16 and refitting . . . . . . . . . . . . . . . . . . . . . . . . . . . . . . . . . . . . . . . . . . .3 Rear suspension angles - general . . . . . . . . . . . . . . . . . . . . . . . . . .19
Front suspension lower arm (pressed steel type) - removal, Rear suspension lower arm (Saloon and Estate models) - overhaul and refitting . . . . . . . . . . . . . . . . . . . . . . . . . . . . . . . . . . .4 removal and refitting . . . . . . . . . . . . . . . . . . . . . . . . . . . . . . . . . . .15
Front suspension strut - removal, overhaul and refitting . . . . . . . . . .7 Rear tie-bar (Saloon and Estate models) - removal and refitting . . .12
Front tie-bar - removal and refitting . . . . . . . . . . . . . . . . . . . . . . . . . .6 Roadwheel check . . . . . . . . . . . . . . . . . . . . . . . . . . . . .See Chapter 1
General description . . . . . . . . . . . . . . . . . . . . . . . . . . . . . . . . . . . . . .1 Steering angles and wheel alignment . . . . . . . . . . . . . . . . . . . . . . . .27
Rear anti-roll bar (Saloon and Estate models) - removal and Steering column - removal, overhaul and refitting . . . . . . . . . . . . . .25 refitting . . . . . . . . . . . . . . . . . . . . . . . . . . . . . . . . . . . . . . . . . . . . .18 Steering column lock - removal and refitting . . . . . . . . . . . . . . . . . .24
Rear axle tube (Van models) - removal and refitting . . . . . . . . . . . .17 Steering gear - removal, overhaul and refitting . . . . . . . . . . . . . . . .26
Rear hub bearings - adjustment . . . . . . . . . . . . . . . . . . . . . . . . . . . . .8 Steering gear bellows - renewal . . . . . . . . . . . . . . . . . . . . . . . . . . . .20
Rear hub bearings - renewal . . . . . . . . . . . . . . . . . . . . . . . . . . . . . . .9 Steering tie-rod outer balljoint - renewal . . . . . . . . . . . . . . . . . . . . .21
Rear roadspring (Saloon and Estate models) - removal and refitting13 Steering wheel - alignment . . . . . . . . . . . . . . . . . . . . . . . . . . . . . . . .23
Rear roadspring (Van models) - removal and refitting . . . . . . . . . . .14 Steering wheel - removal and refitting . . . . . . . . . . . . . . . . . . . . . . .22
Rear shock absorber (Saloon and Estate models) - removal, Suspension and steering check . . . . . . . . . . . . . . . . . .See Chapter 1 testing and refitting . . . . . . . . . . . . . . . . . . . . . . . . . . . . . . . . . . . .10 Tyre checks . . . . . . . . . . . . . . . . . . . . . . . . . . . . . . . . . .See Chapter 1
Degrees of difficulty Easy, suitable for Fairly easy, Fairly difficult, Difficult, suitable Very difficult, novice with little suitable for suitable for for experienced suitable for expert experience beginner with competent DIY DIY mechanic DIY or professional some experience mechanic
Specifications
Front suspension
Type . . . . . . . . . . . . . . . . . . . . . . . . . . . . . . . . . . . . . . . . . . . . . . . . . . . . Independent by MacPherson struts with coil springs and integral telescopic shock absorbers. Anti-roll bar fitted to all models except pre-1983 1.1 litre versions
Rear suspension
Type: Saloon and Estate models . . . . . . . . . . . . . . . . . . . . . . . . . . . . . . . . . Independent with coil springs, telescopic shock absorbers and 10 tie-
bars Van models . . . . . . . . . . . . . . . . . . . . . . . . . . . . . . . . . . . . . . . . . . . . . Tubular axle located by semi-elliptic leaf springs and telescopic shock absorbers
Hub bearing grease . . . . . . . . . . . . . . . . . . . . . . . . . . . . . . . . . . . . . . . . To Ford specification SAM-1C-9111A
Steering
Type . . . . . . . . . . . . . . . . . . . . . . . . . . . . . . . . . . . . . . . . . . . . . . . . . . . . Rack and pinion
Steering gear lubricant: Type: Oil . . . . . . . . . . . . . . . . . . . . . . . . . . . . . . . . . . . . . . . . . . . . . . . . . . To Ford specification SQM-2C9003-AA Semi-fluid grease . . . . . . . . . . . . . . . . . . . . . . . . . . . . . . . . . . . . . . To Ford specification SAM1C-9106-AA Quantity: Pre-May 1983 models . . . . . . . . . . . . . . . . . . . . . . . . . . . . . . . . . . . 95 cc of semi-fluid grease Post-May 1983 models . . . . . . . . . . . . . . . . . . . . . . . . . . . . . . . . . . 120 cc of oil, and 70 cc of semi-fluid grease (add grease to the rack ends) 10·2 Suspension and steering
Front wheel alignment
Toe setting: Pre-May 1983 models: Checking tolerance . . . . . . . . . . . . . . . . . . . . . . . . . . . . . . . . . . . . . 1.5 mm toe-in to 5.5 mm toe-out Adjust to . . . . . . . . . . . . . . . . . . . . . . . . . . . . . . . . . . . . . . . . . . . . . 1.0 mm toe-in to 3.0 mm toe-out May 1983 models onward: Checking tolerance . . . . . . . . . . . . . . . . . . . . . . . . . . . . . . . . . . . . . 0.5 mm toe-in to 5.5 mm toe-out Adjust to . . . . . . . . . . . . . . . . . . . . . . . . . . . . . . . . . . . . . . . . . . . . . 1.5 mm to 3.5 mm toe-out
Roadwheels
Wheel size: Steel wheels . . . . . . . . . . . . . . . . . . . . . . . . . . . . . . . . . . . . . . . . . . . . 13x4.50, 13x5, 14x6 Alloy wheels . . . . . . . . . . . . . . . . . . . . . . . . . . . . . . . . . . . . . . . . . . . . 14x5.50, 14x6, 15x6
Tyres
Tyre size: Saloon and Estate models . . . . . . . . . . . . . . . . . . . . . . . . . . . . . . . . . 145 SR 13,155 SR/TR 13, 175/70 SR/HR 13, 175/65 HR 14, 185/60 HR 13, 185/60 HR 14, 195/50 VR 15 Van models . . . . . . . . . . . . . . . . . . . . . . . . . . . . . . . . . . . . . . . . . . . . . 155 SR 13, 165 RR 13
Torque wrench settings Nm lbf ft
Front suspension
Driveshaft retaining nut (threads lightly greased) . . . . . . . . . . . . . . . . . . 205 to 235 151 to 173
Lower arm mounting pivot bolt . . . . . . . . . . . . . . . . . . . . . . . . . . . . . . . . 51 to 64 38 to 47
Lower arm balljoint pinch-bolt . . . . . . . . . . . . . . . . . . . . . . . . . . . . . . . . 48 to 60 35 to 44
Brake caliper anchor bracket mounting bolts . . . . . . . . . . . . . . . . . . . . . 50 to 66 37 to 49
Suspension strut to hub carrier . . . . . . . . . . . . . . . . . . . . . . . . . . . . . . . 80 to 90 59 to 66
Tie-bar to lower arm (pre-1983 1.1 litre models) . . . . . . . . . . . . . . . . . . 75 to 90 55 to 66
Tie-bar to mounting bracket (pre-1983 1.1 litre models) . . . . . . . . . . . . 44 to 55 32 to 41
Anti-roll bar to lower arm . . . . . . . . . . . . . . . . . . . . . . . . . . . . . . . . . . . . 90 to 110 66 to 81
Anti-roll bar clamp nuts and bolts . . . . . . . . . . . . . . . . . . . . . . . . . . . . . 45 to 56 33 to 41
Tie-bar to lower arm (1985 RS Turbo models) . . . . . . . . . . . . . . . . . . . . 90 to 110 66 to 81
Tie-bar-to-anti-roll bar clamp (1985 RS Turbo models) . . . . . . . . . . . . . 22 to 26 16 to 19
Tie-bar front pivot nut (1985 RS Turbo models) . . . . . . . . . . . . . . . . . . . 70 to 90 52 to 66
Suspension strut top mounting to body (pre-May 1983 models) . . . . . . 20 to 24 15 to 18
Suspension strut-to-body retaining nut (May 1983 models onward) . . . 40 to 52 30 to 38
Suspension strut top mounting piston rod nut . . . . . . . . . . . . . . . . . . . . 52 to 65 38 to 48
Rear suspension (Saloon and Estate models)
Lower arm inboard pivot bolt . . . . . . . . . . . . . . . . . . . . . . . . . . . . . . . . . 70 to 90 52 to 66
Lower arm-to-stub axle carrier through-bolt . . . . . . . . . . . . . . . . . . . . . 60 to 70 44 to 52
Shock absorber top mounting nut . . . . . . . . . . . . . . . . . . . . . . . . . . . . . 42 to 52 31 to 38
Shock absorber to stub axle carrier . . . . . . . . . . . . . . . . . . . . . . . . . . . . 70 to 90 52 to 66
Tie-bar front mounting pivot bolt . . . . . . . . . . . . . . . . . . . . . . . . . . . . . . 70 to 90 52 to 66
Tie-bar-to-stub axle carrier nut . . . . . . . . . . . . . . . . . . . . . . . . . . . . . . . . 70 to 90 52 to 66
Brake backplate to stub axle carrier . . . . . . . . . . . . . . . . . . . . . . . . . . . . 45 to 55 33 to 41
Rear suspension (Van models)
Roadspring U-bolt nuts . . . . . . . . . . . . . . . . . . . . . . . . . . . . . . . . . . . . . 36 to 45 27 to 33
Roadspring shackle nuts . . . . . . . . . . . . . . . . . . . . . . . . . . . . . . . . . . . . 40 to 50 30 to 37
Roadspring eye bolt nuts . . . . . . . . . . . . . . . . . . . . . . . . . . . . . . . . . . . . 70 to 90 52 to 66
Shock absorber top mounting bracket to body . . . . . . . . . . . . . . . . . . . 20 to 25 15 to 18
Shock absorber to top mounting bracket . . . . . . . . . . . . . . . . . . . . . . . . 40 to 50 30 to 37
Brake backplate to stub axle . . . . . . . . . . . . . . . . . . . . . . . . . . . . . . . . . 45 to 55 33 to 41
Steering
Steering gear to bulkhead bolts . . . . . . . . . . . . . . . . . . . . . . . . . . . . . . . 45 to 50 33 to 37
Tie-rod outer balljoint to steering arm . . . . . . . . . . . . . . . . . . . . . . . . . . 25 to 30 18 to 22
Tie-rod outer balljoint-to-tie-rod locknut . . . . . . . . . . . . . . . . . . . . . . . . 57 to 68 42 to 50
Steering column shaft coupling pinch-bolt . . . . . . . . . . . . . . . . . . . . . . . 45 to 56 33 to 41
Steering wheel nut . . . . . . . . . . . . . . . . . . . . . . . . . . . . . . . . . . . . . . . . . 27 to 34 20 to 25
Rack slipper cover plate bolts (pre-May 1983 models) . . . . . . . . . . . . . 6 to 9 5 to 7
Pinion bearing cover plate bolts (pre-May 1983 models) . . . . . . . . . . . . 17 to 24 13 to 18
Rack slipper plug (post-May 1983 models) . . . . . . . . . . . . . . . . . . . . . . 4 to 5 3 to 4
Tie-rod inner balljoint to rack . . . . . . . . . . . . . . . . . . . . . . . . . . . . . . . . . 68 to 90 50 to 66
Roadwheels
Roadwheel bolts (all models) . . . . . . . . . . . . . . . . . . . . . . . . . . . . . . . . . 70 to 100 52 to 74 Suspension and steering 10·3
1.1 Exploded view of the front suspension components
A Suspension strut
B Top mounting (pre-May 1983 models)
C Top mounting (post-May 1983 models)
D Hub carrier
E Front hub
F Balljoint assembly
G Pressed steel lower arm
H Tie-bar
J Anti-roll bar
K Forged lower arm
1.2 General view of the rear 1 General description suspension as used on Saloon and Estate models The independent front suspension is of the X and Y indicate alternative lower MacPherson strut type, incorporating coil arm and tie-bar mounting positions springs and integral telescopic shock absorbers. Lateral location of each strut assembly is by a forged or pressed steel lower suspension arm containing rubber inner mounting bushes and incorporating a balljoint at their outer ends. On pre-May 1983 1.1 litre models,
fore and aft location of the pressed steel lower suspension arms is by a tie-bar. On post-May 1983 1.1 litre models and all other variants the forged steel lower arms are interconnected by an anti-roll bar which also provides fore and aft location of both suspension arms. Additional location is 10 provided by an adjustable tie-bar on 1985 RS Turbo models. The hub carriers which contain the hub bearings, brake calipers and the hub/disc assemblies are bolted to the MacPherson struts and connected to the lower arms via the balljoints (see illustration). On Saloon and Estate models the rear suspension is also fully independent by means of pressed steel lower suspension arms, coil springs and separate telescopic 1.3 General view of the rear suspension as shock absorbers. The suspension arms are used on Van models attached to the underbody at their inner ends through rubber bushes and to the stub axle carrier at their outer ends, again through rubber bushes. The shock absorbers are 10·4 Suspension and steering
bolted to the stub axle carriers at their lower
ends which also carry the rear brake
backplate as well as the rear hub/drum
assemblies. Fore and aft location of the lower
arms is by a tie-bar and an anti-roll bar is also
fitted to models with fuel-injection (see
illustration). The rear suspension on Van variants
consists of a transverse
beam axle located
and supported by a single leaf spring on each
side, and utilising telescopic shock absorbers
to control vertical movement. A stub axle is
welded to each end of the axle and these
carry the rear brake backplates and the
hub/drum assemblies (see illustration). 2.8 Using a two-legged puller to draw off 2.11 Removing the lower arm balljoint The steering gear is of the conventional the wheel hub Torx type pinch-bolt
rack and pinion type located behind the front 10 Release the balljoint from the steering arm their seats using a piece of suitable diameter
wheels. Movement of the steering wheel is using a balljoint separator tool. tubing.
transmitted to the steering gear by means of a 11 Disconnect the lower arm balljoint from 22 Liberally pack a high quality lithium based
steering shaft containing two universal joints. the hub carrier by removing the nut and grease into the bearings, making sure to work
The front wheels are connected to the pinch-bolt (see illustration). Note that the plenty into the spaces between the rollers.
steering gears by tie-rods each having an pinch-bolt is of the socket-headed (Torx) type Note that the cavity between the inner and
inner and outer balljoint. and a special key or socket bit (available from outer bearings in the carrier must not be accessory shops) will be required for this packed with grease
since this could cause a purpose. pressure build-up and result in the seals 2 Front hub bearings - renewal 12 Undo the bolt which secures the hub leaking. carrier to the base of the suspension strut. 23 Install the bearing to one side of the
Note: A new driveshaft nut, and a new tie-rod 13 Using a suitable lever, separate the carrier carrier, then fill the lips of the new oil seal with
balljoint split-pin must be used on refitting. from the strut by prising open the clamp jaws grease and tap it squarely into position (see
1 Remove the wheel trim and release the (see illustration). illustration).
staking on the driveshaft retaining nut using a 24 Fit the bearing and its seal to the opposite 14 Support the driveshaft so that it does not
suitable punch. side in a similar way. hang down by more than 20° from the
2 Slacken the driveshaft retaining nut and the 25 Fit the dust shield by tapping it into horizontal then withdraw the hub carrier.
wheel bolts. position using a block of wood. 15 Support the hub carrier in a vice fitted
3 Jack up the front of the car, support it on 26 Smear the driveshaft splines with grease, with protected jaws.
stands (see "Jacking and Vehicle Support") then install the carrier over the end of the 16 Using pliers, pull out the dust shield from driveshaft.
and remove the roadwheel. the groove in the hub carrier. 27 Connect the carrier to the suspension
4 Undo the two bolts securing the brake
caliper anchor bracket to the hub carrier. 17 Prise out the inner and outer oil seals. strut and tighten the bolt to the specified
5 Withdraw the anchor bracket and brake 18 Lift out the bearings. torque.
caliper complete with disc pads and suspend it 19 With a suitable drift, drive out the bearing 28 Reconnect the suspension lower arm
from a convenient place under the wheel arch. tracks. Take care not to damage the bearing balljoint to the carrier and secure by passing
6 Remove the driveshaft retaining nut and track carrier surface during removal since any the pinch-bolt through the groove in the
washer. burrs on the surface could prevent the new balljoint stud. The head of the pinch-bolt
7 Undo the retaining screw and withdraw the tracks seating correctly during assembly. should be to the rear.
brake disc from the hub. 20 Clean away all old grease from the hub 29 Reconnect the tie-rod to the steering arm,
8 Using a two-legged puller draw off the hub carrier. tighten the castellated nut to the specified
(see illustration). 21 Drive the new bearing tracks squarely into torque and secure with a new split pin.
9 Extract the split pin and unscrew the
castellated nut from the steering tie-rod
balljoint.
2.23 Sectional view of the hub bearing oil 2.31 Using special tool 14-022 to fit the seal front hub and driveshaft A Grease applied to cavity between oil seal lips 2.13 Using a lever to
spread the hub B
Axial sealing lip A Hub carrier C Tool 14-022 carrier clamp jaws C Radial sealing lips B Hub Suspension and steering 10·5
35 Tighten the driveshaft retaining nut to the specified torque then stake the nut into the driveshaft groove using a small punch (see illustration). 36 Tighten the wheel bolts to the specified torque and refit the wheel trim.
3 Front suspension lower arm (forged type) - removal, overhaul and refitting 1 The forged type suspension arm is fitted to all models except pre-May 1983 1.1 litre 2.35 Staking the driveshaft retaining nut versions. 3.3 Suspension lower arm disconnected at inboard end Removal
30 Install the hub/disc and push it on to the Refitting
driveshaft as far as it will go using hand 2 Jack up the front of the car and support it on stands (see "Jacking and Vehicle Support"). 8 Refitting is the reverse sequence to
pressure only. 3 Undo the nut and remove the pivot bolt removal. Tighten all nuts and bolts to the
31 The threaded end of the driveshaft joint securing the lower arm at its inboard end (see specified torque with the weight of the car on
should be protruding far enough through the its roadwheels. When refitting the Torx pinch-
hub to enable it to be drawn fully home using illustration). bolt, note that the head of the bolt must face
the old driveshaft nut and packing washers. If 4 Disconnect the lower arm balljoint from the the rear of the car.
this is not the case it will be necessary to use hub carrier by removing the nut and pinch-
Ford special tool 14-022 or a suitable bolt. Note that the pinch-bolt is of the socket-
alternative (see illustration). headed (Torx) type and a special key or 4 Front suspension lower arm
32 With the hub in place fit a new driveshaft socket bit (available from accessory shops) (pressed steel type) - removal,
retaining nut and the washer but only tighten will be required for this purpose (see overhaul and refitting
the nut hand tight at this stage. illustrations).
33 Refit the brake disc and caliper anchor 1 The pressed steel type suspension is only 5 Unscrew and remove the nut, washer and
bracket, tightening the anchor bracket bolts to fitted to pre-May 1983 1.1 litre models (see bush from the end of the anti-roll bar as
the specified torque. illustration). described in Section 5 (or tie-bar on 1985 RS
34 Refit the roadwheel and lower the car to
the ground. Turbo models) (see illustration). Withdraw Removal the arm from under the car. 2 Jack up the front of the car and support it Overhaul on stands (see "Jacking and Vehicle Support"). 3 Undo the nut and remove the pivot bolt 6 Renewal of the pivot bush at the inboard securing the lower arm at its inboard end. end of the arm is possible using a vice and 4 Undo the two nuts which secure the tie-bar small tubes of suitable diameter (see and lower arm balljoint to the lower arm. illustration). Lubricate the new bush Separate the arm from the tie-bar and remove thoroughly with rubber grease to ease it from under the car. installation. 7 If the balljoint is worn it will be necessary to Overhaul renew the arm complete as the balljoint 5 Renewal of the pivot bush is carried out in cannot be removed separately. the same way as described in Section 3.
3.4a Removing the lower arm balljoint pinch-bolt nut 10
3.5 Anti-roll bar-to-lower arm mounting 3.6 Method of fitting lower arm inboard pivot bush
A Nut D Lower arm A Tubular spacer D Tube or
3.4b Separating the balljoint from the hub B Dished washer E Anti-roll bar B Lower arm socket carrier C Bushes C Bush E Vice 10·6 Suspension and steering
6 If the balljoint is worn it can be renewed a) Lubricate the bushes with rubber grease
after removing it from the hub carrier as to aid refitting.
described in Section 3. b) Ensure that the end of the anti-roll bar with the left-hand thread is fitted to the
Refitting right-hand side of the car.
7 Refitting is the reverse sequence to c) Fit the washers with their concave sides
removal. Tighten all nuts and bolts to the facing away from the bushes.
specified torque with the weight of the car on d) Tighten all nuts and bolts with the weight
its roadwheels. If the balljoint has been of the car on its roadwheels.
removed, refit the Torx pinch-bolt with its e) Where lockplates are used, bend up the
head towards the rear of the car. tabs to lock the bolts after tightening.
5 Front anti-roll bar - removal 6 Front tie-bar - removal and and refitting 4.1 Pressed steel type lower arm refitting components
Removal A Lower arm D Balljoint Pre-May 1983 1.1 litre models
1 The anti-roll bar is used in conjunction with B Tie-bar E Retaining nuts
the forged type suspension lower arm. C Retaining bolt Removal
2 Jack up the front of the car and support it washers and the bushes (see illustration). 1 Jack up the front of the car and support it
on stands (see "Jacking and Vehicle Support"). Note that the nut on the right-hand side of the on stands (see "Jacking and Vehicle Support").
3 Where fitted flatten the lockplate tabs and anti-roll bar has a left-hand thread and is 2 Unscrew and remove the nut which holds
unscrew the two bolts or two nuts each side unscrewed by turning it clockwise. the tie-bar to the large pressed steel mounting
securing the anti-roll bar clamps to the 5 On 1985 RS Turbo models separate the bracket (see illustration). Take off the dished
underbody (see illustrations). ends of the anti-roll bar from the tie-bars by washer and the rubber insulator.
4 Disconnect the ends of the anti-roll bar by releasing the clamp nuts and bolts (see 3 Disconnect the lower arm balljoint from the
unscrewing the nuts and removing the illustration 6.12). hub carrier by removing the nut and pinch- 6 On all models except 1985 RS Turbo undo bolt. Note that the pinch-bolt is of the socket- the nut and remove the pivot bolt securing headed (Torx) type and a special key or one of the suspension lower arms at its socket bit (available from accessory shops) inboard end. will be required for this purpose. 7 Withdraw the anti-roll bar from the lower 4 Unbolt the opposite end of the tie-bar from arms and remove it from under the car. the suspension arm. 8 Remove the remaining rubber bush and 5 Withdraw the tie-bar from its pressed steel washer from each end of the anti-roll bar. bracket and take off the remaining washer, Smear the bar with rubber grease to aid bush insulator and steel sleeve. removal. Refitting Refitting 6 Where necessary the bush in the pressed steel mounting bracket can be renewed if the 9 Inspect the bushes carefully and renew old bush is drawn out using a bolt, nut and them if they show any signs of cracking, suitable distance pieces. 5.3a Anti-roll bar front mounting clamp splitting or deformation. Bushes of different 7 Refitting the tie-bar is a reversal of removal. details - pre-1986 models material have been introduced on Escort Finally tighten all nuts and bolts to the models during the course of production and it A Body bracket D Retaining bolts specified torque only when the weight of the is therefore essential that the bushes are B Anti-roll bar E Lockplates vehicle is again on its roadwheels. When always renewed in sets of four to ensure that C Clamp F Bush refitting the Torx pinch-bolt note that the head all are of the same type. of the bolt must face the rear of the car. 10 Refitting is the reverse sequence to removal but bearing in mind the following points:
6.2 Front tie-bar mountings - pre-May 5.3b Anti-roll bar front mounting clamp 1983 1.1 litre models details - post-1986 models A Tie-bar E Front insulator A Body bracket C Bush B Flat washers F Bush bolts D Anti-roll bar 5.4 Anti-roll to lower arm retaining nut C Mounting bracket G Steel sleeve B Clamp E Retaining nuts D Retaining nut H Rear insulator Suspension and steering 10·7
6.12 Front tie-bar mountings - 1985 RS Turbo models
A Retaining nut B Anti-roll bar clamp C Adjustment clamp D Front mounting bolt E Basic setting length = 565 ± 1.5 mm (22.24 ± 0.6 in) 7.3 Brake hose and grommet location in strut (A) and strut-to-hub carrier pinch-bolt (B)
Overhaul Note: Spring compressor tools will be required for this operation. 6 Clean away external dirt and mud.
1985 RS Turbo models 7 If the strut has been removed due to oil 7 Front suspension strut - leakage or to lack of damping, then it should
Removal removal, overhaul and refitting be renewed with a new or factory reconditioned unit. Dismantling of the original
8 Jack up the front of the vehicle and support strut is not recommended and internal
it on stands (see "Jacking and Vehicle Removal components are not generally available.
Support"). 1 Slacken the roadwheel bolts, raise the front 8 Before the strut is exchanged, the coil
9 Undo the nut and remove the washer and of the vehicle and support it securely on spring will have to be removed. To do this, a
bush securing the end of the tie-bar to the spring compressor or compressors will be stands (see "Jacking and Vehicle Support"),
suspension arm. needed. These are generally available from then remove the roadwheel.
10 Undo the nut and bolt and remove the tie- tool
hire centres or they can be purchased at 2 Support the underside of the driveshaft on
bar-to-anti-roll bar clamp. most motor accessory shops. blocks or by tying it up to the rack-and-pinion
11 Undo the tie-bar front nut and pivot bolt 9 Engage the compressor over four coils of steering housing.
and remove the bar from under the car. 3 Where fitted, detach the brake hose and the spring and compress the spring
Refitting location grommet from the strut location sufficiently to release spring tension from the bracket, then unscrew and remove the pinch- top mounting (see illustration).
12 Do not alter the length of the tie-rod bolt which holds the base of the suspension 10 Once the spring is compressed, unscrew
otherwise the steering castor angle will have strut to the hub carrier (see illustration). and remove the nut from the end of the piston
to be reset. If the length has been altered or if Using a suitable tool, lever the sides of the rod which retains the top mounting. As there
a new tie-bar is being fitted, set the length to slot in the carrier apart until it is free from the will be a tendency for the piston rod to turn
the basic setting as shown (see illustration). strut. while the nut is unscrewed, insert a 6 mm
The length can be adjusted by slackening the 4 On pre-May 1983 models undo the two Allen key to hold the rod still.
forward clamp bolt and turning the threaded bolts securing the strut to the inner wing 11 Remove the top mounting and lift off the
portion as necessary. Tighten the clamp after turret. On post-May 1983 models lift off the spring and compressor.
adjustment. cover then unscrew the strut retaining nut. 12 The compressor need not be released if
13 Refitting is the reverse sequence to Prevent the piston rod from turning using a 6 the spring is to be fitted immediately to a new
removal but tighten all nuts and bolts to the mm Allen key (see illustrations). strut. If the compressor is to be released from
specified torque with the weight of the car on 5 Withdraw the complete strut assembly from the spring, make sure that you do it slowly
its roadwheels. under the front wing. and progressively.
10
7.4a Suspension strut-to-turret mounting 7.4b Removing the nut cover . . . 7.4c . . . and strut retaining nut on post- bolts on pre-1983 models 1983 models Note Allen key to prevent piston rod turning 10·8 Suspension and steering
A fractional amount of wheel movement must be present. 10 Repeat the operations on the opposite hub, refit the roadwheels and lower the vehicle to the floor.
9 Rear hub bearings - renewal
1 Raise and support the rear of the vehicle on 7.9 Coil spring retained with spring stands (see "Jacking and Vehicle Support"). compressors Remove the roadwheel and release the handbrake.
13 The top mounting can be dismantled by 2 On fuel-injected models and Van versions
sliding off the thrust bearing and withdrawing undo the retaining screw and withdraw the
the spring upper seat, gaiter spring and, brake drum from the hub.
where fitted, insulator. Also, if fitted, slide the 7.13 Exploded view of the suspension 3 Tap off the dust cap from the end of the
bump stop from the piston rod (see strut upper mounting components hub (see illustration).
illustration). A Pre-May 1983 models 4 Extract the split pin and remove the nut
14 Renew any worn or damaged B Post-May 1983 models retainer.
components. If the front strut and/or coil 5 Unscrew and remove the nut and take off
spring is to be removed then it is advisable the thrustwasher.
also to renew the equivalent assembly on the 8 Rear hub bearings - adjustment 6 Pull the hub/drum off the stub axle slightly
other side. then push it back. This will now leave the
15 Fit the spring to the strut, making sure outboard bearing
ready to be taken off the
that the ends of the coils locate correctly in Note: A new hub nut split-pin must be used stub axle (see illustration).
the shaped parts of the spring seats. on refitting. 7 Withdraw the hub/drum.
16 Fit the top mounting components, being 1 Raise and support the rear of the vehicle on 8 Prise the oil seal from the hub and take out
very careful to maintain the correct order of stands. Release the handbrake. the inboard taper roller bearing (see
assembly of the individual components. 2 This adjustment will normally only be illustration).
17 Gently release and remove the spring required if, when the top and bottom of the 9 Using a punch, drive out the bearing outer roadwheel are gripped and "rocked"
compressor. Check that the ends of the tracks, taking care not to
burr the bearing excessive movement can be detected in the seats.
spring are correctly located in the shaped bearings. Slight movement is essential. 10 If new bearings are being fitted to both
sections of the spring seatings. 3 Remove the roadwheel. Using a hammer hubs, do not mix up the bearing components
Refitting and cold chisel, tap off the dust cap from the but keep them in their individual packs until end of the hub. required.
18 Refit the strut using the reverse of the 4 Extract the split pin and take off the nut 11 Drive the new bearing tracks squarely into
removal procedure. Lower the vehicle so that retainer. their hub recesses.
it is standing on its roadwheels before 5 Tighten the hub nut to a torque of between 12 Pack both bearings with the specified
tightening the top mounting bolts or nut to the 20 and 25 Nm (15 and 18 lbf ft), at the same grease, working plenty into the rollers. Be
specified torque. time rotating the brake drum in an anti- generous, but there is no need to fill the cavity clockwise direction. between the inner and outer bearings. 6 Unscrew the nut one half a turn and then 13 Locate the inboard bearing and then tighten it only finger tight. grease the lips of a new oil seal and tap it into 7 Fit the nut retainer so that two of its slots position. line up with the split pin hole. Insert a new 14 Fit the hub onto the stub axle, taking care split pin, bending the end around the nut, not not to catch the oil seal lips. over the end of the stub axle. 15 Fit the outboard bearing and the 8 Tap the dust cap into position. thrustwasher and screw on the nut. 9 Recheck the play as described in paragraph 2. 16 Adjust the bearings (Section 8).
9.3 Exploded view of the rear hub bearings A Oil seal F Outboard bearing B Inboard bearing G Thrustwasher C Bearing outer H Retaining nut track J Nut retainer D Hub and drum K Split pin E Bearing outer L Dust cap 9.6 Rear hub outboard bearing removal 9.8 Removing the hub bearing oil seal track Suspension and steering 10·9
10.3 Rear shock absorber top mounting 10.4 Removing the shock absorber top 10.6 Brake hydraulic hose-to-shock mounting nut - Saloon and Estate models absorber attachment (arrowed) - Saloon and Estate models
17 On fuel-injected models and Van versions 7 Undo the two bolts securing the shock
refit the brake drum and secure with the absorber to the stub axle carrier and withdraw 3 Unbolt the top mounting bracket from the
retaining screw. the unit, together with cup and bump rubber, body and withdraw the unit (see illustration).
18 Refit the roadwheel and lower the car to from under the wheel arch. 4 Undo the nut and pivot bolt to separate the
the ground. mounting bracket from the shock absorber. Testing 10 Rear shock absorber (Saloon 8 To test the shock absorber, grip its lower Testing and Estate models) - removal, mounting in a vice so that the unit is vertical. 5 Proceed as described in Section 10. 9 Fully
extend and retract the shock absorber testing and refitting Refitting ten or
twelve times. Any lack of resistance in either direction will indicate the need for 6 Refitting is a reversal of removal, but if a
Removal renewal, as will evidence of leakage of fluid. new unit is being installed, prime it first in a
1 Slacken the roadwheel bolts, raise the rear Refitting similar way to that described for testing.
of the vehicle, support it on stands (see
"Jacking and Vehicle Support") and remove 10 Refitting is a reversal of removal, but if a new unit is being installed, prime it first in a 12 Rear tie-bar (Saloon and
the roadwheel. similar way to that described for testing. Estate models) - removal and
2 Support the suspension lower arm with a
jack. refitting
3 Open the tailgate and lift the
parcel tray to 11 Rear shock absorbers (Van
expose the shock absorber top mounting (see models) - removal, testing and Removal
illustration). refitting
4 Remove the cap and then unscrew the nut 1 Before attempting to remove a tie-bar, note
from the shock absorber spindle. To prevent the location of all washers and bushes. These
the spindle turning, use an Allen key in the Removal control the rear wheel alignment and they
socket provided (see illustration). 1 Raise and support the rear of the vehicle on must be returned to their original locations.
5 Take off the cap and insulator. 2 Raise the rear of the vehicle and support it stands (see "Jacking and Vehicle Support").
6 Separate the brake hydraulic hose from the with stands (see "Jacking and Vehicle Place a jack beneath the rear axle tube and
shock absorber by slackening the centre Support"). just raise it slightly.
locking nut and easing the hose and pipe 3 Unscrew and remove the pivot bolt from 2 Disconnect the shock absorber lower
down and out of the slot in the bracket (see mounting by unscrewing the nut and pivot the eye at the front end of the tie-bar (see
illustration). On the right-hand side there is bolt. illustration).
very little clearance for a spanner and it may
be easier if the roadspring is removed as
described in Section 13. 12.3 Exploded view of the rear tie-bar mountings - Saloon and Estate models 10 A Nut B Tie-bar C Washer (additionalwashers may be fitted) D Bush E Washer F Nut G Bush H Washer (additional washers may be fitted) J Bush K Pivot bolt
11.3 Removing the rear shock absorber top mounting bracket - Van models 10·10 Suspension and steering
12.4 Tie-bar-to-stub axle carrier retaining 13.3 Anti-roll bar-to-lower arm shackle 13.4 Lower arm inboard pivot nuts and
nut (arrowed) - Saloon and Estate models attachment (arrowed) bolts (arrowed) - Saloon and Estate models
4 Unscrew the nut from the rear end of the removal. If applicable the plastic sleeved end
tie-bar, take off the washers and bushes as of the coil spring must be at the upper end 15 Rear suspension lower arm
the tie-bar is withdrawn and keep them in when fitted. Tighten all nuts and bolts to the (Saloon and Estate models) -
strict sequence for refitting (see illustration). specified torque with the car standing on its removal and refitting
Refitting roadwheels.
5 Renewal of the tie-bar flexible bush is quite Removal
easily carried out using sockets or distance 14 Rear roadspring (Van 1 Raise the rear of the car and support it on
pieces and applying pressure in the jaws of a models) - removal and refitting stands (see "Jacking and Vehicle Support").
vice. 2 On cars equipped with the anti-lock braking
6 Refit the tie-bar by reversing the removal system, refer to Chapter 9 and remove the
operations. Removal load apportioning valve adjusting bracket 1 To remove the single leaf type rear from the lower arm. 13 Rear roadspring (Saloon and roadspring from the Van, raise the rear of the 3 If an anti-roll bar is fitted, disconnect the Estate models) - removal and vehicle and support it securely under the body shackles from the lower arm by levering them refitting
members (see "Jacking and Vehicle Support"). apart with a screwdriver (see illustration Support the axle tube using a jack or stands. 13.3). 2 Unscrew the spring U-bolt nuts and 4 Support the lower arm using a jack located
Removal withdraw the bump rubber plate complete beneath the roadspring.
1 Raise the rear of the car and support it on 5 Undo the nut and remove the arm inboard with shock absorber lower attachment (see
stands (see "Jacking and Vehicle Support"). pivot bolt. illustration).
Remove the roadwheel. 6 Undo the nut, remove the outboard pivot 3 Disconnect the shackle from the rear end of through-bolt then lower the jack and remove
2 Support the suspension lower arm by the roadspring and pull the spring downward.
placing a jack beneath the spring seating. the spring and insulator pad. 4 Unscrew and remove the spring front eye 7 Withdraw the lower arm from the car.
3 On models equipped with a rear anti-roll bolt and nut (see illustration).
bar disconnect the bar from the shackles by Refitting 5 Remove the spring from under the vehicle.
levering them apart with a screwdriver (see
illustration). 8 Refitting is the reverse sequence to Refitting removal, bearing in mind the following points:
4 Undo the nut and remove the lower arm
inboard pivot bolt (see illustration). 6 Refit by reversing the removal operations, a) If applicable the plastic sleeved end of the
5 Slowly lower the jack beneath the arm and but do not tighten the nuts to the specified coil spring must be at the upper end
remove the spring and insulator pad. torque until the weight of the vehicle has been when fitted. lowered onto the wheels. b) Tighten all nuts and bolts to the specified
Refitting 7 On completion adjust the braking system torque with the car standing on its
6 Refitting is the reverse sequence to roadwheels. light laden valve as described in Chapter 9. c) On cars equipped with the anti-lock braking system, refit the load apportioning valve adjusting bracket as described in Chapter 9.
14.4 Rear roadspring front eye bolt - Van models A Pivot bolt B Mounting bracket C Spring eye
14.2 Rear roadspring U-bolt nuts (arrowed) - Van models Suspension and steering 10·11
Refitting 16 Rear stub axle carrier 9 Refitting is the reverse sequence to removal (Saloon and Estate models) - bearing in mind the following: removal and refitting a) Adjust the hub bearings as described in Section 8.
Removal b) Tighten the U-bolt nuts to the specified torque with the weight of the vehicle on
1 Raise and support the rear of the car on its roadwheels.
stands (see "Jacking and Vehicle Support"). c) Bleed the brake hydraulic system and
Remove the roadwheel. adjust the light laden valve as described
2 Remove the rear hub as described in in Chapter 9.
Section 9.
3 Remove the rear brake shoe assembly, as 18 Rear anti-roll bar (Saloon and
described in Chapter 9. You will also need to
disconnect the brake fluid pipe at its Estate models) - removal and
connection to the wheel cylinder. Plug the 16.6 Rear stub axle and shock absorber refitting
pipe and cylinder connections to prevent fluid attachment - Saloon and Estate models
loss and the ingress of dirt. bleeding the hydraulic circuit until after Removal
4 Extract the handbrake cable through the the hub and brake drum are refitted. 1 Slacken the left-hand roadwheel bolts, raise
backplate, then unscrew the four backplate d) Adjust the hub bearings, as detailed in and support the rear of the car on stands (see
retaining bolts and withdraw the backplate. Section 8. "Jacking and Vehicle Support"). Remove the
5 Position a jack under the lower arm and roadwheel.
support it. 17 Rear axle tube (Van models) 2 Lever the shackles from the right and left-
6 Undo the two nuts and remove the bolts - removal and refitting hand suspension lower arms (see
securing the shock absorber to the stub axle illustration).
carrier (see illustration). 3 Unbolt the anti-roll bar from the underbody,
7 Undo the nut and remove the lower arm Removal carefully noting the relative fixing locations.
outboard pivot through-bolt. 1 Raise the rear of the vehicle and support it 4 Release the fuel lines from their securing
8 Accurately record the location and number on stands (see "Jacking and Vehicle clips. Support the fuel tank and remove the
of washers at the tie-bar attachment then Support"). Remove the rear roadwheels. three tank mounting bolts. Carefully lower the
undo the nut and withdraw the stub axle 2 Support the axle tube on a jack preferably tank on its support (see illustration).
carrier. of trolley type. 5 Withdraw the anti-roll bar from the left-hand
Refitting 3 Remove the rear hub as described in side of the vehicle. Section 9. 6 To remove the rubber bushes from the anti-
9 If the stub axle is damaged or worn 4 Disconnect the brake hydraulic pipes and roll bar simply prise open the bush retainers
excessively then it must be renewed. hoses at the axle tube bracket. Plug the pipe with a screwdriver. Press the retainers
10 Refitting is a reversal of the removal and hose ends after removal. together so that the fixing holes are in line
procedure, but note the following: 5 Disconnect the brake pipe unions at the when refitting. a) When reassembling the tie-bar to the stub rear wheel cylinders then undo the four bolts axle ensure that the spacers, washers and each side and remove both rear brake Refitting bushes are correctly located (as noted backplates. 7 Refitting is a reversal of removal. The fuel during removal). 6 Undo the axle-to-roadspring retaining U- tank must be bolted in position before b) Do not fully tighten the suspension bolt nuts and remove the U-bolts. securing the anti-roll bar. Ensure that the retaining nuts and bolts to their specified 7 Lower the axle tube to the ground while at underbody fixings are refitted in their original torque settings until the vehicle is lowered the same time sliding the light laden valve link locations. and standing on its roadwheels. rod from its spacer tube. Remove the link rod 8 Lubricate the shackle bushes with soap c) Refit and connect the brake assembly and bush from the axle tube. solution before reconnecting them to the components, as given in Chapter 9. Leave 8 Withdraw the axle from under the vehicle. lower arms.
10
18.2 Disconnecting the rear anti-roll bar shackles - Saloon and 18.4 Fuel tank attachment details Estate models A Mounting bolts (arrowed) C Fuel line clips A Left-hand side B Right-hand side B Mounting bolt (arrowed) 10·12 Suspension and steering
19 Rear suspension angles - general The rear wheel toe and camber angles are
set in production and do not require checking
under normal service conditions. Of the two,
only the toe setting can be adjusted, the
camber angle being fixed by production sizes
and tolerances. The only time that angles will need to be
checked will be after an accident in which the
rear of the car has suffered damage or where
a rear end
skid has caused a side impact on a 20.3 Steering tie-rod outer balljoint 20.6 Releasing tie-rod balljoint using
rear roadwheel. showing exposed threads (A) on tie-rod separator tool Severely worn components of the rear
suspension can also cause the angles to be 6 Using a suitable balljoint extractor, separate end of the rack, leave the bellows unclamped
misaligned, in which case renewal of the the balljoint taper pin from the eye of the at this stage.
defective components should rectify the steering arm (see illustration). 13 If the bellows are being fitted to the rack
suspension angles and alignment. 7 Unscrew the balljoint from the end of the support bush end of the rack housing, clamp The actual settings have been revised a tie-rod, also the locknut. As a
double check the inner end of the bellows.
number of times as a result of component for correct repositioning of the tie-rod balljoint 14 Always use new screw-type clamps,
changes during the course of production and when reassembling, note the number of turns never re-use the old factory-fitted wire type
also to improve directional stability. The required to remove it. when securing the bellows.
settings also vary according to model year, 8 Release the clip from the end of the 15 Screw the locknut into position on the tie-
engine size and optional equipment, and to damaged
bellow and slide it from the rack and rod, followed by the outer tie-rod balljoint.
list all the settings would be beyond the scope the tie-rod (see illustration). Screw the joint the exact number of turns
of this manual. If in any doubt about the rear 9 When ordering the new bellows and noted during removal.
suspension angles, or if the rear tyre wear retaining clips also
specify the diameter of the 16 Connect the balljoint to the steering arm,
appears excessive it is recommended that the tie-rod which will vary according to tighten the nut to the specified torque and
car be taken to a Ford dealer for accurate manufacture and can be checked with a ruler insert a new split pin to secure.
checking on optical alignment equipment. or calipers. This is important since if the 17 If applicable, add the correct quantity of
wrong size bellows are fitted they will not seal the specified lubricant to the end of the or possibly be damaged on fitting. steering rack (insert the grease into the 20 Steering gear bellows - 10 If a damaged bellow has caused steering bellows), then move the rack from lock-to- renewal lubricant loss it will be necessary to drain any lock to assist the entry of the lubricant into the remaining lubricant and renew it. To do this steering gear.
1 At the first indication of a split or grease turn the steering wheel gently to expel as 18 Where applicable, ensure that the fresh
leakage from the bellows, renew them. much lubricant as possible from the rack lubricant has worked its way into the steering
2 Loosen off the roadwheel bolts, raise the housing. If the opposing bellow is not being gear, then tighten the bellow retaining
front of the vehicle and support it on stands renewed it is recommended that it is released clamp(s).
(see "Jacking and Vehicle Support"). Remove from the rack housing to allow the old 19 Refit the roadwheels and lower the vehicle
the roadwheels. lubricant to be removed from that end, too. to the ground. Settle the suspension by
3 Measure and take note of the amount of 11 Smear the
narrow neck of the new bouncing the front end.
thread on the tie-rod which is exposed (see bellows with grease and slide into position 20 Tighten the balljoint locknut and check the
illustration). This will ensure correct toe- over the tie-rod, ensuring that the bellows are amount of tie-rod thread exposed. It should be
setting on reassembly. correctly located in the tie-rod groove on the as noted when dismantling and therefore
4 Loosen off the tie-rod outer ball-joint outer bellow end (where applicable) (see provide the correct toe-setting, but in any case
locknut. illustration). the alignment should really be checked at the
5 Extract the split pin and remove the nut 12 If new bellows are being fitted to the earliest opportunity, as described in Section 27
from the balljoint taper pin. pinion or by your Ford dealer.
20.11 Steering gear bellows fitting details
A Rack housing B Bellows C Steering tie-rod D Retaining clips E Apply a smear of grease when fitting
20.8 Bellows-to-rack and pinion housing wire type retaining clip (arrowed) Suspension and steering 10·13
22.1a Steering wheel trim removal 22.1b Prising up the steering wheel horn 22.1c . . . followed by the contact plate push . . . to withdraw the wheel - take adequate 5 To adjust the steering wheel through a 21 Steering tie-rod outer precautions to avoid damage to the finish. small angle, carry out the following balljoint - renewal 5 Where applicable note the steering shaft operations. direction indicator cam which has its peg 6 Release the tie-rod balljoint locknuts.
1 If as the result of inspection the tie-rod uppermost. 7 Turn one tie-rod clockwise and the
outer balljoints are found to be worn, remove opposite one anti-clockwise by the identical Refitting amount. For every 1° of steering wheel
them as described in Section 20.
2 When the balljoint nuts are unscrewed, it is 6 Refitting is the reverse sequence to angular error, turn each tie-rod through 30°.
sometimes found that the balljoint taper pin removal. Ensure that the direction indicator 8 Once the steering wheel has been
turns in the eye of the steering arm to prevent switch is in the
neutral position (this will avoid centralised (front wheels in straight-
ahead the nut from unscrewing. Should this
happen , the possibility of damage to the self- position), retighten the tie-rod balljoint
apply pressure to the top of the balljoint using cancelling mechanism). Check that the locknuts.
a length of wood as a lever to seat the taper roadwheels are still in the straight-ahead 9 Although the toe setting should not have
pin while the nut is unscrewed. When this position and locate the steering wheel with altered, check the front wheel alignment as the larger section between the spokes described in Section 27.
condition is met with, a balljoint extractor is uppermost. Tighten the steering wheel
unlikely to be required to free the taper pin retaining nut to the specified torque. 24 Steering column lock -
from the steering arm.
3 With the tie-rod removed, wire brush the removal and refitting
threads of the tie-rod and apply grease to them. 23 Steering wheel - alignment
4 Screw on the new balljoint to take up a Note: For ignition switch removal see
position similar to the original. Due to Chapter 5. A new shear-bolt will be
manufacturing differences, the fitting of a new 1 Owing to the fact that the steering wheel is required on refitting.
component will almost certainly
mean that the located on a hexagon shaped steering shaft, it
front wheel alignment will require some may be difficult to obtain
perfect steering wheel Removal
adjustment. Check this as described in alignment due to lack of fine adjustment. 1 To remove the ignition switch/column lock,
Section 27. 2 It is therefore acceptable to adjust the tie- the shear-head bolt must be drilled out.
5 Connect the balljoint to the steering arm, as rods to give unequal lengths. 2 Access for drilling can only be obtained if
described in Section 20. 3 Check that the front roadwheels are in the the steering column is lowered. To do this, straight-ahead position and that the toe remove the shrouds from the upper end of the setting is as specified. column by extracting the fixing screws. 22 Steering wheel - removal and 4 If the steering wheel is more than 30° out of Disconnect the battery earth lead. refitting alignment, remove it and centralise it as much as possible on its shaft.
Removal
1 According to model, either pull off the 10
steering wheel trim, prise out the insert which
carries the Ford motif at the centre, or carefully
prise up and lift off the horn push followed by
the contact plate (see illustrations).
2 Insert the ignition key and turn it to position I.
3 Hold the steering wheel from turning and
have the front roadwheels in the straight-
ahead attitude. Unscrew the steering wheel
retaining nut using a socket and extension.
4 Withdraw the steering wheel from the shaft.
No great effort should be necessary, as the 24.6b Steering column lock components -
wheel is located on a hexagonal-section shaft, pre-1986 models
which does not normally cause the binding 24.6a Steering column lock assembly A Lock housing D Shear bolt
associated with splined shafts. However, if shear bolt (A) B Upper clamp indentation
difficulty is experienced, a puller may be used Pre-1986 version shown C Column tube 10·14 Suspension and steering
25.6a Removing the steering column 25.6b . . . and lower shrouds on a pre-1986 25.6c . . . and on a post-1986 version upper . . . model . . .
3 Unscrew the bonnet release lever mounting 9 Refit the bonnet release lever and the 4 Remove the steering wheel, as described in
screw and position the lever to one side. column shrouds. Section 22.
4 Disconnect the steering column clamps. 10 Reconnect the battery. 5 Remove the direction indicator cam from
The lower one is of bolt and nut type, while the top end of the steering shaft (where fitted).
the upper one is of stud and nut design. 25 Steering column - removal, 6 Extract the fixing screws and remove the
5 Lower the shaft/column carefully until the upper and lower shrouds from the upper end
steering wheel rests on the seat cushion. overhaul and refitting of the steering column (see illustrations).
6 Centre-punch the end of the shear-bolt 7 Remove the insulation panel from the lower
which secures the steering column lock and Removal part of the facia (see illustration).
then drill it out. Remove the ignition 8 Extract the screw, remove the bonnet 1 Disconnect the battery negative terminal.
switch/column lock (see illustrations). release lever mounting and place it to one 2 Turn the ignition key and rotate the steering side (see illustration).
Refitting wheel to bring the front roadwheels to the 9 Take out the fixing screws and remove the straight-ahead position.
7 When refitting the lock, check for correct switches from the steering column (see 3 Working within the engine compartment,
operation and then tighten the new shear-bolt illustrations). unscrew and remove the pinch-bolt which
securing bolt until its head breaks off. 10 Disconnect the wiring harness multi-plug holds the steering shaft to the splined pinion
8 Raise the steering column and reconnect at the side of the column. shaft of the rack-and-pinion steering gear.
the clamps. 11 Unbolt the upper and lower clamps from the steering column and then withdraw the column/shaft into the vehicle. If any difficulty is experienced in separating the lower shaft from the pinion gear, prise the coupling open very slightly with a screwdriver. Note that on certain models (including all Cabriolets), an additional bracing bracket may be fitted between the column support bracket and the body (see illustrations). Overhaul 12 Wear in the column bearings can be rectified by renewing them. Access to them is obtained by extracting the tolerance ring from the upper end of the column and then 25.7 Removing the facia lower panel 25.8 Removing the bonnet release lever withdrawing the shaft from the lower end of the column. The lower bearing and spring will
25.9a Steering column switch removal on 25.9b . . . and switch retaining screw 25.11a Steering column lower mounting a pre-1986 model . . . locations (arrowed) on post-1986 versions clamp bolts (arrowed) Suspension and steering 10·15
30 Refit the insulation panel to the lower 25.11b Steering column brace on 1987 facia. onwards Cabriolet models 31 Tighten the coupling pinch-bolt at the base of the steering shaft. A Brace D Support bracket 32 Reconnect the battery negative terminal. B Special bolt E Spacer washer C Nut F Bodywork 26 Steering gear - removal, overhaul and refitting
Removal Note: New tie-rod balljoint split-pins must be used on refitting. 1 Set the front roadwheels in the straight- ahead position. 2 Raise the front of the vehicle and fit stands (see "Jacking and Vehicle Support"). Remove the front roadwheels. 3 Working under the bonnet, remove the pinch-bolt from the coupling at the base of the steering column shaft. 4 Extract the split pins from the tie-rod
come with it. Make sure that the steering Refitting balljoint taper pin nuts, unscrew the nuts and
column lock is unlocked before withdrawing remove them. 20 Fit the direction indicator cancelling cam
the shaft. 5 Separate the balljoints from the steering to the top of the shaft, making sure that the
13 If the upper bearing is to be renewed, first arms using a suitable separator tool. peg will be uppermost when the column is in
remove the lock assembly by drilling out the 6 Flatten the locktabs on the steering gear the in-car attitude (where fitted).
shear-head bolt. The upper bearing may now securing bolts and unscrew and remove the 21 Fit the steering wheel to the shaft,
be levered out of its seat. bolts. Withdraw the steering gear downwards screwing on the nut sufficiently tightly to be
14 Commence reassembly by tapping the able to pull the lower bearing into the column to separate the coupling from the steering
new upper bearing into its seat in the lock tube with the bearing slots correctly aligned shaft and then take it out from under the front
housing. Refit the column upper clamp and with the pegs on the tube. wing (see illustrations).
bush. 22 Refit the column, making sure to engage
15 Locate the column lock on the column Overhaul the coupling at its lower end with the splined
tube and screw in a new shear-head bolt until pinion shaft. 7 Examine the steering gear assembly for
its head breaks off. 23 Bolt up the column upper and lower signs of wear or damage, and check that the
16 Insert the conical spring into the column clamps. rack moves freely throughout the full length of
tube so that the larger diameter end of the 24 Reconnect the wiring harness multi-plug. its travel, with no signs of roughness or
spring is against the lowest convolution of the 25 Refit the combination switches to the excessive free play between the steering gear
collapsible section of the column tube. steering column. pinion and rack. It is possible to overhaul the
17 Slide the lower bearing onto the shaft so 26 Reconnect the bonnet release lever. steering gear assembly housing components,
that its chamfered edge will mate with the 27 Fit the column shrouds. but this task should be entrusted to a Ford
corresponding one in the column lower 28 Check that the steering wheel is correctly dealer. It is likely to be cheaper to obtain an
bearing seat when the shaft is installed. aligned (wheels in the straight-ahead exchange reconditioned steering gear
18 Insert the shaft into the lower end of the position). If not, remove the steering wheel assembly (which will be supplied complete
steering column. Make sure that the lock is and realign it (see also Section 23). with tie-rods) than to overhaul a worn or
unbolted and pass the shaft up carefully 29 Tighten the steering wheel nut to the damaged assembly. The only components
through the upper bearing. specified torque and then insert the motif or which can be renewed easily by the home
19 Fit the bearing tolerance ring and
waved horn push into the centre of the steering mechanic are the steering gear bellows, and
washer. wheel. the tie-rod outer balljoints. Renewal procedures for the bellows and tie-rod outer 10 balljoints are given in Sections 20 and 21 respectively. Refitting 8 If a new steering gear assembly is being installed, the tie-rods balljoints may have to be removed from the original unit and screwed onto the new tie-rods to approximately the same setting. If a note was not made of the position of the original tie-rod balljoints on their rods, inspection of the 26.6b Steering gear mounting details threads will probably indicate their original location. In any event it is important that the
26.6a Steering gear-to-bulkhead mounting A Clamp C Steering gear new balljoints are screwed on an equal retaining bolt and locktab (arrowed) B Bush amount at this stage. 10·16 Suspension and steering
9 Make sure that the steering gear is centred.
Do this by turning the pinion shaft to full lock
in one direction and then count the number of
turns required to rotate it to the opposite lock.
Now turn the splined pinion shaft through half
the number of turns just counted.
10 Check that the roadwheels and the
steering wheel are in the straight-ahead
attitude, offer up the steering gear and
connect the shaft coupling without inserting
the pinch-bolt.
11 Bolt up the gear housing and lock the
bolts with their lockplate tabs.
12 Reconnect the tie-rod balljoints to the
steering arms. Tighten the securing nuts to 27.5 Slackening tie-rod balljoint locknut
the specified torque setting and fit new split for toe setting adjustment
pins to secure. 7 With the gauge, measure the distance
13 Tighten the coupling pinch-bolt to the between the two inner rims of the roadwheels
specified torque. Refit the roadwheels and (at hub height) at the rear of the wheel. Push
lower the vehicle to the floor. the vehicle forward to rotate the wheel
14 If the tie-rods were disturbed or if a new through 180° (half a turn) and measure the
assembly was installed, check and adjust the distance between the wheel inner rims, again
wheel alignment, as described in Section 27. at hub height, at the front of the wheel. This 27.2 Wheel alignment diagram last measurement should
differ from the first 27 Steering angles and wheel A Camber one by the specified toe-in/toe-out (see B Castor alignment C Toe setting "Specifications"). 8 Where the toe setting is found to be
1 Accurate front wheel alignment is essential to toe-in. If the distance at the front inside incorrect, release the tie-rod balljoint locknuts
to good steering and for even tyre wear. edges is greater than that at the rear, the and turn the tie-rods by an equal amount.
Before considering the steering angles, check wheels toe-out. Only turn them through a quarter turn at a
that the tyres are correctly inflated, that the 3 Due to the need for
precision gauges to time before re-checking the alignment. Do not
roadwheels are not buckled, the hub bearings measure the small angles of the steering and grip the threaded part of the tie-rod during
are not worn or incorrectly adjusted and that suspension settings, it is preferable to leave adjustment and make sure that the bellows
the steering linkage is in good order. this work to your dealer. Camber and castor outboard clip is released, otherwise the
2 Wheel alignment consists of four factors angles are set in production and are not bellows will twist as the tie-rod is rotated.
(see illustration): adjustable. If these angles are ever checked When each tie-rod is viewed from the rack
Camber is the angle at which the roadwheels and found to be outside specification then housing, turning the rods clockwise will
are set from the vertical when viewed from the either the suspension components are increase the toe-out. Always turn the tie-rods
front or rear of the vehicle. Positive camber is damaged or distorted, or wear has occurred in the same direction when viewed from the
the angle (in degrees) that the wheels are in the bushes at the attachment points. centre of the vehicle, otherwise they will
tilted outwards at the top from the vertical. 4 If you wish to check the toe setting yourself, become unequal in length. This would cause
Castor is the angle between the steering axis first make sure that the lengths of both tie-rods the steering wheel
spoke alignment to alter
and a vertical line when viewed from each are equal when the steering is in the straight- and also cause problems on turning with tyre
side of the vehicle. Positive castor is indicated ahead position. This can be measured scrubbing.
when the steering axis is inclined towards the reasonably accurately by
counting the number 9 On completion of adjustment, tighten the
rear of the vehicle at its upper end. of exposed threads on the tie-rod adjacent to tie-rod balljoint locknuts without altering the
Steering axis inclination is the angle, when the balljoint assembly (refer to Section 23). setting of the tie-rods. Hold the balljoint
viewed from the front or rear of the vehicle, 5 Adjust, if necessary, by releasing the assembly at the mid-point of its arc of travel
between the vertical and an imaginary line locknut from the balljoint assembly and the (flats are provided on it for a spanner) while
drawn between the upper and lower clamp at the small end of the bellows (see the locknuts are tightened.
suspension swivel balljoints or upper and illustration). 10 Finally, tighten the bellows clamps.
lower strut mountings. 6 Obtain a tracking gauge. These are 11 For rear wheel alignment refer to Section 19.
Toe is the amount by which the distance available in various forms from accessory
between the front inside edges of the stores, or one can be fabricated from a length
roadwheel rims differs from that between the of steel tubing, suitably cranked to clear the
rear inside edges. If the distance at the front is sump and bellhousing, and having a setscrew
less than that at the rear, the wheels are said and locknut at one end. 11·1
Chapter 11
Bodywork and fittings
Contents
Body exterior fittings - removal and refitting . . . . . . . . . . . . . . . . . .25 Interior mirror - removal and refitting . . . . . . . . . . . . . . . . . . . . . . . .28
Bonnet - removal and refitting . . . . . . . . . . . . . . . . . . . . . . . . . . . . . .7 Interior trim panels - removal and refitting . . . . . . . . . . . . . . . . . . . .32
Bonnet lock - removal and refitting . . . . . . . . . . . . . . . . . . . . . . . . . .9 Maintenance - bodywork and underframe . . . . . . . . . . . . . . . . . . . . .2
Bonnet release cable - removal and refitting . . . . . . . . . . . . . . . . . . .8 Maintenance - upholstery and carpets . . . . . . . . . . . . . . . . . . . . . . . .3
Boot lid (Cabriolet models) - removal and refitting . . . . . . . . . . . . . .17 Major body damage - repair . . . . . . . . . . . . . . . . . . . . . . . . . . . . . . . .5
Bumper components - removal and refitting . . . . . . . . . . . . . . . . . . .6 Minor body damage - repair . . . . . . . . . . . . . . . . . . . . . . . . . . . . . . . .4
Central door locking system components - removal and refitting . .18 Power-operated folding
roof - fluid level checking and bleeding . .23
Centre console - removal and refitting . . . . . . . . . . . . . . . . . . . . . . .30 Power-operated folding roof components - removal and refitting . .24
Doors - removal and refitting . . . . . . . . . . . . . . . . . . . . . . . . . . . . . .12 Radiator grille - removal and refitting . . . . . . . . . . . . . . . . . . . . . . . .10
Door handle and lock components - removal and refitting . . . . . . .13 Rear parcel
shelf - removal and refitting . . . . . . . . . . . . . . . . . . . . .29
Door trim panel - removal and refitting . . . . . . . . . . . . . . . . . . . . . .11 Seats - removal and refitting . . . . . . . . . . . . . . . . . . . . . . . . . . . . . .26
Door window glass and regulator - removal and refitting . . . . . . . .14 Seat belts - removal and refitting . . . . . . . . . . . . . . . . . . . . . . . . . . .27
Exterior mirror - removal and refitting . . . . . . . . . . . . . . . . . . . . . . .19 Seat belt check . . . . . . . . . . . . . . . . . . . . . . . . . . . . . . .See Chapter 1
Facia - removal and refitting . . . . . . . . . . . . . . . . . . . . . . . . . . . . . . .33 Sunroof components - removal, refitting and adjustment . . . . . . . .21
Folding roof (Cabriolet models) - removal and refitting . . . . . . . . . .22 Tailgate - removal and refitting . . . . . . . . . . . . . . . . . . . . . . . . . . . . .15
General description . . . . . . . . . . . . . . . . . . . . . . . . . . . . . . . . . . . . . .1 Tailgate/boot lid lock and cylinder - removal and refitting . . . . . . . .16
Glove compartment - removal and refitting . . . . . . . . . . . . . . . . . . .31 Windscreen and fixed window glass - removal and refitting . . . . . .20
Hinge and lock check and lubrication . . . . . . . . . . . . . .See Chapter 1
Degrees of difficulty Easy, suitable for Fairly easy, suitable Fairly difficult, Difficult, suitable for Very difficult, novice with little for beginner with suitable for competent experienced DIY suitable for expert DIY experience some experience DIY mechanic mechanic or professional
Specifications
Torque wrench setting Nm lbf ft
All seat belt anchor bolts . . . . . . . . . . . . . . . . . . . . . . . . . . . . . . . . . . . . 29 to 41 21 to 30
vehicle. It is important to flush these off in 2 Maintenance - bodywork and such a way as to prevent grit from scratching 1 General description underframe the finish. The wheel arches and underframe need washing in the same way to remove any The body is of welded steel construction The general condition of a vehicle's accumulated mud which will retain moisture
available in 3 or 5-door Hatchback, 3 or 5- bodywork is the one
thing that significantly and tend to encourage rust. Paradoxically 11
door Estate, soft-top Cabriolet, or Van affects its value. Maintenance is easy but enough, the best time to clean the underframe
configurations.
needs to be regular. Neglect, particularly after and wheel arches is in wet
weather when the minor damage, can lead quickly to further mud is thoroughly wet and soft. In very wet The body is of monocoque construction deterioration and costly repair
bills . It is weather the underframe is usually cleaned of
and is of energy-absorbing design. important also to keep watch on those parts of large accumulations automatically and this is Rust and corrosion protection is applied to the vehicle not immediately visible, for
instance a good time for inspection.
all new vehicles and includes zinc
phosphate the underside, inside all the wheel arches and Periodically, except on vehicles with a wax-
dipping and wax injection of box sections and the lower part of the engine compartment. based underbody protective coating, it is a
door interiors. The basic maintenance routine for the good idea to have the whole of the underframe All body panels are welded, including the bodywork is washing preferably with a lot of of the vehicle steam cleaned, engine
front wings, so it is recommended that major water, from a hose. This will remove all the compartment included, so that a thorough
body damage repairs are left to your dealer. loose solids which may have stuck to the inspection can be carried out to see what minor 11·2 Bodywork and fittings
repairs and renovations are necessary. Steam mallet with a wooden or plastic head. Whilst
cleaning is available at many garages and is doing this, hold a suitable block of wood
necessary for removal of the
accumulation of 4 Minor body damage - repair firmly against the outside of the panel to
oily grime which sometimes is allowed to absorb the impact from the hammer blows
become thick in certain areas. If steam and thus prevent a large area of the bodywork Note: For more detailed information about
cleaning
facilities are not available, there are from being "belled-out". bodywork repair, Haynes Publishing produce
one or two excellent grease solvents available Should the
dent be in a section of the a book by Lindsay
Porter called "The Car bodywork which has a double skin or some
which can be brush applied. The dirt can then Bodywork Repair Manual". This incorporates other factor making it inaccessible from
be simply hosed off. Note that these methods information on such aspects as rust treatment behind, a different technique is called for. Drill
should not be used on vehicles with wax- painting and glass fibre repairs, as well as several small holes through the metal inside
based underbody protective coating or the details on more ambitious repairs involving the area - particularly in the deeper section.
coating will be removed. Such vehicles should welding and panel beating. Then screw long self-tapping screws into the
be inspected annually, preferably just prior to holes just sufficiently for them to gain a good
winter, when the underbody should be washed Repair of minor scratches in
purchase in the metal. Now the dent can be
down and any damage to the wax coating bodywork pulled out by pulling on the protruding heads
repaired. Ideally, a completely fresh coat If the scratch is very superficial, and does of the screws with a pair of pliers.
should be applied. It would also be worth not penetrate to the metal of the bodywork, The next stage of the repair is the removal
considering the use of such wax-based repair is very simple. Lightly rub the area of of the paint from the damaged area, and from
protection for injection into door panels, sills, the scratch with a paintwork renovator, or a an inch or so of the surrounding "sound"
box sections, etc., as an additional safeguard very fine cutting paste, to remove loose paint bodywork. This is accomplished most easily
against rust damage where such protection is from the scratch and to clear the surrounding by using a wire brush or abrasive pad on a
not provided by the vehicle manufacturer. bodywork of wax polish. Rinse the area with power drill, although it can be done just as clean water. effectively by hand using sheets of abrasive After washing paintwork, wipe off with a Apply touch-up paint to the scratch using a paper. To complete the
preparation for filling,
chamois
leather to give an unspotted clear fine paint brush; continue to apply fine layers score the surface of the
bare metal with a
finish. A coat of protective wax polish will give of paint until the surface of the paint in the screwdriver or the
tang of a file, or
added protection against chemical pollutants in scratch is level with the surrounding alternatively, drill small holes in the affected
the air. If the paintwork sheen has dulled or paintwork. Allow the new paint at least two area. This will provide a really good "key" for
oxidised, use a cleaner/polisher combination to weeks to harden: then blend it into the the filler paste.
restore the brilliance of the
shine . This requires surrounding paintwork by rubbing the scratch To complete the repair see the Section on
a little effort, but such dulling is usually caused area with a paintwork renovator or a very fine filling and re-spraying.
because regular washing has been neglected.
Care needs to be taken with metallic paintwork, cutting paste. Finally, apply a coat of wax Repair of rust holes or gashes in
as special non-abrasive cleaner/polisher is polish. bodywork
required to avoid damage to the finish. Always Where the scratch has penetrated right
check that the door and ventilator opening drain through to the metal of the bodywork, causing Remove all paint from the affected area and
holes and pipes are completely clear so that the metal to rust, a different repair technique from an inch or so of the surrounding "sound"
water can be drained out.
Bright work should is required. Remove any loose rust from the bodywork, using an abrasive pad or a wire
be treated in the same way as paint work. bottom of the scratch with a penknife, then brush on a power drill. If these are not
Windscreens and
windows can be kept clear of apply rust inhibiting paint to prevent the available a few sheets of abrasive paper will
the smeary film which often appears, by the use formation of rust in the future. Using a rubber do the job just as effectively. With the paint
of a proprietary glass cleaner. Never use any or nylon applicator, fill the scratch with removed you will be able to gauge the severity
form of wax or other body or
chromium polish bodystopper paste. If required, this paste can of the corrosion and therefore decide whether
on glass. be mixed with cellulose thinners to provide a to renew the whole panel (if this is possible) or very thin paste which is ideal for filling narrow to repair the affected area. New body panels scratches. Before the
stopper -paste in the are not as expensive as most people think 3 Maintenance - upholstery and scratch hardens, wrap a piece of smooth and it is often quicker and more satisfactory carpets cotton rag around the top of a finger. Dip the to fit a new panel than to attempt to repair finger in cellulose thinners, and then quickly large areas of corrosion. Mats and carpets should be brushed or
sweep it across the surface of the stopper- Remove all fittings from the affected area
vacuum cleaned regularly to keep them free of paste in the scratch; this will ensure that the except those which will act as a guide to the
grit. If they are badly stained remove them from surface of the stopper-paste is slightly original shape of the damaged bodywork (eg
the vehicle for scrubbing or sponging and make hollowed. The scratch can now be painted headlamp shells etc). Then, using tin snips or
quite sure they are dry before refitting. Seats over as described earlier in this Section. a hacksaw blade, remove all loose metal and
and interior trim panels can be kept clean by any other metal badly affected by corrosion.
wiping with a damp cloth and upholstery Repair of
dents in bodywork Hammer the edges of the hole inwards in
cleaner. If they do become stained (which can When deep denting of the vehicle's order to create a slight depression for the filler
be more apparent on light coloured upholstery) bodywork has taken place, the first task is to paste.
use a little liquid detergent and a soft nail brush pull the dent out, until the affected bodywork Wire brush the affected area to remove the
to scour the grime out of the grain of the almost attains its original shape. There is little powdery rust from the surface of the
material. Do not forget to keep the headlining point in trying to restore the original shape remaining metal. Paint the affected area with
clean in the same way as the upholstery. When completely, as the metal in the damaged area rust inhibiting paint; if the back of the rusted
using liquid cleaners inside the vehicle do not will have stretched on impact and cannot be area is accessible treat this also.
over-wet the surfaces being cleaned. Excessive reshaped fully to its original contour. It is Before filling can take place it will be
damp could get into the seams and padded better to bring the level of the dent up to a necessary to block the hole in some way. This
interior causing stains, offensive odours or even point which is about 1/8 in (3 mm) below the can be achieved by the use of aluminium or
rot. If the inside of the vehicle gets wet level of the surrounding bodywork. In cases plastic mesh, or aluminium tape.
accidentally it is worthwhile taking some trouble where the dent is very
shallow anyway, it is Aluminium or plastic mesh or glass fibre
to dry it out properly, particularly where carpets not worth trying to pull it out at all. If the matting is probably the best material to use
are involved. Do not leave oil or electric heaters underside of the dent is accessible, it can be for a large hole. Cut a piece to the
inside the vehicle for this purpose. hammered out gently from behind, using a approximate size and shape of the hole to be Bodywork and fittings 11·3
filled, then position it in the hole so that its used, it can be mixed with cellulose thinners power drill. The damaged part is then welded
edges are below the level of the surrounding to form a really thin paste which is ideal for back together by using a hot air gun to heat
bodywork. It can be retained in position by filling small holes. Repeat this spray and up and fuse a plastic filler rod into the groove.
several blobs of filler paste around its repair procedure until you are satisfied that Any excess plastic is then removed and the
periphery. the surface of the filler, and the feathered area rubbed down to a smooth finish. It is Aluminium tape should be used for small or edge of the paintwork are perfect. Clean the important that a filler rod of the correct plastic
very narrow holes. Pull a piece off the roll and repair area with clean water and allow to dry is used, as body components can be made of
trim it to the approximate size and shape fully.
required, then pull off the backing paper (if The repair area is now ready for final a variety of different types (eg polycarbonate,
used) and stick the tape over the hole; it can spraying. Paint spraying must be carried out ABS, polypropylene).
be overlapped if the thickness of one piece is in a warm, dry, windless and dust free Damage of a less serious
nature (abrasions,
insufficient. Burnish down the edges of the atmosphere. This condition can be created minor cracks etc) can be repaired by the DIY
tape with the handle of a screwdriver or artificially if you have access to a large indoor owner using a two-part
epoxy filler repair
similar, to ensure that the tape is securely working area, but if you are forced to work in material. Once mixed in equal proportions,
attached to the metal underneath. the open, you will have to pick your day very this is used in similar
fashion to the bodywork carefully. If you are working indoors, dousing filler used on metal panels. The filler is usually
Bodywork repairs - filling and re- the floor in the work area with water will help cured in twenty to
thirty minutes, ready for
spraying to settle the dust which would otherwise be in
sanding and painting. Before using this Section, see the Sections the atmosphere. If the repair area is confined If the owner is renewing a complete
on dent, deep scratch, rust holes and gash component
himself , or if he has repaired it to one body panel, mask off the surrounding
repairs. panels; this will help to minimise the
effects of with epoxy filler, he will be left with the Many types of bodyfiller are available, but
generally speaking those proprietary kits a slight mis-match in paint
colours . Bodywork problem of finding a suitable paint for finishing
which contain a tin of filler paste and a tube of fittings (eg
chrome strips, door handles etc) which is compatible with the type of plastic
resin hardener are best for this type of repair. will also need to be masked off. Use genuine used. At one time the use of a universal paint
A wide, flexible plastic or nylon applicator will masking tape and several thicknesses of was not possible owing to the
complex range
be found invaluable for imparting a smooth
newspaper for the masking operations. of plastics encountered in body component
and well contoured finish to the surface of the Before commencing to spray, agitate the applications. Standard paints, generally
filler. aerosol can thoroughly, then spray a test area speaking, will not
bond to plastic or rubber Mix up a little filler on a clean piece of card (an old tin, or similar) until the technique is satisfactorily, but paints to match any plastic
or board - measure the hardener carefully mastered. Cover the repair area with a thick or rubber finish can be obtained from dealers.
(follow the
maker 's instructions on the pack) coat of primer; the thickness should be built However, it is now possible to obtain a plastic
otherwise the filler will set too rapidly or too up using several thin layers of paint rather body parts finishing kit which consists of a
slowly. Using the applicator apply the filler than one thick one. Using 400 grade wet-and-
paste to the prepared area; draw the pre-primer treatment, a primer and coloured dry paper, rub down the surface of the primer
applicator across the surface of the filler to top coat. Full instructions are normally until it is really smooth. While doing this, the
achieve the correct contour and to level the supplied with a kit, but basically the method work area should be thoroughly doused with
filler surface. As soon as a contour that of use is to first apply the pre-primer to the water, and the wet-and-dry paper periodically
approximates to the correct one is achieved, component concerned and allow it to dry for rinsed in water. Allow to dry before spraying
stop working the paste - if you carry on too up to 30 minutes. Then the primer is applied on more paint.
long the paste will become sticky and begin to and left to dry for about an hour before finally Spray on the top coat, again
building up the
"pick up" on the applicator. Continue to add applying the special coloured top coat. The
thin layers of filler paste at twenty-minute thickness by using several thin layers of paint. Start spraying in the centre of the repair area result is a correctly coloured component
intervals until the level of the filler is just proud where the paint will
flex with the plastic or
of the surrounding bodywork. and then work outwards, with a side-to-side motion, until the whole repair area and about rubber, a property that standard paint does Once the filler has hardened, excess can be 2 inches of the surrounding original paintwork not normally possess.
removed using a metal plane or file. From then
on, progressively
finer grades of abrasive is covered. Remove all masking material 10 to
paper should be used, starting with a 40 15 minutes after spraying on the final coat of
grade production paper and finishing with 400 paint. 5 Major body damage - repair
grade wet-and-dry paper. Always wrap the Allow the new paint at least two weeks to
abrasive paper around a flat rubber,
cork , or harden, then, using a paintwork renovator or a Where serious damage has occurred or
wooden block - otherwise the surface of the very fine cutting paste, blend the edges of the
filler will not be completely flat. During the large areas need renewal due to neglect, it paint into the existing paintwork. Finally, apply
smoothing of the filler surface the wet-and-dry means that completely new sections or panels wax polish.
paper should be periodically rinsed in water. will need welding in, and this is best left to
This will ensure that a very smooth finish is Plastic components professionals. If the damage is due to impact,
imparted to the filler at the final stage. With the use of more and more plastic body it will also be necessary to completely check 11 At this stage the "dent" should be components by the vehicle manufacturers (eg the alignment of the bodyshell structure. Due
surrounded by a ring of bare metal, which in to the principle of construction, the strength bumpers, spoilers, and in some cases major
turn should be encircled by the
finely and shape of the whole car can be affected by body panels), rectification of more serious
"feathered" edge of the good paintwork. damage to one part. In such instances the
Rinse the repair area with clean water, until all damage to such items has become a matter of either entrusting repair work to a specialist service of a dealer with specialist checking
of the dust produced by the rubbing-down in this field, or renewing complete
jigs are essential. If a body is left misaligned, it
operation has gone. components. Repair of such damage by the is first of all dangerous, as the car will not Spray the whole repair area with a light coat
of primer - this will show up any imperfections DIY owner is not really feasible owing to the handle properly, and secondly uneven
in the surface of the filler. Repair these cost of the equipment and materials required stresses will be
imposed on the steering,
imperfections with fresh filler paste or for effecting such repairs. The basic technique engine and transmission, causing abnormal
bodystopper, and once more smooth the involves making a groove along the line of the wear or complete failure. Tyre wear may also
surface with abrasive paper. If bodystopper is crack in the plastic using a rotary burr in a be excessive. 11·4 Bodywork and fittings
6.8 Front bumper attachments - pre-1986 6.13 Front bumper-to-arch screw (A) and 6.1 Bumper overrider details - pre-1986 models retaining nut (B) - 1986 models onwards models A Without headlamp washer 1 Bumper bar 3 Retaining nut 13 From under the wheel arch, undo the B With headlamp washer 2 Washer single bumper retaining nut on each side (see illustration). On models with wheel arch 6 Slide the moulding from the end retainers, liners, to improve access to the securing nuts, 6 Bumper components - removal noting that the front bumper moulding is in if desired the wheel arch liners and/or the and refitting two parts. windscreen washer reservoir can be removed. Refitting 14 From within the engine compartment undo the single nut each side securing the bumper
Bumper overriders 7 To refit, push the moulding into position to the front body panel (see illustration). and fully engage the clips.
Removal 15 Carefully withdraw the bumper from the Front bumper front of the car.
1 On pre-1986 models the overrider is held to
the bumper by a clamp screw. Find this screw Refitting Pre-1986 models
on the underside of the bumper and release it 16 Refitting is the reversal of removal. Removal
- the overrider can then be withdrawn (see
illustration). If headlamp washers are fitted, 8 To remove the bumper complete, open the Rear bumper bonnet and unscrew the bumper securing nuts
disconnect the fluid hose as the overrider is Pre-1986 models except Van from each end of the bumper (see illustration).
withdrawn. 9 Withdraw the bumper from the vehicle. Removal
2 On models from 1986 onwards the bumper 10 Release the locking tangs using pliers, 17 To remove the bumper complete, open
assembly must be removed for access. Once and pull or tap the quarter section free using a
this is done undo the two nuts (or single screw the tailgate and unscrew the bumper securing piece of soft wood to prevent damage. If nuts from each end of the bumper (see
on XR3i models) and remove the overrider. required the quarter section end retaining illustration).
Refitting clips can be removed from the body by 18 Withdraw the bumper from the vehicle,
3 In all cases refitting is a reversal of removal. twisting through 90° and pulling free. and disconnect the number plate wiring plugs. Refitting 19 Release the locking tangs using pliers as
Bumper moulding (pre-1986 11 Reassembly and refitting are reversals of shown, and pull or tap the quarter section free
models) removal and dismantling. using a piece of soft wood to prevent damage Models from 1986 onwards (see illustration). If required the quarter
Removal section end retaining clips can be removed
4 Where so equipped, remove the overriders Removal from the body by twisting through 90° and
as described previously in this Section. 12 Undo the single screw each side securing pulling free.
5 Release the moulding from the bumper by the bumper to the edge of the wheel arch. Refitting
compressing the jaws of the retaining clips 20 Reassembly and refitting are reversals of
inside the bumper. removal and dismantling.
6.17 Rear bumper attachments - pre-1986 models
6.14 Front bumper retaining nuts in engine 1 Bumper bar 3 Washer 6.19 Removing rear quarter bumper compartment - 1986 models onwards 2 Mounting bracket 4 Fixing nut retaining tangs - pre-1986 models Bodywork and fittings 11·5
6.22 Rear bumper attachments in luggage 7.2 Disconnecting the windscreen washer 7.8 Bonnet bump stop (arrowed) compartment - 1986 models onwards fluid pipe
Models from 1986 onwards except bonnet lid, unbolt the hinges and lift the lid 2 Extract the single screw and remove the
Van from the vehicle. cable bracket from the steering column.
Removal Refitting 3 Working within the engine compartment,
21 Undo the three screws each side securing pull the cable grommet from the bonnet
latch the bumper to the edge of the wheel arch. 6 Refit by reversing the removal operations. If bracket and then disengage the cable end
22 From inside the luggage compartment a new bonnet is being installed, position it so fitting from the latch (see illustration).
undo the two bumper retaining nuts each side that an equal gap is provided at each side when it is being closed. 4 Unclip the cable from the side of the engine
(see illustration). 7 The bonnet should close smoothly and compartment.
23 Disconnect the number plate lamp wiring, positively without excessive pressure. If it 5 Withdraw the cable through the engine
ease the sides of the bumper outward and
withdraw it from the car. does not, carry out the following adjustment. compartment rear bulkhead into the vehicle
Refitting 8 Screw in the bump stops which are located interior.
24 Refitting is a reversal of removal. on the front upper cross rail (see illustration). Close the bonnet and then readjust the bump Refitting
Van models stops until the bonnet is flush with the wing 6 Refitting is a reversal of removal.
25 To remove either rear quarter bumper, upper surfaces.
prise out the number plate lamp, disconnect 9 Adjust the striker centrally in relation to the
the bulbholder and extract the two Torx latch. Release it by unscrewing its pressed 9 Bonnet lock - removal and
screws. Refitting is a reversal of removal. steel locknut. refitting 10 Screw the striker in or out until the bonnet fully closes under its own weight when 7 Bonnet - removal and refitting allowed to drop from a point 300 mm (12 in) Removal above its released position. 1 Extract the three securing screws from the lock and lower it until the cable can be
Removal 8 Bonnet release cable - removal disconnected.
1 Open the bonnet and support it on its
stay . and refitting 2 Withdraw the lock from below the top rail.
2 Disconnect the screen washer pipe on the
underside of the bonnet lid (see illustration). Refitting
3 Where applicable, disconnect the earth Removal 3 Refit by reversing the removal operations.
lead from the bonnet. 1 Working inside the vehicle, extract the three
4 Mark round the hinge plates on the screws and remove the steering column
underside of the bonnet lid as an aid to shroud. Open the bonnet. If the cable is broken, 10 Radiator grille - removal and
refitting. the release latch must be operated using a refitting
5 With an assistant supporting one side of the suitably shaped bar through the grille aperture.
Pre-1988 models Removal 11 1 The grille is held in position by four spring clips (see illustration). 2 Once these clips are released, the grille can be removed from the body panel. Refitting 3 Refit by reattaching the spring clips.
1988 models onwards 4 The radiator grille is integral with the
8.3 Bonnet cable attachment at latch and 10.1 Radiator grille spring clip - pre-1988 bumper moulding, and is removed with the bracket (arrowed) models bumper. 11·6 Bodywork and fittings
11.2a Prise out the plastic insert . . . 11.2b . . . and unscrew the regulator 11.4 Unscrew the armrest handle
remove the door pocket
finisher . 1986 models onwards 11 Door trim panel - removal and 4 Remove the door pull/armrest. This is held refitting by two screws (see illustration). On Base Removal models with a door pull only, the end caps will 8 Remove the door window regulator handle. have to be prised up to
reveal the screws. Do this by prising out the plastic insert from the
Pre-1986 models 5 Push the door lock remote control handle handle and extracting the screw now exposed.
Removal bezel towards the rear of the vehicle to Remove the washer from behind the handle. release it from its retaining lugs (see 9 Prise off the door pull handle capping, undo
1 On
Ghia versions only, remove the panel the three screws and remove the handle (see illustration).
capping by carefully prising out the retaining illustrations). On vehicles with electrically 6 Again using the forked tool, pass it round
clips using a forked tool. This can easily be operated windows, pull out the switches and the edge of the panel between the panel and
made from a piece of scrap metal. disconnect the wiring.
2 Remove the door window regulator handle. the door and release each of the panel clips in turn. Lift the panel from the door (see 10 Undo the door lock remote control handle
Do this by prising out the plastic insert from bezel retaining screw and remove the bezel
the handle and extracting the screw which will illustration). (see illustrations).
now be exposed (see illustrations). Refitting 11 Prise out the plastic trim cap and unscrew
3 On vehicles fitted with electrically operated the lower front panel retaining screw.
front windows, pull out the switches and 7 Refitting is a reversal of removal. Unscrew the three remaining screws, one at the upper front and two at the rear of the panel (see illustrations). 12 Carefully release the retaining clips at the top of the panel and lift upwards to disengage the lower brackets. 13 From 1989, a new
foam watershield is fitted under the door trim panel, secured in position by a strip of butyl. 14 To remove the watershield, the butyl strip must not be touched with the hands or subsequent adhesion will be impaired. 15 If the foam watershield is damaged beyond re-use on removal, all traces of it, and the butyl, must be removed from the door
11.5 Removing the remote control handle 11.6 Removing the door trim panel inner skin. The butyl can be removed by bezel "
rolling " it up on itself to form a ball.
11.9a Prise out the door pull handle 11.9b . . . undo the screws . . . 11.9c . . . and remove the handle capping . . . Bodywork and fittings 11·7
11.10a Undo the remote control handle 11.10b . . . and remove the bezel 11.11a Release the trim cap and undo the bezel retaining screw . . . screw . . .
11.11b . . . followed by the side screws 12.7a Front door lower hinge nuts 12.7b Door hinge assemblies - pre-1986 (arrowed) models
16 New butyl strips can then be applied and Refitting A Rear door B Front door
a new watershield fitted. Use a roller to press 9 Refitting is a reversal of removal, but do not
the shield into contact with the butyl strip. fully tighten the hinge bolts until the alignment Rear door
Refitting of the door within the body aperture has been checked. Saloon and Estate models
17 Refitting is a reversal of removal. 11 The operations are similar to those 1986 models onwards described for the front door on pre-1986 10 The procedure is as described previously models, except that the centre pillar trim 12 Doors - removal and refitting in this Section for pre-1986 models, but it is panels must be removed for access to the necessary to extract the pin from the upper hinge bolts. hinge rather than unbolting the hinge from the
Front door pillar. To do this, ideally special tool 41-018 is Van models needed, but a suitable alternative can be Removal
Pre-1986 models made from a piece of metal with a U-shaped 12 Begin by opening the door to its full extent
Removal cut-out which will engage under the head of and supporting it on a jack or blocks, with a
1 Open the door fully and support its lower the pin (see illustrations). Strike the tool pad of cloth used to prevent scratching.
edge on a jack or blocks covered with a pad downward to remove the pin. When refitting, 13 Disconnect the check strap from its lower
of cloth to prevent scratching. tap the pin upwards into place. edge.
2 Unscrew the two bolts which hold the
check arm bracket to the body and
disconnect the arm.
3 Remove the scuff plate from the
sill at the
bottom of the door aperture. 11
4 Unclip the lower cowl side trim panel, and
where fitted remove the
radio speaker
(Chapter 12).
5 Remove the heater duct.
6 On cars with electrically operated windows,
mirrors or central locking, disconnect the
wiring multi-plug from inside the passenger
compartment and feed the wires through the
aperture in the pillar.
7 Unbolt the door lower hinge from the body
pillar (see illustrations).
8 Unbolt the upper hinge from the body pillar, 12.10a Front door upper hinge pin 12.10b Front door upper hinge pin removal
then lift the door from the vehicle. (arrowed) on 1986 models onwards using special tool - 1986 models onwards 11·8 Bodywork and fittings
13.2 Peel back the waterproof sheet for 13.3 Door exterior handle retaining screws 13.7 Remote control handle retaining access to the door handle (arrowed) screw (arrowed)
14 Unbolt the hinges from the door and Refitting is to be renewed, the later type of lock must
remove the door from the vehicle. 8 Refitting is a reversal of removal, but ensure be fitted as follows.
Refitting that the lock operating rod is correctly 17 On models with central locking,
15 Refitting is a reversal of removal, but do reconnected. Refit the door trim panel with disconnect the battery negative lead.
not fully tighten the hinge bolts until the reference to Section 11. 18 Remove the door inner trim panel with
alignment of the door within the body aperture reference to Section 11.
has been checked. Door lock and cylinder 19 Peel back the waterproof sheet as All models except Cabriolet necessary to gain access. 13 Door handle and lock 20 Disconnect the control rods from the lock. Removal components - removal and 9 Remove the door trim panel (Section 11). 21 To remove the lock cylinder, pull out the refitting retaining clip and seal, and withdraw the 10 Peel back the waterproof sheet as cylinder. necessary to gain access. 11 On 1986 models onwards, remove the 22 On certain models, the lock is secured to
Door exterior handle the door with rivets. Drill out the rivets, or exterior handle as described previously in this Section. remove the securing screws, as applicable.
Removal 12 Disconnect the control rods from the lock. 23 Withdraw the lock from the door, and
1 Remove the door trim panel (Section 11). where applicable remove the central locking 13 To remove the lock cylinder, pull out the
2 Peel back the waterproof sheet as solenoid from the lock. retaining clip and seal and withdraw the
necessary to gain access (see illustration). cylinder (see illustration). 24 Remove the plate from the inside edge of
3 Undo the two screws and withdraw the 14 Remove the lock by extracting the three the door.
handle from the door (see illustration). securing screws and lowering the lock Refitting
4 Disconnect the control rod and remove the sufficiently to permit the cylinder lock rod to 25 If the lock was secured to the door with
handle. clear the lock housing (see illustration). Turn rivets, the door must be drilled as shown, in
Refitting the latch around the door
frame and withdraw order to accept the securing screws for the
5 Refitting is a reversal of removal. the assembly through the rear cut-out in the new lock (see illustration). Apply suitable door. corrosion protection and repaint the area
Door interior handle Refitting around the holes. 15 Refitting is a reversal of removal.
Removal 26 Remove the shaded area of the new Cabriolet models threaded plate, as shown (see illustration).
6 Remove the door trim panel (Section 11).
7 Remove the interior handle securing screw, Removal
then manipulate the handle from the door and 16 From late 1984, Cabriolet models were
disconnect the lock operating rod (see fitted with revised door locks. Due to it no
illustration). longer being available, if an early type of lock
13.25 Drill the door at the points indicated when fitting a new lock to early Cabriolet models 13.13 Door lock cylinder retaining clip 13.14 Door lock retaining screws A Existing holes (arrowed) (arrowed) Note: dimensions given in millimetres Bodywork and fittings 11·9
27 Where applicable, fit the central locking
solenoid to the new lock, then fit the threaded
plate in the door, and fit the lock. Tighten the
securing screws finger-tight only at this stage.
28 Reconnect the control rods to the lock.
29 If a later type lock is being fitted to a
model which was previously fitted with an
early type lock, a revised lock striker plate
must also be fitted. Where applicable, fit the
new striker plate and tighten the securing
screws finger-tight.
30 Close the door once to achieve correct
alignment between the lock and striker, then
open the door and tighten the lock and striker
securing screws securely. 13.26 Remove the shaded area (A) when 14.5 Glass run extension retaining screw
31 Refit the waterproof sheet and the door fitting a new door lock threaded plate to (arrowed)
inner trim panel with reference to Section 11. early Cabriolet models
32 Where applicable, reconnect the battery
negative lead. Refitting under the lip of the weatherstrip. Make any 7 Refitting of the door glass is the reversal of final adjustments as necessary. 14 Door window glass and the removal procedure. On completion check regulator - removal and that the window operates freely before Front door window glass - models refitting refitting the waterproof sheet and trim to the with electric windows door. Removal
Front door window glass - models Cabriolet models 15 Lower the window fully on the door that is
with manual windows Removal being dismantled. 8 Remove the door trim panel as described in 16 Disconnect the battery.
Saloon, Estate and Van models Section 11. 17 Remove the door trim panel as described
Removal 9 Carefully peel back the waterproof sheet in Section 11.
1 Remove the door trim panel, as described from the door. 18 Disconnect the motor wiring multi-plugs
in Section 11. 10 Remove the door weatherstrip and rubber and retaining clips.
2 Carefully peel back the waterproof sheet end block. 19 Remove the mounting screws from the
from the door. 11 Lower the window and, working through motor and the regulator - three screws each.
3 Prise off the inner and outer glass the aperture, disconnect the linkage arms 20 Extract the retaining screw from the door
weatherstrips. from the bottom rail. glass channel. Detach the channel from the
4 Lower the window so that the regulator 12 Lift the glass upwards from the door. door.
connector is level with the door lower Refitting 21 Remove the glass as described previously
aperture. 13 Refitting is a reversal of removal, but in this Section for models with manual
5 Remove the single screw which retains the adjust the window stop as follows. windows.
glass run extension (accessible through the 14 Loosen the adjustment bolt, then raise the
small aperture at the lower corner of the door) window until the top edge of the glass Refitting
(see illustration). touches the top guide seal (see illustration). 22 Refitting is a reversal of removal; ensure
6 Detach the window channel from the Now position the stop on the regulator that the wiring is secured out of the way of the
regulator ball and socket joints then raise and mechanism and tighten the bolt. Check that, window regulating system, and check that the
remove the window from the exterior side of with the door shut and the window fully window operates freely before refitting the
the door (see illustrations). raised, the top front corner of the glass is waterproof sheet and trim to the door.
11
14.6a Window channel to regulator 14.6b Removing the door window glass 14.14 Window stop adjustment bolt - attachments (A) and glass run extension Cabriolet models securing screw (B) 11·10 Bodywork and fittings
39 Lower the glass so that the channel and regulator attachments are accessible through the door aperture. Detach the ball and socket joints (two for the front door, one for the rear door). 40 Lower the glass to the base of the door, then undo the seven screws, or drill out the seven rivets on later models, which secure the regulator in position. Note that on some models only five retaining rivets may be used (see illustrations). 41 With the screws or rivets removed, the regulator unit can be withdrawn from the aperture in the door (see illustration). 14.35 Removing the rear door quarter 14.38 Peeling back the door waterproof window sheet Refitting 42 Refitting is a reversal of the removal
Rear door sliding window glass - Rear door fixed window glass procedure. Align the regulator with the
models with manual windows respective holes before screwing or pop Removal riveting it to secure. The ball and socket joints
Removal 30 Remove the door trim panel, as described are a push-fit to the glass channel, but
23 Proceed as described in paragraphs 1 to 4. in Section 11. support the channel when pushing on the
24 Remove the upper and lower screws 31 Carefully peel back the waterproof sheet joint.
which secure the divisional channel and from the door. 43 Since the screw fixing regulator is no
quarter window in position. Remove the door 32 Prise off the inner and outer glass longer being manufactured, replacing the
quarter window. weatherstrips. regulator on early models with the later type
25 Detach the window channel from the 33 Lower the sliding window so that the regulator necessitates drilling out the retaining
regulator ball and socket joints then raise and regulator connector is level with the door holes to 7 mm (0.276 in). Special J-nuts must
remove the window from the interior side of lower aperture. then be fitted to the regulator positioned in
the door. 34 Remove the upper and lower screws line with each of the seven securing holes. which secure the divisional channel and The regulator can then be attached to the
Refitting quarter window in position. door shell using seven M6 x 10 mm screws.
26 Refitting of the door glass is the reversal of 35 Remove the door quarter window (see Do not use any other screw type.
the removal procedure. On completion check illustration).
that the window operates freely before refitting Electric window regulator
the waterproof sheet and trim to the door. Refitting 36 Refit in reverse order of removal. On All models except Cabriolet
Rear door sliding window glass - completion check that the sliding window can Removal
models with electric windows be freely regulated before refitting the 44 Lower the window fully. waterproof sheet and door trim. 45 Disconnect the battery.
Removal 46 Remove the door trim panel as described
27 Proceed as described in paragraphs 15 Manual window regulator (all in Section 11.
to 20. except Cabriolet rear quarter 47 Disconnect the motor wiring multi-plugs
28 Remove the glass as described previously window regulator) and retaining clips.
in this Section for models with manual Note: Seven M6 x 10 mm screws will be 48 Remove the mounting screws from the
windows. required to secure the regulator on refitting. motor and the regulator - three screws each (see illustration).
Refitting Removal 49 Extract the retaining screw from the door
29 Refitting of the door glass is the reversal of 37 Remove the door trim panel, as described glass channel. Detach the channel from the
the removal procedure. On completion check in Section 11. door and remove the door glass as described
that the window operates freely before refitting 38 Carefully peel back the waterproof sheet previously in this Section for models with
the waterproof sheet and trim to the door. from the door (see illustration). manual windows.
14.40a Removing the regulator retaining 14.40b Regulator retaining
rivet location 14.41 Withdrawing the window regulator screws (arrowed) Bodywork and fittings 11·11
14.48 Electric window regulator 14.51 Twist the motor clockwise to clear 14.53 Withdrawing the window motor and mechanism the door aperture regulator from the door A Regulator mounting screws whole assembly in a clockwise direction and Cabriolet models B Motor mounting screws guide it out of the cut-out (see illustration). Removal C Glass channel fixing screw 54 Remove the two Allen screws from the 58 Proceed as described in paragraphs 44
50 Grip the motor mounting plate in one regulator travel stop, and the single screw to 47, then lower the window so that the window
hand and the regulator in the other. Raise the from the regulator gear guide (see securing channel can be seen through the lower
regulator and at the same time pull the motor illustrations). opening in the door. It may be necessary to
towards the hinge end of the door. 55 Extract the circlip from the motor temporarily connect the wiring to do this.
51 Slowly twist the motor in a clockwise driveshaft and remove the drivegear. 59 Remove the regulator securing bolts and
direction and at the same time
fold the 56 Move the regulator to expose the motor nuts (see illustration).
regulator over the top of the motor so that it mounting bolts. Extract the bolts and separate 60 Release the regulator mechanism rollers
comes to rest on the lock side of the door the motor from the regulator (see from the window securing channels and
(see illustration). illustration). remove the glass from the door (as described
52 Rotate the motor mounting in an anti- Refitting 57 Reassembly and refitting is a reversal of previously in this Section).
clockwise direction until a corner of the
mounting comes into view in the cut-out of the dismantling and removal procedures. 61 Release the wiring loom and remove the
the door. Before refitting the door trim check that the regulator mechanism from the door (refer to
53 Move the assembly so that this corner wiring is secured out of the way of the window the previous sub-Section describing the
projects through the cut-out and then turn the regulating system. procedure for non-Cabriolet models). Refitting 62 Begin refitting by locating the regulator mechanism loosely in position in the door. 63 Refit the wiring loom. 64 Refit the window glass and insert the rollers of the regulator mechanism into the window securing channel. 65 Fit and tighten the regulator securing bolts and nuts. 66 Fit the inner and outer door weatherstrips. 67 Raise the window fully and check that the edge of the glass is in alignment with the roof seal. 68 Adjust the height and alignment of the glass using the screws indicated (see 14.54a Removing the window motor 14.54b Window motor driveshaft circlip (A) illustration). regulator travel stop - Allen screws and gear guide retaining screw (B) arrowed
11
14.68 Adjusting screws (arrowed) for electric window glass on Cabriolet models 14.56 Window motor mounting bolt 14.59 Electric window regulator securing locations (arrowed) bolts and nuts (arrowed) - Cabriolet models A Glass height B Glass alignment 11·12 Bodywork and fittings
14.80 Rear quarter window adjustments - Cabriolet models 15.2 Electrical connections at the tailgate (1986 model shown) A Wiper motor C Feed and relay connectors B Radio aerial connection D Earthing point
69 The remainder of the refitting procedure is 79 To remove the regulator, extract the six 6 From the top edge of the tailgate aperture,
a reversal of removal. screws and withdraw it through the aperture. remove the weatherstrip. Release the Refitting headlining clips from the flange.
Rear quarter window glass and 7 Undo the screws and remove the pillar trim
regulator - Cabriolet models 80 Refitting is a reversal of removal, but on each side, then pull the headlining down adjust the glass so that the upper and rear for access to the hinge bolts.
Removal edges touch the weatherstrip using the 8 With the tailgate supported, undo the nuts
70 Fully lower the roof and remove the screws shown (see illustration). from the hinge bolts and remove the tailgate.
weatherstrip and window channel from the
centre pillar. 15 Tailgate - removal and Refitting
71 Extract the clip and pull back the trim to
expose the upper seat belt anchorage. refitting 9 Refitting is a reversal of removal. Adjust the position of the tailgate in the aperture at the
Unscrew the bolt and place the seat belt to hinge bolts and the closing action at the
one side. Removal striker plate.
72 Lower the window and remove the 1 Remove the trim panel (Section 32).
regulator handle. 2 Disconnect the wiring from the heated rear 16 Tailgate/boot lid lock and
73 Fold the rear seat cushion forwards. window element, radio aerial, wiper motor
74 Remove the inner and outer window tailgate speakers and tailgate lock motor as cylinder - removal and refitting
weatherstrips and the quarter panel rubber applicable (see illustration).
end block. 3 Tie a strong
cord to the end of each Removal
75 Remove the front quarter trim panel. separate wiring loom. Pull out the flexible
76 Remove the roof lever knob and bezel, 1 Remove the trim panel as described in grommets and withdraw the wiring
looms until
then remove the trim panel (3 screws) with the Section 32. the cords appear. Untie the looms, leaving the
lever in the locked position and disconnect 2 Extract the lock cylinder retaining clip, cords in the tailgate.
the speaker wires. disconnect the control rods and remove the 4 Repeat this procedure for the washer
77 Peel off the waterproof sheet then, cylinder. supply pipe.
working through the aperture, unbolt the 3 Undo the three screws and detach the lock 5 With an assistant supporting the tailgate,
window rail from the regulator. assembly (see illustration). prise off the stout clips or release the pegs
78 Move the window rearwards from the and disconnect the support struts from the
regulator then lift it from the car. Refitting tailgate (see illustration). 4 Refitting is a reversal of removal
17 Boot lid (Cabriolet models) - removal and refitting
Removal 1 Open the boot and
prop it open using a length of wood. 2 Pull out the clips securing the gas strut and remove the strut. 3 Working inside the boot, undo the nuts securing the hinge assemblies to the
framework .
15.5 Releasing tailgate strut retaining clip 16.3 Tailgate lock retaining screws 4 Ease the lid rearwards to disengage the (arrowed) studs, and lift the lid away. Bodywork and fittings 11·13
5 The hinge assemblies can be removed from
the lid by prising off the plastic covers and
undoing the bolts securing the hinges to the
lid. One is accessible from outside and one
from inside.
Refitting
6 Refitting is a reversal of removal, but do not
fully tighten the bolts until the lid has been
lined up and closed properly.
18 Central door locking system components - removal and refitting
General
1 On pre-1986 models the locks, with the
exception of the one on the driver's door, are
actuated by solenoids (see illustration). On
1986 models onwards, the locks are actuated
by electric motors.
Switch (driver's door lock)
Removal
2 Raise the driver's door lock fully.
3 Disconnect the battery.
4 Remove the door trim panel (Section 11).
5 Disconnect the wiring plugs inside the door
cavity and release the wires from their clips.
6 Release the lock control rods and remove
the lock fixing screws.
7 Remove the lock from the door interior by
guiding it round the glass guide channel.
8 Extract the two screws and remove the
switch from the lock.
Refitting 18.1 Layout of the solenoid operated central door locking system as fitted to pre-
9 Refitting is a reversal of removal, but before 1986 models
refitting the door trim panel check that the A Front door components B Rear door components C Tailgate components
wires within the door cavity are out of the way
of the window regulating mechanism and
secured by strap clips. 12 Pull the relay from its securing clips (see Solenoids - pre-1986 models
Control relay illustration).
Removal 13 Disconnect the multi-plug and remove the Front door relay. Removal
10 Disconnect the battery.
11 Remove the under-facia trim panel from Refitting 15 Disconnect the battery.
the passenger side. 16 Remove the door trim panel as described 14 Refitting is a reversal of removal. in Section 11. 17 Disconnect the lock operating rods and extract the three lock fixing screws (see illustration). 18 Release the wiring from the clips, manoeuvre the lock round the door glass 11 guide channel and remove it through the cut- out in the door panel (see illustration). 19 Separate the solenoid from the lock after extracting the fixing screws. Refitting 20 Refitting is a reversal of removal, bearing in mind the following points. a) When fitting the door lock solenoids, 18.17 Door locking rod attachments - pre- locate the guide lock assembly into 18.12 Central locking solenoid relay 1986 models position, but do not fully tighten the location behind glovebox - pre-1986 A, B and C Control rods retaining screws until after the bellcrank models D Lock retaining screws and rubber operating rod guides, and the 11·14 Bodywork and fittings
18.18 Door lock solenoid removal - 18.33 Tailgate lock and solenoid 18.42 Door lock motor location - 1986 pre-1986 models components - pre-1986 models models onwards
internal lock operating lever are fitted. A Lock barrel clip C Lock fixing bolts 41 Remove the door trim panel (Section 11). b) Check that, when the solenoid is in the B Lock rod clip 42 Undo the two retaining screws, or drill out unlocked position, the gaiter has an Remove the cylinder. the bracket rivets, and withdraw the motor uncompressed length of 20 mm (0.78 in). 31 Slightly lower the tailgate and working (see illustration). c) Before refitting the door trim panel check through the lock cylinder hole, move the lock 43 Disconnect the motor from the operating that the wires within the door cavity are lever away from its spring until the lock rod, disconnect the wiring multi-plug and out of the way of the window regulating engages. remove the motor. mechanism and secured by strap clips. 32 Disconnect the solenoid wiring. Refitting 33 Extract the lock fixing bolts and remove 44 Refitting is a reversal of removal.
Rear door the lock (see illustration). Tailgate and boot lid
Removal 34 Insert a screwdriver through the aperture
21 Disconnect the battery. left by removal of the lock and unscrew the Removal
22 Remove the door trim panel as described two solenoid fixing screws. Withdraw the 45 Disconnect the battery.
in Section 11. solenoid. 46 Open the tailgate or boot lid and remove
23 Remove the bellcrank and operating lever Refitting the trim panel where applicable (see Section
by extracting the securing screws. 35 Refitting is a reversal of removal. 32).
24 Release the operating rod rubber 47 Disconnect the motor wiring multi-plug.
insulators from the door and disconnect the Boot lid (Cabriolet) 48 Undo the motor retaining bolts,
wiring. Removal disconnect the operating rod and remove the
25 Extract the lock securing screws, push 36 Disconnect the battery. motor.
the lock into the door cavity and then 37 Remove the boot lid lock unit, as Refitting
withdraw the lock with the operating rods described in Section 16, and disconnect the 49 Refitting is a reversal of removal.
through the cut-out in the door panel. solenoid wiring.
26 Extract the screws and disconnect the 38 Unscrew and remove the two solenoid 19 Exterior mirror - removal and
solenoid from the lock. retaining screws, unhook the operating shaft
Refitting refitting and withdraw the solenoid.
27 Refer to paragraph 20. Refitting
Tailgate Without remote control 39 Refitting is a reversal of removal.
Removal Removal
28 Disconnect the battery. Motors - 1986 models onwards
29 Open the tailgate and remove the trim 1 Using a screwdriver, prise off the triangular
panel (see Section 32). Front and rear doors trim panel from inside the mirror mounting Removal position.
30 Remove the lock rod clip and then prise 2 Unscrew the three screws and withdraw the
out the clip which retains the lock cylinder. 40 Disconnect the battery. mirror. Refitting 3 Refitting is a reversal of removal. With remote control Removal 4 Two types of remote control mirror are used on Escort models. On the original version, a special wrench is needed to unscrew the mirror actuator bezel, although a C-spanner may
serve as a substitute. Once the bezel is removed the mirror is removed as for the non- remote control type. 5 On later versions extract the retaining
19.5a Remote control mirror handle circlip 19.5b Removing the remote control handle circlip and pull off the remote control handle (see illustrations). Bodywork and fittings 11·15
19.6a Extract the trim cover and undo the 19.6b . . . then remove the trim panel 19.7 Removing the door mirror retaining screw . . . screws
6 Extract the trim cover, undo the screw and and the screen is fully fitted.
remove the triangular trim panel (see 20 Windscreen and fixed 11 If a bright moulding was removed, refit it
illustrations). window glass - removal and now. This can be one of the most difficult
jobs 7 Undo the three screws and remove the refitting to do without a special tool. The moulding
mirror (see illustration). should be pressed into its groove just after the groove lips have been prised open to receive
Refitting Windscreen it. Take care not to cut the weatherstrip if
8 Refitting is a reversal of removal. improvising with a made-up tool. Note: The average DIY mechanic is advised to
Electrically-operated mirrors leave windscreen removal and refitting to an Tailgate glass expert. For the owner who insists on doing it 12 The operations are very similar to those
Removal himself, the following paragraphs are given. described for windscreen renewal in the
9 Initially disconnect the battery earth lead or Removal preceding sub-Section.
remove the heated window fuse from the 1 All models are fitted with a
laminated glass 13 Disconnect the leads from the heated rear
fusebox. screen and in consequence even if cracked, it window/radio aerial and the wiper motor
10 Remove the door trim panel as described will probably be removed as one piece. (where fitted).
in Section 11 and disconnect the wiring multi- 2 Cover the bonnet in front of the windscreen 14 The tailgate glass is of toughened type,
plug. The mirror is then removed in the same with an old
blanket to protect against not laminated, so if it has shattered, remove
way as the non-remote control type. scratching. all granular glass with a small vacuum cleaner.
Refitting 3 Remove the wiper arms and blades (see Rear window glass - Cabriolet Chapter 12). models
11 Refitting is a reversal of removal, but 4 Working inside the vehicle, push the lip of
check the operation of the mirror before finally the screen weather seal under the top and the Removal
refitting the door trim panel. sides of the body aperture flange. 15 Disconnect the heated rear window wiring
Mirror glass renewal 5 With an assistant standing outside the car and pull the wiring from the weatherstrip. to restrain the screen, push the glass with 16 Have an assistant support the window
Removal weather seal out of the bodyframe. frame from outside then push out the glass
12 On "high specification" models with fixed 6 Where fitted, extract the bright moulding from the inside.
(ie not remote control) mirrors, lever the glass from the groove in the weatherstrip and then 17 Remove the weatherstrip from the glass pull the weatherstrip off the glass. and clean away all traces of sealant.
assembly outwards to disengage it from the 7 Unless the weatherstrip is in good
balljoint on the mirror glass mounting. Refitting condition, it should be renewed.
13 On "low specification" models with fixed 8 Although sealant it not normally used with 18 Refit in reverse order to removal using the
(ie not remote control) mirrors, unclip the these screens, check that the glass groove in method described previously in this Section
cover, then remove the securing screw and the weatherstrip is free from sealant or glass for the windscreen, and finally apply suitable
withdraw the glass assembly. chippings. sealant beneath the outer lip of the
14 On models with remote control mirrors, Refitting weatherstrip.
insert a thin screwdriver through the hole in the
bottom of the mirror assembly, and whilst 9 Commence refitting by fitting the Fixed rear quarter window 11
supporting the glass, move the tang in the weatherstrip to the glass. Locate a length of
direction of the door to release the locking ring. nylon or terylene cord in the body flange Removal
Refitting groove of the weatherstrip so that the ends of 19 The glass is removed complete with the cord emerge at the bottom centre and weatherstrip by pushing it out from inside the
15 On "high specification" models with fixed cross over by a length of about 150 mm. vehicle.
mirrors, carefully push the glass into position, 10 Offer the screen to the body and engage 20 The lip of the weatherstrip must be
ensuring that the balljoint engages securely. the lower lip of the weatherstrip on its flange. released from the top and sides of the window
16 On "low specification" models with fixed With an assistant applying gentle, even aperture using a suitable tool before exerting
mirrors, secure the glass with the screw, and pressure on the glass from the outside, pull pressure to remove the assembly.
refit the cover. the ends of the cord simultaneously at right-
17 On models with remote control mirrors, angles to the glass. This will pull the lip of the Refitting
ensure that the locking ring is in place, then weatherstrip over the body flange. Continue 21 Refit using a cord as described previously
carefully push the glass into position. until the cord is released from the centre top in this Section for the windscreen. 11·16 Bodywork and fittings
21 Sunroof components - removal, refitting and adjustment
Sunroof panel
Removal
1 To remove this type of glass panel, pull the
sun blind into the open position and have the
sliding roof closed.
2 Wind the sliding roof handle in an anti-
clockwise direction for one complete turn.
3 Remove the three screws and clips which 21.8 Fixing sequence for sunroof panel 21.15 Sunroof sliding gear to roof screws
connect the lower frame and glass. retaining screws
4 Turn the handle to close the sliding roof and tamping tool to ensure that the tensioning
remove the three screws from each side
which hold the glass to the sliding gear. 22 Folding roof (Cabriolet cable is fully inserted in the rail. A little sealant
5 Remove the glass panel by lifting it from the models) - removal and refitting should be applied at the points where the
outside of the vehicle. cable passes through the covering.
Refitting Removal 23 Power-operated folding roof
6 To refit the panel, have the roof closed, 1 Remove the rear side, wheel arch and roof - fluid level checking and
locate the glass and secure with the three stowage compartment trim panels.
screws on each side. Once the screws are bleeding 2 Disconnect the heated rear window wiring
secure give the handle one complete turn in a and pull it from the weatherstrip.
clockwise direction. 3 Release the roof front locking catches. General
7 Set the glass to align with the roof panel 4 Unscrew the nuts and remove the rear
and locate the lower frame to glass brackets. 1 As from 1987, a power-operated folding window frame guides.
Insert the clips through the brackets. roof is available as an option on Cabriolet 5 Remove the protection cover screw and the
8 Insert the retaining screws in the sequence models. tensioning screw from each side (see
shown (see illustration). 2 The roof is operated hydraulically from an illustration). 6 Unscrew the nuts at both tensioning cable electric pump located in the left-hand side of
Adjustment the boot. Hydraulic rams, mounted on each blocks.
9 The sunroof panel can be adjusted within side of the vehicle by the rear wheel housings, 7 Pull the roof and cable from the rail and
its aperture and for flush fitting with the roof actuate the roof folding mechanism. A control release the cable.
panel in the following way. switch is mounted on the centre console. In
10 To correct the panel-to-aperture gap, 8 With the roof frame upright, unbolt the strap retaining brackets. the event of failure, the roof can be operated
bend the weatherstrip flange as necessary. manually by opening a bypass valve on the
11 To adjust the panel height at its front 9 Remove the headlining wire screw and unhook the wire. side of the pump.
edge, release the corner screws, raise or 3 The system is sealed and requires no
lower the panel as necessary and retighten 10 Disconnect the gas struts. 11 Lower the front of the roof then unscrew regular maintenance apart from periodic
the screws. the three mounting bolts on each side. checking of the fluid level.
12 To adjust the panel height at its rear edge,
release the two screws at each side on the 12 Lift the complete folding roof from the car. Fluid level checking
link assemblies and push the links up or down Refitting 4 The level should be checked with the roof
within the limits of the elongated screw holes.
Retighten the screws when alignment is 13 Refitting is a reversal of removal, but do open. With the roof in the closed position, the
correct. not tighten the mounting bolts or tensioning level will be lower due to the displacement of block nuts until the front of the roof is locked the hydraulic rams.
Sunroof sliding gear and the rear beading is in the rail (see 5 Pull down the trim panel/pump cover on the illustration). It may be necessary to use a left-hand side of the boot.
Removal
13 Remove the glass panel as described
previously in this Section.
14 Turn the sliding roof regulator handle
clockwise to the fully closed position. Extract
the three screws and remove the regulator
handle and the handle cup.
15 Extract the four screws from each side
which hold the sliding gear to the roof (see
illustration). Lift up the front of the gear and
withdraw it from the front of the sliding roof
aperture.
Refitting
16 Refitting is a reversal of removal, but if
necessary adjust the sunroof panel as 22.5 Protection cover screw (A) and 22.13 Cable tensioning block nut
described previously in this Section. tensioning screw (B) - Cabriolet models (arrowed) - Cabriolet models Bodywork and fittings 11·17
23.6 Fluid level
sight glass for power- 23.7 Filling the power-operated folding 23.9 Bypass valve (arrowed) on side of operated folding roof roof fluid pump reservoir power-operated folding roof fluid pump
6 Check that the fluid in the reservoir on the jerking, and the level of noise from the pump apply locking compound to them, then fit the
end of the pump is between the "MIN" and will be
steady . stud and tighten it securely.
"MAX" marks on the sight glass (see 14 Top-up the system, tighten the filler plug 12 Refit the hydraulic rams as described
illustration). and refit disturbed panels. previously in this Section.
7 If the level requires topping-up, remove the
filler plug from the top of the pump reservoir Pump 24 Power-operated folding roof
and fill the reservoir with the specified fluid
until the level reaches the "MAX" mark (see components - removal and Removal
illustration). refitting 13 Disconnect the battery, then pull down
8 Refit the filler plug and trim panel. the pump cover in the boot and open the bypass valve by 90 to 180 degrees. Do not
Bleeding Hydraulic rams open it any further.
9 Open the bypass valve on the side of the Removal 14 Open the roof manually.
pump body (see illustration). 15 Remove the floor panel and left-hand 1 Remove the rear wheelhouse covers with wheelhouse panel from the boot. This involves
10 Open, close and re-open the roof reference to Section 32. propping open the boot lid and disconnecting
manually. 2 Mark the two hoses connected to the ram the supporting gas strut from the lower
11 Fill the reservoir to the "MAX" mark, then as a guide to reassembly, then remove the balljoint.
fit the filler plug loosely and close the bypass circlips securing the ram to the two studs on 16 Release residual pressure in the system
valve on the side of the pump. the framework. by opening the filler plug on the pump.
12 Open and close the roof several times 3 Release residual pressure in the system by Tighten the plug when the pressure has been
using the power mode. opening the filler plug on the pump body. released.
13 When all air has been bled from the 4 Loosen the hydraulic unions on the ram, 17 Disconnect the electrical lead to the
system the roof will operate smoothly without then remove the ram from the studs and lay it pump. in a suitable container in the boot. Undo the 18 Remove the nuts securing the pump to the unions and catch the hydraulic fluid in the boot floor, and place the pump in a suitable container (see illustration). container to catch the fluid which will be spilt 5 If the unions are to remain disconnected for when the pump hoses are disconnected. any length of time, cover the ends to prevent 19 Mark the hoses as a guide to reassembly, dirt entering the system. then undo their connections (see illustration). Refitting Cover the open ends if they are to remain disconnected for any length of time. 6 Refitting the ram is a reversal of removal, noting that the large circlip is fitted to the lower stud. 7 On completion, fill and bleed the system as described in Section 23. Hydraulic ram upper pivot stud Removal 11 8 Should the hydraulic ram pivot stud break in service it can be renewed as follows. 9 Open the tap on the hydraulic pump, then manually open the roof halfway. 10 Using a mole wrench, remove the broken end of the pivot stud from the framework. If the remaining stud is too short it may be 24.19 Power-operated folding roof fluid possible to remove it using a proprietary stud pump removed from mounting with hoses extractor kit. marked
24.4 Power-operated folding roof hydraulic
ram assembly - hydraulic unions (arrowed) Refitting A Filler plug C Wiring plug A and B Upper and lower clips 11 De-grease the threads on the new stud, B Hydraulic unions D Pump mountings 11·18 Bodywork and fittings
24.22 Routing of power-operated folding 25.2a Front
spoiler attachments - 25.2b Front wheel arch extension roof hydraulic hoses XR3 models attachments - RS Turbo models A Retaining screws B Retaining pegs A and B Rivets D Screw cap
Refitting C Screws
20 Refitting is a reversal of removal. used to separate them from their mounting Rear seat cushion
21 On completion, fill and bleed the system surfaces (see illustration).
as described in Section 23. Removal Refitting
Hydraulic hoses 7 Unscrew and remove the Torx (socket- 6 New emblems have adhesive already headed) screws from the seat cushion hinges applied and a protective backing. Before
Removal which are located on each side. sticking them into position, clean off all the old
22 Renewing the hydraulic hoses involves 8 Lift the cushion from the floor and remove it adhesive from the mounting surface of the
disconnecting the relevant hose connections from the vehicle. vehicle.
from the pump or ram (see earlier Refitting
paragraphs), noting its routing, and where it is 9 Refitting is a reversal of removal.
clipped or taped to other components (see 26 Seats - removal and refitting
illustration). Rear seat backrest
Refitting Removal
23 Refit in the reverse order to removal. Front seat 10 Fold the seat cushion forward and then
24 On completion, fill and bleed the system Removal fold the seat back down to expose the hinges.
as described in Section 23. 11 Extract the screws which hold the 1 Slide the seat as far forward as it will go. 2 Unscrew and remove the bolts which retain backrest to the hinges. 25 Body exterior fittings - the rear of the seat
slides to the floor pan. 12 Remove the backrest from the vehicle. removal and refitting 3 Slide the seat as far to the rear as it will go Refitting and remove the bolts which secure the front 13 Refitting is a reversal of removal. ends of the slides to the floor.
Spoilers and wheel arch 4 Remove the seat from the vehicle interior.
deflectors 5 If the seat slides must be detached from the 27 Seat belts - removal and
Removal seat, invert the seat and remove the two bolts refitting from each side. Detach the cross-rod and
1 The spoilers and wheel arch deflectors clips.
fitted to XR3, XR3i, Cabriolet and RS Turbo Front belt - 3-door models
models are secured by screws, rivets and Refitting Note: Note the fitted sequence of any plates,
clips, or a combination of all three. 6 Refitting is a reversal of removal. Tighten washers and spacers when unbolting the seat
2 The screw and rivet fasteners are the front bolts before the rear ones to ensure belt anchors.
concealed under blanking plugs which are that the seat is located evenly on the floorpan.
prised out to gain access to the screw or rivet Removal
as applicable (see illustrations). These can 1 Slide the belt
stalk cover upwards to
then be drilled out or unscrewed and the expose the anchor bolt.
spoiler or wheel arch deflector withdrawn. 2 Unbolt the stalk.
Refitting 3 Unbolt the lower anchor rail, pull the end of the rail away from the panel and slide the belt
3 Refitting is a reversal of removal. from it.
Body adhesive emblems and 4 Prise the moulded cap from the centre pillar
mouldings anchorage and remove the bolt. 5 Prise the belt guide
runner from the rear
Removal quarter trim panel and slide the runner from
4 The radiator grille
emblem , the front wing the belt.
motif, the tailgate emblems and the body side 6 Remove the rear quarter trim panel
mouldings are all of the self-adhesive type. (Section 32).
5 To remove these devices, it is 25.5 Removing tailgate adhesive badge 7 Unbolt the
reel /belt assembly from the inner
recommended that a length of nylon cord is rear quarter body panel. Bodywork and fittings 11·19
Refitting Refitting 5 If a new windscreen is being installed, peel
8 Refitting is a reversal of removal, but ensure 26 Refitting is a reversal of removal, but off the protective layer from the black
patch ,
that any spacers, plates and washers are in ensure that any spacers, plates and washers which is pre-coated with adhesive.
correct sequence and tighten all bolts to the are in correct sequence and tighten all bolts to 6 Peel off the protective layer from the mirror
specified torque wrench settings. the specified torque wrench settings. adhesive patch and locate the mirror precisely onto the black patch on the screen. Hold it in
Front belt - 5-door models Rear belt - Estate models position for at least two minutes.
Note: Note the fitted sequence of any plates, Note: Note the fitted sequence of any plates, 7 For best results, the fitting of a bonded type
washers and spacers when unbolting the seat washers and spacers when unbolting the seat mirror should be carried out in an ambient
belt anchors. belt anchors. temperature of 70°C (158°F). The careful use of a
blower heater on both the glass and
Removal Removal mirror should achieve this temperature level.
9 Proceed as described in paragraphs 1 and 2. 27 Proceed as described in paragraphs 20
10 Prise the moulded cap from the centre to 22. 29 Rear parcel shelf - removal
pillar anchorage and remove the bolt. 28 Raise the moulded cap from the support and refitting
11 Remove the pillar lower trim panel (see strap mounting, slide the mounting plate to
Section 32). one side until the large hole passes over the
12 Unbolt the inertia reel and the anchor bolt head and the strap can be removed. Removal
plate from the centre pillar. 29 Unscrew the cap and bolt. 1 Open the tailgate fully and disengage the
Refitting 30 Raise the cover on the inertia reel to parcel shelf lifting strap loops from the tailgate expose the bolt and unbolt the reel. retaining knobs.
13 Refitting is a reversal of removal, but
ensure that any spacers, plates and washers Refitting 2 Lift out the parcel shelf pivot pins from their
are in correct sequence and tighten all bolts to 31 Refitting is a reversal of removal, but notches in the support brackets and withdraw
the specified torque wrench settings. ensure that any spacers, plates and washers the shelf. are in correct sequence and tighten all bolts to 3 Pull each strap loop through its hole in the
Front belt - Cabriolet the specified torque wrench settings. rear edge of the shelf by disengaging the
Note: Note the fitted sequence of any plates, upper and lower retaining collars.
washers and spacers when unbolting the seat Rear belt - Cabriolet 4 The shelf brackets are secured with pop
belt anchors. Note: Note the fitted sequence of any plates, rivets which must be drilled out if the brackets washers and spacers when unbolting the seat are to be removed.
Removal belt anchors. Refitting
14 Unbolt the centre stalk.
15 Remove the clip and pull back the trim to Removal 5 Refitting is a reversal of removal.
expose the upper anchor. Unscrew the 32 Raise the rear seat cushion.
anchor bolt. 33 Release the buckles from the elasticated 30 Centre console - removal and
16 Unbolt and pull out the lower mounting straps.
rail. Slide the belt from the rail. refitting 34 Unbolt the seat belts from their floor
17 Remove the rear quarter trim panel then mountings.
pull the belt through the slot in the panel and Refitting Removal
through the pillar guide. 35 Refitting is a reversal of removal, but 1 Remove the gear lever knob.
18 Unbolt the inertia reel unit. ensure that any spacers, plates and washers 2 Pull the rubber gaiter up the lever and
Refitting are in correct sequence and tighten all bolts to remove it.
19 Refitting is a reversal of removal, but the specified torque wrench settings. 3 Undo the four screws and remove the
ensure that any spacers, plates and washers console (see illustrations).
are in correct sequence and tighten all bolts to Refitting
the specified torque wrench settings. 28 Interior mirror - removal and refitting 4 Refitting is a reversal of removal.
Rear belt - Saloon models
Note: Note the fitted sequence of any plates, Removal
washers and spacers when unbolting the seat
belt anchors. 1 The interior mirror is bonded to the windscreen glass. If it must be removed, grip
Removal the mirror firmly and push it forward to break
20 Raise the rear seat cushion and remove the adhesive bond.
the anchor bolt from the floor pan. 2 When refitting the mirror, the following 11
21 Unclip the elasticated strap from the lower preliminary work must first be carried out.
belt buckle. 3 Remove existing adhesive from the
22 Unbolt the inertia reel anchor plate from windscreen glass using a suitable solvent.
the floor. Allow the solvent to evaporate. The location of
23 Unbolt the belt from the body pillar upper the mirror base is marked on the glass with a
section. black patch, so that there should not be any
24 Prise out the belt guide runner from the
chance of an error when fitting.
rear package tray support panel and slide the
runner from the belt. Refitting
25 Raise the inertia reel cover, unscrew the 4 If the original mirror is being refitted, clean
reel mounting bolt and withdraw reel and all the old adhesive from the mirror mounting 30.3a Centre console lower retaining
spacer. base, and apply a new adhesive patch to it. screws (arrowed) 11·20 Bodywork and fittings
30.3b Centre console fixings 32.4 Rear quarter trim panel securing clip 32.7 Removing a sill scuff plate securing locations screw
Cowl side trim panel 17 On three-door models, the rear quarter 31 Glove compartment - window will first have to be removed before removal and refitting Removal the pillar trim panel can be withdrawn. 7 Extract the two screws from the scuff plate 18 The lower trim panel can be removed from (see illustration). the pillar after the four screws have been
Pre-1986 models extracted. 8 Remove the two clips and detach the panel
Removal by pulling it from its two locating pegs (see Refitting
1 Open the glovebox lid and extract the illustration). 19 Refitting is a reversal of removal, but
screws which hold the glovebox to the facia. Refitting tighten the seat belt anchor bolts to the
2 Remove the latch (two screws). specified torque. 9 Refitting is a reversal of removal.
3 Remove the single screw inside the top of
the glove compartment which holds it to the Windscreen pillar trim panel Rear pillar trim panel
moulded bracket. Withdraw the glove
compartment. Removal Removal
Refitting 10 Remove the windscreen as described in 20 Remove the rear seat belt upper Section 20. anchorage.
4 Refitting is a reversal of removal. 11 Pull off the door aperture weatherstrip. 21 Fold down the rear seat back.
1986 models onwards 12 Peel back the edges of the trim panel and 22 Extract the five securing screws and remove it. remove the trim panel (see illustration).
Removal Refitting Refitting
5 Undo the two screws and remove the glove
compartment lid. 13 Refitting is a reversal of removal, but refit 23 Refitting is a reversal of removal, but
6 Remove the latch (two screws) and tighten the seat belt anchor bolts to the the windscreen as described in Section 20.
disconnect the lamp wiring (where fitted). specified torque.
7 Undo the three screws and remove the Centre pillar trim panels
glove compartment. Tailgate trim panel Removal 24 This comprises a flat panel secured with
Refitting 14 Remove the two seat belt anchorages push-in type clips. If a rear wiper is fitted, this
8 Refitting is a reversal of removal. from the pillar. will have a moulded cover over the wiper 15 Pull off the weatherstrips from the door motor secured by quarter-turn fasteners. 32 Interior trim panels - removal apertures. 25 To remove the moulded cover, turn the and refitting 16 Remove the upper trim panel from the heads of the fasteners through 90° to release pillar. them (see illustration).
Rear quarter trim panel
Removal
1 Unbolt the seat belt from its floor mounting.
2 Pass the belt buckle slide through the panel
aperture.
3 Pull the seat cushion and backrest forward.
4 Extract the single screw from the quarter
panel and then using a suitable forked tool,
lever out the clips and remove the panel (see
illustration).
5 The clips and ashtray are detachable after
the panel has been withdrawn.
Refitting
6 Refitting is a reversal of removal; tighten the 32.8 Removing cowl side trim panel 32.22 Rear pillar trim panel securing
seat belt anchor bolt to the specified torque. screw locations Bodywork and fittings 11·21
32.25 Releasing a tailgate moulded cover fastener
Rear wheelhouse covers
26 These are fitted to certain Base and L
models and are of moulded type. On Ghia
versions the covers are cloth covered while on
5-door versions, the covers have an upper
finisher held by two screws.
Load space trim panel
27 These take the form of moulded panels on 33.13a Crash pad and facia attachments - pre-1986 Base and L models
"high series" trim models and flat panels on
Base and L versions. The panels are held in A Clip C Nut E Screw F Screw
position by external clips. B Screw D Screw E1 Screw (L models)
Door trim panels 14 The crash padding can be detached by 1986 models onwards
28 Refer to Section 11 of this Chapter. removing the glove compartment mounting bracket and lock bracket, withdrawing the Removal side and centre face level vents and 16 Disconnect the battery negative lead. 33 Facia - removal and refitting 17 Refer to Chapter 10 and remove the extracting all the securing clips. steering column assembly. Refitting 18 Refer to Chapter 12 and remove the
Pre-1986 models 15 Refitting is a reversal of removal. instrument panel.
Removal
1 Disconnect the battery negative lead.
2 Remove the under-dash cover panels.
3 Refer to Chapter 10 and remove the
steering column assembly.
4 Refer to Chapter 12 and remove the
instrument panel.
5 Where applicable, refer to Chapter 12 and
remove the warning indicator control unit of
the auxiliary warning system, and where fitted,
the fuel computer.
6 Detach the heater controls, switches and
wiring multi-plugs, with reference to Chapter 3.
7 Remove the ashtray and
cigar lighter
mounting panel. 11
8 Remove the radio and its mounting bracket
(Chapter 12).
9 Disconnect the wire from the loudspeaker
and remove the speaker (four screws).
10 Remove the glove compartment (Section 31).
11 Where fitted, remove the choke cable
(Chapter 4).
12 Detach the vent ducts and demister hoses
from the heater.
13 Extract the securing screws and clips and 33.13b Crash pad and facia attachments - pre-1986 GL and Ghia models
remove the facia panel complete with crash A Screw B Clip C Screw D Screw
pad (see illustrations). 11·22 Bodywork and fittings
19 Where applicable, refer to Chapter 12 and
remove the warning indicator control unit of
the auxiliary warning system and where fitted,
the fuel computer.
20 Remove the choke cable, where fitted, as
described in Chapter 4.
21 Remove the heater control knobs.
22 Undo the two heater control facia panel
screws, pull the panel out and disconnect the
wiring multi-plug. Remove the panel.
23 Remove the ashtray.
24 Refer to Chapter 12 and remove the radio
or radio/
cassette player .
25 Undo the radio/ashtray facia panel
screws, withdraw the panel and disconnect
the cigar lighter wiring, if fitted. Remove the
panel.
26 Remove the glove compartment as
described in Section 31.
27 Undo the
nine screws and one nut
securing the facia, then remove the unit from
the car (see illustration).
28 The crash padding can be removed after 33.27 Crash pad and facia attachments - 1986 models onwards
undoing the screws from behind the facia. A Retaining screws B Retaining nuts
Refitting
29 Refitting is a reversal of removal. 12·1
Chapter 12
Electrical system
Contents
Aerial - removal and refitting . . . . . . . . . . . . . . . . . . . . . . . . . . . . . .23 Heated rear window aerial amplifier - removal and refitting . . . . . . .24
Auxiliary warning system components - removal and refitting . . . .15 Horn - removal and refitting . . . . . . . . . . . . . . . . . . . . . . . . . . . . . . .16
Bulbs (exterior lamps) - renewal . . . . . . . . . . . . . . . . . . . . . . . . . . . . .5 Instrument panel - removal and refitting . . . . . . . . . . . . . . . . . . . . . .9
Bulbs (interior lamps) - renewal . . . . . . . . . . . . . . . . . . . . . . . . . . . . .6 Instrument panel components - removal and refitting . . . . . . . . . . .10
Cigar lighter - removal and refitting . . . . . . . . . . . . . . . . . . . . . . . . .11 Loudspeakers - removal and refitting . . . . . . . . . . . . . . . . . . . . . . .22
Clock - removal and refitting . . . . . . . . . . . . . . . . . . . . . . . . . . . . . .13 Radio/cassette player and
graphic equaliser - removal and refitting21
Electrical fault finding - general information . . . . . . . . . . . . . . . . . . . .2 Speedometer cable - removal and refitting . . . . . . . . . . . . . . . . . . .12
Electrical system check . . . . . . . . . . . . . . . . . . . . . . . . .See Chapter 1 Switches - removal and refitting . . . . . . . . . . . . . . . . . . . . . . . . . . . . .4
Exterior lamps - removal and refitting . . . . . . . . . . . . . . . . . . . . . . . .7 Tailgate wiper motor - removal and refitting . . . . . . . . . . . . . . . . . .19
Fuel computer components - removal and refitting . . . . . . . . . . . . .14 Washer fluid level check . . . . . . . . . . . . . . . . . . . . . . . .See Chapter 1
Fuses, relays and circuit breakers - general information . . . . . . . . . .3 Wash/wipe system components - removal and refitting . . . . . . . . .20
General information and precautions . . . . . . . . . . . . . . . . . . . . . . . . .1 Windscreen/tailgate wiper blades and arms - removal and refitting 17
Headlamps and auxiliary lamps - beam alignment . . . . . . . . . . . . . .8 Windscreen wiper motor and linkage - removal and refitting . . . . .18
Degrees of difficulty Easy, suitable for Fairly easy, suitable Fairly difficult, Difficult, suitable for Very difficult, novice with little for beginner with suitable for competent experienced DIY suitable for expert DIY experience some experience DIY mechanic mechanic or professional
Specifications
System type ........................................... 12 volt, negative earth
Bulbs Wattage
Headlamp: Halogen . . . . . . . . . . . . . . . . . . . . . . . . . . . . . . . . . . . . . . . . . . . . . . . . 60/55 Tungsten . . . . . . . . . . . . . . . . . . . . . . . . . . . . . . . . . . . . . . . . . . . . . . . 50/45W
Front sidelamp . . . . . . . . . . . . . . . . . . . . . . . . . . . . . . . . . . . . . . . . . . . . 4W
Front indicator lamp . . . . . . . . . . . . . . . . . . . . . . . . . . . . . . . . . . . . . . . . 21W
Stop/tail lamp . . . . . . . . . . . . . . . . . . . . . . . . . . . . . . . . . . . . . . . . . . . . . 21/5W
Reversing lamp . . . . . . . . . . . . . . . . . . . . . . . . . . . . . . . . . . . . . . . . . . . . 21W
Rear foglamp . . . . . . . . . . . . . . . . . . . . . . . . . . . . . . . . . . . . . . . . . . . . . 21 W
Rear indicator lamp . . . . . . . . . . . . . . . . . . . . . . . . . . . . . . . . . . . . . . . . . 21W
Rear number plate lamp . . . . . . . . . . . . . . . . . . . . . . . . . . . . . . . . . . . . . 5W
Auxiliary lamp (Halogen) . . . . . . . . . . . . . . . . . . . . . . . . . . . . . . . . . . . . . 55W
Foglamp (Halogen) . . . . . . . . . . . . . . . . . . . . . . . . . . . . . . . . . . . . . . . . . 55W
Instrument
cluster warning lamps . . . . . . . . . . . . . . . . . . . . . . . . . . . . . . 1.3W
Panel illumination . . . . . . . . . . . . . . . . . . . . . . . . . . . . . . . . . . . . . . . . . . 2.6W
Cigar lighter illumination . . . . . . . . . . . . . . . . . . . . . . . . . . . . . . . . . . . . . 1.4W
Glove compartment lamp . . . . . . . . . . . . . . . . . . . . . . . . . . . . . . . . . . . . 2W
Luggage compartment lamp . . . . . . . . . . . . . . . . . . . . . . . . . . . . . . . . . 10W 12
Interior lamp . . . . . . . . . . . . . . . . . . . . . . . . . . . . . . . . . . . . . . . . . . . . . . 10W
Windscreen wipers
Wiper blades: Front . . . . . . . . . . . . . . . . . . . . . . . . . . . . . . . . . . . . . . . . . . . . . . . . . . Champion X-4503 Rear . . . . . . . . . . . . . . . . . . . . . . . . . . . . . . . . . . . . . . . . . . . . . . . . . . . Champion X-5103
Wiper arms: Front . . . . . . . . . . . . . . . . . . . . . . . . . . . . . . . . . . . . . . . . . . . . . . . . . . Champion CCA6 Rear . . . . . . . . . . . . . . . . . . . . . . . . . . . . . . . . . . . . . . . . . . . . . . . . . . . Champion type not available 12·2 Electrical system
Torque wrench settings Nm lbf ft
Horn to body . . . . . . . . . . . . . . . . . . . . . . . . . . . . . . . . . . . . . . . . . . . . . . 25 to 35 18 to 26
Windscreen wiper arm to pivot mounting . . . . . . . . . . . . . . . . . . . . . . . . 15 to 18 11 to 13
Rear wiper arm to pivot mounting . . . . . . . . . . . . . . . . . . . . . . . . . . . . . 12 to 15 9 to 11
Reversing lamp switch to transmission . . . . . . . . . . . . . . . . . . . . . . . . . 16 to 20 12 to 15
Door window motor mounting bolts . . . . . . . . . . . . . . . . . . . . . . . . . . . . 4 to 5 3 to 4
Window regulator bolts . . . . . . . . . . . . . . . . . . . . . . . . . . . . . . . . . . . . . . 4 to 5 3 to 4
noting whether other components related to Finding an open-circuit 1 General information and the circuit are operating properly. If several 9 To check for an open-circuit, connect one precautions components or circuits fail at one time, the lead of a circuit
tester or voltmeter to either problem is likely to be related to a shared fuse the negative battery terminal or a known good or earth connection.
General information earth. 3 Electrical problems usually stem from 10 Connect the other lead to a connector in The body electrical system consists of all simple causes, such as loose or corroded the circuit being tested, preferably nearest to
lights, wash/wipe equipment, interior connections, a faulty earth connection, a the battery or fuse.
electrical equipment, and associated switches blown fuse, a melted fusible link, or a faulty relay (refer to Section 3 for details of testing 11 Switch on the circuit, bearing in mind that
and wiring. relays). Visually inspect the condition of all some circuits are live only when the ignition The electrical system is of the 12 volt fuses, wires and connections in a problem switch is moved to a particular position.
negative earth type. Power to the system is circuit before testing the components. Use 12 If voltage is present (indicated either by
provided by a 12-volt battery, which is the wiring diagrams to determine which the tester bulb
lighting or a voltmeter reading,
charged by the alternator (see Chapter 5). terminal connections will need to be checked, as applicable), this means that the section of The engine electrical system (battery, in order to pinpoint the trouble-spot. the circuit between the relevant connector
alternator, starter motor, ignition system) is 4 The basic tools required for electrical fault- and the battery is problem-free.
covered separately in Chapter 5. finding
include a circuit tester or voltmeter (a 13 Continue to check the remainder of the
Precautions 12-volt bulb with a set of test leads can also circuit in the same fashion. be used for certain tests); a self-powered test 14 When a point is reached at which no Warning: Before carrying out any voltage is present, the problem must lie work on the electrical system, light (sometimes known as a continuity tester); an ohmmeter (to measure resistance); a between that point and the previous test point read through the precautions with voltage. Most problems can be traced to given in "Safety first!" at the battery and set of test leads; and a
jumper wire, preferably with a circuit breaker or fuse a broken, corroded or loose connection.
beginning of this manual, and in Chapter 5. incorporated, which can be used to bypass Finding a short-circuit Prior to working on any component in the suspect wires or electrical components.
electrical system, the battery negative lead Before attempting to locate a problem with 15 To check for a short-circuit, first
should first be disconnected, to prevent the test instruments, use the wiring diagram to disconnect the load(s) from the circuit (loads
possibility of electrical short circuits and/or determine where to make the connections. are the components which draw current from
fires. 5 To find the source of an intermittent wiring a circuit, such as bulbs, motors, heating fault (usually due to a poor or dirty elements, etc). connection, or damaged wiring insulation), a 16 Remove the relevant fuse from the circuit, 2 Electrical fault finding - general and connect a circuit tester or voltmeter to the "wiggle" test can be performed on the wiring. information This involves wiggling the wiring by hand, to fuse connections. see if the fault occurs as the wiring is moved. 17 Switch on the circuit, bearing in mind that
Note: Refer to the precautions given in It should be possible to narrow down the some circuits are live only when the ignition
"Safety first!" and in Section 1 of this Chapter source of the fault to a particular section of switch is moved to a particular position.
before starting work. The following tests
relate wiring. This method of testing can be used in 18 If voltage is present (indicated either by
to testing of the main electrical circuits, and conjunction with any of the tests described in the tester bulb lighting or a voltmeter reading,
should not be used to test delicate electronic the following sub-Sections. as applicable), this means that there is a
circuits (such as anti-lock braking systems), 6 Apart from problems due to poor short-circuit.
particularly where an electronic control connections, two basic types of fault can 19 If no voltage is present, but the fuse still
module is used. occur in an electrical circuit - open-circuit or blows with the load(s) connected, this short-circuit. indicates an internal fault in the load(s).
General 7 Open-circuit faults are caused by a break
1 A typical electrical circuit consists of an somewhere in the circuit, which prevents Finding an earth fault
electrical component, any switches, relays, current from flowing. An open-circuit fault will 20 The battery negative terminal is
motors, fuses, fusible links or circuit breakers prevent a component from working, but will connected to "earth" - the metal of the
related to that component, and the wiring and not cause the relevant circuit fuse to blow. engine/transmission and the car body - and
connectors which link the component to both 8 Short-circuit faults are caused by a "short" most systems are
wired so that they only
the battery and the chassis. To help pinpoint a somewhere in the circuit, which allows the receive a positive feed, the current returning
problem in a circuit, wiring diagrams are current flowing in the circuit to "escape" along via the metal of the car body. This means that
included at the end of this manual. an alternative route, usually to earth. Short- the component mounting and the body form
2 Before attempting to diagnose an electrical circuit faults are normally caused by a part of that circuit. Loose or corroded
fault, first study the appropriate wiring breakdown in wiring insulation, which allows a mountings can therefore cause a range of
diagram, to obtain a more complete feed wire to touch either another wire, or an electrical faults, ranging from total failure of a
understanding of the components included in earthed component such as the bodyshell. A circuit, to a puzzling partial fault. In particular,
the particular circuit concerned. The possible short-circuit fault will normally cause the lights may shine dimly (especially when
sources of a fault can be narrowed down by relevant circuit fuse to blow. another circuit
sharing the same earth point is Electrical system 12·3
in operation), motors (eg wiper motors or the
radiator cooling fan motor) may run slowly, 3.2a Fuse and relay box showing plastic cover removal (2), fuse removal (3) and
and the operation of one circuit may have an relays (4). Check if fuse has blown at point indicated in inset
apparently-unrelated effect on another. Note
that on many vehicles, earth straps are used
between certain components, such as the
engine/transmission and the body, usually
where there is no metal-to-metal contact
between components, due to flexible rubber
mountings, etc.
21 To check whether a component is
properly earthed, disconnect the battery, and
connect one lead of an ohmmeter to a known
good earth point. Connect the other lead to
the wire or earth connection being tested. The
resistance reading should be zero; if not,
check the connection as follows.
22 If an earth connection is
thought to be
faulty, dismantle the connection, and clean and a relay for the central locking system is
back to bare metal both the bodyshell and the located under the instrument panel next to the
wire terminal or the component earth glove compartment.
connection mating surface. Be careful to 6 Circuit breakers are only fitted to vehicles
remove all traces of dirt and corrosion, then equipped with electrically operated windows
use a knife to trim away any paint, so that a or a central locking system. The circuit
clean metal-to-metal joint is made. On breakers are also located in the fusebox.
reassembly, tighten the joint fasteners
securely; if a wire terminal is being refitted, 1986 models onwards
use serrated washers between the terminal 7 The fusebox and its location are the same
and the bodyshell, to ensure a clean and on later models but the fuse positions and
secure connection. When the connection is circuits protected have been rearranged.
remade, prevent the
onset of corrosion in the Additional fuses are still used and located as
future by applying a coat of petroleum jelly or for early models. A central locking system
silicone-based grease, or by spraying on (at relay is no longer fitted following circuit
regular intervals) a proprietary ignition sealer, modifications. 3.2b Fusebox location (arrowed) on engine
or a water-dispersant lubricant. 8 Relays located in the fusebox have their compartment bulkhead - cover removed to circuits designated by a
symbol for show fuses and relays 3 Fuses, relays and circuit identification. Up to six additional relays are breakers - general information located under the instrument panel on the driver's side. These are used in conjunction with the speed sensor, diode assembly, fuel-
Pre-1986 models injection system, heated windscreen, and dim-dip lighting system. On certain RS Turbo 4 Switches - removal and refitting
1 The fuses and most of the relays are models, a relay to prevent radio interference
located in a plastic box attached to the by the ignition system is fitted adjacent to the
bulkhead on the driver's side of the engine
compartment. fuel-injection module behind the plenum General chamber in the engine compartment.
2 The fuses are numbered to identify the 1 Disconnect the battery negative terminal 9 The direction indicator/hazard flasher relay
circuit which they protect and the circuits are before removing any switches. is located at the rear of the direction indicator
represented by
symbols on the plastic multi-function switch on the steering column. Pre-1986 models
fusebox cover (see illustrations).
3 When an accessory or other electrical Wiper delay switch
component or system fails, always check the 2 Remove the switch knob and the bezel nut.
fuse first. The fuses are coloured red (10A), 3 Withdraw the switch through the parcel tray
blue (15A), yellow (20A), clear (25A) and green and disconnect it from the wiring harness.
(30A). Always renew a fuse with one of an 4 Refitting is a reversal of removal.
identical rating. Never renew a fuse more than
once without finding the source of the trouble. Rear foglamp, heated rear window,
Spare fuses are carried in the fusebox lid. rear window wash/wipe switches
4 The radio, and where fitted, electrically 12 5 Using a screwdriver carefully prise the
operated aerial, have their own in-line circuit switch from the facia panel (see illustration).
fuses, or are fused in the rear of the radio 6 Disconnect the wiring multi-plug and
casing. remove the switch.
5 Relays are of the plug-in type and will be 7 Refitting is a reversal of removal.
found within the fusebox with a symbol on the
cover designating the relay circuit. Additional Steering column multi-function
relays for the headlamp washers, fuel injection switches
system and speed sensor (where fitted) are 4.5 Rear window wash/wipe switch 8 Undo the screws and remove the upper
located below the facia on the driver's side, removal - pre-1986 models and lower steering column shrouds. 12·4 Electrical system
4.9 Steering column multi-function switch 4.18 Courtesy lamp switch removal from 4.27 Removing the heater blower motor removal pre-1986 models door pillar switch - pre-1986 models A Switch retaining screws Reversing lamp switch Loudspeaker balance control joystick
9 Undo the switch retaining screws,
disconnect the wiring multiplug and remove Manual transmission 32 Disconnect the battery.
the switch (see illustration). 21 On manual transmission models the 33 Use a screwdriver and carefully prise free
10 Refitting is a reversal of removal. switch is located on the forward facing side of the balance control bezel (see illustration). the transmission housing beneath the clutch 34 Pull free the cassette stowage box from
Load space lamp switch - all models release lever. its aperture.
except Cabriolet 22 Working in the engine compartment 35 Rotate the securing clip anti-clockwise to
11 Open the tailgate and release the four trim disconnect the switch wiring and unscrew the remove it and the balance control from the
panel fasteners. switch. box (see illustration). Detach the wiring
12 Disconnect the lead from the switch and 23 Refitting is a reversal of removal. multi-plug.
remove the switch retaining screw. Automatic transmission 36 Refit in the reverse order of removal.
13 Refitting is a reversal of removal. 24 On automatic transmission models the reversing lamp switch is combined with the 1986 models onwards
Local space lamp switch - Cabriolet Note: With the exception of the switches starter inhibitor switch, and reference should
models listed in the following paragraphs, removal and be made to Chapter 7, Part B.
14 Open the boot lid and undo the switch refitting of all switches is as described
retaining screw. Stop-lamp switch/handbrake warning previously in this Section for pre-1986 models.
15 Withdraw the switch and disconnect the switch Heated windscreen/rear window, rear
lead. Tape the lead to the rear panel to 25 Refer to Chapter 9. foglamp switches
prevent it dropping in the hole. Heater blower motor switch 37 Undo the two screws, carefully remove
16 Refitting is a reversal of removal. 26 Remove the switch knob by carefully the instrument panel bezel then prise out the
Courtesy lamp switch pulling it off. switch with a screwdriver (see illustration).
17 Extract the screw securing the switch to 27 Depress the two tangs and withdraw the 38 Disconnect the wiring multi-plug and
the door pillar. switch from the facia (see illustration). remove the switch.
18 Withdraw the switch from its rubber 28 Disconnect the wiring and remove the 39 Refitting is a reversal of removal.
shroud and disconnect the lead. Tape the switch. Steering column multi-function
lead to the pillar to prevent it dropping in the 29 Refitting is a reversal of removal. switches
hole (see illustration). Electric window switch 40 Remove the steering wheel (Chapter 10).
19 Refitting is a reversal of removal. 30 Carefully lever the switch from the armrest 41 Undo the screws and remove the upper
Ignition switch and disconnect the multi-plug connector. and lower steering column shroud (see
20 Refer to Chapter 5, Part A. 31 Refit by reversing the removal operations. illustrations).
4.33 Removing the speaker balance 4.35 Speaker balance control removal - 4.37 Rear foglamp switch removal - control bezel - pre-1986 models pre-1986 models models from 1986 onwards A Releasing the securing clip B Balance control removal from stowage box Electrical system 12·5
4.41a Unscrewing the steering column 4.41b . . . and lower retaining screws 4.47 Heater control panel retaining screw shroud upper . . . locations - 1986 models onwards
42 Undo the retaining screws and remove 50 Disconnect the switch wiring multi-plug. moistened with methylated spirit.
the switch from the steering column. 51 Refitting is a reversal of removal. 4 Fit the new bulb using a reversal of the
43 Disconnect the switch wiring multi-plug. removal procedure, taking care not to touch Door mirror control switch
44 If removing the direction indicator multi- the glass.
function switch, remove the hazard flasher 52 Using a thin screwdriver carefully prise the
switch and relay if required. switch out of its location in the facia. Front sidelamp
45 Refitting is a reversal of removal, but refit 53 Disconnect the wiring multi-plug and 5 The bulbholder is located on the side of the
the steering wheel with reference to Chapter 10. remove the switch. headlamp unit and is removed by twisting it 54 Refitting is a reversal of removal. anti-clockwise (see illustration).
Heater blower motor switch Loudspeaker balance control joystick 6 Withdraw the push-fit bulb from the holder.
46 Carefully pull off the three heater control 7 Fit the new bulb using a reversal of the
knobs. 55 Disconnect the battery then remove the removal procedure.
47 Undo the two retaining screws and instrument panel as described in Section 9.
remove the heater control panel (see 56 Carefully prise off the trim bezel using a Front direction indicator lamp
illustration). screwdriver. 8 Working through the aperture in the inner
48 Undo the two switch panel-to-facia 57 Turn the retaining clip anti-clockwise and wing panel in the engine compartment, turn
securing screws and withdraw the panel. remove the clip. the bulbholder anti-clockwise and withdraw it
49 Depress the two tabs on either side of the 58 From within the instrument panel aperture from the
lens unit (see illustration).
switch and remove the switch. disconnect the wiring multi-plug and remove 9 Depress and turn the bulb anti-clockwise to the unit. remove it from the holder. 59 Refit in the reverse order of removal. 10 Fit the new bulb using a reversal of the removal procedure. 5 Bulbs (exterior lamps) - renewal Front direction indicator side
repeater lamp 11 Reach up behind the front wheelarch and Headlamp locate the back of the repeater lamp holder. 1 From within the engine compartment pull 12 Depress the two clips on the holder body the multi-plug from the rear of the headlamp. and push the assembly outwards and out of 2 Remove the rubber gaiter and rotate the the wing. bulb securing clip or release the spring clip 13 Twist the bulbholder anti-clockwise to arms according to type (see illustration). free it from the lens. 3 Withdraw the bulb, taking care not to touch 14 Pull the bulb from its socket. 5.2 Releasing headlamp bulb spring clip the glass with your fingers (see illustration). If 15 Push in a new bulb and refit the assembly arms the glass is touched, wipe the bulb with a rag in the reverse order to removal.
12
5.3 Headlamp bulb removal 5.5 Sidelamp bulb location (arrowed) in 5.8 Front indicator bulbholder accessible side of headlamp through inner wing panel aperture 12·6 Electrical system
5.16 Front auxiliary lamp lens retaining 5.17 Disconnecting auxiliary lamp earth 5.18 Removing the auxiliary lamp screw lead bulbholder
Front auxiliary lamp and foglamp Rear lamps - Estate
16 Undo the retaining screw at the bottom of 27 Open the tailgate and release the side trim 6 Bulbs (interior lamps) - renewal
the lens and withdraw the lens assembly (see panel by turning the four screws a quarter of a
illustration). turn with a coin.
17 Disconnect the earth lead and remove the 28 Push the upper and lower retaining tabs Pre-1986 models
lens (see illustration). apart and withdraw the bulbholder.
18 Spring back the clip legs and remove the 29 Remove the relevant bulb by pushing Glove compartment lamp
bulbholder, then withdraw the bulb (see down and turning anti-clockwise. 1 This is simply a matter of gently pulling the
illustration). Avoid touching the bulb glass 30 Fit the new bulb using a reversal of the bulb from its holder.
with your fingers. If the glass is touched, wipe removal procedure.
it with a cloth moistened in methylated spirit. Heater control illumination lamp
19 Fit the new bulb using a reversal of the Rear lamp - Van 2 Slide the heater control levers to the top of
removal procedure, taking care not to touch 31 Open the rear doors and remove the rear their travel.
the glass. trim panel to gain access to the bulbholders 3 Pull off the heater motor switch knob, then
Rear lamps - Saloon (where applicable). unclip the control trim panel from the facia. 32 Remove the individual bulbholders by 4 Pull the bulb from the lamp socket.
20 Open the tailgate, reach down and turning anti-clockwise, then similarly remove 5 Refitting is a reversal of removal.
depress the retaining tab on the side of the the bulbs from the holders. Hazard warning switch lamp
bulbholder. Swing the bulbholder outward to 33 Fit the new bulb using a reversal of the
release the locating tag at the other end (see 6 Grip the switch cover and pull it off.
illustration). removal procedure. 7 Gently pull the bulb from its socket (see
21 Remove the relevant bulb by pushing Rear number plate lamp illustration).
down and turning anti-clockwise. 8 Refitting is a reversal of removal.
22 Fit the new bulb using a reversal of the 34 Using a small screwdriver carefully prise
removal procedure. the lamp out of the bumper. Interior lamp 35 On pre-1986 models turn the bulbholder 9 Carefully prise the lamp from its location
Rear lamp - Cabriolet anti-clockwise and remove it from the lens. and remove the bulb from its spring contact
23 Open the boot and pull the bulb cover open. Withdraw the push-fit bulb (see illustration). on the lamp body.
24 Push the upper and lower retaining tabs 36 On 1986 models onwards spread the 10 Fit the new bulb using a reversal of the
apart and withdraw the bulbholder. retaining clips and withdraw the bulbholder. removal procedure.
25 Remove the relevant bulb by pushing Remove the bulb by pushing and turning anti-
down and turning anti-clockwise. clockwise. Load space lamp
26 Fit the new bulb using a reversal of the 37 Fit the new bulb using a reversal of the 11 Using a thin screwdriver, prise the lamp
removal procedure. removal procedure. from its location (see illustration).
5.20 Removing the rear lamp bulbholder 5.35 Removing the number plate lamp 6.7 Hazard warning switch bulb renewal - for access to the bulbs bulbholder from the lens pre-1986 models Electrical system 12·7
6.11 Removing the load space lamp 7.3a Releasing the headlamp side plastic 7.3b Headlamp upper plastic retaining clip retaining clip head head (arrowed)
12 Remove the bulb from its spring contact clip. 1986 models onwards 33 Refitting is a reversal of removal.
13 Fit the new bulb using a reversal of the Note: With the exception of the bulbs listed in
removal procedure. 7 Exterior lamps - removal and the following paragraphs, removal and refitting
Load space lamp (Cabriolet) of all bulbs is as described previously in this refitting
14 Open the boot lid and prise out the lamp Section for pre-1986 models.
with a thin screwdriver. Glove compartment lamp
15 Depress and twist the bulb from the holder. Headlamp 21 From inside the glove compartment undo
16 Fit the new bulb using a reversal of the the two switch assembly retaining screws and Removal
removal procedure. withdraw the assembly. 1 On pre-1986 models, remove the radiator
Roof-mounted clock illumination lamp 22 Using a thin screwdriver carefully prise grille as described in Chapter 11. out the switch and remove the bulb by
17 Remove the clock (Section 13). pushing and turning anti-clockwise. 2 Working in the engine compartment,
18 Remove the rear cover from the unit by 23 Refitting is a reversal of removal. disconnect the headlamp wiring multi-plug
depressing the two clips at the top outer and remove the sidelamp bulbholder.
corners of the cover. Heater control illumination lamp 3 Rotate the side and upper plastic retaining
19 The bulb is a bayonet fitting in its holder. 24 Pull off the three heater control knobs. clip heads through 90° to release the
20 Refitting is a reversal of removal. 25 Undo the two retaining screws and headlamp mountings (see illustrations). withdraw the heater control panel. 4 With the headlamp unit released, pull it 26 From the rear of the panel, push and turn sharply forward off its lower ballstud. the bulb anti-clockwise to remove. 27 Fit the new bulb using a reversal of the Refitting removal procedure. 5 Refitting is a reversal of removal. Manual choke knob warning lamp Front direction indicator lamp 28 Remove the choke knob by depressing the pin located on the underside of the knob. Removal 29 Withdraw the sleeve, then remove the 6 Working inside the engine compartment bulb by pushing it down, then pushing down disconnect the indicator bulb holder from the the bulb retainer using a thin screwdriver. lamp. 30 Refitting is a reversal of removal. 7 Remove the headlamp as described above. Fuel computer lamp 8 Remove the headlamp upper plastic 31 Remove the fuel computer (Section 14). retaining clip then unscrew the ball-headed 32 Using thin-nosed pliers, turn the bolt (see illustrations). 7.8a Removing the retaining clip . . . bulbholder anti-clockwise to remove it then 9 Remove the lower adjuster by turning the withdraw the push-fit bulb. collar (see illustrations).
12
7.8b . . . and the ball-headed bolt 7.9a Release the adjuster by turning the 7.9b . . . then remove the adjuster collar (arrowed) 12·8 Electrical system
7.10 Release the direction indicator side 9.2a Extracting the instrument panel bezel 9.2b Removing the instrument panel bezel spring clip screws - pre-1986 model - pre-1986 model
10 Release the side spring clip, then pull the Refitting
lamp out at the bottom to disengage the 8 Headlamps and auxiliary 6 Refitting is a reversal of removal.
upper tangs (see illustration). lamps - beam alignment
Refitting 1986 models onwards The headlamps are adjustable individually
11 Refitting is a reversal of removal. Removal for both horizontal and vertical alignment from
Rear lamp within the engine compartment. The auxiliary 7 Refer to Chapter 10 and remove the lamp adjustment is carried out by slackening steering wheel.
Removal the lamp mounting and moving the lamp as 8 Extract the two screws and pull the
12 Remove the bulbholder(s) as described in necessary. instrument panel bezel from the panel. The
Section 5. Accurate alignment can only be carried out two clips at the base will release by the pulling
13 Remove the lamp retaining screws or nuts using optical beam setting equipment, and this action (see illustration).
as applicable, and remove the lamp. work should be entrusted to a Ford dealer. 9 Undo the four screws securing the panel to the facia (see illustrations).
Refitting 10 Pull the panel away from the facia and 9 Instrument panel - removal and disconnect the wiring multi-plug and
14 Refitting is a reversal of removal. refitting speedometer cable from the rear of the
Pre-1986 models Removal 1 Disconnect the battery negative terminal. 2 Extract the screws and pull the instrument panel bezel from the panel. The two clips at the base of the bezel will release by the pulling action (see illustrations). 3 Extract the two screws which hold the panel to the facia (see illustration). 4 Remove the dash under-trim panel, reach up and disconnect the cable from the speedometer by depressing the serrated plastic ring. 9.3 Removing an instrument panel 5 Gently pull the cluster forwards and to one 9.8 Bezel lower retaining clip (arrowed) - retaining screw - pre-1986 model side so that the wiring multi-plug can be 1986 models onwards disconnected. Withdraw the panel.
9.9a Instrument panel upper retaining 9.9b . . . and lower screw removal - 9.10 Disconnecting the speedometer screw (arrowed) 1986 models onwards cable Electrical system 12·9
10.2 Instrument panel bulb renewal 10.11a Instrument panel assembly 10.11b Instrument panel assembly upper retaining screws-pre-1986 models retaining screws - 1986 models onwards
instrument panel. It may be necessary to feed 6 Remove all illumination and warning lamp
the speedometer cable slack through the bulbholders. 11 Cigar lighter - removal and
bulkhead from the engine compartment to 7 Undo all the nuts and remove the washers refitting
facilitate removal. Withdraw the panel (see from the
printed circuit terminals.
illustration). 8 Remove the wiring multi-plug retainers and carefully pull the printed circuit off the pins on Removal
Refitting the rear of the panel. 1 Disconnect the battery negative terminal.
11 Refitting is a reversal of removal. Refitting 2 On pre-1986 models remove the ashtray 9 Refitting is the reverse sequence to then undo the screws and withdraw the 10 Instrument panel removal. ashtray housing. On 1986 models onwards, components - removal and refer to Section 21 and remove the refitting Speedometer radio/cassette player. 3 Disconnect the wiring from the cigar lighter Removal body.
Panel illumination and warning 10 Remove the instrument panel as 4 Pull out the cigar lighter element.
lamp bulbs described in Section 9. 5 Push the lighter body and illuminating ring 11 Undo the retaining screws around the out of their locations then separate the ring
Removal edge of the panel at the rear and separate the from the lighter body.
1 Remove the instrument panel as described two panel halves (see illustrations).
in Section 9. 12 Undo the two screws and remove the Refitting
2 Turn the bulbholders anti-clockwise and speedometer (see illustrations). 6 Refitting is the reverse sequence to
remove them from the rear of the instrument Refitting removal.
panel (see illustration).
3 The bulbs and bulbholders are renewed 13 Refitting is the reverse sequence to removal. 12 Speedometer cable - removal
complete, the bulbs cannot be removed from
the holders separately. and refitting Tachometer
Refitting 14 The procedure is the same as for the
4 Refit by pushing down and turning speedometer except that the unit is secured Removal
clockwise. by three nuts. 1 Disconnect the battery and remove the instrument panel as described in Section 9.
Printed circuit Fuel and temperature gauges 2 Disconnect the cable from the transmission 15 Proceed as for the speedometer but and release it from its clips and grommet.
Removal remove the combined gauge assembly after 3 Withdraw the cable through the bulkhead.
5 Remove the instrument panel (Section 9). undoing the four nuts. Refitting 4 Refitting is a reversal of removal. The inner and outer cables are supplied as a complete assembly.
13 Clock - removal and refitting 12
Facia mounted clock Removal 1 Remove the instrument panel (Section 9). 2 Undo the screws around the edge of the 10.12a Extracting speedometer retaining 10.12b Removing the speedometer instrument panel at the rear and separate the screws two panel halves. 12·10 Electrical system
3 Undo the nuts and remove the clock. 3 Withdraw the computer module from the 12 Undo the two retaining screws and facia to the right of the instrument panel. remove the fuel flow sensor.
Refitting 4 Disconnect the wiring multi-plug and
4 Refitting is a reversal of removal. Refitting remove the computer. 13 Refitting is the reverse sequence to
Roof mounted clock Refitting removal. Ensure that the sealing washers are 5 Refitting is a reversal of removal. correctly fitted.
Removal
5 Disconnect the battery negative terminal. Speed sender unit
6 Extract the two screws which hold the 15 Auxiliary warning system
clock to the header panel. Removal components - removal and
7 Disconnect the clock and courtesy lamp 6 Undo the retaining nut and detach the refitting
wiring plug. speedometer cable from the speed sender
8 Detach the lamp from the clock. unit (see illustration). 7 Unclip and disconnect the wiring General
Refitting multi-plug. 1 This system monitors the fluid levels and
9 Refit by reversing the removal operations. 8 Undo the retaining nut and withdraw the front brake pads for excessive wear. In the
Once the battery is reconnected, the time speed sender unit from the transmission. event of a fluid level dropping below the
must be re-set. Refitting specified level, or the brake pads wearing 9 Refitting is a reversal of removal. down to the minimum allowable thickness, the 14 Fuel computer components - driver is warned of the particular malfunction removal and refitting Fuel flow sensor by means of a warning lamp.
Removal Low washer fluid warning switch
Computer unit 10 The fuel flow sensor is used in conjunction Removal with the fuel computer on fuel-injected models
Removal and is located on the fuel distributor at the front 2 Drain or syphon out the reservoir fluid then
1 Disconnect the battery negative terminal. left-hand side of the engine compartment. disconnect the switch multi-plug. Lever the
2 Undo the two instrument panel bezel 11 Disconnect the wiring multi-plug then switch away from the seal grommet using the
retaining screws and ease the bezel out to undo the two banjo unions on the side of the flat blade of a suitable screwdriver. Do not
release the lower clips. unit. Note the position of the sealing washers. allow fluid to enter the connectors.
14.6 Fuel computer component layout on fuel- injected models A Fuel computer B Fuel tank sender unit C Speed sender unit D Fuel flow sensor Electrical system 12·11
Refitting 2 Depress the small clip on the blade and
3 Refit in reverse order of removal, checking slide the blade out of the hooked part of the
that the grommet is correctly seated. On arm (see illustration).
completion, check that the switch is 3 Before removing the wiper arms it is
operational and that there are no leaks around worthwhile marking their parked position on
the grommet. the glass with a strip of masking tape as an aid to refitting. Raise the plastic nut cover.
Low coolant warning switch 4 Unscrew the nut which holds the arm to the pivot shaft and pull the arm from the splines.
Removal Refitting
4 Drain the coolant from the expansion tank
(see Chapter 1), having first depressurized the 5 Refit by reversing the removal operations.
system if necessary.
5 Detach the switch multi-plug and then 18 Windscreen wiper motor and
unscrew the threaded retainer. The switch can 17.2 Disconnecting wiper blade from arm linkage - removal and refitting
then be levered from the seal grommet using
a flat-bladed screwdriver. Do not allow pads. Refer to Chapter 9 for details of brake
coolant to enter the connectors. pad removal and refitting. Removal
Refitting Auxiliary system warning light 1 Remove the wiper arms and blades as
6 Refit in reverse order, and, on completion, bulbs described in Section 17.
check the switch operation and, when the 2 Disconnect the battery negative terminal. 12 The auxiliary warning light bulbs are 3 Remove the nut covers, the fixing nuts,
reservoir is refilled to the specified level, that integral with the instrument panel and are
there are no signs of leaks from the washers and spacers from the pivot shafts. welded in position. They cannot be individually
grommet/retainer. 4 Disconnect the wiper motor wiring at the renewed. To remove the instrument panel refer multi-pin plugs.
Warning indicator control unit to Section 9. 5 Unscrew the two fixing bolts and withdraw the motor complete with linkage from the
Removal engine compartment (see illustration).
7 Remove the radio speaker grille and 16 Horn - removal and refitting 6 Remove the spacers from the pivot shafts.
speaker from the facia. 7 The motor can be separated from the
8 Disconnect the multi-plug from the warning linkage by removing the nut from the
indicator/control assembly and then remove Removal crankarm and then unbolting the motor from
the two nylon fixing nuts which hold the 1 The horn(s) are located in the left-hand front the mounting.
assembly in position on the facia panel. Take corner of the engine compartment. Before
care when withdrawing and handling the unit removing, disconnect the battery. Refitting
not to knock it, as the integral micro- 2 Disconnect the lead from the horn. 8 Refitting is a reversal of removal, but
electronics could be damaged. 3 Unscrew the single bolt and remove the connect the motor crankarm when the link is
Refitting horn and bracket. aligned with it as shown (see illustration).
9 Refit in the reverse order of removal. On Refitting
completion check that the warning lights 4 Refitting is a reversal of removal. 19 Tailgate wiper motor -
function for the initial period of five seconds removal and refitting
after the ignition is switched on. 17 Windscreen/tailgate wiper
Low fuel sensor unit blades and arms - removal Removal
10 This is integral with the fuel tank sender and refitting 1 Disconnect the battery and remove the
unit and is removed from the tank as wiper arm/blade assembly.
described in Chapter 4. 2 Remove the pivot shaft nut, spacer and Removal outer seals.
Brake pad wear indicators 1 Pull the wiper arm away from the glass until 3 Open the tailgate and remove the trim panel
11 The sensors are integral with the brake the arm locks. (refer to Chapter 11).
12
18.5 Windscreen wiper motor fixing bolts 18.8 Windscreen wiper crankarm 19.4 Tailgate wiper motor retaining bolts (arrowed) alignment for refitting (arrowed) 12·12 Electrical system
4 Release the earth lead and unscrew the 10 The pump and fluid level sensor unit can 23 Adjustment of the jet spray pattern can be
two, or on later models, three wiper motor be eased away from their location apertures in done using a pin in the jet nozzle.
mounting bolts (see illustration). the reservoir. Twin jet system - pre-1986 models
5 Disconnect the multi-pin plug and remove Refitting
the motor from the tailgate. 11 Refitting is a reversal of removal; check 24 Later models are fitted with a twin jet
6 Take off the pivot shaft seal, spacer and that the pump and fluid level sensor grommets windscreen washer system instead of the
bracket from the motor. are in good condition when reassembling, and single jet type used on earlier models. 25 The jets are located as shown, one each check for leaks on completion.
Refitting side on the bonnet inner panel (see
7 Refit by reversing the removal operations. Tailgate washer pump illustration). The washer supply hose is connected to a central T-piece connector Saloon models which directs the fluid to each jet. 20 Wash/wipe system 26 The twin jets can be adjusted in the same Removal components - removal and 12 Remove the load space trim panel as manner as the earlier single type. They should refitting described in Chapter 11. be set so that the fluid jets hit the windscreen 13 Disconnect the leads at the multi-plug. about 250 mm (9.8 in) from the top edge of 14 Unscrew the three reservoir mounting the windscreen.
Windscreen washer pump screws, and remove the reservoir until the Twin jet system - 1986 models
Engine compartment-mounted fluid pipe can be pulled from the pump. onwards
reservoir 15 With the reservoir removed, pull the pump 27 1986 models onwards are fitted with a
Removal from its reservoir seal. twin jet system but using the same jet type as
1 Drain the washer fluid container. Refitting the early single jet system.
2 Disconnect the lead and washer pipe. 16 Refit by reversing the removal operations. 28 Removal, refitting and adjustment
3 Ease the top of the washer pump away Estate models procedures for this washer type are therefore
from the fluid container and remove it. the same as described previously. Removal
Refitting
4 Refitting is a reversal of removal; check that 17 Open the tailgate, raise the spare wheel Tailgate washer jet
the pump sealing grommet is a good fit. cover and disconnect the electrical leads and fluid pipe from the pump. Removal
Windscreen washer pump - wing- 18 Extract the two securing screws and 29 Remove the tailgate wiper motor as
mounted reservoir remove the pump (see illustration). described in Section 19.
Removal Refitting 30 Pull the washer jet off the tailgate wiper
5 On some models the windscreen washer 19 Refitting is a reversal of removal. motor shaft, disconnect the hose and remove
pump and fluid reservoir are mounted on the the jet.
forward end of the underside of the left-hand Windscreen washer jets Refitting
front wing panel. It also incorporates the Single jet system - pre-1986 models 31 Refitting is the reverse of removal.
headlamp washer pump which also draws its
fluid from this reservoir. Removal 20 Open the bonnet and disconnect the Headlamp washer pump
6 To remove the reservoir and pump units
withdraw the level dipstick and syphon the washer pipe from the jet. Removal
fluid out of the reservoir through the filler 21 If the pipe stub on the jet assembly is now 32 Drain the washer reservoir by siphoning,
neck. pushed to one side, the jet retaining tang will and disconnect the electrical leads from the
7 Unscrew and remove the reservoir retaining be released and the jet can be removed from pump.
bolts at its top end from inside the engine the bonnet grille slots. 33 Disconnect the fluid pipe from the pump.
compartment. Refitting 34 Release the reservoir clamp screw.
8 Working under the wheel arch, unscrew 22 Refit by reversing the removal operations. 35 Ease the top of the pump from the
and remove the two lower retaining bolts. The end of the plastic washer pipe should be reservoir and remove it upwards.
9 Withdraw the reservoir, carefully pulling its warmed in very hot water to make it easier to
filler neck through the grommet on the inner push onto the jet pipe stub and so avoid Refitting
wing panel. Disconnect the pump hoses. breaking it. 36 Refitting is a reversal of removal.
20.18 Tailgate washer pump retaining screws (A) - Estate models 20.25 Twin jet windscreen washer layout - pre-1986 models Electrical system 12·13
Headlamp washer jet
37 The headlamp washer jets are an integral
part of the bumper overrider and cannot be
removed separately. If a jet is to be renewed
for any reason the complete overrider must be
obtained (see Chapter 11).
38 Adjustment of the jets entails the use of
special tool 32-004. If the tool is not available,
have this work carried out by a Ford dealer.
21 Radio/cassette player and graphic equaliser - removal and refitting 21.11 Later type radio retaining tang 21.17 Radio/cassette player extractor tool
Note: The information in this Section applies to locations
Ford original equipment fitment components. 12 With the radio withdrawn, disconnect the 20 Push the retaining clips inwards to
Radio power lead, the speaker plug, earth lead, the remove the removal tool from each side (see aerial cable and feed. illustration).
Early models 13 From the rear of the radio remove the Refitting
Removal plastic support bracket and locating plate, 21 Refit in the reverse order of removal. The
1 Disconnect the battery. then remove the radio from the front bracket. withdrawal tools do not have to be used,
2 Pull off the control knobs, the tuning knob Refitting simply push the unit into its aperture until the
spacer and the
tone control lever. Remove the 14 Refitting is the reversal of the removal securing clips engage in their slots.
cover panel. procedure. Graphic equaliser
3 Extract the four fixing screws from the front
of the radio. Radio/cassette player 22 The procedure is the same as for the
4 Pull the radio far enough from the facia to radio/cassette player as fitted to later models Early models and described previously in this Section.
be able to disconnect the aerial, power supply
and earth leads and the speaker wires. 15 Proceed as described previously in this
5 Unscrew the two nuts which hold the Section for the radio fitted to early models. 22 Loudspeakers - removal and
receiver to the mounting plate. Remove the Later models
mounting plate. refitting
6 Take off the rear support bracket and Removal
locating plate. 16 Disconnect the battery. 17 To withdraw the radio/cassette unit from Facia mounted loudspeaker
Refitting
7 Refitting is a reversal of removal. its aperture you will need to fabricate the U- Removal shaped extractor tools from wire rod of
Later models suitable gauge to insert into the withdrawal 1 Carefully prise up the speaker grille using a
Removal slots on each side of the unit (in the front face) small screwdriver. Lift it from the facia.
8 Disconnect the battery. (see illustration). 2 Extract the speaker mounting screws which
9 Remove the radio control knobs and 18 Insert the withdrawal tools as shown then, are now exposed.
withdraw the tuning knob spacer and the tone pushing each outwards simultaneously, pull 3 Lift the speaker up until the connecting
control lever. wires can be disconnected by pulling on their them evenly to withdraw the radio/cassette
10 Unscrew and remove the facia plate terminals. The wires have different connecting unit (see illustration). It is important that an
retaining nuts and washers, then withdraw the terminals to prevent incorrect connection. equal pressure is applied to each tool as the
facia plate. unit is withdrawn. Refitting
11 The radio retaining tangs can now be 19 Once withdrawn from its aperture 4 Refitting is a reversal of removal.
pulled inwards (towards the centre of the radio)
and the radio withdrawn from its aperture. You disconnect the aerial cable, the power lead,
may need to make a hook-ended rod (welding the aerial feed, the speaker plugs, the earth Cowl panel-mounted loudspeaker
rod is ideal) to pull the tangs inwards to release lead and the light and memory feed (where applicable). Pre-1986 models (except Cabriolet)
the radio (see illustration). Removal 5 Prise out the grille retaining clip. 6 Extract screws as necessary to be able to remove the cowl panel/grille. 7 Extract the four speaker mounting screws and withdraw the speaker until the leads can 12 be disconnected at the rear of the speaker (see illustration). Refitting 8 Refitting is a reversal of removal. 1986 models onwards (except Cabriolet) Removal
21.18 Radio/cassette player removal using 21.20 Releasing the extractor tool after 9 Extract sufficient screws from the scuff the extractor tools removal plate to facilitate cowl panel removal. 12·14 Electrical system
22.7 Cowl mounted loudspeaker retaining 22.10 Cowl mounted loudspeaker panel 22.11 Cowl mounted loudspeaker retaining screw locations - pre-1986 models retainer removal - 1986 models onwards screw locations - 1986 models onwards
10 Insert a screwdriver into the captive 20 On all models undo the four speaker Refitting
plastic retainers and turn 90° anti-clockwise retaining screws, pull the speaker away from 29 Refitting is a reverse of removal. Position the
to remove them. Withdraw the cowl panel the shelf and disconnect the wires. speaker so that the terminals face forwards.
(see illustration). Refitting
11 Undo the three speaker retaining screws,
disconnect the leads and remove the speaker 21 Refitting is a reversal of removal. 23 Aerial - removal and refitting
(see illustration). Rear parcel tray-mounted
Refitting loudspeaker
12 Refitting is a reversal of removal. Manually-operated type - all
Cabriolet models Removal models except Cabriolet
Removal 22 Unscrew the collar and pull the wiring Removal
13 Extract the screws from the scuff plate. plug from the loudspeaker.
14 Extract the end screw from the facia panel. 23 Remove the rear parcel tray. Unscrew the 1 Withdraw the radio (Section 21) until the four retaining screws and remove the speaker. aerial lead can be pulled out of the receiver
15 Prise the door weatherseal from the cowl socket.
panel. Refitting 2 Working under the front wing, release the
16 Remove the cowl panel and, if required, 24 Refit in the reverse order to removal. aerial inner wing bracket (see illustration).
unclip the speaker grille. 3 Prise out the grommet and pull the aerial
17 Extract the four speaker mounting screws Rear quarter panel-mounted lead through the hole in the inner wing.
and withdraw the speaker until the leads can loudspeaker - Cabriolet models 4 Unscrew the aerial collar retaining nut.
be disconnected. 5 Withdraw the aerial, spacers and seal (see
Refitting Removal illustration).
18 Refitting is a reversal of removal. 25 Fully open the roof and lock it. Refitting
Rear parcel shelf-mounted 26 Pull off the roof release lever knob and 6 Refitting is a reversal of removal.
loudspeaker remove the window winder. 27 Pull back the rear quarter trim panel then Manually-operated type -
Removal remove the three screws and withdraw the Cabriolet models
19 On pre-1986 models, prise the loudspeaker trim panel with the speaker.
cover free by inserting a screwdriver blade into 28 Disconnect the wiring then extract the Removal
the slots on the side of the cover (see screws and detach the speaker and grille from 7 Open the boot lid and detach the support
illustration). the panel. Note the location of the washers. strut from the side panel.
22.19 Rear parcel shelf-mounted 23.2 Manually operated aerial 23.5 Manually operated aerial upper loudspeaker removal - pre-1986 models attachments - all except Cabriolet models attachment fixings - all except Cabriolet A Prising cover open A Inner wing bracket B Rubber grommet A Collar retaining nut C Spacer B Retaining screw locations screw C Aerial B Bezel D Seal Electrical system 12·15
23.9 Manually operated aerial location on 23.14 Power operated aerial attachments - 23.18 Power operated aerial location on Cabriolet models all models except Cabriolet Cabriolet models A Grommet
8 Release the tabs and remove the trim B Lower bracket screw
panel. C Aerial drain tube 24 Heated rear window aerial
9 From under the rear panel undo the aerial amplifier - removal and
bracket retaining screw (see illustration). refitting 15 Prise out the grommet and pull the aerial
10 Undo the aerial collar retaining nut and lead through the hole in the inner wing.
remove the spacers and seal. Withdraw the 16 Unscrew the aerial upper retaining nut
aerial after unscrewing the lead. and lower the aerial from its location. Take off Removal
Refitting the seals and spacers. 1 On some 1986 models onwards the radio aerial is incorporated in the heated rear
11 Refitting is a reversal of removal. Refitting window element, and to assist reception an
Power-operated type - all models 17 Refitting is a reversal of removal. amplifier is fitted. This is located in the tailgate
except Cabriolet Power-operated type - Cabriolet adjacent to the tailgate wiper motor. Removal and refitting is as follows.
Removal models 2 Remove the tailgate wiper motor trim panel
12 Carry out the operations described in 18 The operations are the same as for the and the adjoining trim panel.
paragraph 1. Cabriolet manually operated type described 3 Undo the two screws and withdraw the
13 Lower the bottom facia insulation panel previously, but in addition disconnect the amplifier.
and disconnect the red and white aerial feed power feed multi-plug before unscrewing the 4 Disconnect the wiring and remove the
cables. aerial lead (see illustration). amplifier.
14 Working under the front wing, extract the Refitting
self-tapping screw which secures the aerial
lower bracket (see illustration). 5 Refitting is a reversal of removal.
Wiring diagrams commence overleaf
12 WD·0
Internal connection details, all models WD·1
12
Internal connection details, all models continued WD·2
Key to wiring diagrams WD·3 Diagram 5: 1986-on in car entertainment
12 WD·4
Diagram 1: 1980-86 Starting, charging, and ignition (except fuel injection models) WD·5 Diagram 1a: 1986-on Starting, charging, and ignition (except fuel injection) all models
12 WD·6
Diagram 2: 1980-86 Lighting all models WD·7 Diagram 2a: 1986-on Lighting all models
12 WD·8
Diagram 3: 1980-86 Ancilliary circuits all models WD·9 Diagram 3a: 1986-on Ancilliary circuits all models
12 WD·10 Diagram 4: 1983-on K-Jetronic fuel injection
For starting and charging circuits see Diagram 1 WD·11 Diagram 4a: 1984-86 KE-Jetronic fuel injection For starting and charging circuits see Diagram 1
12 WD·12 Diagram 4b: 1986-on KE-Jetronic fuel injection
For starting and charging circuits see Diagram 1a Reference REF·1
Dimensions and Weights . . . . . . . . . . . . . . . . . . REF·1 Tools and Working Facilities . . . . . . . . . . . . . . . . REF·6
Conversion factors . . . . . . . . . . . . . . . . . . . . . . . .REF·2 MOT Test Checks . . . . . . . . . . . . . . . . . . . . . . . .REF·8
Buying Spare Parts and Vehicle Identification . . REF·3 Fault Finding . . . . . . . . . . . . . . . . . . . . . . . . . . . REF·12
General Repair Procedures . . . . . . . . . . . . . . . . . REF·4
Glossary of Technical
Terms . . . . . . . . . . . . . . . REF·19
Jacking and Vehicle Support . . . . . . . . . . . . . . . REF·5 Index . . . . . . . . . . . . . . . . . . . . . . . . . . . . . . . . . REF·23
Dimensions and Weights
Note: All figures are approximate, and may vary according to model. Refer to manufacturer's data for exact figures.
Dimensions Wheelbase:
Overall length: Saloon, Estate and Cabriolet . . . . . . . . . . . . . . . . . . . . . . . .2402 mm Pre-1986 models: Van . . . . . . . . . . . . . . . . . . . . . . . . . . . . . . . . . . . . . . . . . . . .2501 mm Front track: Saloon and Cabriolet . . . . . . . . . . . . . . . . . . . . . . . . . . . .4068 mm Pre-1986 models . . . . . . . . . . . . . . . . . . . . . . . . . .
1390 to
1400 mm Estate . . . . . . . . . . . . . . . . . . . . . . . . . . . . . . . . . . . . . . . .4131 mm 1986 models onwards . . . . . . . . . . . . . . . . . . . . . .1404 to 1423 mm Van . . . . . . . . . . . . . . . . . . . . . . . . . . . . . . . . . . . . . . . . . .4129 mm Rear track: 1986 models onwards: Pre-1986 models . . . . . . . . . . . . . . . . . . . . . . . . . .1384 to 1423 mm Saloon (except XR3i and RS Turbo) . . . . . . . . . . . . . . . .4049 mm 1986 models onwards . . . . . . . . . . . . . . . . . . . . . .1384 to 1439 mm Cabriolet, XR3i and RS Turbo . . . . . . . . . . . . . . . . . . . . .4061 mm Estate . . . . . . . . . . . . . . . . . . . . . . . . . . . . . . . . . . . . . . . .4107 mm Weights Van . . . . . . . . . . . . . . . . . . . . . . . . . . . . . . . . . . . . . . . . . .4181 mm Nominal kerb weight:
Overall width: 1.1 litre . . . . . . . . . . . . . . . . . . . . . . . . . . . . . . . . . . . . .855 to 905 kg Pre-1986 models . . . . . . . . . . . . . . . . . . . . . . . . . .1640 to 1656 mm 1.3 litre . . . . . . . . . . . . . . . . . . . . . . . . . . . . . . . . . . . . .870 to 915 kg 1986 models onwards . . . . . . . . . . . . . . . . . . . . . . . . . . . . .1743 mm 1.4 litre . . . . . . . . . . . . . . . . . . . . . . . . . . . . . . . . . . . . .875 to 930 kg
Overall height: 1.6 litre . . . . . . . . . . . . . . . . . . . . . . . . . . . . . . . . . . . . .885 to 995 kg Pre-1986 models: Maximum trailer weight: Saloon, Estate and Cabriolet . . . . . . . . . . . . . . .1389 to 1400 mm 1.1 litre models . . . . . . . . . . . . . . . . . . . . . . . . . . . . . . . . . . . . .245 kg Van . . . . . . . . . . . . . . . . . . . . . . . . . . . . . . . . . . . . . . . . . .1568 mm All other models . . . . . . . . . . . . . . . . . . . . . . . . . . . . . . . . . . . .408 kg 1986 models onwards: Van payloads: Saloon, XR3i, RS Turbo and Cabriolet . . . . . . . .1349 to 1371 mm 35 Van . . . . . . . . . . . . . . . . . . . . . . . . . . . . . . . . . . . . . . . . . . .491 kg Estate . . . . . . . . . . . . . . . . . . . . . . . . . . . . . . . . . . . . . . . .1389 mm 55 Van . . . . . . . . . . . . . . . . . . . . . . . . . . . . . . . . . . . . . . . . . . .772 kg REF Van . . . . . . . . . . . . . . . . . . . . . . . . . . . . . . . . . . . . . . . . . .1594 mm Maximum roof rack load . . . . . . . . . . . . . . . . . . . . . . . . . . . . . . . .75 kg REF·2 Conversion factors
Length (distance)
Inches (in) x 25.4 = Millimetres (mm) x 0.0394 = Inches (in)
Feet (ft) x 0.305 =
Metres (m) x 3.281 = Feet (ft)
Miles x 1.609 = Kilometres (km) x 0.621 = Miles
Volume (capacity)
Cubic inches (cu in; in3) x 16.387 = Cubic centimetres (cc; cm3) x 0.061 = Cubic inches (cu in; in3)
Imperial pints (Imp pt) x 0.568 = Litres (l) x 1.76 = Imperial pints (Imp pt)
Imperial quarts (Imp qt) x 1.137 = Litres (l) x 0.88 = Imperial quarts (Imp qt)
Imperial quarts (Imp qt) x 1.201 = US quarts (US qt) x 0.833 = Imperial quarts (Imp qt)
US quarts (US qt) x 0.946 = Litres (l) x 1.057 = US quarts (US qt)
Imperial gallons (Imp gal) x 4.546 = Litres (l) x 0.22 = Imperial gallons (Imp gal)
Imperial gallons (Imp gal) x 1.201 = US gallons (US gal) x 0.833 = Imperial gallons (Imp gal)
US gallons (US gal) x 3.785 = Litres (l) x 0.264 = US gallons (US gal)
Mass (weight)
Ounces (oz) x 28.35 = Grams (g) x 0.035 = Ounces (oz)
Pounds (lb) x 0.454 = Kilograms (kg) x 2.205 = Pounds (lb)
Force
Ounces-force (ozf; oz) x 0.278 = Newtons (N) x 3.6 = Ounces-force (ozf; oz)
Pounds-force (lbf; lb) x 4.448 = Newtons (N) x 0.225 = Pounds-force (lbf; lb)
Newtons (N) x 0.1 = Kilograms-force (kgf; kg) x 9.81 = Newtons (N)
Pressure
Pounds-force per square inch x 0.070 = Kilograms-force per square x 14.223 = Pounds-force per square inch
(psi; lbf/in2; lb/in2) centimetre (kgf/cm2; kg/cm2) (psi; lbf/in2; lb/in2)
Pounds-force per square inch x 0.068 = Atmospheres (atm) x 14.696 = Pounds-force per square inch
(psi; lbf/in2; lb/in2) (psi; lbf/in2; lb/in2)
Pounds-force per square inch x 0.069 = Bars x 14.5 = Pounds-force per square inch
(psi; lbf/in2; lb/in2) (psi; lbf/in2; lb/in2)
Pounds-force per square inch x 6.895 = Kilopascals (kPa) x 0.145 = Pounds-force per square inch
(psi; lbf/in2; lb/in2) (psi; lbf/in2; lb/in2)
Kilopascals (kPa) x 0.01 = Kilograms-force per square x 98.1 = Kilopascals (kPa) centimetre (kgf/cm2; kg/cm2)
Millibar (mbar) x 100 = Pascals (Pa) x 0.01 = Millibar (mbar)
Millibar (mbar) x 0.0145 = Pounds-force per square inch x 68.947 = Millibar (mbar) (psi; lbf/in2; lb/in2)
Millibar (mbar) x 0.75 = Millimetres of mercury (mmHg) x 1.333 = Millibar (mbar)
Millibar (mbar) x 0.401 = Inches of water (inH2O) x 2.491 = Millibar (mbar)
Millimetres of mercury (mmHg) x 0.535 = Inches of water (inH2O) x 1.868 = Millimetres of mercury (mmHg)
Inches of water (inH2O) x 0.036 = Pounds-force per square inch x 27.68 = Inches of water (inH2O) (psi; lbf/in2; lb/in2)
Torque (moment of force)
Pounds-force inches x 1.152 = Kilograms-force centimetre x 0.868 = Pounds-force inches
(lbf in; lb in) (kgf cm; kg cm) (lbf in; lb in)
Pounds-force inches x 0.113 =
Newton metres (Nm) x 8.85 = Pounds-force inches
(lbf in; lb in) (lbf in; lb in)
Pounds-force inches x 0.083 = Pounds-force feet (lbf ft; lb ft) x 12 = Pounds-force inches
(lbf in; lb in) (lbf in; lb in)
Pounds-force feet (lbf ft; lb ft) x 0.138 = Kilograms-force metres x 7.233 = Pounds-force feet (lbf ft; lb ft) (kgf m; kg m)
Pounds-force feet (lbf ft; lb ft) x 1.356 = Newton metres (Nm) x 0.738 = Pounds-force feet (lbf ft; lb ft)
Newton metres (Nm) x 0.102 = Kilograms-force metres x 9.804 = Newton metres (Nm) (kgf m; kg m)
Power
Horsepower (hp) x 745.7 =
Watts (W) x 0.0013 = Horsepower (hp)
Velocity (speed)
Miles per hour (miles/hr; mph) x 1.609 = Kilometres per hour (km/hr; kph) x 0.621 = Miles per hour (miles/hr; mph)
Fuel consumption*
Miles per
gallon (mpg) x 0.354 = Kilometres per litre (km/l) x 2.825 = Miles per gallon (mpg)
Temperature
Degrees
Fahrenheit = (°C x 1.8) + 32 Degrees
Celsius (Degrees Centigrade; °C) = (°F - 32) x 0.56
* It is common
practice to convert from miles per gallon (mpg) to litres/100 kilometres (l/100km), where mpg x l/100 km = 282 Buying Spare Parts REF·3
Spare parts are available from many sources, and greases, brake pads, touch-up paint, etc). frequently offer
competitive prices when
including maker's appointed garages, accessory Components of this nature sold by a compared with a main dealer or local
garage ,
shops, and motor factors. To be sure of reputable
shop are of the same standard as but it will pay to obtain several
quotes before
obtaining the correct parts, it will sometimes be those used by the car manufacturer. making a
decision . When researching prices,
necessary to quote the vehicle identification
Besides components, these shops also sell also ask what `extras' may be added - for
number. If possible, it can also be useful to take tools and general accessories, usually have instance, fitting a new valve and balancing the
the old parts along for positive identification. convenient opening hours, charge lower prices, wheel are both
commonly charged on top of
Items such as starter motors and alternators may and can often be found not far from home. the
price of a new tyre.
be available under a service exchange scheme - Some accessory shops have parts counters Other sources
any parts returned should always be clean. where the components needed for almost any Our advice regarding spare part sources is repair job can be purchased or ordered.
Beware of parts or materials obtained from
as follows. market stalls, car boot sales or similar outlets. Motor factors Such items are not invariably sub-standard,
Officially-appointed garages Good factors will stock all the more but there is little chance of compensation if This is the best source of parts which are important components which wear out they do prove unsatisfactory. In the case of
peculiar to your car, and are not otherwise comparatively quickly and can sometimes safety-critical components such as brake pads
generally available (eg badges, interior trim, supply individual components needed for the there is the risk not only of financial loss but
certain body panels, etc). It is also the only overhaul of a larger assembly (eg brake seals also of an accident causing injury or
death .
place at which you should buy parts if the and hydraulic parts, bearing shells, pistons, Second-hand components or assemblies
vehicle is still under warranty. valves, alternator brushes). They may also obtained from a car breaker can be a good
Accessory shops handle work such as cylinder block reboring, buy in some circumstances, but this sort of crankshaft regrinding and balancing, etc. purchase is best made by the experienced These are very good
places to buy DIY mechanic.
materials and components needed for the Tyre and exhaust specialists
maintenance of your car (oil, air and fuel These outlets may be independent or
filters, spark plugs, light bulbs, drivebelts, oils members of a local or national chain. They
Vehicle Identification Numbers Modifications are a continuing and bonnet. This illustrates graphically the basic Additionally, on later models a chassis
unpublicised process in vehicle manufacture, tuning functions,
typically plug gap, ignition number is stamped on the floor panel
quite apart from major model changes. Spare timing, idle speed and CO level, and (where between the driver's seat and door, and is
parts manuals and
lists are compiled upon a applicable) valve clearances, points gap and covered by a fold back plastic flap.
numerical basis, the individual vehicle dwell angle.
identification numbers being essential to correct
identification of the component concerned. When ordering spare parts, always give as
much information as possible. Quote the
vehicle model, year of manufacture, body and
engine numbers as appropriate. The Vehicle Identification Number is located
on the plate found under the bonnet above
the radiator. The plate also carries information
concerning paint colour, final drive ratio etc. The engine number is located in one of the
following places, according to engine type: Front right-hand side of engine block Front face of cylinder block Front left-hand side of engine block Cylinder block above clutch bellhousing A tuning decal will also be found under the
Vehicle identification plate location
1 Type Approval Number
2 Vehicle Identification Number
3 Gross vehicle weight
4 Gross
train weight
5 Permitted front axle loading
6 Permitted rear axle loading
7 Steering (LHD/RHD)
8 Engine
9 Transmission
10 Axle (final drive ratio)
11 Trim (interior)
12 Body type
13 Special territory version
14 Body colour
15 KD reference (usually
blank ) or exhaust REF emission level REF·4 General Repair Procedures Whenever servicing, repair or overhaul work unshouldered, the seal should be fitted with effectiveness after long periods of use, and
is carried out on the car or its components, it its face flush with the housing top face (unless should be renewed as a matter of course.
is necessary to observe the following otherwise instructed). Split pins must always be replaced with
procedures and instructions. This will assist in new ones of the correct size for the hole.
carrying out the operation efficiently and to a Screw threads and fastenings When thread-locking compound is found
professional standard of workmanship. Seized nuts, bolts and screws are quite a on the threads of a fastener which is to be re- common occurrence where corrosion has set used, it should be cleaned off with a wire
Joint mating faces and gaskets in, and the use of penetrating oil or releasing brush and solvent, and fresh compound When separating components at their fluid will often overcome this problem if the applied on reassembly.
mating faces, never insert screwdrivers or offending item is soaked for a while before
similar implements into the joint between the attempting to release it. The use of an impact Special tools
faces in order to prise them apart. This can driver may also provide a means of releasing Some repair procedures in this manual
cause severe damage which results in oil such stubborn fastening devices, when used entail the use of special tools such as a press,
leaks, coolant leaks, etc upon reassembly. in conjunction with the appropriate two or three-legged pullers, spring
Separation is usually achieved by tapping screwdriver bit or socket. If none of these compressors, etc. Wherever possible, suitable
along the joint with a soft-faced hammer in methods works, it may be necessary to
resort readily-available alternatives to the
order to break the seal. However, note that to the careful application of heat, or the use of manufacturer's special tools are described,
this method may not be suitable where a hacksaw or nut splitter device. and are shown in use. In some instances,
dowels are used for component location. Studs are usually removed by locking two where no alternative is possible, it has been Where a gasket is used between the mating nuts together on the threaded part, and then necessary to resort to the use of a
faces of two components, ensure that it is using a spanner on the lower nut to unscrew manufacturer's tool, and this has been done
renewed on reassembly, and fit it dry unless the stud. Studs or bolts which have broken off for reasons of safety as well as the efficient
otherwise stated in the repair procedure. Make below the surface of the component in which completion of the repair operation. Unless you
sure that the mating faces are clean and dry, they are mounted can sometimes be removed are highly-skilled and have a thorough
with all traces of old gasket removed. When using a stud extractor. Always ensure that a understanding of the procedures described,
cleaning a joint face, use a tool which is not blind tapped hole is completely free from oil, never attempt to bypass the use of any
likely to score or damage the face, and remove grease, water or other fluid before installing special tool when the procedure described
any burrs or nicks with an oilstone or fine file. the bolt or stud. Failure to do this could cause specifies its use. Not only is there a very great Make sure that tapped holes are cleaned the housing to crack due to the hydraulic risk of personal injury, but expensive damage
with a pipe cleaner, and keep them free of action of the bolt or stud as it is screwed in. could be caused to the components involved.
jointing compound, if this is being used, When tightening a castellated nut to accept Environmental considerations
unless specifically instructed otherwise. a split pin, tighten the nut to the specified Ensure that all orifices, channels or pipes torque, where applicable, and then tighten When disposing of used engine oil, brake
are clear, and blow through them, preferably further to the next split pin hole. Never fluid, antifreeze, etc, give due
consideration to
using compressed air. slacken the nut to align the split pin hole, any detrimental environmental effects. Do not, unless stated in the repair procedure. for instance, pour any of the above liquids
Oil seals When checking or retightening a nut or bolt down drains into the general sewage system, Oil seals can be removed by levering them to a specified torque setting, slacken the nut or onto the ground to soak away. Many local
out with a wide flat-bladed screwdriver or or bolt by a quarter of a turn, and then council
refuse tips provide a facility for waste
similar tool. Alternatively, a number of self- retighten to the specified setting. However, oil disposal, as do some garages. If none of
tapping screws may be screwed into the seal, this should not be attempted where angular these facilities are available, consult your local
and these used as a purchase for pliers or tightening has been used. Environmental Health Department, or the
similar in order to pull the seal free. For some screw fastenings, notably National Rivers
Authority , for further advice. Whenever an oil seal is removed from its cylinder head bolts or nuts, torque wrench With the universal tightening-up of
working location, either individually or as part settings are no longer specified for the latter legislation regarding the emission of
of an assembly, it should be renewed. stages of tightening, "angle-tightening" being environmentally-harmful substances from The very fine sealing lip of the seal is easily called up instead. Typically, a fairly low torque motor vehicles, most current vehicles have
damaged, and will not seal if the surface it tamperproof devices fitted to the main wrench setting will be applied to the
contacts is not completely clean and free from adjustment points of the fuel system. These bolts/nuts in the correct sequence, followed
scratches, nicks or grooves. If the original devices are primarily designed to prevent by one or more stages of tightening through
sealing surface of the component cannot be unqualified persons from adjusting the fuel/air specified angles.
restored, and the manufacturer has not made mixture, with the chance of a consequent
provision for slight relocation of the seal Locknuts, locktabs and washers increase in
toxic emissions. If such devices
relative to the sealing surface, the component Any fastening which will rotate against a are encountered during servicing or overhaul,
should be renewed. component or housing during tightening they should, wherever possible, be renewed Protect the lips of the seal from any surface should always have a washer between it and or refitted in accordance with the vehicle
which may damage them in the course of the relevant component or housing. manufacturer's requirements or current
fitting. Use tape or a conical sleeve where Spring or split washers should always be legislation.
possible. Lubricate the seal lips with oil before renewed when they are used to lock a critical Note: It is
fitting and, on dual-lipped seals, fill the space component such as a big-end bearing antisocial and
between the lips with grease. retaining bolt or nut. Locktabs which are
illegal to dump oil Unless otherwise stated, oil seals must be folded over to retain a nut or bolt should down the drain.
fitted with their sealing lips toward the always be renewed. To find the
lubricant to be sealed. Self-locking nuts can be re-used in non- location of your Use a tubular drift or block of wood of the critical areas, providing resistance can be felt local oil
recycling appropriate size to install the seal and, if the when the locking portion passes over the bolt bank,
call this
seal housing is shouldered, drive the seal or stud thread. However, it should be noted number free.
down to the
shoulder . If the seal housing is that self-locking stiffnuts tend to lose their Jacking and Vehicle Support REF·5
The jack supplied in the vehicle tool kit To raise the rear of a Van, place the jack may be jacked up under the rear spring seat,
should only be used for emergency roadside under the centre of the axle tube, taking care or the Van under the leaf spring-to-axle tube
wheel changing unless it is supplemented not to contact the brake pressure regulating mounting plate.
with axle stands. valve or the hydraulic lines. Never work under, around or near a raised When using a trolley or other type of Axle stands should only be located under car unless it is adequately supported in at
workshop jack, it can be placed under the the double-skinned sections of the side least two places with axle stands or suitable
front lower crossmember (provided a shaped members at the front of the vehicle, or under sturdy blocks.
block of wood is used as an insulator) to raise the sill jacking points. At the rear of the vehicle
the front of the vehicle. (Saloon or Estate), place the stands under the To raise the rear of a Saloon (except fuel- member to which the tie-bar is attached. On
injected variants) or Estate, place the jack Vans, place the stands under the leaf spring
under the right-hand suspension lower arm front attachment body bracket.
mounting bracket using a rubber pad as an Provided only one wheel at the rear of the
insulator. vehicle is to be raised, the Saloon and Estate
Jacking and support points on vehicle underside (Saloon and Estate models) A Axle
stand positions (rear) B Axle stand positions under sills (with wooden or rubber pad) C Axle stand positions (front) D Trolley jack position for raising front of car (on pre-1986 models, use shaped wooden block as shown) E Trolley jack position for raising rear of car on carburettor engine models only (not to be used on fuel-injection versions due to fuel pump location)
Jacking and support points on vehicle underside (Van models) A Axle stand positions (rear) B Axle stand positions under sills (with wooden or rubber pad) C Axle stand positions (front) D Trolley jack position for raising front of vehicle (on pre-1986 models, use shaped wooden block as shown) E Trolley jack position for raising rear of vehicle
REF REF·6 Tools and Working Facilities
Introduction Maintenance Repair and overhaul tool kit A
selection of good tools is a fundamental and minor repair tool kit These tools are virtually essential for
requirement for
anyone contemplating the The tools given in this list should be anyone undertaking any major repairs to a
maintenance and repair of a motor vehicle.
considered as a minimum requirement if motor vehicle, and are additional to those
For the owner who does not possess any, routine maintenance, servicing and minor given in the Maintenance and minor repair list.
their purchase will prove a considerable repair operations are to be undertaken. We Included in this list is a comprehensive set of
expense, offsetting some of the savings made recommend the purchase of combination sockets. Although these are expensive, they
by doing-it-yourself. However, provided that spanners (ring one end, open-ended the will be found invaluable as they are so
the tools purchased meet the relevant national other); although more expensive than open-
versatile - particularly if various drives are
safety standards and are of good quality, they ended ones, they do give the advantages of included in the set. We recommend the half-
will last for many years and prove an both types of spanner. inch square-drive type, as this can be used
extremely worthwhile investment. Combination spanners: with most proprietary torque wrenches. To help the average owner to decide which Metric - 8 to 19 mm inclusive The tools in this list will sometimes need to
tools are needed to carry out the various tasks Adjustable spanner - 35 mm jaw (approx.) be supplemented by tools from the Special list:
detailed in this manual, we have compiled Spark plug spanner (with rubber insert) - Sockets (or box spanners) to cover range in
three lists of tools under the following petrol models previous list (including Torx sockets)
headings: Maintenance and minor repair, Spark plug gap adjustment tool - petrol Reversible ratchet drive (for use with
Repair and overhaul, and Special. Newcomers models sockets)
to
practical mechanics should start off with Set of feeler gauges Extension piece, 250 mm (for use with
the Maintenance and minor repair tool kit, and Brake bleed nipple spanner sockets)
confine themselves to the simpler jobs around Screwdrivers: Universal joint (for use with sockets)
the vehicle. Then, as
confidence and Flat blade - 100 mm long x 6 mm dia Torque wrench (for use with sockets)
experience grow, more difficult tasks can be Cross blade - 100 mm long x 6 mm dia Self-locking grips
undertaken, with extra tools being purchased Combination pliers Ball pein hammer
as, and when, they are needed. In this way, a Hacksaw (junior) Soft-faced mallet (plastic/aluminium or
Maintenance and minor repair tool kit can be Tyre pump rubber)
built up into a Repair and overhaul tool kit over Tyre pressure gauge Screwdrivers:
a considerable period of time, without any Oil can Flat blade - long & sturdy, short (chubby),
major cash outlays. The experienced do-it- Oil filter removal tool and narrow (electrician's) types
yourselfer will have a tool kit good enough for Fine emery cloth Cross blade Long & sturdy, and short
most repair and overhaul procedures, and will Wire brush (small) (chubby) types
add tools from the Special category when it is Funnel (
medium size) Pliers:
felt that the expense is justified by the amount Long-nosed
of use to which these tools will be put. Side cutters (electrician's) Circlip (internal and external) Cold chisel - 25 mm Scriber Scraper Centre-punch Pin punch Hacksaw Brake hose clamp Brake/clutch bleeding kit Selection of twist
drills Steel
rule /straight-edge Allen keys (inc. splined/Torx type) Selection of files Wire brush Axle stands Jack (strong trolley or hydraulic type) Sockets and reversible ratchet drive Valve spring compressor Light with extension lead
Spline bit set Piston ring compressor Clutch plate alignment set Tools and Working Facilities REF·7
Special tools Buying tools Working facilities The tools in this list are those which are not Reputable motor accessory shops and Not to be
forgotten when discussing tools
used regularly, are expensive to buy, or which superstores often offer excellent quality tools is the workshop itself. If anything more than
need to be used in accordance with their at discount prices, so it pays to shop around. routine maintenance is to be carried out, a
manufacturers' instructions. Unless relatively Remember, you don't have to buy the most suitable working area becomes essential.
difficult mechanical jobs are undertaken expensive items on the shelf, but it is always It is appreciated that many an owner-
frequently, it will not be
economic to buy advisable to steer clear of the very cheap mechanic is forced by circumstances to
many of these tools. Where this is the case, tools. Beware of `bargains' offered on market remove an engine or similar item without the
you could consider clubbing together with stalls or at car boot sales. There are plenty of benefit of a garage or workshop. Having done
friends (or joining a motorists' club) to make a good tools around at reasonable prices, but this, any repairs should always be done under
joint purchase, or borrowing the tools against always aim to purchase items which meet the the cover of a roof.
a
deposit from a local garage or tool hire relevant national safety standards. If in doubt, Wherever possible, any dismantling should
specialist. It is worth noting that many of the ask the proprietor or manager of the shop for be done on a clean, flat workbench or table at
larger DIY superstores now carry a large advice before making a purchase. a suitable working height.
range of special tools for hire at modest rates. Any workbench needs a vice; one with a jaw The following list contains only those tools Care and maintenance of tools opening of 100 mm is suitable for most jobs.
and instruments freely available to the public, Having purchased a reasonable tool kit, it is As mentioned previously, some clean dry
and not those special tools produced by the necessary to keep the tools in a clean and
storage space is also required for tools, as well
vehicle manufacturer specifically for its dealer serviceable condition. After use, always wipe as for any lubricants, cleaning fluids, touch-up
network . You will find occasional references off any dirt, grease and metal particles using a paints etc, which become necessary.
to these manufacturers' special tools in the clean, dry cloth, before
putting the tools away. Another item which may be required, and
text of this manual. Generally, an alternative Never leave them lying around after they have which has a much more general usage, is an
method of doing the job without the vehicle been used. A simple tool rack on the garage electric drill with a
chuck capacity of at least 8
manufacturers' special tool is given. However, or workshop
wall for items such as mm. This, together with a good range of twist
sometimes there is no alternative to using screwdrivers and pliers is a good idea. Store drills, is virtually essential for fitting
them. Where this is the case and the relevant all normal spanners and sockets in a metal accessories.
tool cannot be bought or borrowed, you will box. Any measuring instruments, gauges, Last, but not least, always keep a supply of
have to entrust the work to a dealer. meters, etc, must be carefully stored where old newspapers and clean, lint-free rags Valve spring compressor they cannot be damaged or become rusty. available, and try to keep any working area as Valve grinding tool Take a little care when tools are used. clean as possible. Piston ring compressor Hammer heads inevitably become marked, Piston ring removal/installation tool and screwdrivers lose the keen edge on their Cylinder bore hone blades from time to time. A little timely Balljoint separator attention with emery cloth or a file will soon Coil spring compressors (where applicable) restore items like this to a good finish. Two/three-legged hub and bearing puller Impact screwdriver Micrometer and/or
vernier calipers Dial gauge Stroboscopic timing light Dwell angle meter/tachometer Universal electrical multi-meter Cylinder compression gauge Hand-operated vacuum pump and gauge Clutch plate alignment set Brake shoe steady spring cup removal tool Bush and bearing removal/installation set Stud extractors Tap and die set Lifting tackle Trolley jack Micrometer set Dial test indicator ("dial gauge")
Stroboscopic timing light Compression tester Stud extractor set REF REF·8 MOT Test Checks This is a guide to
getting your vehicle through the MOT test.
Obviously it will not be possible to examine the vehicle to the same
standard as the professional MOT tester. However, working through
the following checks will enable you to identify any problem areas
before submitting the vehicle for the test. Where a testable component is in
borderline condition, the tester
has discretion in deciding whether to pass or fail it. The basis of such
discretion is whether the tester would be
happy for a close relative or
friend to use the vehicle with the component in that condition. If the
vehicle presented is clean and evidently well cared for, the tester may
be more inclined to pass a borderline component than if the vehicle is
scruffy and apparently neglected. It has only been possible to summarise the test requirements here,
based on the regulations in force at the time of printing. Test standards
are becoming increasingly stringent, although there are some
exemptions for older vehicles. For full details obtain a copy of the Haynes
publication Pass the MOT! (available from stockists of Haynes manuals). An assistant will be needed to help carry out some of these checks.
The checks have been sub-divided into four categories, as follows:
1 Checks carried out FROM THE DRIVER'S 2 Checks carried out WITH THE VEHICLE 3 Checks carried out WITH THE VEHICLE 4 Checks carried out on YOUR VEHICLE'S SEAT ON THE GROUND RAISED AND THE EXHAUST EMISSION WHEELS FREE TO SYSTEM TURN
1 Checks carried out FROM THE DRIVER'S SEAT
Handbrake Test the operation of the handbrake.
Excessive travel (too many clicks) indicates
incorrect brake or cable adjustment. Check that the handbrake cannot be
released by tapping the lever sideways. Check
the security of the lever mountings.
Check that the brake pedal is secure and in movement of the steering wheel, indicating good condition. Check also for signs of fluid wear in the column support bearings or leaks on the pedal, floor or carpets, which couplings. would indicate failed seals in the brake master cylinder. Windscreen and mirrors Check the servo unit (when applicable) by The windscreen must be free of cracks or operating the brake pedal several times, then other significant damage within the driver's keeping the pedal depressed and starting the field of view. (Small
stone chips are engine. As the engine starts, the pedal will acceptable.) Rear view mirrors must be move down slightly. If not, the vacuum hose or secure,
intact , and capable of being adjusted. the servo itself may be faulty.
Steering wheel and column
Footbrake Examine the steering wheel for fractures or Depress the brake pedal and check that it looseness of the hub, spokes or rim.
does not creep down to the floor, indicating a Move the steering wheel from side to side
master cylinder fault. Release the pedal, wait and then up and down. Check that the
a few seconds, then depress it again. If the steering wheel is not loose on the column,
pedal travels nearly to the floor before firm indicating wear or a loose retaining nut.
resistance is felt, brake adjustment or repair is Continue moving the steering wheel as before,
necessary. If the pedal feels spongy, there is but also turn it slightly from left to right.
air in the hydraulic system which must be Check that the steering wheel is not loose
removed by bleeding. on the column, and that there is no abnormal MOT Test Checks REF·9
Electrical equipment Inspect both front brake flexible hoses for cracks or deterioration of the rubber. Turn the Switch on the ignition and check the steering from lock to lock, and ensure that the operation of the horn. hoses do not contact the wheel, tyre, or any Check the windscreen washers and wipers, part of the steering or suspension mechanism. examining the wiper blades; renew damaged With the brake pedal firmly depressed, check or perished blades. Also check the operation the hoses for bulges or leaks under pressure. of the stop-lights.
Seat belts and seats
Note: The following checks are applicable to
all seat belts, front and rear. Examine the webbing of all the belts
(including rear belts if fitted) for cuts, serious
fraying or deterioration.
Fasten and unfasten
each belt to check the buckles. If applicable,
check the retracting mechanism. Check the
security of all seat belt mountings accessible Check the operation of the sidelights and
from inside the vehicle. number plate lights. The lenses and reflectors Steering and suspension The front seats themselves must be must be secure, clean and undamaged. Have your assistant turn the steering wheel
securely attached and the backrests must Check the operation and alignment of the
lock in the upright position. from side to side slightly, up to the point where headlights. The headlight reflectors must not the steering gear just begins to transmit this be tarnished and the lenses must be
Doors movement to the roadwheels. Check for undamaged. Both front doors must be able to be opened excessive free play between the steering Switch on the ignition and check the
and closed from outside and inside, and must wheel and the steering gear, indicating wear or operation of the direction indicators (including
latch securely when closed. insecurity of the steering column joints, the the instrument panel tell-
tale ) and the hazard column-to-steering gear coupling, or the warning lights. Operation of the sidelights and steering gear itself. stop-lights must not
affect the indicators - if it 2 Checks carried out WITH THE VEHICLE ON THE does, the cause is usually a bad earth at the rear light cluster. Have your assistant turn the steering wheel more vigorously in each direction, so that the roadwheels just begin to turn. As this is done, Check the operation of the rear foglight(s), GROUND examine all the steering joints, linkages, including the warning light on the instrument fittings and attachments. Renew any panel or in the switch.
Vehicle identification component that shows signs of wear or Footbrake damage. On vehicles with power steering, Number plates must be in good condition, check the security and condition of the
secure and legible, with
letters and numbers Examine the master cylinder, brake pipes steering pump, drivebelt and hoses.
correctly spaced
spacing at (A) should be and servo unit for leaks, loose mountings, Check that the vehicle is standing level,
twice that at (B). corrosion or other damage. and at approximately the correct ride height. Shock absorbers Depress each corner of the vehicle in turn, then release it. The vehicle should rise and then settle in its normal position. If the vehicle continues to rise and fall, the shock absorber is defective. A shock absorber which has seized will also cause the vehicle to fail.
The fluid reservoir must be secure and the The VIN plate and/or homologation plate fluid level must be between the upper (A) and
must be legible. lower (B) markings.
REF REF·10 MOT Test Checks
Exhaust system Front and rear suspension and The same general checks apply to vehicles Start the engine. With your assistant wheel bearings fitted with other suspension types, such as torsion bars, hydraulic displacer units, etc.
holding a rag over the tailpipe, check the Starting at the front right-hand side, grasp Ensure that all mountings and attachments are
entire system for leaks. Repair or renew the roadwheel at the 3 o'clock and 9 o'clock secure, that there are no signs of excessive
leaking sections. positions and shake it vigorously. Check for wear, corrosion or damage, and (on hydraulic free play or insecurity at the wheel bearings, types) that there are no fluid leaks or damaged suspension balljoints, or suspension
mount - pipes. ings, pivots and attachments. Inspect the shock absorbers for signs of Now grasp the wheel at the 12 o'clock and serious fluid leakage. Check for wear of the 6 o'clock positions and repeat the previous mounting bushes or attachments, or damage inspection. Spin the wheel, and check for to the body of the unit. roughness or tightness of the front wheel bearing. Driveshafts (fwd vehicles only) Rotate each front wheel in turn and inspect the constant velocity joint gaiters for splits or damage. Also check that each driveshaft is straight and undamaged.
3 Checks carried out WITH THE VEHICLE RAISED AND THE WHEELS FREE TO TURN
Jack up the front and rear of the vehicle, If excess free play is suspected at a
and securely support it on axle stands. component pivot point, this can be confirmed
Position the stands clear of the suspension by using a large screwdriver or similar tool and
assemblies. Ensure that the wheels are levering between the mounting and the
clear of the ground and that the steering component attachment. This will confirm
can be turned from lock to lock. whether the wear is in the pivot bush, its Braking system retaining bolt, or in the mounting itself (the bolt
Steering mechanism If possible without dismantling, check holes can often become elongated). brake pad wear and disc condition. Ensure Have your assistant turn the steering from that the friction lining material has not worn
lock to lock. Check that the steering turns excessively, (A) and that the discs are not
smoothly, and that no part of the steering fractured, pitted, scored or badly worn (B).
mechanism, including a wheel or tyre, fouls
any brake hose or pipe or any part of the body
structure. Examine the steering rack rubber gaiters
for damage or insecurity of the retaining clips.
If power steering is fitted, check for signs of
damage or leakage of the fluid hoses, pipes or
connections. Also check for excessive
stiffness or binding of the steering, a missing
split pin or locking device, or severe corrosion
of the body structure within 30 cm of any
steering component attachment point. Carry out all the above checks at the other front wheel, and then at both rear wheels.
Springs and shock absorbers Examine all the rigid brake pipes Examine the suspension struts (when underneath the vehicle, and the flexible applicable) for serious fluid leakage, corrosion, hose(s) at the rear. Look for corrosion, chafing or damage to the casing. Also check the or insecurity of the pipes, and for signs of security of the mounting points. bulging under pressure, chafing, splits or If coil springs are fitted, check that the deterioration of the flexible hoses. spring ends locate in their seats, and that the Look for signs of fluid leaks at the brake spring is not corroded, cracked or broken. calipers or on the brake backplates. Repair or If leaf springs are fitted, check that all renew leaking components. leaves are intact, that the axle is securely Slowly spin each wheel, while your attached to each spring, and that there is no assistant depresses and releases the deterioration of the spring eye mountings, footbrake. Ensure that each brake is operating bushes, and shackles. and does not bind when the pedal is released. MOT Test Checks REF·11
the engine speed to return to idle, and watch for smoke emissions from the exhaust tailpipe. If the idle speed is obviously much too high, or if dense blue or clearly-visible black smoke comes from the tailpipe for more than 5 seconds, the vehicle will fail. As a rule of thumb, blue smoke signifies oil being burnt (engine wear) while black smoke signifies unburnt fuel (dirty air cleaner element, or other carburettor or fuel system fault). An exhaust gas analyser capable of measuring carbon monoxide (CO) and hydrocarbons (HC) is now needed. If such an Examine the handbrake mechanism, properly seated, and that the wheel is not instrument cannot be
hired or borrowed, a
checking for frayed or broken cables, distorted or damaged. local garage may
agree to perform the check
excessive corrosion, or wear or insecurity of Check that the tyres are of the correct size for a small fee.
the linkage. Check that the mechanism works for the vehicle, that they are of the same size
on each relevant wheel, and releases fully, and type on each axle, and that the pressures CO emissions (mixture)
without binding. are correct. At the time of writing, the maximum CO It is not possible to test brake efficiency Check the tyre tread depth. The
legal level at idle is 3.5% for vehicles first used after
without special equipment, but a road test can minimum at the time of writing is 1.6 mm over August 1986 and 4.5% for older vehicles.
be carried out later to check that the vehicle at least three-quarters of the tread width. From January 1996 a much tighter limit
pulls up in a straight line. Abnormal tread wear may indicate incorrect (around 0.5%) applies to catalyst-equipped front wheel alignment. vehicles first used from August 1992. If the
Fuel and exhaust systems CO level cannot be reduced far enough to Inspect the fuel tank (including the filler Body corrosion pass the test (and the fuel and ignition
cap), fuel pipes, hoses and unions. All Check the condition of the entire vehicle systems are otherwise in good condition) then
components must be secure and free from structure for signs of corrosion in load-bearing the carburettor is badly worn, or there is some
leaks. areas. (These include chassis box sections, problem in the fuel injection system or Examine the exhaust system over its entire side sills, cross-members, pillars, and all catalytic converter (as applicable).
length, checking for any damaged, broken or suspension, steering, braking system and
missing mountings, security of the retaining seat belt mountings and anchorages.) Any HC emissions
clamps and rust or corrosion. With the CO emissions within limits, HC corrosion which has seriously reduced the emissions must be no more than 1200 ppm thickness of a load-bearing area is likely to (parts per million). If the vehicle fails this test cause the vehicle to fail. In this case at idle, it can be re-tested at around 2000 rpm; professional repairs are likely to be needed. if the HC level is then 1200 ppm or less, this Damage or corrosion which causes sharp counts as a pass. or otherwise dangerous edges to be exposed Excessive HC emissions can be caused by will also cause the vehicle to fail. oil being burnt, but they are more likely to be due to unburnt fuel.
4 Checks carried out on YOUR VEHICLE'S EXHAUST
Diesel models The only emission test applicable to Diesel EMISSION SYSTEM engines is the measuring of exhaust smoke density. The test involves accelerating the engine several times to its maximum Petrol models unloaded speed.
Wheels and tyres Have the engine at normal operating Note: It is of the utmost importance that the Examine the sidewalls and tread area of temperature, and make sure that it is in good engine timing belt is in good condition before
each tyre in turn. Check for cuts, tears, lumps,
tune (ignition system in good order, air filter the test is carried out.
bulges, separation of the tread, and
exposure element clean, etc).
of the ply or cord due to wear or damage. Before any measurements are carried out, Excessive smoke can be caused by a dirty
Check that the tyre bead is correctly seated raise the engine speed to around 2500 rpm, air cleaner element. Otherwise, professional
on the wheel rim, that the valve is sound and and hold it at this speed for 20 seconds. Allow advice may be needed to find the cause.
REF REF·12 Fault Finding Engine 1 Automatic transmission 6 Engine fails to rotate when attempting to start Fluid leakage Engine rotates but will not start Transmission fluid brown or has burned smell Engine difficult to start when cold General gear selection problems Engine difficult to start when hot Transmission will not downshift (kickdown) with accelerator fully Starter motor noisy or excessively rough in engagement depressed Engine starts but stops immediately Engine will not start in any gear, or starts in gears other than Park Engine idles erratically or Neutral Transmission slips, shifts roughly, is noisy or has no drive in Engine misfires at idle speed forward or reverse gears Engine misfires throughout the driving speed range Engine hesitates on acceleration Driveshafts 7 Engine stalls Clicking or knocking noise on turns (at slow speed on full lock) Engine lacks power Vibration when accelerating or decelerating Engine backfires Oil pressure warning light illuminated with engine running Braking system 8 Engine runs-on after switching off Vehicle pulls to one side under braking Engine noises Noise (grinding or high-pitched squeal) when brakes applied Excessive brake pedal travel Cooling system 2 Brake pedal feels spongy when depressed Overheating Excessive brake pedal effort required to stop vehicle Overcooling Judder felt through brake pedal or steering wheel when braking External coolant leakage Brakes binding Internal coolant leakage Rear wheels locking under normal braking Corrosion Suspension and steering systems 9 Fuel and exhaust system 3 Vehicle pulls to one side Wheel wobble and vibration Excessive fuel consumption Excessive pitching and/or rolling around corners or during Fuel leakage and/or fuel odour braking Excessive noise or fumes from exhaust system Wandering or general instability Clutch 4 Excessively stiff steering Excessive play in steering Pedal travels to floor - no pressure or very little resistance Lack of power assistance Clutch fails to disengage (unable to
select gears) Tyre wear excessive Clutch slips (engine speed increases with no increase in vehicle speed) Electrical system 10 Judder as clutch is engaged Battery will not hold a charge for more than a few days Noise when depressing or releasing clutch pedal Ignition warning light remains illuminated with engine running Ignition warning light fails to come on Manual transmission 5 Lights inoperative Noisy in neutral with engine running Instrument readings inaccurate or erratic Noisy in one particular gear Horn inoperative or unsatisfactory in operation Difficulty engaging gears Windscreen/tailgate wipers inoperative or unsatisfactory in Jumps out of gear operation Vibration Windscreen/tailgate washers inoperative or unsatisfactory in Lubricant leaks operation Central locking system inoperative or unsatisfactory in operation Electric windows inoperative or unsatisfactory in operation
Introduction The vehicle owner who does his or her own maintenance according With any fault finding, the first step is to decide where to begin
to the recommended service schedules should not have to use this investigations. Sometimes this is obvious, but on other occasions a
section of the manual very often. Modern component reliability is such little detective work will be necessary. The owner who makes half a
that, provided those items subject to wear or deterioration are dozen haphazard adjustments or replacements may be successful in
inspected or renewed at the specified intervals, sudden failure is curing a fault (or its symptoms), but will be none the wiser if the fault
comparatively rare. Faults do not usually just happen as a result of recurs and ultimately may have spent more time and money than was
sudden failure, but
develop over a period of time. Major mechanical necessary. A calm and
logical approach will be found to be more
failures in particular are usually preceded by
characteristic symptoms satisfactory in the long run. Always take into account any warning
over hundreds or even thousands of miles. Those components which signs or abnormalities that may have been noticed in the period
do occasionally fail without warning are often small and easily carried preceding the fault - power loss, high or low gauge readings, unusual
in the vehicle. smells, etc - and remember that failure of components such as fuses or spark plugs may only be pointers to some underlying fault. Fault Finding REF·13
The pages which follow provide an easy reference guide to the more Cure the
disease , not the symptom. Substituting a flat battery with a
common problems which may occur during the operation of the fully charged one will get you off the hard shoulder, but if the
vehicle. These problems and their possible causes are grouped under underlying cause is not attended to, the new battery will go the same
headings denoting various components or systems, such as Engine, way. Similarly, changing oil-fouled spark plugs for a new set will get
Cooling system, etc. The Chapter and/or Section which deals with the you moving again, but remember that the reason for the fouling (if it
problem is also shown in brackets. Whatever the fault, certain basic wasn't simply an incorrect grade of plug) will have to be established
principles apply. These are as follows: and corrected. Verify the fault. This is simply a matter of being sure that you
know Don't take anything for
granted . Particularly, don't forget that a
what the symptoms are before starting work. This is particularly "new" component may itself be defective (especially if it's been rattling
important if you are investigating a fault for
someone else who may not around in the boot for months), and don't leave components out of a
have described it very accurately. fault diagnosis sequence just because they are new or recently fitted. Don't overlook the obvious. For example, if the vehicle won't start, is When you do finally diagnose a difficult fault, you'll probably realise
there petrol in the tank? (Don't take anyone else's word on this particular that all the evidence was there from the start.
point, and don't
trust the fuel gauge either!) If an electrical fault is
indicated, look for loose or broken wires before digging out the test gear.
1 Engine
Engine fails to rotate when attempting to start Engine starts but stops immediately Battery terminal connections loose or corroded ("Weekly checks"). Loose or faulty electrical connections in the ignition circuit (Chapter 1 Battery discharged or faulty (Chapter 5, Part A). and Chapter 5, Part B). Broken, loose or disconnected wiring in the starting circuit Vacuum leak at the carburettor/fuel injection unit/throttle body or (Chapter 5, Part A). inlet manifold (Chapter 4). Defective starter solenoid or switch (Chapter 5, Part A). Carburettor or fuel injection system fault (Chapter 4). Defective starter motor (Chapter 5, Part A). Starter pinion or flywheel ring gear teeth loose or broken (Chapter 5, Engine idles erratically Part A and Chapter 2). Air filter element clogged (Chapter 1). Engine earth strap broken or disconnected (Chapter 5, Part A). Vacuum leak at the carburettor/fuel injection unit/throttle body, Automatic transmission not in Park/Neutral position or starter inlet manifold or associated hoses (Chapter 4). inhibitor switch faulty (Chapter 7, Part B). Worn, faulty or incorrectly gapped spark plugs (Chapter 1). Uneven or low cylinder compressions (Chapter 2).
Engine rotates but will not start Camshaft lobes worn (Chapter 2). Fuel tank empty. Timing belt incorrectly tensioned - where applicable (Chapter 2, Battery discharged (engine rotates slowly) (Chapter 5, Part A). Part B). Battery terminal connections loose or corroded ("Weekly checks"). Incorrect valve clearances - where applicable (Chapter 2, Part A). Ignition components damp or damaged (Chapter 1 and Chapter 5, Carburettor or fuel injection system fault (Chapter 4). Part B). Broken, loose or disconnected wiring in the ignition circuit (Chapter 1 Engine misfires at idle speed and Chapter 5, Part B). Worn, faulty or incorrectly gapped spark plugs (Chapter 1). Worn, faulty or incorrectly gapped spark plugs (Chapter 1). Faulty spark plug HT leads (Chapter 1). Carburettor or fuel injection system fault (Chapter 4). Incorrect ignition timing (Chapter 1). Major mechanical failure (eg camshaft drive) (Chapter 2). Vacuum leak at the carburettor/fuel injection unit/throttle body, inlet manifold or associated hoses (Chapter 4).
Engine difficult to start when cold Distributor cap cracked or tracking internally - where applicable Battery discharged (Chapter 5, Part A). (Chapter 1). Battery terminal connections loose or corroded ("Weekly checks"). Uneven or low cylinder compressions (Chapter 2). Worn, faulty or incorrectly gapped spark plugs (Chapter 1). Disconnected, leaking or perished crankcase ventilation hoses Carburettor or fuel injection system fault (Chapter 4). (Chapter 4, Part E). Other ignition system fault (Chapter 1 and Chapter 5, Part B). Carburettor or fuel injection system fault (Chapter 4). Low cylinder compressions (Chapter 2). Incorrect valve clearances - where applicable (Chapter 2, Part A). Incorrect valve clearances - where applicable (Chapter 2, Part A). Engine misfires throughout the driving speed
Engine difficult to start when hot range Air filter element dirty or clogged (Chapter 1). Fuel filter choked (Chapter 1). Carburettor or fuel injection system fault (Chapter 4). Fuel pump faulty or delivery pressure low (Chapter 4). Low cylinder compressions (Chapter 2). Fuel tank vent blocked or fuel pipes restricted (Chapter 4). Incorrect valve clearances - where applicable (Chapter 2, Part A). Vacuum leak at the carburettor/fuel injection unit/throttle body,
Starter motor noisy or excessively rough in inlet manifold or associated hoses (Chapter 4).
engagement Worn, faulty or incorrectly gapped spark plugs (Chapter 1). Faulty spark plug HT leads (Chapter 1). Starter pinion or flywheel ring gear teeth loose or broken (Chapter 5, Distributor cap cracked or tracking internally - where applicable Part A and Chapter 2). (Chapter 1). Starter motor mounting bolts loose or missing (Chapter 5, Part A). Faulty ignition coil or DIS module (Chapter 5, Part B). Starter motor internal components worn or damaged (Chapter 5, Uneven or low cylinder compressions (Chapter 2). Part A). Carburettor or fuel injection system fault (Chapter 4). REF Incorrect valve clearances - where applicable (Chapter 2, Part A). REF·14 Fault Finding
1 Engine (continued)
Engine hesitates on acceleration Oil pressure relief valve defective (Chapter 2). Oil pick-up strainer clogged (Chapter 2). Worn, faulty or incorrectly gapped spark plugs (Chapter 1). Vacuum leak at the carburettor/fuel injection unit/throttle body, Engine runs-on after switching off inlet manifold or associated hoses (Chapter 4). Excessive carbon build-up in engine (Chapter 2). Carburettor or fuel injection system fault (Chapter 4). High engine operating temperature (Chapter 3).
Engine stalls Carburettor or fuel injection system fault (Chapter 4). Vacuum leak at the carburettor/fuel injection unit/throttle body, Engine noises inlet manifold or associated hoses (Chapter 4). Fuel filter choked (Chapter 1). Pre-ignition (pinking) or knocking during acceleration or Fuel pump faulty or delivery pressure low (Chapter 4). under load Fuel tank vent blocked or fuel pipes restricted (Chapter 4). Ignition timing incorrect (Chapter 1). Carburettor or fuel injection system fault (Chapter 4). Incorrect grade of fuel (Chapters 1 and 4). Vacuum leak at the carburettor/fuel injection unit/throttle body,
Engine lacks power inlet manifold or associated hoses (Chapter 4). Incorrect ignition timing (Chapter 1). Excessive carbon build-up in engine (Chapter 2). Timing belt/chain incorrectly fitted or tensioned (Chapter 2). Worn or damaged distributor (where applicable) or other ignition Fuel filter choked (Chapter 1). system component (Chapter 5, Part B). Fuel pump faulty or delivery pressure low (Chapter 4). Carburettor or fuel injection system fault (Chapter 4). Uneven or low cylinder compressions (Chapter 2). Whistling or wheezing noises Worn, faulty or incorrectly gapped spark plugs (Chapter 1). Vacuum leak at the carburettor/fuel injection unit/throttle body, Leaking inlet manifold or carburettor/fuel injection unit/throttle inlet manifold or associated hoses (Chapter 4). body gasket (Chapter 4). Brakes binding (Chapters 1 and 9). Leaking exhaust manifold gasket or pipe to manifold joint (Chapter 4, Clutch slipping (Chapter 6). Part E). Automatic transmission fluid level incorrect (Chapter 1). Leaking vacuum hose (Chapters 4, 5 and 9). Carburettor or fuel injection system fault (Chapter 4). Blowing cylinder head gasket (Chapter 2). Tapping or rattling noises
Engine backfires Worn valve gear or camshaft (Chapter 2). Ignition timing incorrect (Chapter 1). Ancillary component fault (water pump, alternator etc) (Chapter 3, Timing belt/chain incorrectly fitted or tensioned (Chapter 2). Chapter 5, Part A and Chapter 10). Vacuum leak at the carburettor/fuel injection unit/throttle body, inlet manifold or associated hoses (Chapter 4). Knocking or thumping noises Carburettor or fuel injection system fault (Chapter 4). Worn big-end bearings (regular heavy knocking, perhaps less under load) (Chapter 2).
Oil pressure warning light illuminated with engine Worn main bearings (rumbling and knocking, perhaps worsening
running under load) (Chapter 2). Low oil level or incorrect grade (Chapter 1). Piston slap (most noticeable when cold) (Chapter 2). Faulty oil pressure sensor (Chapter 2). Ancillary component fault (water pump, alternator etc) (Chapter 3, Worn engine bearings and/or oil pump (Chapter 2). Chapter 5, Part A and Chapter 10). High engine operating temperature (Chapter 3).
2 Cooling system
Overheating External coolant leakage Insufficient coolant in system ("Weekly checks"). Deteriorated or damaged hoses or hose clips (Chapter 1). Thermostat faulty (Chapter 3). Radiator core or heater matrix leaking (Chapter 3). Radiator core blocked or grille restricted (Chapter 3). Pressure cap faulty (Chapter 3). Electric cooling fan or thermoswitch faulty (Chapter 3). Water pump seal leaking (Chapter 3). Pressure cap faulty (Chapter 3). Boiling due to overheating (Chapter 3). Ignition timing incorrect (Chapter 1). Core plug leaking (Chapter 2). Inaccurate temperature gauge sender unit (Chapter 3). Air lock in cooling system (Chapter 1). Internal coolant leakage Leaking cylinder head gasket (Chapter 2).
Overcooling Cracked cylinder head or cylinder bore (Chapter 2). Thermostat faulty (Chapter 3). Inaccurate temperature gauge sender unit (Chapter 3). Corrosion Infrequent draining and flushing (Chapter 1). Incorrect antifreeze mixture or inappropriate type (Chapter 1). Fault Finding REF·15
3 Fuel and exhaust system
Excessive fuel consumption Excessive noise or fumes from exhaust system Air filter element dirty or clogged (Chapter 1). Leaking exhaust system or manifold joints (Chapter 1 and Chapter 4, Carburettor or fuel injection system fault (Chapter 4). Part E). Ignition timing incorrect (Chapter 1). Leaking, corroded or damaged silencers or pipe (Chapter 1 and Tyres underinflated (Chapter 1). Chapter 4, Part E). Broken mountings causing body or suspension contact (Chapter 1).
Fuel leakage and/or fuel odour Damaged or corroded fuel tank, pipes or connections (Chapter 4). Carburettor or fuel injection system fault (Chapter 4).
4 Clutch
Pedal travels to floor - no pressure or very little Clutch disc linings contaminated with oil or grease (Chapter 6).
resistance Faulty pressure plate or weak diaphragm spring (Chapter 6). Broken clutch cable (Chapter 6). Judder as clutch is engaged Incorrect clutch adjustment (Chapter 6). Clutch disc linings contaminated with oil or grease (Chapter 6). Broken clutch release bearing or fork (Chapter 6). Clutch disc linings excessively worn (Chapter 6). Broken diaphragm spring in clutch pressure plate (Chapter 6). Clutch cable sticking or frayed (Chapter 6).
Clutch fails to disengage (unable to select gears) Faulty or distorted pressure plate or diaphragm spring (Chapter 6). Worn or loose engine or gearbox mountings (Chapter 2). Incorrect clutch adjustment (Chapter 6). Clutch disc hub or gearbox input shaft splines worn (Chapter 6). Clutch disc sticking on gearbox input shaft splines (Chapter 6). Clutch disc sticking to flywheel or pressure plate (Chapter 6). Noise when depressing or releasing clutch pedal Faulty pressure plate assembly (Chapter 6). Worn clutch release bearing (Chapter 6). Clutch release mechanism worn or incorrectly assembled (Chapter 6). Worn or dry clutch pedal bushes (Chapter 6).
Clutch slips (engine speed increases with no Faulty pressure plate assembly (Chapter 6).
increase in vehicle speed) Pressure plate diaphragm spring broken (Chapter 6). Broken clutch disc cushioning springs (Chapter 6). Incorrect clutch adjustment (Chapter 6). Clutch disc linings excessively worn (Chapter 6).
5 Manual gearbox
Noisy in neutral with engine running Worn synchroniser units (Chapter 7, Part A).* Worn selector forks (Chapter 7, Part A).* Input shaft bearings worn (noise apparent with clutch pedal released but not when depressed) (Chapter 7, Part A).* Vibration Clutch release bearing worn (noise apparent with clutch pedal Lack of oil (Chapter 1). depressed, possibly less when released) (Chapter 6). Worn bearings (Chapter 7, Part A).*
Noisy in one particular gear Lubricant leaks Worn, damaged or chipped gear teeth (Chapter 7, Part A).* Leaking differential output oil seal (Chapter 7, Part A).
Difficulty engaging gears Leaking housing joint (Chapter 7, Part A).* Leaking input shaft oil seal (Chapter 7, Part A).* Clutch fault (Chapter 6). Worn or damaged gear linkage (Chapter 7, Part A). *Although the corrective action necessary to remedy the symptoms Incorrectly adjusted gear linkage (Chapter 7, Part A). described is beyond the scope of the home mechanic, the above Worn synchroniser units (Chapter 7, Part A).* information should be helpful in isolating the cause of the condition so
Jumps out of gear that the owner can communicate clearly with a professional mechanic. Worn or damaged gear linkage (Chapter 7, Part A). Incorrectly adjusted gear linkage (Chapter 7, Part A).
REF REF·16 Fault Finding
6 Automatic transmission
Note: Due to the complexity of the automatic transmission, it is difficult a) Engine starting in gears other than Park or Neutral.
for the home mechanic to properly diagnose and service this unit. For b) Indicator on gear selector lever pointing to a gear other than the
problems other than the following, the vehicle should be taken to a one actually being used.
dealer service department or automatic transmission specialist. c) Vehicle moves when in Park or Neutral. d) Poor gear shift quality or erratic gear changes.
Fluid leakage Refer to Chapter 7, Part B for selector mechanism adjustment. Automatic transmission fluid is usually deep red in colour. Fluid
leaks should not be confused with engine oil which can easily be blown Transmission will not downshift (kickdown) with
onto the transmission by air flow. accelerator pedal fully depressed To determine the source of a leak, first remove all built-up dirt and Low transmission fluid level (Chapter 1).
grime from the transmission housing and surrounding areas using a Incorrect selector mechanism adjustment (Chapter 7, Part B).
degreasing agent or by steam cleaning. Drive the vehicle at low speed
so air flow will not blow the leak far from its source. Raise and support Engine will not start in any gear, or starts in gears
the vehicle and determine where the leak is coming from. The following other than Park or Neutral
are common areas of leakage. Incorrect starter inhibitor switch adjustment (Chapter 7, Part B). a) Oil pan. Incorrect selector mechanism adjustment (Chapter 7, Part B). b) Dipstick tube (Chapter 1). c) Transmission-to-oil cooler fluid pipes/unions (Chapter 7, Part B). Transmission slips, shifts roughly, is noisy or has no drive in forward or reverse gears
Transmission fluid brown or has burned smell There are many probable causes for the above problems, but the Transmission fluid level low or fluid in need of renewal (Chapter 1). home mechanic should be concerned with only one possibility - fluid level. Before taking the vehicle to a dealer or transmission specialist,
General gear selection problems check the fluid level and condition of the fluid as described in Chapter 1. Chapter 7, Part B deals with checking and adjusting the selector Correct the fluid level as necessary or change the fluid and filter if
mechanism on automatic transmissions. The following are common needed. If the problem persists, professional help will be necessary.
problems which may be caused by a poorly adjusted cable.
7 Driveshafts
Clicking or knocking noise on turns (at slow speed Vibration when accelerating or decelerating
on full lock) Worn inner constant velocity joint (Chapter 8). Lack of constant velocity joint lubricant (Chapter 8). Bent or distorted driveshaft (Chapter 8). Worn outer constant velocity joint (Chapter 8).
8 Braking system
Note: Before assuming that a brake problem exists, make sure that the Excessive brake pedal travel
tyres are in good condition and correctly inflated, the front wheel Inoperative rear brake self-adjust mechanism (Chapters 1 and 9).
alignment is correct and the vehicle is not loaded with weight in an Faulty master cylinder (Chapter 9).
unequal manner. Apart from checking the condition of all pipe and Air in hydraulic system (Chapters 1 and 9).
hose connections, any faults occurring on the anti-lock braking system Faulty vacuum servo unit (Chapter 9).
should be referred to a Ford dealer for diagnosis. Brake pedal feels spongy when depressed
Vehicle pulls to one side under braking Air in hydraulic system (Chapters 1 and 9). Worn, defective, damaged or contaminated front brake pads or Deteriorated flexible rubber brake hoses (Chapters 1 and 9). rear brake shoes on one side (Chapters 1 and 9). Master cylinder mounting nuts loose (Chapter 9). Seized or partially seized front brake caliper or rear wheel cylinder Faulty master cylinder (Chapter 9). piston (Chapters 1 and 9). A mixture of brake pad/shoe lining materials fitted between sides Excessive brake pedal effort required to stop (Chapters 1 and 9). vehicle Front brake caliper mounting bolts loose (Chapter 9). Faulty vacuum servo unit (Chapter 9). Rear brake backplate mounting bolts loose (Chapter 9). Disconnected, damaged or insecure brake servo vacuum hose Worn or damaged steering or suspension components (Chapters 1 (Chapter 9). and 10). Primary or secondary hydraulic circuit failure (Chapter 9).
Noise (grinding or high-pitched squeal) when Seized brake caliper or wheel cylinder piston(s) (Chapter 9).
brakes applied Brake pads or brake shoes incorrectly fitted (Chapters 1 and 9). Incorrect grade of brake pads or brake shoes fitted (Chapters 1 Brake pad or shoe friction lining material worn down to metal and 9). backing (Chapters 1 and 9). Brake pads or brake shoe linings contaminated (Chapters 1 and 9). Excessive corrosion of brake disc or drum. (May be apparent after the vehicle has been standing for some time (Chapters 1 and 9).
Foreign object (stone chipping etc) trapped between brake disc and shield (Chapters 1 and 9). Fault Finding REF·17
Judder felt through brake pedal or steering wheel Brakes binding
when braking Seized brake caliper or wheel cylinder piston(s) (Chapter 9). Excessive run-out or distortion of front discs or rear drums Incorrectly adjusted handbrake mechanism (Chapter 9). (Chapters 1 and 9). Faulty master cylinder (Chapter 9). Brake pad or brake shoe linings worn (Chapters 1 and 9). Brake caliper or rear brake backplate mounting bolts loose Rear wheels locking under normal braking (Chapter 9). Rear brake shoe linings contaminated (Chapters 1 and 9). Wear in suspension or steering components or mountings Faulty brake pressure regulator (Chapter 9). (Chapters 1 and 10).
9 Suspension and steering
Note: Before diagnosing suspension or steering faults, be sure that the Excessively stiff steering
trouble is not due to incorrect tyre pressures, mixtures of tyre types or Lack of steering gear lubricant (Chapter 10).
binding brakes. Seized track rod end balljoint or suspension balljoint (Chapters 1
Vehicle pulls to one side and 10). Broken or incorrectly adjusted auxiliary drivebelt (Chapter 1). Defective tyre ("Weekly checks"). Incorrect front wheel alignment (Chapter 10). Excessive wear in suspension or steering components (Chapters 1 Steering rack or column bent or damaged (Chapter 10). and 10). Incorrect front wheel alignment (Chapter 10). Excessive play in steering Accident damage to steering or suspension components (Chapter 1). Worn steering column intermediate shaft universal joint (Chapter 10).
Wheel wobble and vibration Worn steering track rod end balljoints (Chapters 1 and 10). Worn rack and pinion steering gear (Chapter 10). Front roadwheels out of balance (vibration felt mainly through the Worn steering or suspension joints, bushes or components steering wheel) (Chapters 1 and 10). (Chapters 1 and 10). Rear roadwheels out of balance (vibration felt throughout the vehicle) (Chapters 1 and 10). Tyre wear excessive Roadwheels damaged or distorted (Chapters 1 and 10). Tyres worn on inside or outside edges Faulty or damaged tyre (Chapter 1). Worn steering or suspension joints, bushes or components Tyres underinflated (wear on both edges) ("Weekly checks"). (Chapters 1 and 10). Incorrect camber or castor angles (wear on one edge only) Wheel bolts loose (Chapters 1 and 10). (Chapter 10). Worn steering or suspension joints, bushes or components
Excessive pitching and/or rolling around corners (Chapters 1 and 10).
or during braking Excessively hard cornering. Defective shock absorbers (Chapters 1 and 10). Accident damage. Broken or weak spring and/or suspension component (Chapters 1 Tyre treads exhibit feathered edges and 10). Incorrect toe setting (Chapter 10). Worn or damaged anti-roll bar or mountings (Chapter 10). Tyres worn in centre of tread
Wandering or general instability Tyres overinflated ("Weekly checks"). Incorrect front wheel alignment (Chapter 10). Tyres worn on inside and outside edges Worn steering or suspension joints, bushes or components Tyres underinflated ("Weekly checks"). (Chapters 1 and 10). Roadwheels out of balance (Chapters 1 and 10). Tyres worn unevenly Faulty or damaged tyre ("Weekly checks"). Tyres/wheels out of balance (Chapter 1). Wheel bolts loose ("Weekly checks" and Chapter 10). Excessive wheel or tyre run-out (Chapter 1). Defective shock absorbers (Chapters 1 and 10). Worn shock absorbers (Chapters 1 and 10). Faulty tyre ("Weekly checks").
10 Electrical system
Note: For problems associated with the starting system, refer to the Ignition warning light remains illuminated with
faults listed under `Engine' earlier in this Section. engine running
Battery will not hold a charge for more than a few Auxiliary drivebelt broken, worn, or incorrectly adjusted (Chapter 1).
days Alternator brushes worn, sticking, or dirty (Chapter 5, Part A). Alternator brush springs weak or broken (Chapter 5, Part A). Battery defective internally (Chapter 5, Part A). Internal fault in alternator or voltage regulator (Chapter 5, Part A). Battery terminal connections loose or corroded ("Weekly checks"). Broken, disconnected, or loose wiring in charging circuit (Chapter 5, Auxiliary drivebelt worn or incorrectly adjusted (Chapter 1). Part A). Alternator not charging at correct output (Chapter 5, Part A). Alternator or voltage regulator faulty (Chapter 5, Part A). Ignition warning light fails to come on Short-circuit causing continual battery drain (Chapter 5, Part A Warning light bulb blown (Chapter 12). and Chapter 12). Broken, disconnected, or loose wiring in warning light circuit (Chapter 12). REF Alternator faulty (Chapter 5, Part A). REF·18 Fault Finding
10 Electrical system (continued)
Lights inoperative Windscreen/tailgate washers inoperative or Bulb blown (Chapter 12). unsatisfactory in operation Corrosion of bulb or bulbholder contacts (Chapter 12). One or more washer jets inoperative Blown fuse (Chapter 12). Faulty relay (Chapter 12). Blocked washer jet (Chapter 12). Broken, loose, or disconnected wiring (Chapter 12). Disconnected, kinked or restricted fluid hose (Chapter 12). Faulty switch (Chapter 12). Insufficient fluid in washer reservoir (Chapter 1). Washer pump fails to operate
Instrument readings inaccurate or erratic Broken or disconnected wiring or connections (Chapter 12).
Instrument readings increase with engine speed Blown fuse (Chapter 12). Faulty voltage regulator (Chapter 12). Faulty washer switch (Chapter 12). Faulty washer pump (Chapter 12).
Fuel or temperature gauge give no reading Washer pump runs for some time before fluid is emitted Faulty gauge sender unit (Chapter 3 or Chapter 4). from jets Wiring open-circuit (Chapter 12). Faulty gauge (Chapter 12). Faulty one-way valve in fluid supply hose (Chapter 12).
Fuel or temperature gauges give continuous maximum Electric windows inoperative or unsatisfactory in
reading operation Faulty gauge sender unit (Chapter 3 or Chapter 4). Window glass will only move in one direction Wiring short-circuit (Chapter 12). Faulty gauge (Chapter 12). Faulty switch (Chapter 12) Window glass slow to move
Horn inoperative or unsatisfactory in operation Incorrectly adjusted door glass guide channels (Chapter 11).
Horn operates all the time Regulator seized or damaged, or in need of lubrication (Chapter 11). Horn push either earthed or stuck down (Chapter 12). Door internal components or trim fouling regulator (Chapter 11). Horn cable to horn push earthed (Chapter 12). Faulty motor (Chapter 11).
Horn fails to operate Window glass fails to move Blown fuse (Chapter 12). Incorrectly adjusted door glass guide channels (Chapter 11). Cable or cable connections loose, broken or disconnected Blown fuse (Chapter 12). (Chapter 12). Faulty relay (Chapter 12). Faulty horn (Chapter 12). Broken or disconnected wiring or connections (Chapter 12). Faulty motor (Chapter 11).
Horn emits intermittent or unsatisfactory sound Cable connections loose (Chapter 12). Central locking system inoperative or Horn mountings loose (Chapter 12). unsatisfactory in operation Faulty horn (Chapter 12). Complete system failure
Windscreen/tailgate wipers inoperative or Blown fuse (Chapter 12).
unsatisfactory in operation Faulty relay (Chapter 12). Broken or disconnected wiring or connections (Chapter 12).
Wipers fail to operate or operate very slowly Faulty control unit (Chapter 11). Wiper blades stuck to screen or linkage seized or binding (Chapter 12). Latch locks but will not unlock, or unlocks but will not lock Blown fuse (Chapter 12). Cable or cable connections loose, broken or disconnected Faulty master switch (Chapter 12). (Chapter 12). Broken or disconnected latch operating rods or levers (Chapter 11). Faulty relay (Chapter 12). Faulty relay (Chapter 12). Faulty wiper motor (Chapter 12). Faulty control unit (Chapter 11).
Wiper blades sweep over too large or too small an area of One solenoid/motor fails to operate
the glass Broken or disconnected wiring or connections (Chapter 12). Wiper arms incorrectly positioned on spindles (Chapter 12). Faulty solenoid/motor (Chapter 11). Excessive wear of wiper linkage (Chapter 12). Broken, binding or disconnected latch operating rods or levers Wiper motor or linkage mountings loose or insecure (Chapter 12). (Chapter 11). Fault in door latch (Chapter 11).
Wiper blades fail to clean the glass effectively Wiper blade rubbers worn or perished (Chapter 12). Wiper arm tension springs broken or arm pivots seized (Chapter 12). Insufficient windscreen washer additive to adequately remove road film ("Weekly checks"). Glossary of Technical Terms REF·19
Asbestos is a health hazard and the dust Brake drum The component of a drum brake
A created by brake systems should never be that rotates with the wheels.
ABS (Anti-lock brake system) A system, inhaled or ingested. Brake linings The friction material which
usually electronically controlled, that senses Axle A shaft on which a wheel revolves, or contacts the brake disc or drum to retard the
incipient wheel lockup during braking and which revolves with a wheel. Also, a solid vehicle's speed. The linings are bonded or
relieves hydraulic pressure at wheels that are beam that connects the two wheels at one riveted to the brake pads or shoes.
about to skid. end of the vehicle. An axle which also Brake pads The replaceable friction pads
Air bag An inflatable bag
hidden in the transmits power to the wheels is known as a that pinch the brake disc when the brakes are
steering wheel (driver's side) or the dash or live axle. applied. Brake pads consist of a friction
glovebox (passenger side). In a head-on Axleshaft A single rotating shaft, on either material bonded or riveted to a rigid backing
collision, the bags inflate, preventing the side of the differential, which delivers power plate.
driver and front passenger from being thrown from the final drive assembly to the drive Brake shoe The crescent-shaped carrier to
forward into the steering wheel or windscreen. wheels. Also called a driveshaft or a halfshaft. which the brake linings are mounted and
Air cleaner A metal or plastic housing, which forces the lining against the rotating
containing a filter element, which removes drum during braking.
dust and dirt from the air being drawn into the Braking systems For more information on
engine.
Air filter element The actual filter in an air B braking systems, consult the Haynes Automotive Brake Manual. Ball bearing An anti-friction bearing
cleaner system, usually manufactured from consisting of a hardened inner and outer race Breaker bar A long socket wrench handle
pleated paper and requiring renewal at regular with hardened steel balls between two
races . providing greater leverage.
intervals. Bearing The curved surface on a shaft or in a Bulkhead The insulated partition between bore, or the part assembled into either, that the engine and the passenger compartment. permits relative motion between them with minimum wear and friction. C Caliper The non-rotating part of a disc-brake assembly that straddles the disc and carries the brake pads. The caliper also contains the hydraulic components that cause the pads to pinch the disc when the brakes are applied. A caliper is also a measuring tool that can be set to measure inside or outside dimensions of an Air filter object. Camshaft A rotating shaft on which a series
Allen key A hexagonal wrench which fits into of cam lobes operate the valve mechanisms.
a recessed hexagonal hole. The camshaft may be driven by gears, by
Alligator clip A long-nosed spring-loaded sprockets and chain or by sprockets and a
metal clip with meshing teeth. Used to make belt.
temporary electrical connections. Bearing Canister A container in an evaporative
Alternator A component in the electrical Big-end bearing The bearing in the end of emission control system; contains activated
system which converts mechanical energy the connecting rod that's attached to the charcoal granules to trap vapours from the
from a drivebelt into electrical energy to crankshaft. fuel system.
charge the battery and to operate the starting Bleed nipple A valve on a brake wheel
system, ignition system and electrical cylinder, caliper or other hydraulic component
accessories. that is opened to purge the hydraulic system
Ampere (amp) A unit of measurement for the of air. Also called a bleed screw.
flow of electric current. One amp is the Brake bleeding Procedure for removing air
amount of current produced by one volt from lines of a hydraulic brake system.
acting through a resistance of one ohm.
Anaerobic sealer A substance used to
prevent bolts and screws from loosening.
Anaerobic means that it does not require
oxygen for activation. The Loctite brand is
widely used.
Antifreeze A substance (usually ethylene
glycol) mixed with water, and added to a
vehicle's cooling system, to prevent freezing Canister
of the coolant in winter. Antifreeze also
contains chemicals to inhibit corrosion and Carburettor A device which mixes fuel with
the formation of rust and other deposits that air in the proper proportions to provide a
would tend to clog the radiator and coolant desired power output from a spark ignition
passages and reduce cooling efficiency. internal combustion engine.
Anti-seize compound A coating that Castellated Resembling the parapets along
reduces the risk of seizing on fasteners that the top of a
castle wall. For example, a
are subjected to high temperatures, such as castellated balljoint stud nut.
exhaust manifold bolts and nuts. Brake bleeding Castor In wheel alignment, the backward or
Asbestos A natural fibrous
mineral with great forward tilt of the steering axis. Castor is
heat resistance, commonly used in the Brake disc The component of a disc brake positive when the steering axis is inclined
composition of brake friction materials. that rotates with the wheels. REF rearward at the top. REF·20 Glossary of Technical Terms
Catalytic converter A silencer-like device in Endfloat The amount of lengthwise
the exhaust system which converts certain D movement between two parts. As applied to a
pollutants in the exhaust gases into less Diagnostic code Code numbers obtained by crankshaft, the distance that the crankshaft
harmful substances. accessing the diagnostic mode of an engine can move forward and back in the cylinder management computer. This code can be block. used to determine the area in the system where a malfunction may be located. Engine management system (EMS) A Disc brake A brake design incorporating a computer controlled system which manages rotating disc onto which brake pads are the fuel injection and the ignition systems in squeezed. The resulting friction converts the an
integrated fashion. energy of a moving vehicle into heat. Exhaust manifold A part with several Double-overhead cam (
DOHC ) An engine passages through which exhaust gases leave that uses two overhead camshafts, usually the engine combustion chambers and enter one for the intake valves and one for the the exhaust pipe. exhaust valves. Drivebelt(s) The belt(s) used to drive accessories such as the alternator, water pump, power steering pump, air conditioning F Catalytic converter compressor, etc. off the crankshaft pulley. Fan clutch A viscous (fluid) drive coupling
Circlip A ring-shaped clip used to prevent device which permits variable engine fan
endwise movement of cylindrical parts and speeds in relation to engine speeds.
shafts. An internal circlip is installed in a Feeler blade A thin strip or blade of hardened
groove in a housing; an external circlip fits into steel, ground to an exact thickness, used to
a groove on the outside of a cylindrical piece check or measure clearances between parts.
such as a shaft.
Clearance The amount of space between
two parts. For example, between a piston and
a cylinder, between a bearing and a journal,
etc.
Coil spring A
spiral of elastic steel found in
various sizes throughout a vehicle, for
example as a springing medium in the
suspension and in the valve train.
Compression Reduction in volume, and Accessory drivebelts
increase in pressure and temperature, of a
gas, caused by squeezing it into a smaller Driveshaft Any shaft used to transmit
space. motion. Commonly used when referring to the Feeler blade
Compression ratio The
relationship between axleshafts on a front wheel drive vehicle. Drum brake A type of brake using a drum- Firing order The order in which the engine
cylinder volume when the piston is at top shaped metal cylinder attached to the inner cylinders fire, or deliver their power
strokes ,
dead centre and cylinder volume when the surface of the wheel. When the brake pedal is beginning with the number one cylinder.
piston is at bottom dead centre.
Constant velocity (CV) joint A type of pressed, curved brake shoes with friction Flywheel A heavy spinning wheel in which
universal joint that cancels out vibrations linings press against the inside of the drum to energy is absorbed and stored by means of
caused by driving power being transmitted slow or stop the vehicle. momentum. On cars, the flywheel is attached
through an angle. to the crankshaft to smooth out firing
Core plug A disc or cup-shaped metal device E impulses.
inserted in a hole in a casting through which EGR valve A valve used to introduce exhaust
core was removed when the casting was gases into the intake air stream. Free play The amount of travel before any
formed . Also known as a freeze plug or Electronic control unit (ECU) A computer action takes place. The "looseness" in a
expansion plug. which controls (for instance) ignition and fuel linkage, or an assembly of parts, between the
Crankcase The lower part of the engine injection systems, or an anti-lock braking initial application of force and actual
block in which the crankshaft rotates. system. For more information refer to the movement. For example, the distance the
Crankshaft The main rotating member, or Haynes Automotive Electrical and Electronic brake pedal moves before the pistons in the
shaft, running the length of the crankcase, Systems Manual. master cylinder are actuated.
with offset "throws" to which the connecting Electronic Fuel Injection (EFI) A computer Fuse An electrical device which protects a
rods are attached. controlled fuel system that distributes fuel circuit against accidental
overload . The typical through an injector located in each intake port fuse contains a soft piece of metal which is of the engine. calibrated to
melt at a predetermined current Emergency brake A braking system, flow (expressed as amps) and break the independent of the main hydraulic system, circuit. that can be used to slow or stop the vehicle if the primary brakes fail, or to hold the vehicle Fusible link A circuit protection device stationary even though the brake pedal isn't consisting of a conductor surrounded by depressed. It usually consists of a hand lever heat-resistant insulation. The conductor is that actuates either front or rear brakes smaller than the wire it protects, so it acts as mechanically through a series of cables and the weakest link in the circuit. Unlike a blown Crankshaft assembly fuse, a failed fusible link must frequently be linkages. Also known as a handbrake or
Crocodile clip See Alligator clip parking brake. cut from the wire for replacement. Glossary of Technical Terms REF·21
Overhead valve (ohv) engine An engine with
G I the valves located in the cylinder head, but
Gap The distance the spark must travel in Ignition timing The moment at which the with the camshaft located in the engine block.
jumping from the centre electrode to the side spark plug fires, usually expressed in the Oxygen sensor A device installed in the
electrode in a spark plug. Also refers to the number of crankshaft degrees before the engine exhaust manifold, which senses the
spacing between the points in a contact piston reaches the top of its stroke. oxygen content in the exhaust and converts
breaker assembly in a conventional points- Inlet manifold A tube or housing with this information into an electric current. Also
type ignition, or to the distance between the passages through which flows the air-fuel called a
Lambda sensor.
reluctor or rotor and the pickup coil in an mixture (carburettor vehicles and vehicles with
electronic ignition. throttle body injection) or air only (port fuel- injected vehicles) to the port openings in the cylinder head. P Phillips screw A type of screw head having a J cross instead of a slot for a corresponding type of screwdriver. Jump start Starting the engine of a vehicle Plastigage A thin strip of plastic thread, with a discharged or weak battery by available in different sizes, used for measuring attaching jump leads from the weak battery to clearances. For example, a strip of Plastigage a charged or helper battery. is
laid across a bearing journal. The parts are assembled and dismantled; the width of the L crushed strip indicates the clearance between Load Sensing Proportioning Valve (LSPV) A journal and bearing. Adjusting spark plug gap brake hydraulic system control valve that works like a proportioning valve, but also
Gasket Any thin, soft material - usually cork, takes into consideration the amount of weight
cardboard, asbestos or soft metal - installed carried by the rear axle.
between two metal surfaces to ensure a good Locknut A nut used to lock an adjustment
seal. For instance, the cylinder head gasket nut, or other threaded component, in place.
seals the joint between the block and the For example, a locknut is employed to keep
cylinder head. the adjusting nut on the rocker arm in position. Lockwasher A form of washer designed to prevent an attaching nut from working loose. Plastigage
M
Propeller shaft The long hollow tube with universal joints at both ends that carries MacPherson strut A type of front power from the transmission to the differential suspension system devised by Earle on front-engined rear wheel drive vehicles. MacPherson at Ford of England. In its original Proportioning valve A hydraulic control form, a simple lateral link with the anti-roll bar valve which limits the amount of pressure to Gasket creates the lower control arm. A long strut - an the rear brakes during panic stops to prevent integral coil spring and shock absorber - is
Gauge An instrument panel display used to wheel lock-up. mounted between the body and the steering
monitor engine conditions. A gauge with a knuckle. Many modern so-called MacPherson
movable pointer on a dial or a fixed scale is an
analogue gauge. A gauge with a numerical strut systems use a conventional lower A-arm R and don't rely on the anti-roll bar for location. Rack-and-pinion steering A steering system
readout is called a
digital gauge. Multimeter An electrical test instrument with with a pinion gear on the end of the steering the capability to measure voltage, current and shaft that mates with a rack (think of a geared
H resistance. wheel opened up and laid flat). When the steering wheel is turned, the pinion turns,
Halfshaft A rotating shaft that transmits
power from the final drive unit to a drive N moving the rack to the left or right. This movement is transmitted through the track
wheel, usually when referring to a live rear NOx Oxides of Nitrogen. A common toxic rods to the steering arms at the wheels.
axle. pollutant emitted by petrol and diesel engines Radiator A liquid-to-air heat transfer device
Harmonic balancer A device designed to at higher temperatures. designed to reduce the temperature of the
reduce torsion or twisting vibration in the coolant in an internal combustion engine
crankshaft. May be incorporated in the
crankshaft pulley. Also known as a vibration O cooling system. Ohm The unit of electrical resistance. One Refrigerant Any substance used as a heat
damper. volt applied to a resistance of one ohm will transfer agent in an air-conditioning system.
Hone An abrasive tool for
correcting small produce a current of one amp. R-12 has been the principle refrigerant for
irregularities or differences in diameter in an Ohmmeter An instrument for measuring many years; recently, however, manufacturers
engine cylinder, brake cylinder, etc. electrical resistance. have begun using R-134a, a non-CFC
Hydraulic tappet A tappet that utilises O-ring A type of sealing ring made of a substance that is considered less harmful to
hydraulic pressure from the engine's special rubber-like material; in use, the O-ring the ozone in the upper atmosphere.
lubrication system to maintain zero clearance is compressed into a groove to provide the Rocker arm A lever arm that rocks on a shaft
(constant contact with both camshaft and sealing action. or pivots on a stud. In an overhead valve
valve stem). Automatically adjusts to variation Overhead cam (ohc) engine An engine with engine, the rocker arm converts the upward
in valve stem length. Hydraulic tappets also the camshaft(s) located on top of the cylinder movement of the pushrod into a downward
reduce valve noise. head(s). movement to open a valve. REF REF·22 Glossary of Technical Terms
Rotor In a distributor, the rotating device Sprocket A tooth or projection on the Turbocharger A centrifugal device, driven by
inside the cap that connects the centre periphery of a wheel, shaped to engage with a exhaust gases, that pressurises the intake air.
electrode and the outer terminals as it turns, chain or drivebelt. Commonly used to refer to Normally used to increase the power output
distributing the high voltage from the coil the sprocket wheel itself. from a given engine displacement, but can
secondary winding to the proper spark plug. Starter inhibitor switch On vehicles with an also be used primarily to reduce exhaust
Also, that part of an alternator which rotates automatic transmission, a switch that emissions (as on VW's "
Umwelt " Diesel
inside the stator. Also, the rotating assembly prevents starting if the vehicle is not in Neutral engine).
of a turbocharger, including the compressor or Park.
wheel, shaft and
turbine wheel. Strut See MacPherson strut.
Runout The amount of wobble (in-and-out
movement) of a gear or wheel as it's rotated. U Universal joint or U-joint A double-pivoted
The amount a shaft rotates "out-of-true." The connection for transmitting power from a
out-of-round condition of a rotating part. driving to a driven shaft through an angle. A U-joint consists of two Y-shaped yokes and a
S T cross-shaped member called the
spider .
Sealant A liquid or paste used to prevent Tappet A cylindrical component which
leakage at a joint. Sometimes used in transmits motion from the cam to the valve
conjunction with a gasket.
Sealed beam lamp An older headlight design stem, either directly or via a pushrod and rocker arm. Also called a cam follower. V
which integrates the reflector, lens and Thermostat A heat-controlled valve that Valve A device through which the flow of
filaments into a hermetically-sealed one-piece regulates the flow of coolant between the liquid, gas, vacuum, or loose material in bulk
unit. When a
filament burns out or the lens cylinder block and the radiator, so maintaining may be started, stopped, or regulated by a
cracks, the entire unit is simply replaced. optimum engine operating temperature. A movable part that opens, shuts, or partially
Serpentine drivebelt A single, long, wide thermostat is also used in some air cleaners in obstructs one or more ports or passageways.
accessory drivebelt that's used on some which the temperature is regulated. A valve is also the movable part of such a
newer vehicles to drive all the accessories, Thrust bearing The bearing in the clutch device.
instead of a series of smaller, shorter belts. assembly that is moved in to the release Valve clearance The clearance between the
Serpentine drivebelts are usually tensioned by levers by clutch pedal action to disengage the valve tip (the end of the valve stem) and the
an automatic tensioner. clutch. Also referred to as a release bearing. rocker arm or tappet. The valve clearance is Timing belt A toothed belt which drives the measured when the valve is closed. camshaft. Serious engine damage may result Vernier caliper A precision measuring if it breaks in service. instrument that measures inside and outside Timing chain A chain which drives the dimensions. Not quite as accurate as a camshaft. micrometer, but more convenient. Toe-in The amount the front wheels are Viscosity The thickness of a liquid or its closer together at the front than at the rear. On resistance to flow. rear wheel drive vehicles, a slight amount of Volt A unit for expressing electrical toe-in is usually specified to keep the front "pressure" in a circuit. One volt that will wheels running parallel on the road by produce a current of one ampere through a offsetting other forces that tend to spread the resistance of one ohm. wheels apart. Serpentine drivebelt Toe-out The amount the front wheels are closer together at the rear than at the front. On W
Shim Thin spacer, commonly used to adjust front wheel drive vehicles, a slight amount of Welding Various processes used to join metal
the clearance or relative positions between toe-out is usually specified. items by heating the areas to be joined to a
two parts. For example, shims inserted into or Tools For full information on choosing and molten state and
fusing them together. For
under bucket tappets control valve using tools, refer to the Haynes Automotive more information refer to the Haynes
clearances. Clearance is adjusted by Tools Manual. Automotive Welding Manual.
changing the thickness of the shim. Tracer A
stripe of a second colour applied to Wiring diagram A drawing portraying the
Slide hammer A special puller that screws a wire insulator to distinguish that wire from components and wires in a vehicle's electrical
into or hooks onto a component such as a another one with the same colour insulator. system, using standardised symbols. For
shaft or bearing; a heavy sliding handle on the Tune-up A process of accurate and careful more information refer to the Haynes
shaft bottoms against the end of the shaft to adjustments and parts replacement to obtain Automotive Electrical and Electronic Systems
knock the component free. the best possible engine performance. Manual. Index REF·23
Note: References throughout this index are in the form - "Chapter number" · "page number"
A
Accelerator pedal - 4A·6, 4B·5, 4C·3, 4D·2 C D Cables - 4A·6, 4B·5, 4C·3, 4D·2, 6·2, 7B·5, Dents in bodywork - 11·2
Acknowledgements - 0·4 9·9, 11·5, 12·9 Differential side gear oil seals - 7A·5
Aerial - 12·14, 12·15 Calipers - 9·4 Dimensions - REF·1
Air bags - 0·5 Cam followers - 2A·16, 2B·20 Direction indicator lamp - 12·5, 12·7
Air Charge Temperature (ACT) sensor - Camshaft - 2A·16, 2B·8, 2B·20 Discs - 9·4 4C·5, 4D·4 Capacities - 1·3 Distributor - 1·11, 5B·6
Air cleaner - 1·21, 4A·3, 4A·4, 4B·5, 4C·3, Carbon canister - 4E·5 Distributorless ignition system (DIS) - 4D·2 5B·3, 5B·4, 5B·6, 5B·10
Air inlet system - 4D·2 Carburettor fuel system - 4A·1 et seq Catalytic converter - 4C·2, 4E·7 Door trim panels - 11·21
Alternator - 1·16, 5A·3 Doors - 11·6, 11·7, 11·8, 11·9, 11·10,
Amplifier module - 5B·9 Central (single-point) Fuel Injection (CFI) system - 4C·1 et seq 11·13, 11·14, 12·5
Anti-lock Braking System - 9·15 Downshift linkage - 7B·3, 7B·4
Anti-roll bar - 10·6, 10·11 Central locking - 11·13 Centre console - 11·19 Drivebelts - 1·16, 9·16
Antifreeze mixture - 1·20 Driveshafts - 1·19, 8·1 et seq
Asbestos - 0·5 Centre pillar trim panels - 11·20 Charge air temperature sensor - 4B·10 Drivetrain - 1·19
Automatic choke unit - 4A·9 Drums - 9·8
Automatic transmission - 1·18, 1·19, Choke control cable - 4A·6 7B·1 et seq Choke knob warning lamp - 12·7
Auxiliary air device - 4B·7
Auxiliary lamp - 12·6 Choke unit - 4A·8, 4A·9, 4A·11, 4A·13 Cigar lighter - 12·9 E
Auxiliary warning system - 12·10 Circuit breakers - 12·3 E-DIS 4 module - 5B·10
Axle tube - 10·11 Clock - 12·7, 12·9, 12·10 Earth fault - 12·2 Clutch - 6·1 et seq EEC IV module - 4C·6, 4D·4, 5B·10 CO emissions (mixture) - 1·9
B Coil - 5B·5, 5B·10 Cold start valve - 4B·6 Electrical system - 12·1 et seq Electro-magnetic pressure actuator - 4B·9 Electronic Fuel Injection (EFI) system -
Balance control joystick - 12·4, 12·5 Computer unit - 12·10 4D·1 et seq
Battery - 0·15, 5A·2, 5A·3 Condenser (contact breakers) - 5B·4 Electronic modules - 5B·10
Beam alignment - 12·8 Connecting rods - 2A·8, 2A·14, 2B·13 Electronic Spark Control (ESC II) module -
Bellows - 8·2, 8·3, 10·12 Contact breaker ignition system - 1·11, 5B·9
Bi-metal housing - 4A·9 1·17, 5B·2, 5B·3, 5B·6 Emblems and mouldings - 11·18
Big-end bearings - 2A·14 Contents - 0·2 Engine - 2A·1 et seq, 2B·1 et seq
Bleeding braking system - 9·10, 9·19 Control relay - 11·13 Engine Coolant Temperature (ECT) sensor
Body corrosion - 11·2 Conversion factors - REF·2 - 4C·5, 4D·4, 5B·10
Body damage - 11·2, 11·3 Coolant - 0·12, 1·20 Engine management and emission system
Bodywork and fittings - 11·1 et seq Coolant warning switch - 12·11 - 4C·2
Bodywork repairs - 11·3 Cooling, heating and ventilation systems - Engine oil - 0·12, 0·16, 1·8
Bonnet - 11·5 3·1 et seq Engine speed sensor - 5B·10
Booster battery (jump) starting - 0·7 Courtesy lamp - 12·4, 12·6 Environmental considerations - REF·4
Boot lid - 11·12, 11·14 Cowl side trim panel - 11·20 ESC module - 5B·9
Bosch K- and KE-Jetronic mechanical fuel Crankcase - 2A·15, 2B·20 Exhaust emission - 0·14, 4E·2, 4E·7 injection systems - 4B·1 et seq Crankcase emission control - 1·22, 4E·2, Exhaust manifold - 1·10, 4E·4
Brake fluid - 0·13, 1·9, 1·24 4E·5 Exhaust system - 1·17, 4E·4
Braking system - 0·13, 9·1 et seq Crankshaft - 2A·7, 2A·14, 2B·8, 2B·19 Exterior fittings - 11·18
Breakerless ignition - 5B·2, 5B·4, 5B·7 Cylinder bores - 2A·14, 2B·19
Bulbs - 12·5, 12·6, Cylinder head - 2A·6, 2A·16, 2B·9, 2B·20,
Bumpers - 11·4 2B·21
REF REF·24 Index
F Heater - 3·7, 3·8, 12·4, 12·5, 12·6, 12·7 Hinges - 1·19 Horn - 12·11 Maintenance - upholstery and carpets - 11·2 Maintenance schedule - 1·4 Manifold Absolute Pressure (MAP) sensor -
Facia - 11·21 Hub bearings - 10·4, 10·8 4C·5, 4D·4
Fan - 3·2, 3·6 Hydraulic pipes and hoses - 9·13, 11·18 Manifolds, exhaust and emission control
Fast idle speed - 4A·10, 4A·11 Hydraulic rams - 11·17 systems - 4E·1 et seq
Fault finding - 5A·2, 12·2, REF·12 et seq Hydraulic system - 9·10, 9·19 Manual transmission - 1·18, 7A·1 et seq
Flywheel - 2A·15, 2B·19 Master cylinder - 9·11
Foglamp - 12·3, 12·4, 12·6
Folding roof - 11·16, 11·17
Ford VV carburettor - 4A·8, 4A·9 I Mirrors - 11·10, 11·14, 11·15, 11·19, 12·5 Mixture (CO) adjustment potentiometer - 4D·4
Fuel accumulator - 4B·5 Idle mixture - 1·9 Mixture adjustment - 1·9, 4A·10
Fuel computer - 12·7, 12·10 Idle speed - 1·9, 4A·10 MOT test checks - REF·8
Fuel cut-off (inertia) switch - 4C·6 Idle speed compensator - 4B·10 Mountings - 2A·8, 2A·9, 2B·14
Fuel distributor - 4B·7 Idle Speed Control Valve (ISCV) - 4D·3
Fuel evaporative emission control - 4E·2, 4E·5
Fuel filter - 1·23 Ignition switch - 5A·6, 12·4 Ignition systems - 1·11, 5B·1 et seq Ignition timing - 1·14 N
Fuel flow sensor - 12·10 Inlet manifold - 4E·3 Number plate lamp - 12·6
Fuel gauge - 12·9 Inner constant velocity joint bellows - 8·2
Fuel-injection control module - 4B·9
Fuel injectors - 4B·6, 4C·4, 4D·3 Instrument panel - 1·19, 12·8, 12·9 Intercooler - 4B·12 Introduction to the Ford Escort - 0·4 O
Fuel level sensor unit - 12·11 Oil and filter - 0·12, 1·8
Fuel pressure regulator - 4B·8, 4C·3, 4D·2 Oil cooler - 2B·25
Fuel pump - 4A·4, 4A·5, 4B·5, 4C·3, 4D·2
Fuel tank - 4B·5, 4C·3, 4D·2 J Oil pump - 2A·9, 2A·15, 2B·19 Oil seals - 2A·7, 2A·15, 2B·8, 2B·20, 7A·5
Fuel trap - 4E·7, 5B·10 Jacking - REF·5 Open-circuit - 12·2
Fuses - 12·3 Jump starting - 0·7 Outer constant velocity joint bellows - 8·3
G K P
Gaskets - 2A·15, 2B·20 Knock sensor - 4C·5 Pads - 1·14, 9·2, 12·11
Gearchange mechanism - 7A·2, 7B·4, 7B·5 Panel illumination and warning lamp bulbs
Gearchange selector shaft oil seal - 7A·5
Glossary of technical terms - REF·19
Glove compartment - 11·20, 12·6, 12·7 L - 12·9 Parcel shelf - 11·19 Pedals - 4A·6, 4B·5, 4C·3, 4D·2, 6·2, 9·14
Graphic equaliser - 12·13 Lamps - 12·6, 12·7, 12·8, 12·11 Pillar trim panel - 11·20
Grille - 11·5 Light laden valve - 9·13 Pistons and rings - 2A·8, 2A·14, 2A·16, Load apportioning valve - 9·18 2B·13, 2B·19, 2B·21
H Load space lamp - 12·4, 12·6, 12·7 Load space trim panel - 11·21 Locks - 1·19, 10·13, 11·5, 11·8, 11·12 Plastic components - 11·3 Ported vacuum switch - 4E·7 Power-operated folding roof - 11·16, 11·17
Handbrake "ON" warning lamp switch - 9·15 Loudspeakers - 12·4, 12·5, 12·13, 12·14 Pressure regulating valve - 9·12
Handbrake - 9·8, 9·9, 12·4 Lower arm - 10·5, 10·10 Printed circuit - 12·9
Handbrake lever - 9·9 Lubricants and fluids - 0·16 Programmed electronic ignition - 5B·2,
Handles - 11·8 5B·3, 5B·4, 5B·8
Hazard warning switch lamp - 12·6
Headlamp - 12·5, 12·7, 12·8, 12·12, 12·13
Heated Exhaust Gas Oxygen (HEGO) M Q sensor - 4C·5, 4E·7 Main bearings - 2A·14
Heated rear window - 12·4 Maintenance - bodywork and underframe - Quarter trim panel - 11·20
Heated windscreen - 12·4 11·1 Quarter window - 11·12, 11·15 Index REF·25
R T Weights - REF·1 Wheel alignment - 10·16 Wheel arch deflectors - 11·18
Radiator - 3·3 Tachometer - 12·9 Wheel changing - 0·8
Radiator fan - 3·2, 3·6 Tailgate - 11·12, 11·14, 11·15, 11·20, Wheel cylinder - 9·7
Radiator grille - 11·5 12·11, 12·12 Wheelhouse covers - 11·21
Radio/cassette player - 12·13 Temperature gauge - 3·7, 12·9 Wheels - 0·8
Re-spraying - 11·3 TFI IV module - 5B·10 Window glass - 11·9, 11·10, 11·15
Relays - 12·3 Thermo-time switch - 4B·10 Window switch - 12·4
Repair procedures - REF·4 Thermostat - 3·4 Windscreen - 0·11, 11·15
Reversing lamp switch - 7A·5, 12·4 Throttle cable - 4A·6, 4B·5, 4C·3, 4D·2 Windscreen pillar trim panel - 11·20
Road test - 1·19 Throttle housing - 4B·8, 4D·3 Windscreen washer - 12·12
Roadwheels - 1·19 Throttle kicker - 4A·11 Windscreen wiper - 12·11
Rocker arms - 2B·20 Throttle Position Sensor (TPS) - 4C·4, 4D·3 Wiper delay switch - 12·3
Rocker gear - 2A·7, 2A·16 Throttle valve control motor - 4C·4 Working facilities - REF·6
Routine maintenance and servicing - 1·1 Tie-bar - 10·6, 10·9 et seq Tie-rod outer balljoint - 10·13
Rust holes in bodywork - 11·2 Timing sprockets and belt - 1·23, 2B·7, 2B·19
S Timing sprockets and chain - 2A·15 Tools and working facilities - REF·6 Towing - 0·9
Safety first! - 0·5 Transmission - 2A·9 , 2A·20, 2B·14, 2B·24,
Seat belts - 1·15, 11·19 also see Manual and Automatic
Seats - 0·12, 11·18, 11·19 transmission
Shock absorbers - 1·15, 10·9 Trim panels - 11·20
Shoes - 1·14, 9·4 Turbocharger - 1·17, 4B·10, 4B·12
Short-circuit - 12·2 Tyres - 0·14, 0·16, 1·8
Sidelamp - 12·5
Sliding window glass - 11·10
Solenoids - 11·13
Spare parts - REF·3 V
Spark plugs - 1·13, 1·17, 1·24 Vacuum servo unit and linkage - 9·14
Speed sender unit - 4C·6, 4D·4, 12·10 Valve clearances - 1·17
Speedometer - 7A·5, 7A·6, 12·9 Vehicle identification - REF·3
Spoilers - 11·18 Vehicle support - REF·5
Springs - 10·10 Ventilation system - 3·7
Starter inhibitor switch - 7B·5
Starter motor - 5A·6
Starting and charging systems - 5A·1 et seq
Steering - see Suspension and steering W
Stop-lamp switch - 9·15, 12·4 Warm-up regulator - 4B·9
Struts - 1·15, 10·7 Warning indicator control unit - 12·11
Stub axle carrier - 10·11 Warning lamps - 9·15, 12·11
Sump - 2A·7, 2B·12 Wash/wipe systems - 12·12
Sunroof - 11·16 Washer fluid - 0·13
Suspension and steering - 1·15, 1·19, Washer fluid warning switch - 12·10 10·1 et seq, 12·3, 12·4 Waste gate solenoid control valve - 4B·11
Switches - 5A·6, 7A·5, 7B·5, 9·15, 11·13, Water pump - 3·5 12·3, 12·4, 12·5, 12·10, 12·11 Weber 2V carburettor - 4A·10, 4A·11, 4A·14
REF Leave blank for manual
listing pages Leave blank for manual
listing pages
REF Preserving Our
Motoring Heritage
Museum . Over 300 immaculately presented cars and motorbikes represent every aspect of our motoring heritage, from elegant reminders of bygone days, such as the superb Model J Duesenberg to curiosities like the bug-
eyed BMW Isetta. There are also many old friends and flames. Perhaps you remember the
1959 Ford
Popular that you did your courting in? The magnificent `Red
Collection ' is a spectacle of
classic sports cars including AC, Alfa Romeo, Austin Healey,
Ferrari , Lamborghini,
Maserati , MG,
Riley ,
Porsche and
Triumph . A Perfect Day Out Each and every vehicle at the Haynes Motor Museum has played its part in the history and culture of Motoring.
Today , they make a wonderful spectacle and a great day out for all the family. Bring the
kids , bring Mum and Dad, but above all bring your
camera to capture those golden memories for ever. You will also find an impressive
array of motoring memorabilia, a comfortable 70 seat video
cinema and one of the most extensive transport book shops in
Britain . The Pit Stop
Cafe serves everything from a cup of tea to wholesome, home-made meals or, if you prefer, you can enjoy the large picnic area nestled in the beautiful rural surroundings of Somerset.
> John Haynes O.B.E., Graham Hill's
Lola Chairman of the Cosworth Formula 1 museum at the wheel car next to a 1934
of a Haynes Light 12. Riley Sports.
The Museum is situated on the A359 Yeovil to Frome road at Sparkford, just off the A303 in Somerset. It is about 40 miles
south of Bristol, and 25 minutes drive from the M5 intersection at Taunton. Open 9.30am - 5.30pm (10.00am - 4.00pm Winter) 7 days a week, except Christmas Day,
Boxing Day and New Years Day Special rates available for
schools , coach
parties and outings Charitable Trust No. 292048
 100 punkti
Autor soovib selle materjali allalaadimise eest saada 100 punkti.
100 punkti
Autor soovib selle materjali allalaadimise eest saada 100 punkti.
 ~ 256 lehte
Lehekülgede arv dokumendis
~ 256 lehte
Lehekülgede arv dokumendis
 2009-05-03
Kuupäev, millal dokument üles laeti
2009-05-03
Kuupäev, millal dokument üles laeti
 107 laadimist
Kokku alla laetud
107 laadimist
Kokku alla laetud
 1 arvamus
Teiste kasutajate poolt lisatud kommentaarid
1 arvamus
Teiste kasutajate poolt lisatud kommentaarid
 timps16
Õppematerjali autor
timps16
Õppematerjali autor
 annaabi.ee


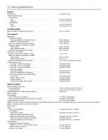
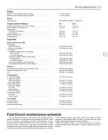

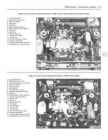
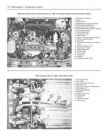
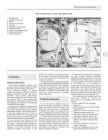
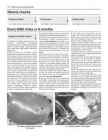
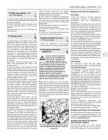
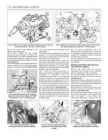
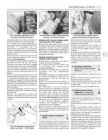
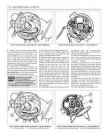
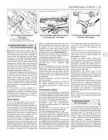
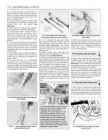
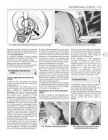
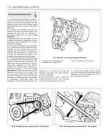
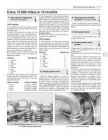
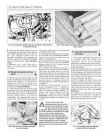
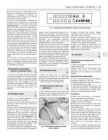
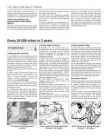
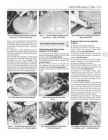
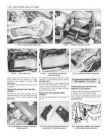
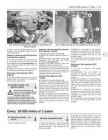


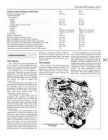
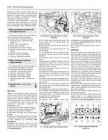
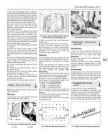
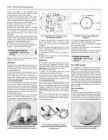
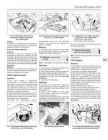
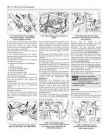
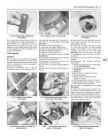
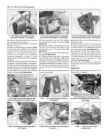
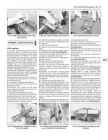
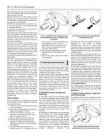
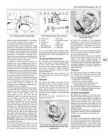
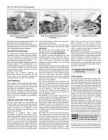
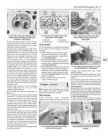
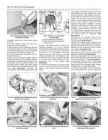
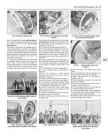
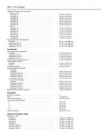
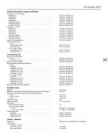

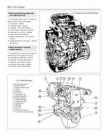
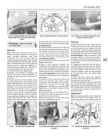
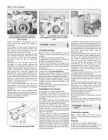
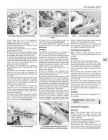
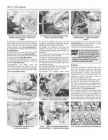
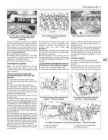
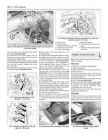
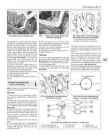
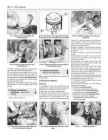
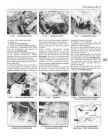
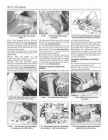
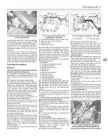
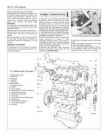
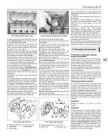
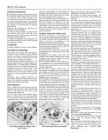
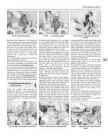
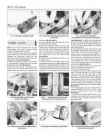
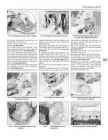
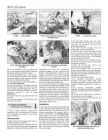
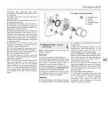

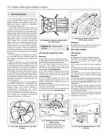
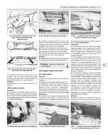
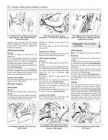
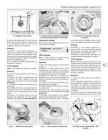
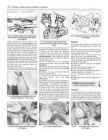
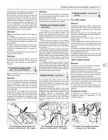
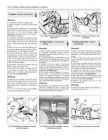

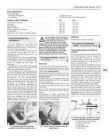
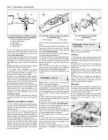
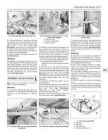
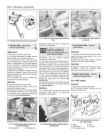
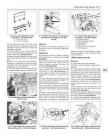
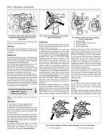
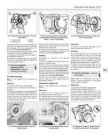
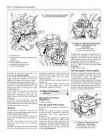
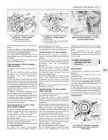
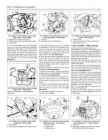
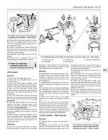
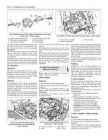
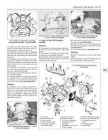
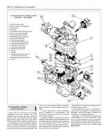
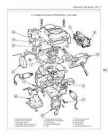
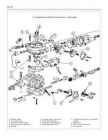
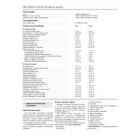
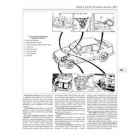
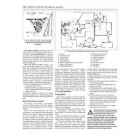
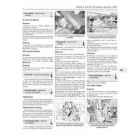
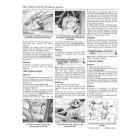
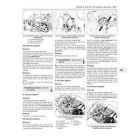
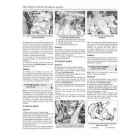
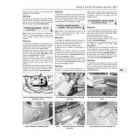
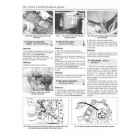
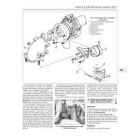
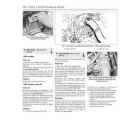
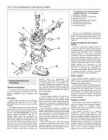
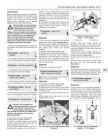
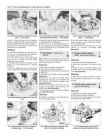
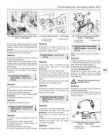
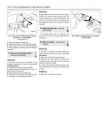
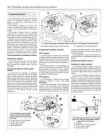
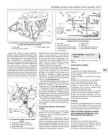
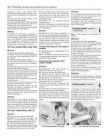
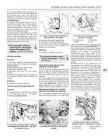
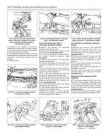
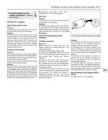

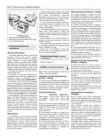
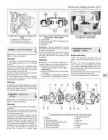
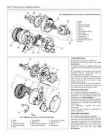
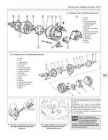
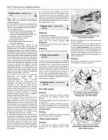
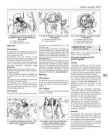
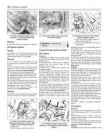
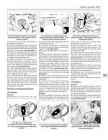
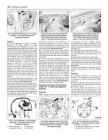
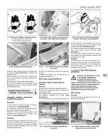
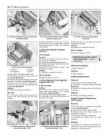
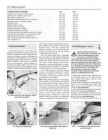
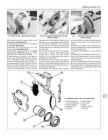
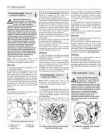
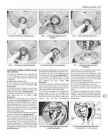
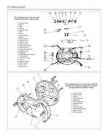
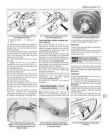
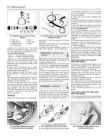
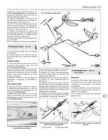
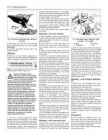
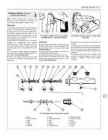
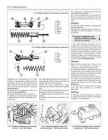
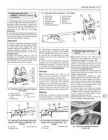
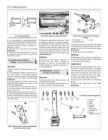
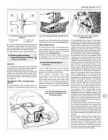
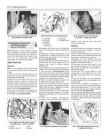
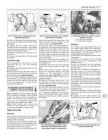
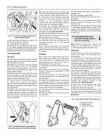
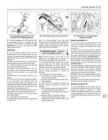


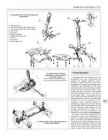
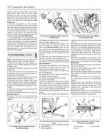
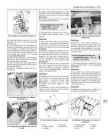
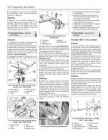
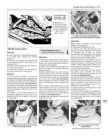
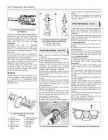
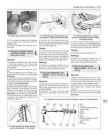
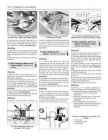
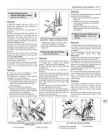
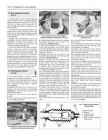
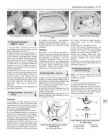
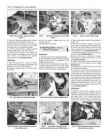
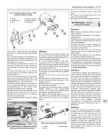
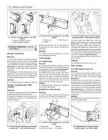
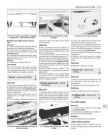
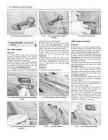
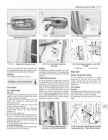
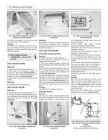
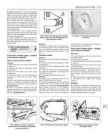
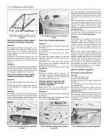
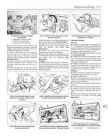
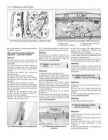
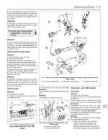
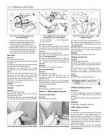
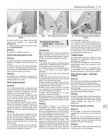
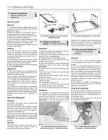
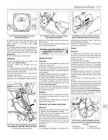
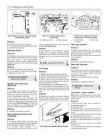
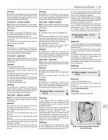
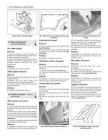
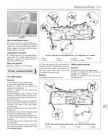
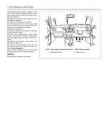
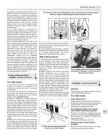
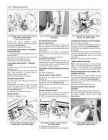
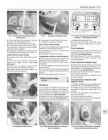
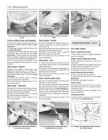
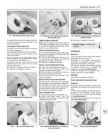
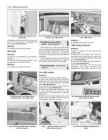
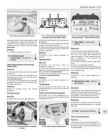
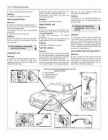
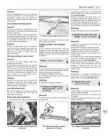
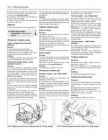
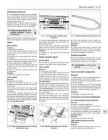
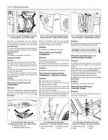
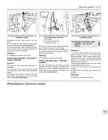
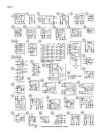
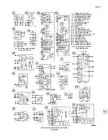
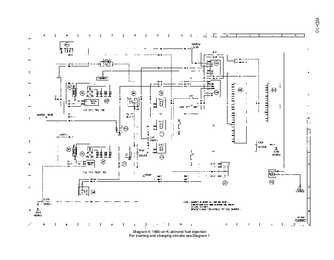
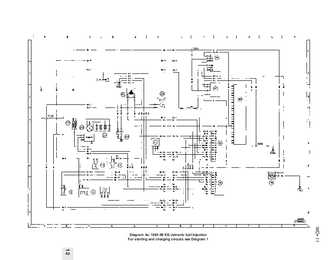
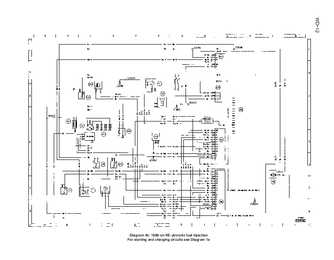
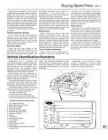
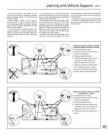
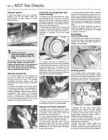
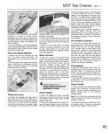








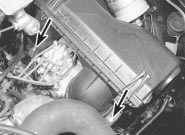
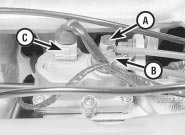
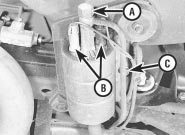
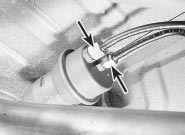
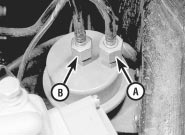
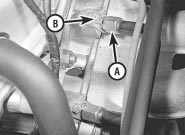
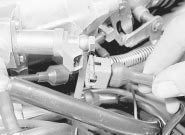
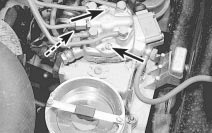
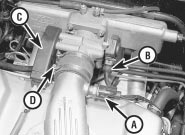
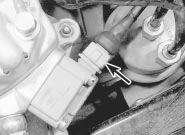
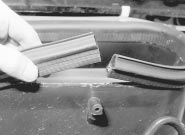
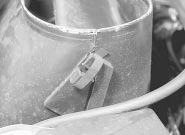
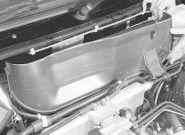
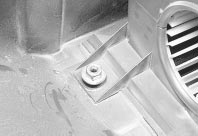
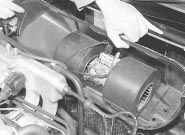
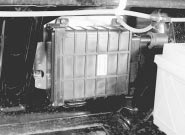
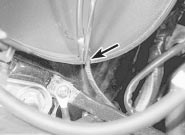
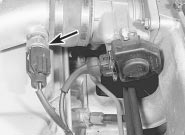
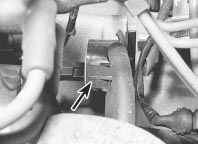
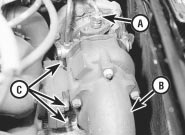
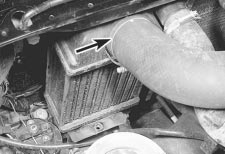


Kõik kommentaarid